A horse made of beads made by own hands will be an excellent gift to a friend. Our simple master class will show how to weave it.
Do you want to weave a horse out of beads? Then read this article and you will learn how to do it. A horse is a graceful and at the same time a strong animal, which for centuries has served a person well. It combines speed and efficiency. In the old days, horses were indispensable workers; sometimes only the work of an entire factory or factory depended on them. They still play the role of irreplaceable helpers, especially in agriculture. But the times of hard work of horses have passed. Today, these animals are considered an object of admiration rather than labor force. 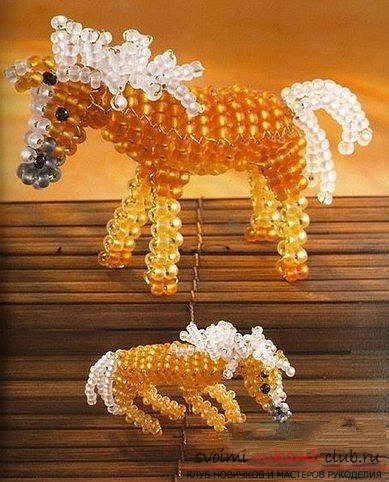 Many people love horses. That's why they are often the theme for performing various crafts. The technique of weaving from beads, too, allows you to create horses that can be a good souvenir. Especially like these horses for children. However, adults will also happily do this craft and will use it as a keychain or decoration. For weaving a horse out of beads we will need:
- round small beads of light brown, gray, black, red or other colors for the performance of the trunk and head;
- thin wire;
- beads small round dark brown or dark gray for hooves;
- black round beads for the eyes and nostrils;
- Nippers.
So, we begin work. Weaving the horse begins with the head, or rather - with the nose. But first you need to sort the beads by selecting the main color (light brown or orange), beads for mane (black or white) and for the nose (dark gray). However, if desired, you can use beads of more than 3 colors, making color transitions on the mane or painting the trunk "in apples". 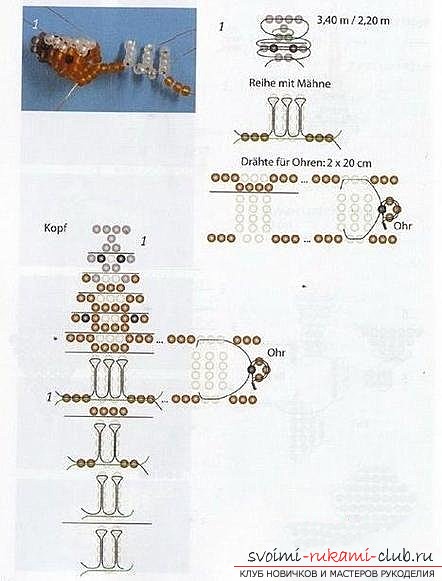 Detailed diagrams show step by stepsequencing. In Figure 1, the top of the first diagram shows the weaving of the nose. As you can see, using black beads between dark gray, you can outline the nostrils of the animal. Below the scheme of weaving the nose is placed the scheme of the mane. In this master class, each thread of the mane consists of 4 beads, but, again, it can be made longer or, conversely, shorter. The front part of the head is made exactly according to the scheme. Next, the rows in Figure 2 in the second scheme are bent and connected. The head ends and the neck (figure 3) is formed by successive lancing of the rows. The body is made similar to the neck, but a smooth extension is made for thickening under the belly. On the side of the horse, a neat suture is formed along the course of picking up new rows.
 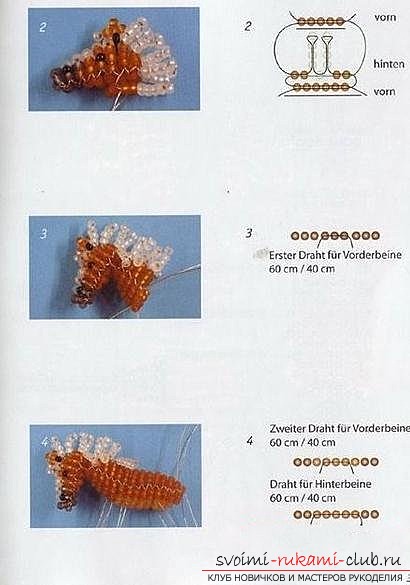 Having finished working on the body, do not forgetweave our legs together. They can be simple low beads, only it is necessary to distinguish hoofs with two rows of darker beads. The tail is made just like the mane, and then curls and bends downward, because it is in this position that the tail should hang. Here, our master class on weaving a horse from beads is completed. There is nothing complicated in it, and questions should not arise. So you will not have problems with weaving. We wish you an easy and pleasant work!
