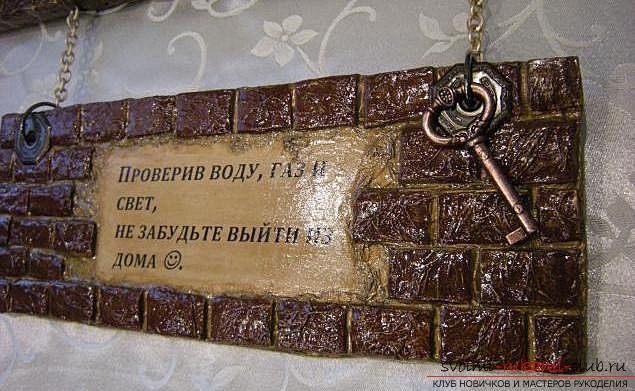
The clavier for the corridor. Lesson with photos. Make a housekeeper for free.
So, sometimes we need to do somethingreally useful. There is nothing better than useful things for home. But, what problem can really require a solution and, accordingly, can be solved? Remember how often you forgot the keys at your table, or in your pocket from your old jacket? - Undoubtedly, such incidents have happened and, accordingly, left behind are far from the most pleasant consequences. I want to get rid of such moments and, in truth, just forget about them. Nevertheless, this is not so simple. Therefore, there was a version of the Wretch. A wallets are an interesting element of decor for a house that will be able to decorate a living space and, accordingly, help solve one key task - storage of keys and other necessary items. In this case, the creation of a housekeeper will not take you too much time, on the contrary - it will prove to be an extremely fascinating and interesting task. How to make a housekeeper with their own hands? - for this we need some materials. First of all - a dense cardboard and preferably a printed picture with a reminder. In the second turn, PVA glue and scissors will be needed. This is necessary to create a unique style of your housekeeper. Nevertheless, accessories will be needed. In the third place, we will use paper services. At the same time, the paper should be flexible, but dense enough. This is so that when interacting with glue and external dyes - it does not deteriorate and lived as much as possible. And finally - a plywood or a piece of particle board. Any of these options is necessary in order to consolidate the future design and make its beautiful appearance. 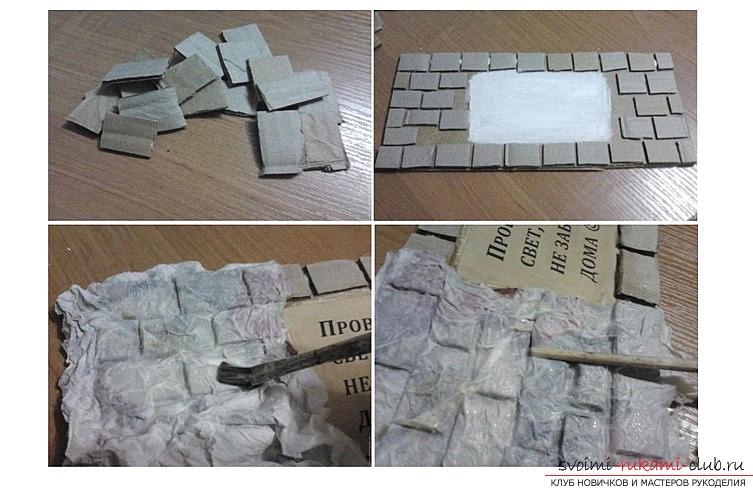 So, you need to cut out small bricksof cardboard, which will characterize the appearance of your future product. This will be special bricks, which then - it will be necessary to expand around the perimeter of your plywood or chipboard. At the same time - it is necessary to leave free space for a picture-reminder. Then, it is necessary to paste these bricks, leaving special gaps to create a future effect. Gaps should be diverse and not have a similarity. This will create an inherent effect, which we will try to achieve in the course of our contact with this hand-made article.
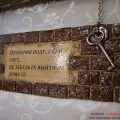
 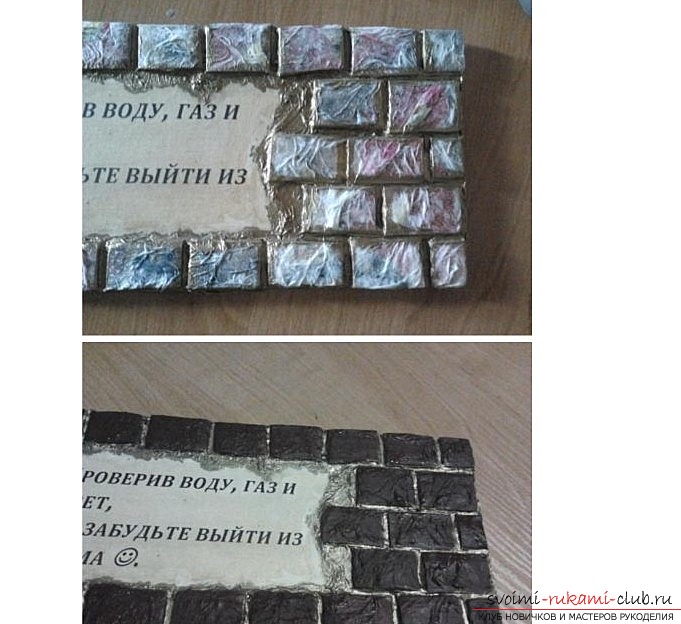 Next, you need to lubricate the whole of this designliquid glue of the pva. Lubricate is necessary around the perimeter of the brick. Then, a layer of normal paper or napkins is applied, and then another layer of PVA glue is applied to fix the effect. At the same time, the paper must be pressed into the gaps to create a "brick effect". Thus, the result with the bricks should be obtained. Then, it is necessary to wait until the glue dries and decorate all this cosmetic composition with the help of paints. Use a variety of colors. You can use a brown color in combination with bronze or silver shades. It is these options will create a special vintage for this interior. Then you need to hang specialmetal accessories that will be used as a storage space for keys, or for suspension of anything. Do not forget to make them as similar as possible to the overall appearance, otherwise - the design will leave much to be desired.
Comments
Related posts:
 How to make an origami-frog made of paper. Lesson and photos are free.
 Handbag for the bride. A popular bag of 2015. The lesson and the scheme is free.
 We create an original decoration for a housekeeper for your house completely free of charge and without special efforts
 How to make a vase for a flower using origami technique. The lesson is free.
 A lesson on weaving the bracelet from the rubber bands "Sidewalk" with detailed recommendations and photos