How to create crafts in the classic origami, creating a Christmas tree in the technique of modular origami.
Children at the age of ten are very active. They already know much, know how much. For them, there is a large number of different games, both outdoors and computer, with the advent of the era of high technology. The latter are increasingly popular, which can not but cause concern to parents. Excessive gazing at the monitor during the game, loud sounds that accompany intergalactic battles or military operations of tank troops, and a lot of emotional excitement from dynamic computer games is sometimes replaced by quiet options for spending free time. In order to distract the child, bring him into a peaceful state, especially in the evening, perfect for origami. In this wonderful form of needlework there are variations of crafts for both boys and girls. After all, from paper, you can do almost anything, starting with simple animal figures, and ending with complex modular origami. Creating in this technique, children concentrate better and focus, develops logical and spatial thinking, they learn to find a creative approach to solving non-standard problems. This is all useful to them in the classroom at school, and beautiful crafts will be their pride, increase their self-esteem and please their loved ones. All boys love sports. For someone passion will be chess, for someone football and basketball. In the origami technique of paper, you can create a basketball basket and a catapult for throwing balls. This craft is also a wonderful toy.  It will take:
- Sheet of paper 20x20 cm for catapult;
- Album for the basketball basket;
- A little foil for the ball (you can replace it with a light candy wrapper from a candy or a piece of thin colored paper).
Basketball ring. The upper right corner of the rectangle should be folded down so that a triangle appears in the foreground. Bend line on the right. Unfold.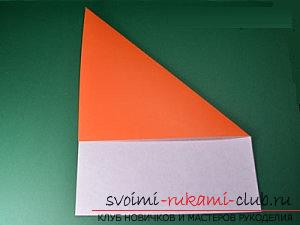 Repeat the same manipulation with the upper left corner.
 Turn the sheet backwards and bend downwards so that the fold line is at the point of contact of the diagonal crease lines from the points above. Unfold.
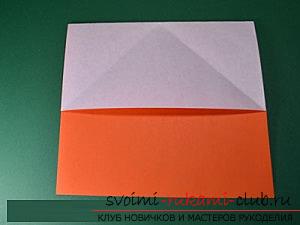
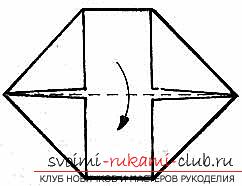
 Expand the paper back and face it,so that the fold lines are at the top. Press on the edges in place of the horizontal crease line so that they touch, the upper side of the rectangle falls down and a double triangle is obtained in the foreground.
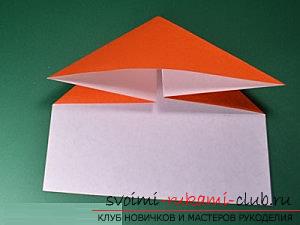 Free the right and left corner of the triangle to meet each other, insert one into one. It's a ring.
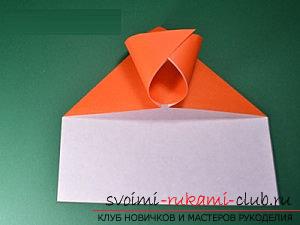 Bend the inside of the right and left edges at an angle of 90 °. It turned out a basketball ring that costs.
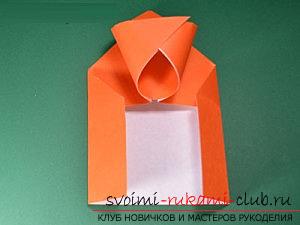
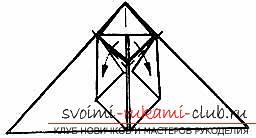
 Catapult. Bend and straighten a square piece of paper diagonally. Arrange the fold line horizontally.
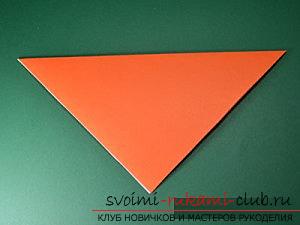 The upper corner is bent down.
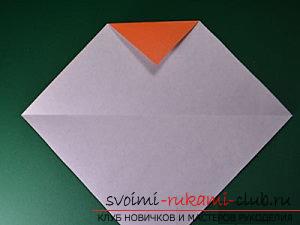 Bends adjacent to it so that their ends meet along the entire length of the bent edge. Remove the corner that was bent before and bend it to the left to the corner.
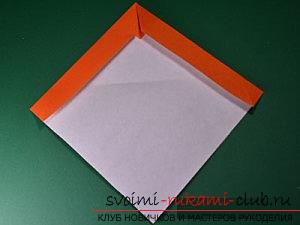
 The edges that folded earlier, folded once more to the center.
 Turn over the workpiece.
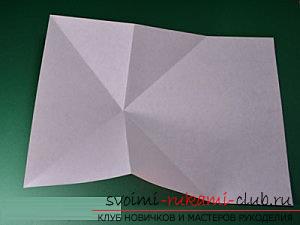
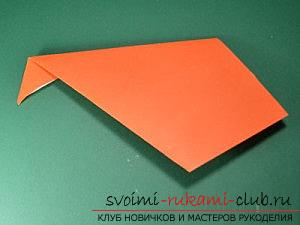 Bend lower edge.
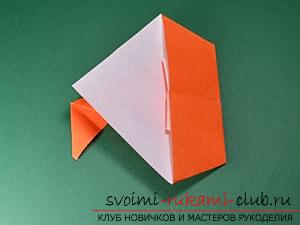 Fold the craft in half.
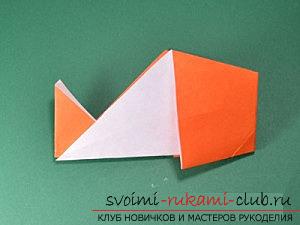 Raise the throwing element up to the level of the outer edges and carefully iron all the folds.
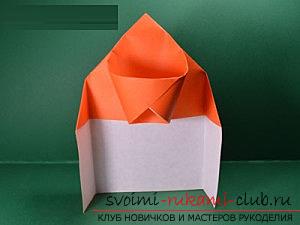
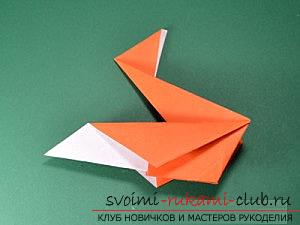 Outer edges bend like wings. A small triangle on the throwing element to reveal. This is a bucket. Pinch it at the base
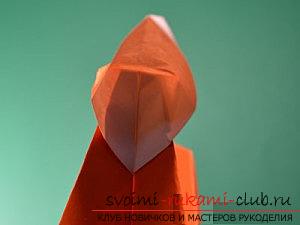 Roll a ball of foil, wrapper or thin paper, put in a bucket, take and pull the wings. The throwing element is straightened, and the ball will fly into the basket.
 Of course, to create such a design can and girls who are in love with basketball, but for those who love flowers, for boys and girls below is a lotus flower in origami technique.
  Bend and straighten a square piece of paper on the diagonals.
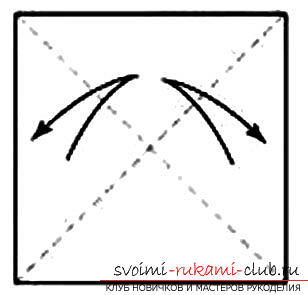 Bend all 4 corners by connecting them in the center.
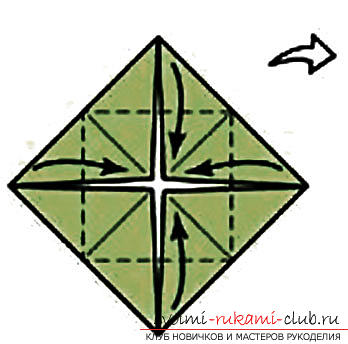 Bend the newly formed corners, again connecting them in the center.
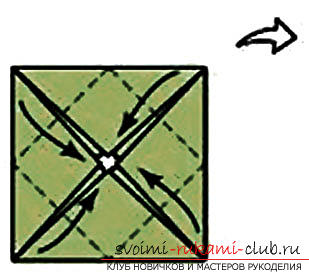
 Turn over the workpiece. Bend the corners in a similar way so that they are connected in the center.
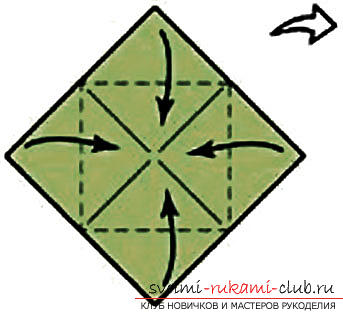 Bend the small triangles towards the center of the figure. Turn the work over.
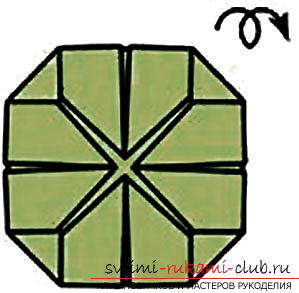 Start turning all the previously bent corners down one by one. It will be petals.
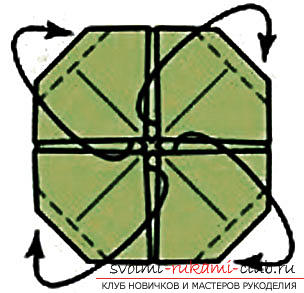
 Flip the design, the lotus is ready. Fish live in a pond with beautiful lotus flowers. You can make an inflatable fish in origami technique.
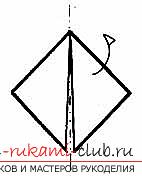
 Bend a square sheet of paper horizontally, vertically and diagonally. Holding on to the edges, bring them horizontally. The figure flattened, we got a double triangle.
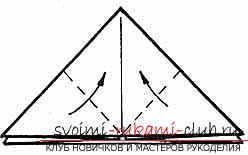 Bend the bottom corners of the front layer of the triangle to the top so that a diamond appears in the foreground. The upper corner of the diamond (it consists of two halves) to bend and unbend in half.
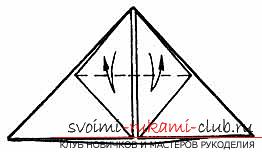 The right and left corners of the rhombus are centered.
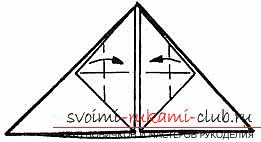 The upper corner of the rhombus (of the two halves) is bent along the previously indicated line and filled into pockets, which turned out after bending the right and left corners of the diamond.
 Expand the work.
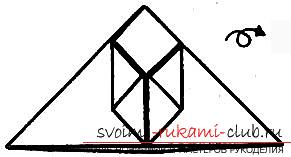 Bend the lower corners of the triangle so that the wrong diamond is obtained.
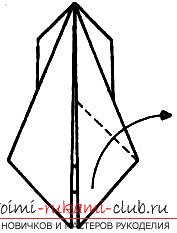 Half of the right lower corner of the rhombus is bent to the right.
 Bend to the right all the left half of the diamond.
 The fish is ready, it can be inflated. Children love jokes, adore crackers. In the technique of origami, you can also create something similar. Suitable for this ordinary notebook (double in the spread).
  Bend and unbend horizontally marking the center line.
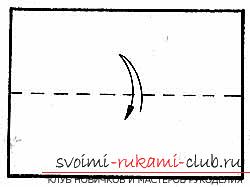 Bend a little all 4 corners inwards.
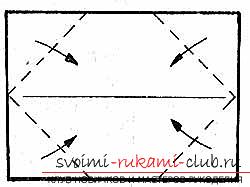
 Fold in half across. Bend line from the top.
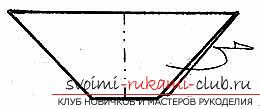 Bend and bend it in half vertically. The upper corners should be lowered so that they meet on the central vertical line.
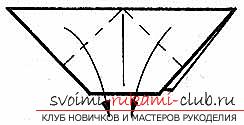
 Fold in half, the fold line on the left, you get a triangle, in which the bottom corner form the corners from the point above.
 Hold this lower corner and drop it sharply. Inflatable volumetric bomb, in which you can pour water.
  Bend and unbend the sheet in half horizontally,vertical and 2 diagonals. Holding the sheet behind the two lateral sides bring the extreme points of the horizontal midline. The figure is flattened, and we get a two-sided triangle bottom down.
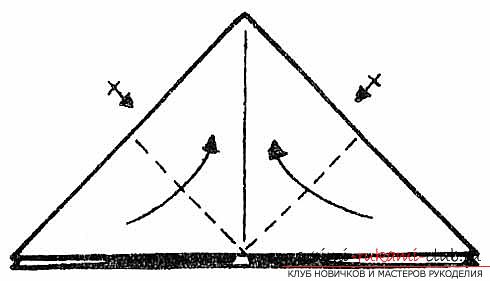 Bend the corners of the base upward so that they touch the upper corner. Repeat from the front and back sides, turned out to be the right rhombus.
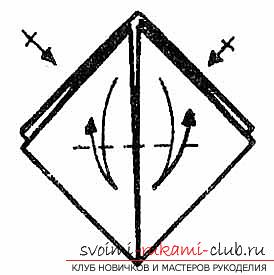 The right and left corners of the rhombus are bent so that they touch the central vertical line. Repeat with both the front and back.
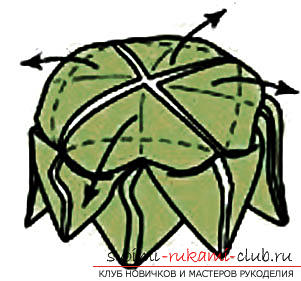
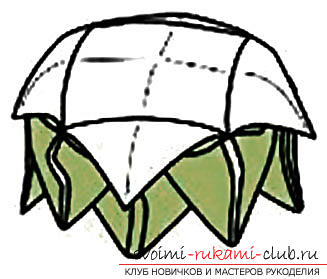
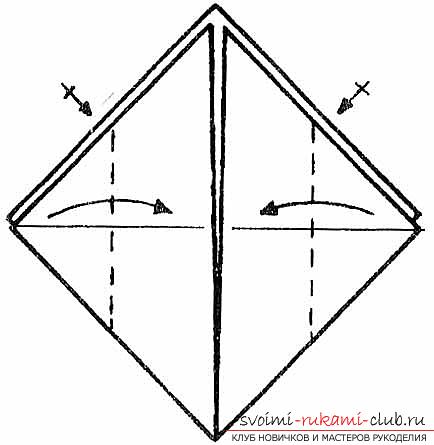 Upper corners bend right and left on both sides.
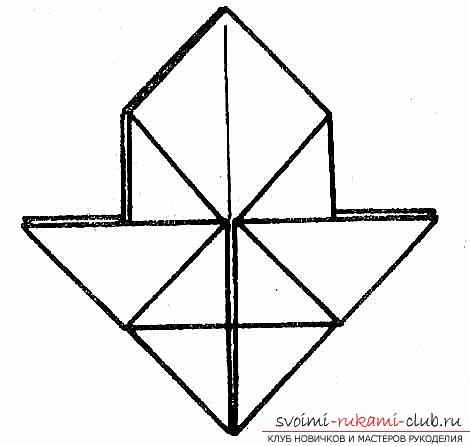 Bottom is a hole in which you can blow or pour water. The bomb is ready. Herringbone in the technique of modular origami.
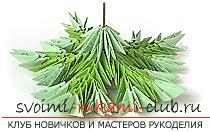
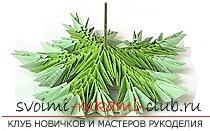
 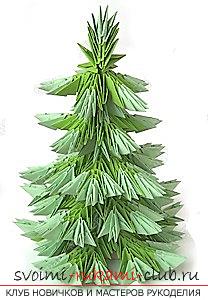 This forest beauty will not only be an objectpride of the baby. It can become an excellent element of decor for the New Year's event and for everyday life. It is created from individual twigs, so the size of the Christmas tree is adjustable. For this figure it is necessary to make 391 modules of dark green and 246 triangular modules of light green color. The composition will be collected from individual branches. To begin, collect the required number of modules according to the scheme. A rectangular sheet of paper is bent in half across the horizontal. Bend line from the top. Bend and unbend vertically. The upper corners should be lowered so that they meet along a vertical central line. The edges that protrude beyond the base of the triangle in the background are raised upward. Bend and unbend the small corners that protrude beyond the sides of the large triangle. Bend the edges out of the point by 1 above. Again bend the small triangles. And again bend the edges upward. Fold in half along the vertical center line.
 It turned out a module with two pockets. When the necessary number of modules is created, proceed to assemble the Christmas tree. Assembling the first twig. In two modules, located the longest side up, insert the third, in two adjacent corners in the two pockets of the third module. It turned out two rows of twigs. The first - 2 modules, the second -1.
 Third row. Pockets (closest to each other) of two more modules are put on the corners of one module. Free corners in this case form needles.
 Alternating one and two modules to collect a twig. Dark green - 12 rows, light green - 2 rows. It is important not to put modules on too deep and periodically compress where the modules are connected. The collected twig slightly bend, in the likeness of a real Christmas tree.
 Assemble the construction of 5 rows for the side branches. From the outer edge of the branch, count three needles and insert the side branches from the two sides in the fourth.
  Add 5 of these blanks, each took 35 modules. This is the bottom row. Connect two branches with one more module.
 For the intermediate ring (they need 4 pieces), dividing the rows of large branches, you need to take 14 modules. 7 for the first row and 7 for the second.
 The next 5 branches make a smaller size - 9 rows of dark green and 3 rows of light green color. For lateral branches - 3 rows.
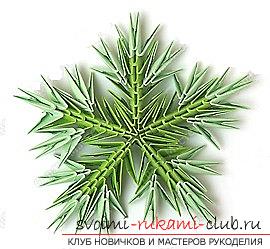 Re-connect the branches. The next third circle of 5 branches - 10 rows for large and 3 for lateral branches. The fourth circle of 5 branches is 8 rows. Lateral not to do. The fifth circle - 6 rows and side also do not.
 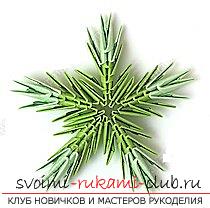 The herringbone tree should be collected in the same way as a branch of eight rows.
 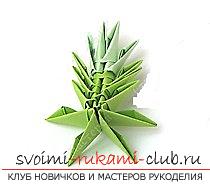 Assembly. As a stand, you can use a regular eraser and a wooden skewer.
 Put on the first row of twigs, the largest, followed by the intermediate ring, alternate circles of twigs and intermediate rings, finish with a crown. The Christmas tree is ready.
Comments
Related posts:
 Schemes of assembly of decorative plates in the technique of modular origami will help to create a beautiful product
 Crafts from paper with their own hands in the origami technique for children aged 4 years.
 How to create your own handicraft in origami technique for children aged 9 years.
 This master class will teach you how to make a vase with tulips made of paper in the modular origami technique.
 Modular origami, how it affects a person practicing modular origami, making modules of a triangular shape, as well as creating a dragonfly in origami technique.