
How to create a rocket from improvised means with your own hands, which will please your child
Many moms, dads, grandfathers and grandmothers are askedThe question is: how can you take your child on long and boring autumn evenings, when the weather does not allow you to go out and walk on the street? We suggest that parents draw the attention of the child to the idea of creating from a handy material (glue, paper, scissors) a real space rocket. Making crafts will expand the creative horizons of the child, and needlework very well develops the fine motor skills of the fingers. So, let's go directly to the process of manufacturing the rocket (all steps will be accompanied by pictures, so you can see what should happen as a result of the work and how it happened). 1. Take:
- PVA glue,
- the remainder of the food film (hollow tube of cardboard),
- scissors,
- paper of different colors.
2. Cut a quarter of a circle from a sheet of colored paper (for convenience, first cut out a whole circle, and cut it into quarters). 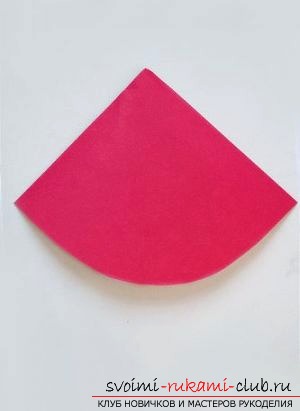 3. Make a cylinder out of the resulting quarter, as shown in the picture, and cut it at the edges (we draw your attention, the diameters of the tube from under the food film and the base of the cone must coincide).
  4. Glue the cone to the top of the tube.
  5. Take the ruler, measure the height of the tube, cut out from the paper of another color a rectangle of the appropriate size and paste it on the tube (in principle, even if you cut off a rectangle slightly larger than necessary, nothing terrible will happen).
  6. Cut six identical trapezoids and glue them together (you should have three wings), leaving room for the docking of the tube (ship hull) and trapezium wings.
  7. Apply the PVA glue to the places left for joining and glue the wings to the hull of the spaceship - our hack is ready!
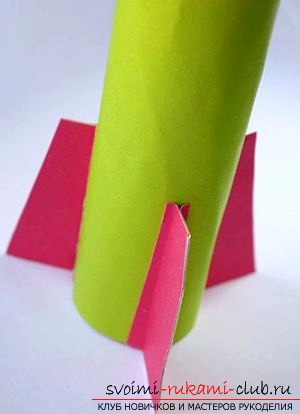
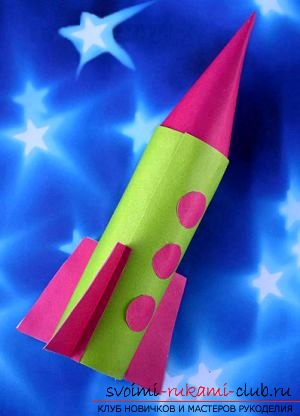 Here is an interesting rocket made of cardboard from usit turned out. Now we will complicate the task a little and execute a rocket in the style of origami technique. A rocket made of cardboard with origami technique If you are a fan of origami technology, we offer you and your child to make a beautiful and at the same time easy to manufacture paper rocket. 1. Cut out a square from the paper, fold it in half, unfold, bend diagonally and again unfold.
  2. The upper corners, as it were, "pull" to the center, but not to the end, but approximately to the middle (as it is shown in the figure).
  3. Leave 2-3 centimeters from the center of the square, bend first one side of the rocket to the middle of the future craft, turn it out and repeat the same operation with the other side of the rocket - congratulations, the airplane is ready! If desired, you can decorate the rocket with illuminators (cut out small circles from the paper and glue them to the artwork) and flame (paint the white paper in the color of fire, cut out a piece in the form of a characteristic flame tongue and attach it to the back of the rocket).


 An interesting version of the rocket, is not it? And now we will try to make a rocket from gofkartona. Rocket from corrugated cardboard Gofkarton - one of the best materials for a variety of crafts: due to the special structure of the surface of the corrugated cardboard, the products look bulky, which gives the toy some unusuality. 1. Take strips of corrugated cardboard of any color and cut into strips 1.5-2 cm wide (also make two strips 4 cm wide). 2. Twist the ten strips of rolls, attaching each subsequent to all the previous ones with the help of PVA glue.
  3. To make the rolls cone-shaped, press them inward.
  4. From two bands of corrugated cardboard with a width of 4 cm, twist the circles whose diameters will be equal to the diameters of the bases of the cones.
 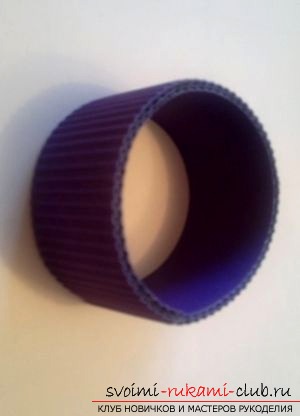 5. From the smallest strips twist 6 rolls - 3 rolls of one color and 3 rolls of a different color: so we will have blanks for the turbines of the rocket.
  6. From white rolls make cones.
  7. Glue the parts as shown in the picture (white patches cover the connection place of our parts).
  8. Connect the turbines of white and yellowish color, then glue them to the dark blue strip on the shell of the missile portholes and connect the turbines and the missile body - our artwork is ready! So, you can make a whole space exposition with a variety of rockets, and arrange an exhibition in school. Interesting and unique missiles will help to develop the imagination and assiduity of children of lower grades.
Comments
Related posts:
 In just a few minutes, we create a mask for children with their own hands. The original entertainment for your child - without difficulty
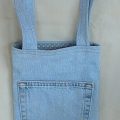 How to make a jeans bag with your own hands, which will please you and your friends
 Master-class on making a candlestick from improvised means by oneself, advice and recommendations.
 Try to tie a sweater for your child. Our master class contains a simple scheme that will be useful for beginners.
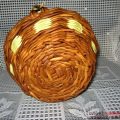 How to make a basket of newspaper baskets with your own hands, which will be a good decor for your home