How to make "Brugge lace" with your own hands - crochet lessons, patterns
Lovers of knit face prettya common problem of matching patterns for knitting. The presence of a qualitative pattern is 50% for any fabric item and basically, each of us evaluates any clothes by its appearance. Therefore, a set of opportunities for learning new patterns will never be superfluous.
How to make "Brugge lace" with your own hands - crochet lessons, patterns
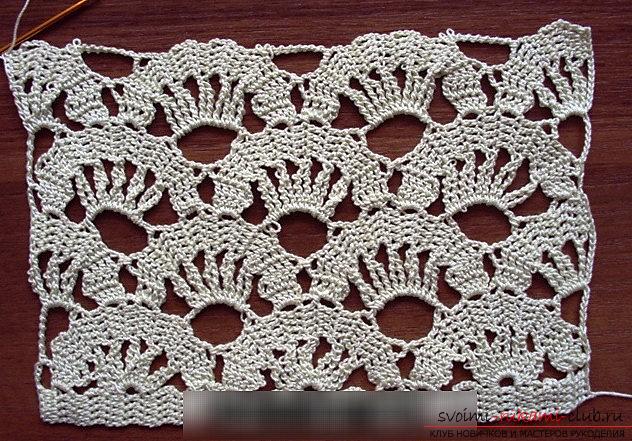
 This lesson offers you to learn and learna new pattern of lace type for the summer-spring period. It will consist of special drawings in the form of a semicircle. The pattern is executed due to the knitting of the braid in the form of a crocheted continuous type. This element is the key to creating the lace of the Bryug variant. With the help of petals, we can form special columns with a crochet. With this pattern you have the opportunity to tie a skirt, top or dress with your own hands, and also make a blouse. We knit the first row
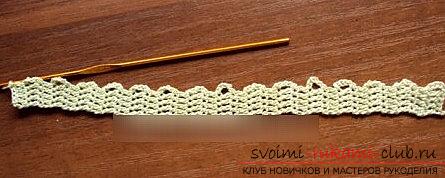
 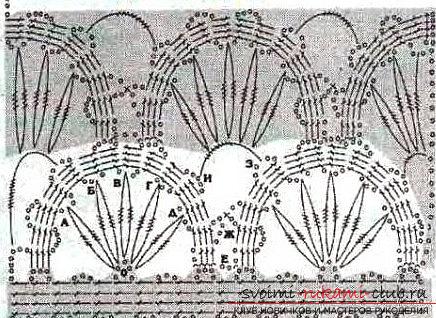 The first series of the initial type is performed with the aid ofbraid. For this, it is necessary to dial four air-type loops and three lifting loops. After this, you need to connect 4 st s to 5 air loops of the lifting version and 4 st. s.n on three air loops of lifting type. Consider that the rapport for this pattern will be ten rows, on each side of the braid should be on the arch, which will consist of five lifting loops, and on the other, three arches of lifting loops.
 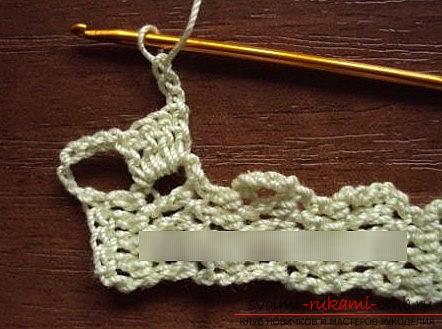 Knitting of the second row
  In order to link the second row, you need to typesix air-type loops of lifting, braid with arches should be made of five air loops, and from the first arch one must also tie the braid in the varinta of 4 st. s.n for five air loops, then repeat this step with one air loop.
  Making the petals
 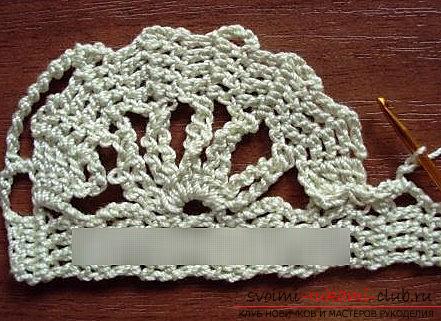 To make the petal number 1, we need to makefour cloaks on the hook, and hook into the arch according to the scheme, which is indicated by the letter "O". Then, we sew the rounds and after, also make four capers, again tying them. Next, grab the thread above which we work and we sew loops (each) on the hook. Thus, we form two pillars into four capes, which are tied with 1 vertex. Next, using two air loops with 4 tbsp. s.n on two air loops, we knit a column in the form of an arch on eight накидов, carrying a hook for the first arch from six петелек.
 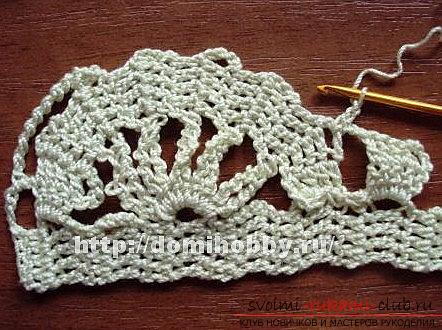 After that - we knit the braid, creating petals fromcolumns, using four capes at a point on B, D, D, and D. Do this after the last lobe, making the second group of columns of the cusp, tying each column using a special connection loop in the arch, then - make three air-type loops and connecting loop, for the next arch.
 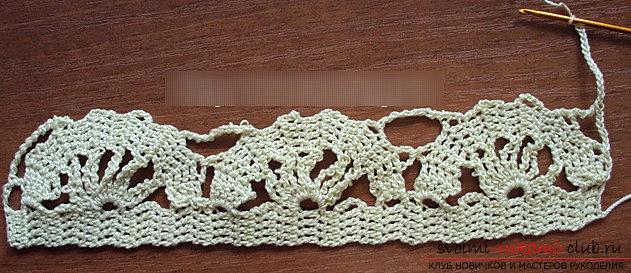 Next, we knit the second half of the circle withbraids, for this we take three loops air, on the rise and knit this part, like the first. For the outer side of the given half of the circle, it is necessary to make a fastening column on the first arch, which will extend beyond the arch of the first part of the circle, and for the second arch, it is necessary to tie a column into seven capes, it will be the center of our half of the circle for the next row. When you finish half the circle, you need to fasten it in the braid for the first row, and then continue knitting the oval until the end of the row. We knit the third row
  In order to link the third row, it is necessarymake three air-type loops, then create a join column in the arch for the last half of the circle. After that, make six air loops, also a column for three capes for the next arch in the last semicircle, then fourteen air type loops.
 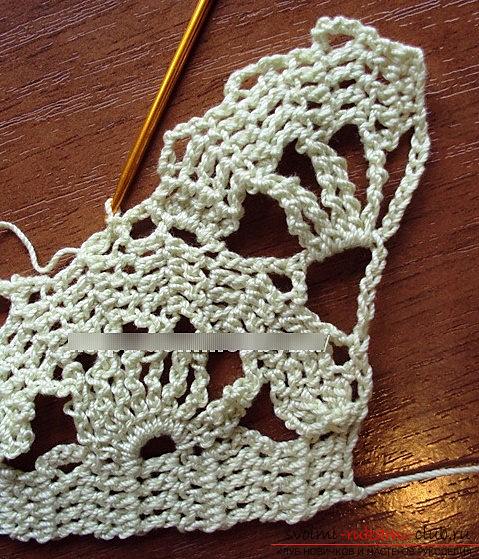 Next, you need to tie a row of starters to the braid,which will consist of 4 tbsp. b.n on the air loops (last) and after, make the binding of the petals, using the columns with the four capes, insert a hook over the arch from the column, using the three capes. After we have connected the three lobes, you need to fix the braid using the connecting columns in the top on the semicircle, using also the previous row. It is also necessary to make air loops (three pieces), also a join column and the next arch, with which we begin to knit a semicircular area into five petals, in the center of which there will be a column of seven capers in the previous row.
 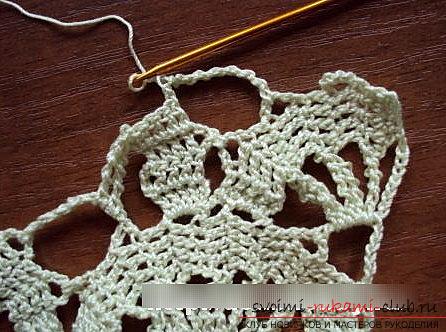 Do not forget to commit actions by producingtying the first outer arch of the braid with the fastening post, making the connection with the previous half of the circle, and also with the next column of the arch on the seven capes. The third row ends easily - we producetie the third petal for the arch column in eight nakidov, 4 tbsp.n with the last row of braid, after - starts the next row, like the second for six loops air type (lifting). Subsequent patterns are knitted using the second and third rows.
Comments
Related posts:
 Grape pattern for shawl crochet - patterns for shawls crochet and patterns
 Cake loops or crochet-knitting techniques
 Crochet patterns with crochet description. Openwork and dense crochet patterns
 How to make simple patterns of divorce for ceramics - math patterns by yourself
 How to make a hedgehog suit with your own hands. Lessons and photos for the costume.