How to make a New Year's gift - a snow ball made of polymer clay with your own hands, step by step photos and description
On the eve of the New Year holidays appears soa lot of joyous hassle. You need to think through the menu, party outfits, decorations for the Christmas tree and the room. And of course, do not forget about gifts for relatives and friends. The shopping fever of pre-holiday days, as well as the search for original and lovely gifts can be quite fascinating, but very exhausting occupation. In this article we will make a wonderful gift that can decorate any interior - a snow ball. This little thing will give the snowy New Year even to the inhabitants of the warm southern territories. 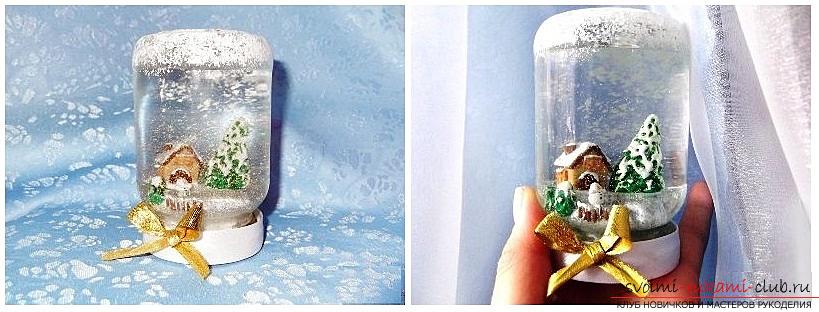 So, to make a sphere with snow from thermoplastic, we need:
- Thermoplastic (color white, green, black, yellow, brown and shades of cherry wood);
- Liquid plastic;
- Acrylic white paint;
- Water with glycerin;
- Brush of high rigidity;
- Usual culinary foil;
- Sealant on silicone (for aquaria);
- Epoxy adhesive;
- Toothpicks;
- Nail scissors
- Stationery knife;
- Toothbrush;
- Universal Stack;
- A small dish;
- A jar with a lid, which can be twisted (a jar of pickles or natural yoghurts is suitable);
- Sequins (foam foam or any other substitute for snow).
Snowy hill. From the foil you need to roll a tight ball. Attach it to the neck of the jar, between the ball and the glass should be a gap around the perimeter of about 3 - 4 mm. If the balloon is bigger, then after we decorate it with clay, it simply will not fit. Before you start working with clay, you need to thoroughly clean the work surface, because the polymer clay, especially white, is very sensitive to dirt. Now carefully mash the white polymer clay and roll it into a 2 mm thick layer. Take our ball of foil and wrap it with white thermoplastic. Carefully crimped so that no gaps remain. Put our snowball on the lid and cover it with a jar. The ball should still pass freely into the hole of the can. A little pressing down on the lid to get a flat bottom for stability. We pull out the ball and go through the tapping movements on the whole surface with a toothbrush. So we got a real snow-covered hill. 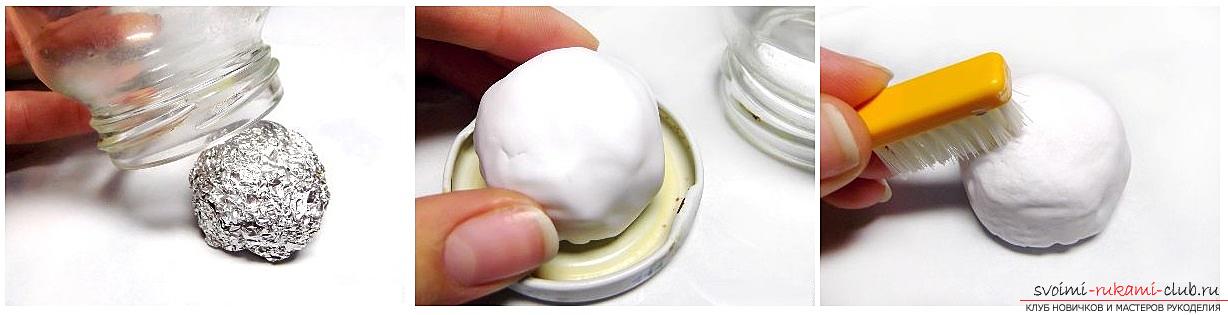 House. We knead the brown and white plastic. Thoroughly mix until a light brown shade is obtained. Now we need to form a rectangular bar from it. Dimensions of the workpiece you determine yourself - this is our future house on a snow-capped hill. At us the preparation has turned out 2 х 1,5 х 1,5 see. We take a knife and we do horizontal grooves on all parties брусочка. This is an imitation of wooden logs, of which our house is built. Now cut the two triangular parts from the block (see photo).
 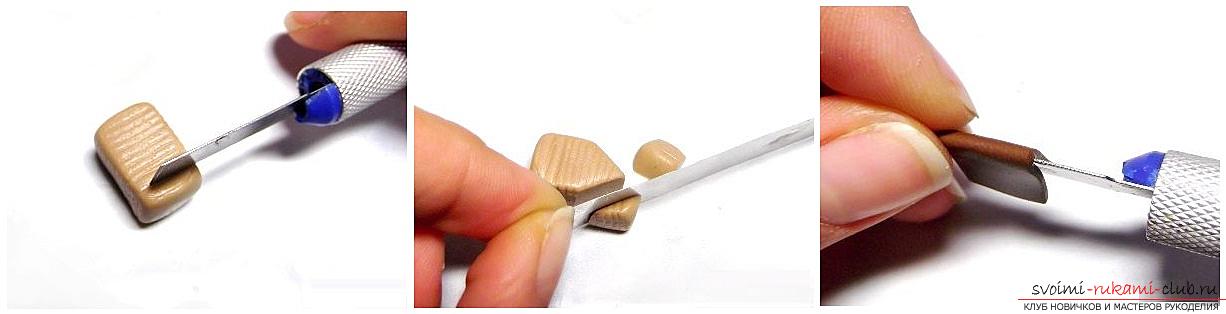 Roll out the brown clay with a 2 mm layer. Cut a rectangle 2 cm wide and about 3 cm long. This is the future roof. You may have other sizes. The main thing is that in terms of width and length the roof should be slightly larger than the triangular part of the house. Now add our brown rectangle in half, putting it across on the blunt side of the knife. We attach our roof to the house. We take brown thermoplastic and roll it with sausage. This is the future pipe for the house. Attach it to the roof and use a toothpick to make a hole in the center, like a real pipe.
 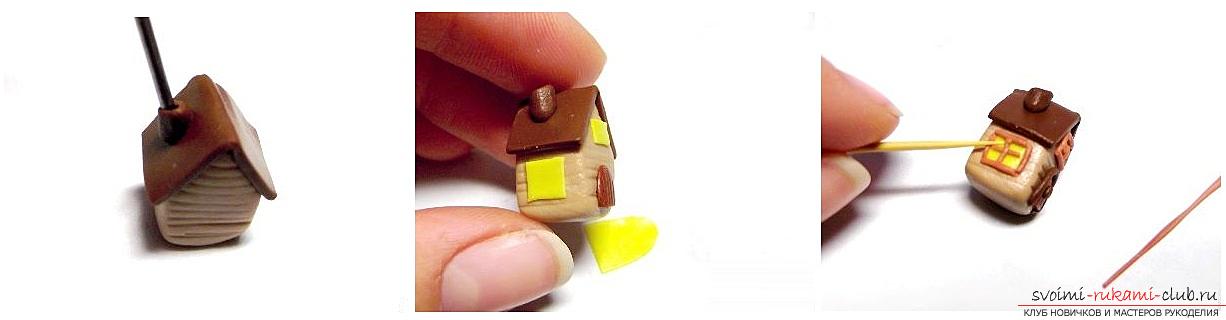 We knead the yellow plastic and roll into a very thinlayer. Cut out 2 windows (more and smaller). Large mount on the side where the pipe on the roof, in the small on the front wall of the house closer to the roof. From a small piece of cherry clay it is necessary to blind the door and attach it under a small window on the central part of the house. Mix the remnants of light brown clay with cherry and roll out the resulting red-brown thermoplastic into a bundle about 0.7 mm thick. From this flagstone make frames for the windows. From the brown clay we roll a similar tourniquet and make a casing for the door. From a small piece of this flagellum we form a round cake - a door handle. The Christmas tree. We knead green thermoplastic. Now you need to form a cone from it. You determine the height yourself, which one will like it. We have about 4 cm. We pierce it with a toothpick in the center. Now hold the Christmas tree for a toothpick and make small incisions with scissors. If you have a little curved manicure work with them. The more you make the cuts, the more splendid the Christmas tree. Now we shoot the tree with a toothpick. We did this way another small Christmas tree.
 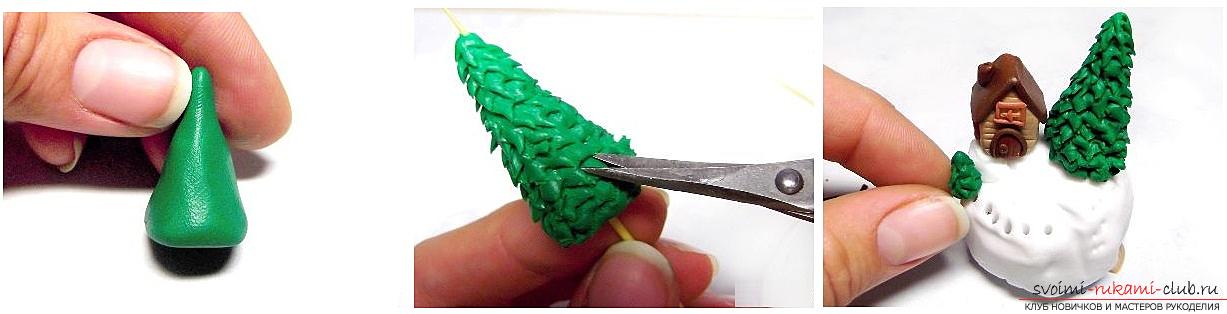 We take our snowball and attach a small house to it. Next to the house we insert the toothpick oiled with liquid plastic and put on the Christmas trees on them. Stack the road in the snow to the house. Along the perimeter make a few holes in the stack, in the bottom we then arrange the fence. Now from a white thermoplastic we make a tiny snowman. The flagellum from the polymer clay is brown, which we have left, cut into sticks for fence.
 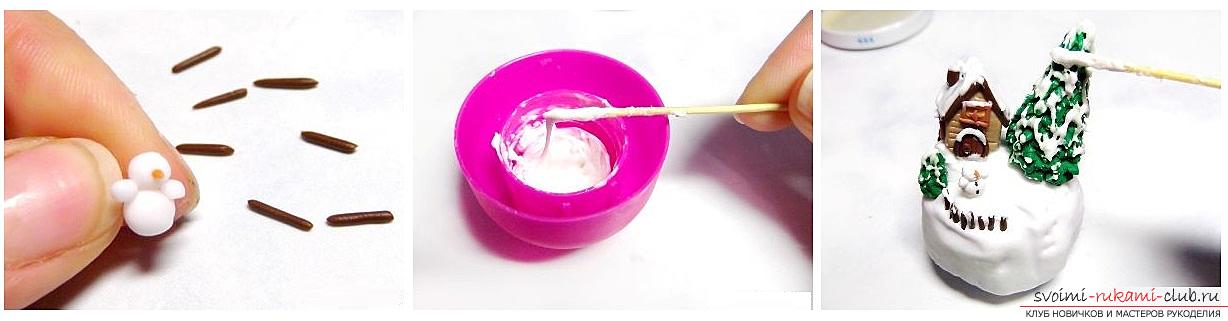 Mix in a separate vessel whitethermoplastic and liquid clay, you can first mix it with your hands, and then with a stick. Consistency should be like that of whipped cream. Pegs from the fence insert into the previously made holes, next to the house we put our snowman. For the spout, you can mix a little cherry and yellow plastic, for the button-embers, take the black. When all the details are in their place, we begin to "fall asleep" everything with snow. We put a little of our white "cream" on the roof of the house, on the door frame, on the window frames, Christmas trees and a fence. We send our billet to the oven. It is necessary to strictly adhere to the temperature and time, which are indicated on the package with clay. When the product has cooled down, proceed to assembly. The bottom of the ball and the lid of the jar must be thoroughly degreased, wipe them with alcohol. Mix the glue components according to the instructions and glue the workpiece to the lid. Set aside for the time needed to freeze. It is indicated in the instructions. After all has stuck and dried up, we take a silicone sealant (the one that aquarists use is suitable) and we put it under the rim of the lid. It is necessary to wait a little, so that it begins to freeze, then the sealant will not stick.
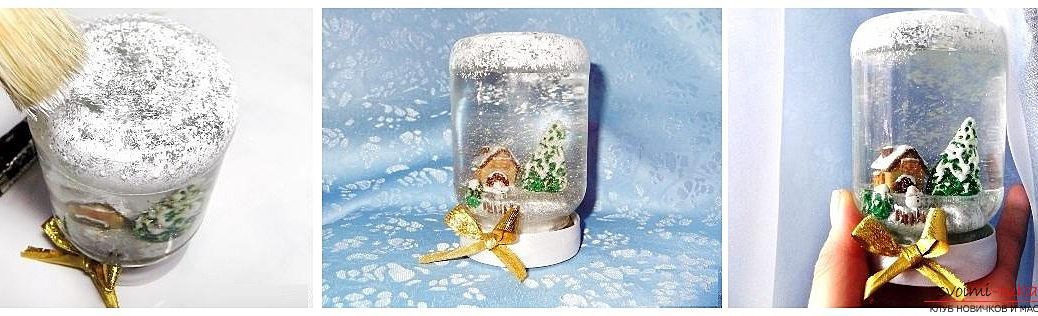
 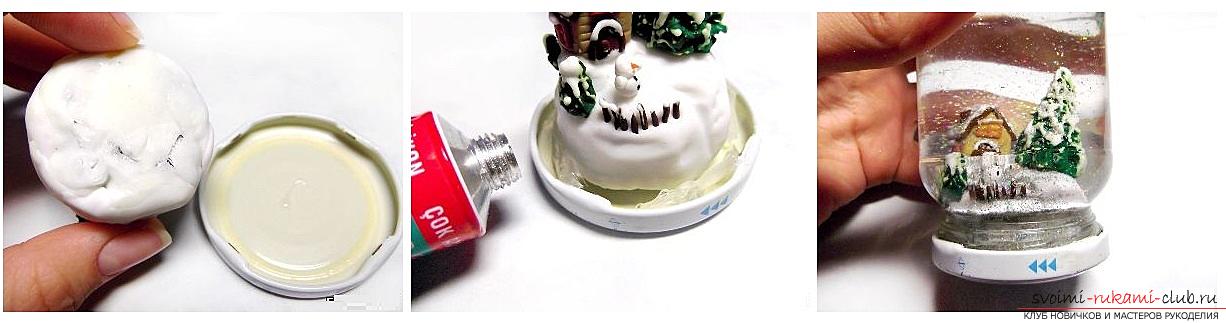 Mix the water and glycerin 1: 1. Pour liquid into the jar, but not to the very edge. Pour foamy crumb or sparkles into the jar. Now it remains to cover the jar with a lid, turn it and turn it over. Water should not not. If everything turned out, take white paint (acrylic) and a hard brush. With pathetic movements, apply paint to the bottom of the can. It turned out very similar to snow.
 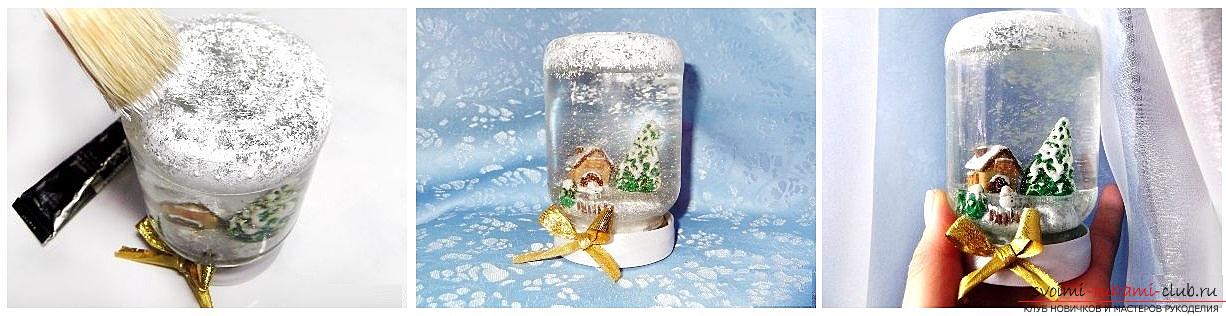 The final touch is the lid decor. Here you can create anything: attach bows, tinsel, ribbons, in general all that will prompt imagination.
Comments
Related posts:
 How to make a gift to March 8 with your own hands made of polymer clay, step-by-step photos of creating a set of bracelet, earrings and pendants
 How to make your own hands a necklace of polymer clay with floral elements, step-by-step photos and a description of the work, an image of a finished necklace
 How to make a toy from a polymer clay - a ball, a detailed description and step-by-step photos of the work
 How to make a brooch made of polymer clay in the form of an oak leaf, step-by-step photos and job description
 How to make a ring made of polymer clay with a decorative element in the form of an orchid flower, step by step photos and description