How to make an anemone flower from beads in French weaving technique, master class with a photo
In this article, we'll weave from the beads very delicateflower - an anemone. The name of the flower can be translated from Greek, like an anemone, from "anemos" - the wind. Elegant petals of this flower can really shake the slightest breeze. Their beauty was appreciated by the Greeks of antiquity, weaving wreaths from anemones, they flourished in the gardens of Japan and China. In the middle of the 17th century, exquisite flowers appeared in the gardens of Europe. A lot of legends go about the origin of the anemone. According to one of them, that was the name of the beautiful nymph, in which the warm wind of the spring Zephyr and the god of the winds of the west, Boreas, were in love. The goddess Flora, having learned about this, turned beauty into a flower. Now the anemone dissolves its petals when the western winds have already ceased to blow, and fades before Zephyr's time comes. 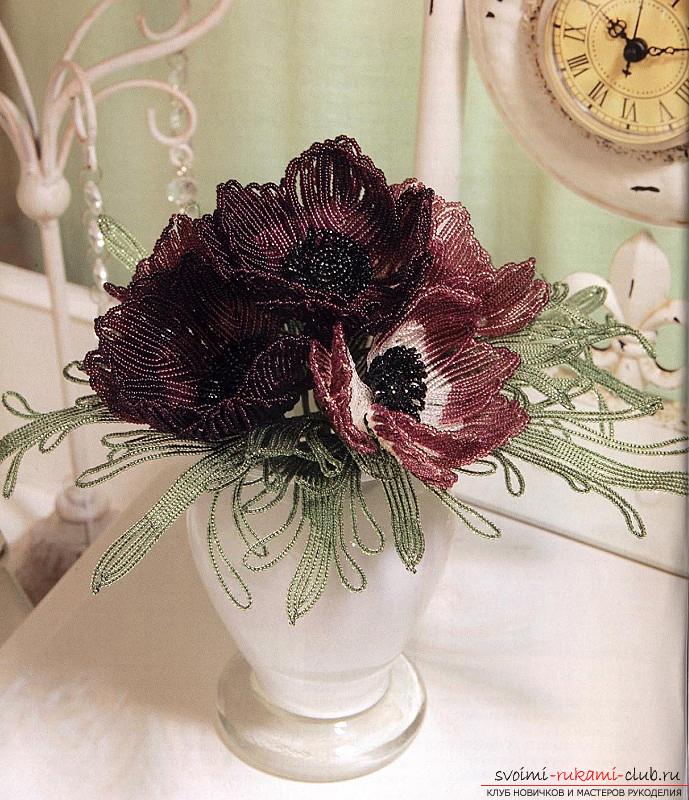 In order to weave an anemone out of beads we will need:
- Beads 11/0 or trihedral felling 9/0 (dark and light colors) for the petals. Because the anemones come in completely different shades, the colors you choose yourself, which are more like;
- Beads 11/0 or trihedral felling 9/0 black for the core;
- Beads 11/0 or trihedral felling 9/0 green for leaves;
- Copper wire No. 26 and No. 30 suitable in color to all shades of beads (each wire requires 1 hank;
- For stems, 3 pieces of wire No. 18 are also needed;
- In addition, wire number 28 of silver color is required;
- Floral ribbon is green.
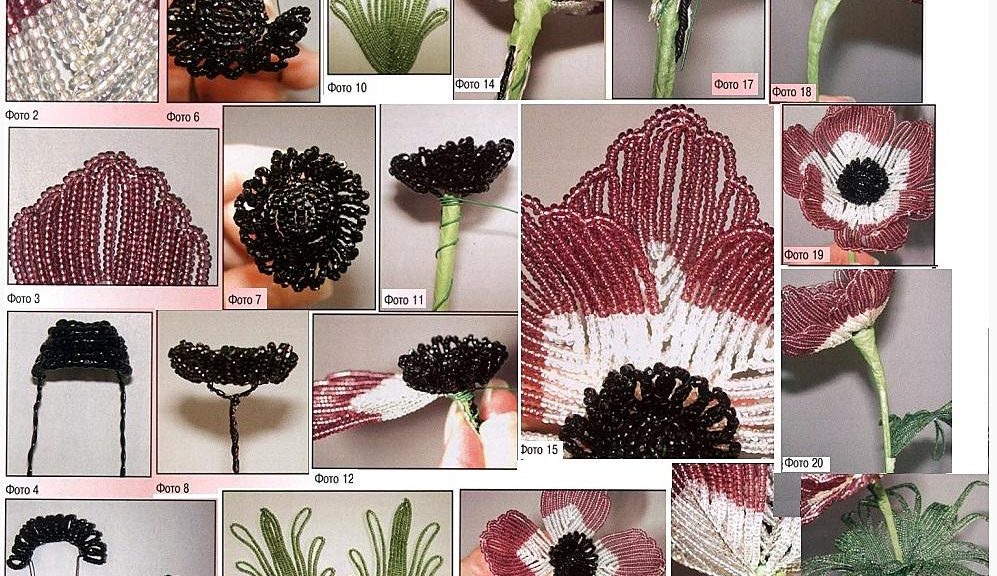
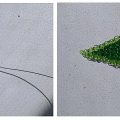
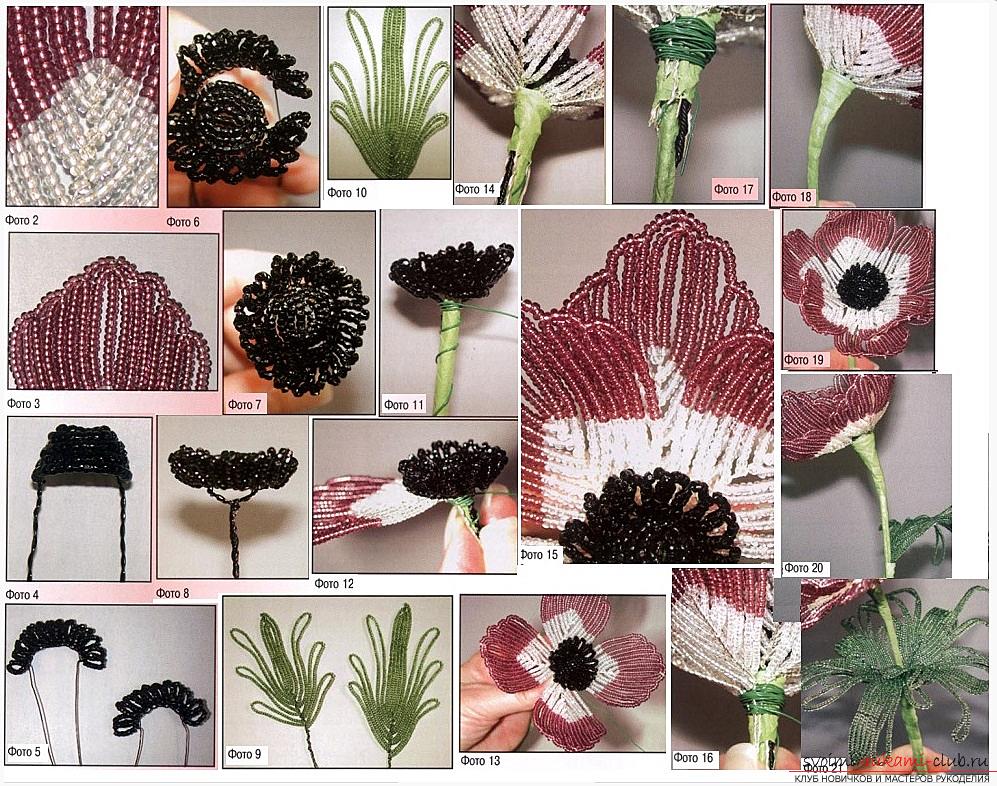 Petals will weave French arc axialweaving. For one flower you need 8 petals. To weave 1 petal you need a piece of wire about 1 m. Now you need to make an axis. To do this, measure from one end of the wire a distance of about 3 to 4 cm and make a long loop below which it is convenient to hold, twisting the wire. Now thread on the axis 1 light and all the other dark beads so that the length is low 1.9 cm. The longer part of the wire is working, we will weave the arc by it. The middle of each petal has a pattern of light beads arranged in the form Ʌ. (see photo). To do this, all the arcs that will go from bottom to top, start with light beads, and the arcs that will go from the top of the axis to the bottom, light beads finish. If there was one light bead in the axial row, then the first pair of arcs should be 2, in the next pair of 3, etc. Orient you will be on the look and adjust the amount of light beads. The first 2 pairs of arcs must be performed completely. Then weave as follows: the working wire is guided from below to the top. String the required amount of light and dark beads. The length should be low so that not to reach the top of the previous arc about 5 - 6 beads. We fasten the wire in a turn not on the axis, but on the nearest arc and begin to knit the beads. First dark, and then light. We fasten the working wire with a turn around the axis from below and begin to weave in a similar way to the second side. It is necessary to do these manipulations twice more on each side. The bottom of the petal should be slightly pointed, so fasten the arms at an angle of approximately 45 °. In order for the petals to hold better, you can flush each small piece of wire around the center of the workpiece. When all the petals are woven, we begin to make the core of the flower. It consists of two parts. The first detail is plaited with a shackle. The axis is longer. On her string black beads - 3 pcs. Make two pairs of arcs. Then you need to bend the axis, as shown in the fourth photo. And weave 8 more circles. Should get a cup. Now it is necessary to twist the working wire and part of the axis. The cup produced two twisted wire ends (one original loop, the second tip of the axis and a working wire). The second part of the core is performed in loop technology. It will take a piece of wire with a low bead of about 30 cm. In each eyelet there are 12 beads. You need 10 to 12 loops for one side. Focus on the volume of the cup. Flattering with two approaches, from the first wire tail, to the second and vice versa. (see the fifth photo). We will fasten the billets by twisting their wires with the ends of the cup. (see the sixth photo). The eyelets need to be straightened so that they are pointed upwards. All the wire ends twist into one. (see the eighth photo). Now we begin to weave the leaves. We will have 2 types of leaves - bigger and smaller. The lower part of the leaflets should be sharpened. The blanks must also be sewn in the form Ʌ. For the first type of leaves per axis, we string 6.5 cm of green beads. We execute 2 pairs of arcs. Then plait with eyelets. Each side has 3 loops. The first is 15 cm long (low beads, therefore, should be at least 30 cm long), the second length is 13 cm (low beads = 26 cm), the third 10 cm (low beads = 20 cm). The length of the wire tails should be approximately the same (the initial loop for fixing the axis and two working wires, the leaves will take a lot of wire, so it will be more appropriate to weave half the loops on the added length of wire). For the second type of leaves you need a low on an axis 4 cm long. 2 pairs of arches. Loops of 11 cm, 9 cm and 6 cm in length (see the tenth photo) Now proceed to assemble the anemone flower. By wire No. 28, fix the core on a piece of wire for the stem. Then fasten the petals around. We will have 2 circles of 4 petals in each. They should be arranged in staggered order. The entire structure is to wrap the flora with tape a few centimeters. Then attach the leaves and continue winding the floras with ribbon. Anemone is ready.
Comments
Related posts:
 How to weave an orchid of beads, a detailed and step-by-step master class of French axial technique of weaving flowers from beads with a lot of photos and a description of the work
 How to create a gerbera flower from beads in the technique of parallel weaving, step by step photos and description
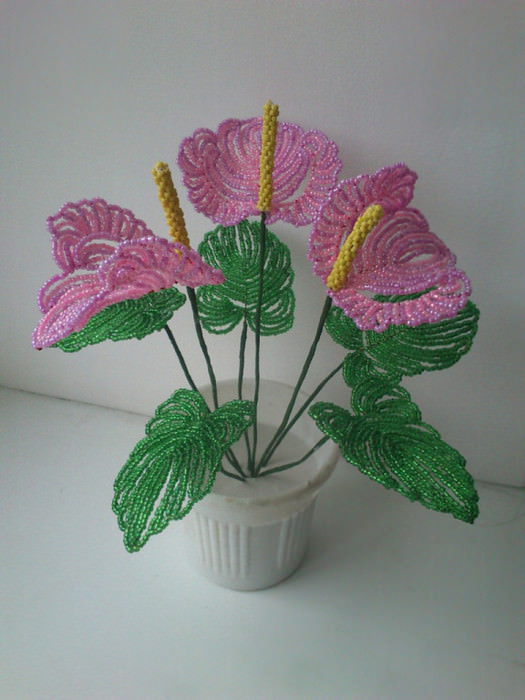 Anthurium from beads master class and weave scheme (photo)
 How to weave multicolored iris from beads in French technique, description and step-by-step photos
 How to weave wisteria from beads, master class with detailed photos and description of the weaving