How to make a magic toy out of felt with your own hands? Master-class of products
New Year's holidays are a time whenI really want to make something pleasant and useful for my home. Under the New Year holiday, we are in search of the most interesting and significant ideas that can be realized for your home. Crafts can be different and even from the simplest, everyday things you can create such art samples that will make your home more vivid and magical. So, what options can we consider in the process of working on a craftsman?
How to make a magic toy out of felt with your own hands? Master-class of products
 Fabric - the most common optionwith which many of us have already encountered. But, few people imagine that for the holiday, like New Year and Christmas, there are many incredible ideas for decorating New Year's toys, using ordinary felt. So, let's consider the very idea: Preparing a toy from felt by one's own hands
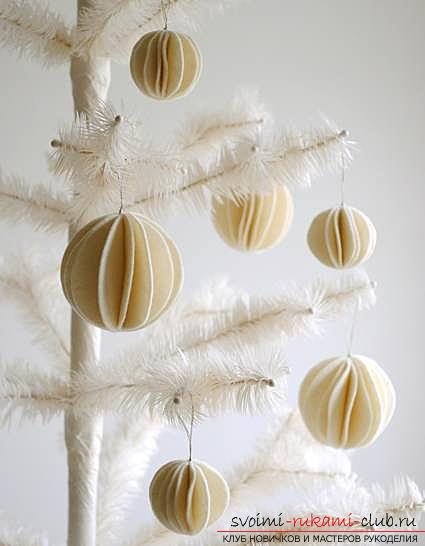
- It will be necessary to take a plain felt of white color
- Prepare the thread of the corresponding color, or silvery, golden color
- The tool of scissors for processing
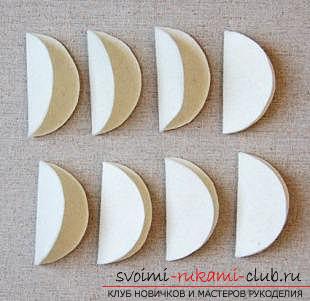
 First, you need to cut outeight identical circles. To make such circles, you should draw identical circles using felt. Also, you can use a compass, or a template, which you need to do in advance from the cardboard. Then, the circles are folded into two parts and pressed against each other.
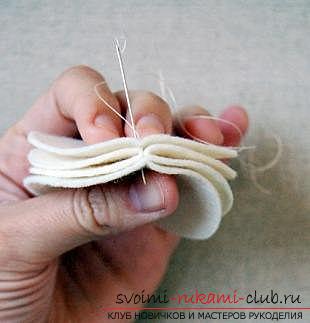
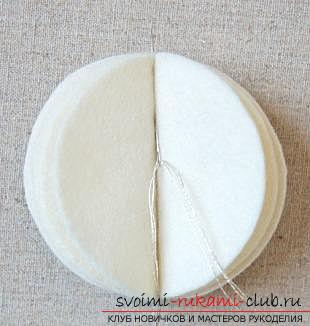 Next, take two bent circles and mergeby means of a central fold, using a needle or thread. In the beginning, it is necessary to make the knot of the knot. It must be done in such a way that it is inside the product, between our circles. The thread does not need to be cut off. Next, we add two more circles, but in full form. One is added to the top layer, the other to the bottom one. We connect them with the help of needles and thread with all our crafts. Sutures should be made at the center of the fold, the thread also does not need to be cut. After, bend the mugs that were stitched and add two more of the same mug. We sew them in the same way as in the previous scheme. We must not forget that the thread is also not cut off. Then, the same thing we repeat with the circles that we have left. further, it is possible to make a thread with a knot and cut the product. In order to form a loop for the toy, it is necessary to make a thread of silver color. To do this, use a thick thread, which can be divided into thin as 3 particles. They should be pierced through the ear with needles. Further, starting from the middle, we make the movement of needles and threads along the upper part, and then in the upper part a loop is formed, which is tied into a knot. Mugs need a little open to get a smooth, shaped ball with a magnificent appearance. Christmas tree of felt
 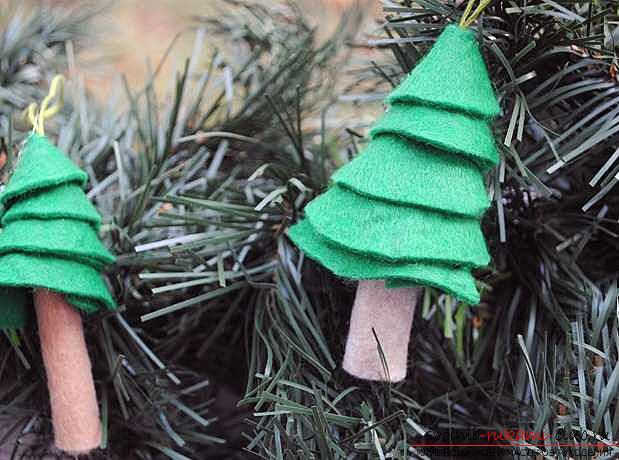 To decorate a Christmas tree, you can not onlytraditional solutions. Quite naturally suitable options for decorating similar Christmas trees, but more small ones. In this article, we'll talk about a simple way to create a similar tree, using the usual fabric of felt:
- Take the felt of green and brown
- Also prepare a sticky substance (hot) in the gun, can be replaced with PVA glue
- Scissors for material processing
- You can also take a pair of scissors and a thread, a needle for processing.
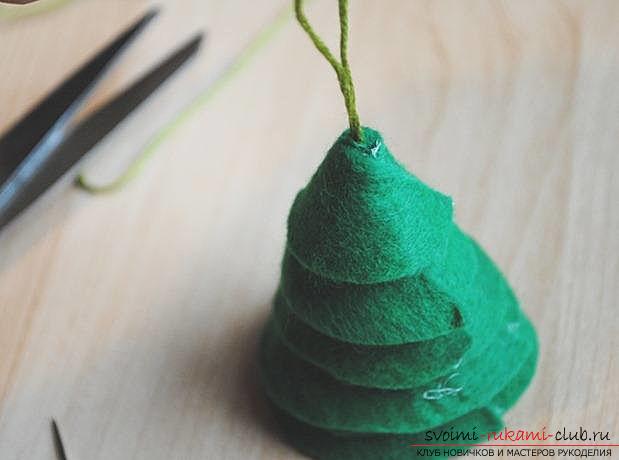 Each circle should be processed into a formtriangle. To do this, you can use the services of a stencil, ruler or template! After, it is necessary to twist the cone and then, fix the ends with glue. Then, it is necessary to insert a variant of a thick thread in the needle and pass through the smallest version of the cone. Then, at the top, form a loop, which in the future will need to be tied through a bundle. We start to add the cone option, using one after the other, we add to each vertex a sticky substance. Work should start from a large cone, and finish the procedure with the smallest product. We use brown felt material to cut rectangles in sizes of 10 by 5 centimeters. We twist these figures to the shape of the tube, using the equalization for the width.
  Then, with the help of glue, we need to fix the end of the product, so that the tube does not unfold. We apply glue from one side of the end of the tube to seal to the Christmas tree. Christmas tree sweets
 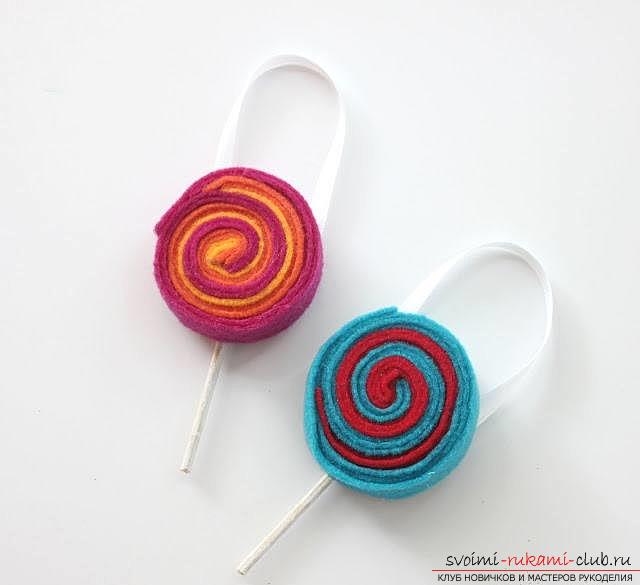 And how to decorate a Christmas tree with candies? To your attention a simple lesson that will tell how to make beautiful toy adaptations in the form of sweets, which you will want to eat!
- Prepare the felt material in different colors
- Take the PVA glue
- You will need braid or thread
- You will need old chopsticks "Chupa-Chups" or matches, skewers
With the help of felt we cut out several stripsa multi-colored species with a width of 1 centimeter and a length of 20 centimeters. Then, 6 add up the strips in combination of two or three colors on each other and twisting them in a spiral pattern. Then, glue, fix the product. After the strips are twisted, one of them is longer than the others. Then, using the back of the candy you get, you need to stick the wand and take the braid and stick to it to get the shape of candy. Then, a cover for the back side, where the element is located braid sticks, cut by means of a small circle of felt according to the diameter and glued to the candy product. That's all! Our artwork from felt is completely ready. Firewalker 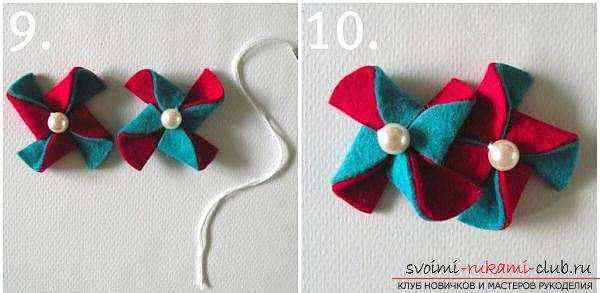 We all know what a traditional turntable looks like. And what if you try to implement this yourself? The material of felt will absolutely allow you to make a bright toy of a turntable and decorate it at will.
- It will be required to take felt material in two colors
- Prepare beads in the number of two pieces
- Take a thread and a needle
- You will need a sticky substance (from silicone, hot glue, or super-glue)
- Scissors for processing
 To begin with, we have to cut two circles inthe color is the same as the diameter of 6 centimeters. Next, the glue is applied to each circle and then glued to a felt sheet with a different color solution. After, the circle is cut and then, with the help of scissors, unnecessary parts are removed. On each of the four sides of each circle we make small incisions and then, bend the ends to the central part. Finally fix it with glue and get the mold of the turntable.
 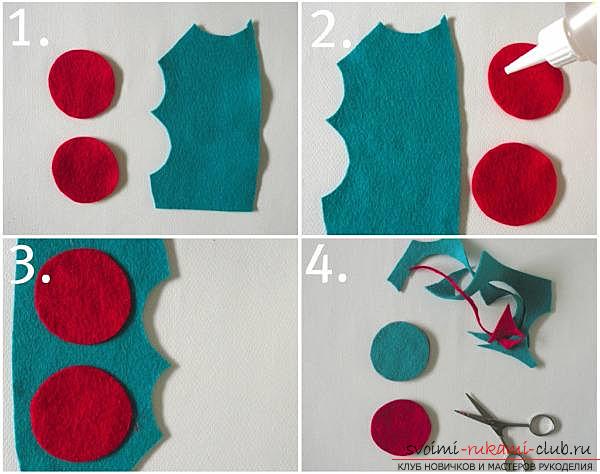 With the second circle we repeat the same thing and getthe necessary elements for decoration. A bead must be sewn to each spinner in the center. Also, you can sew the braid so that the decoration can be hung to the Christmas tree. Or, you can fasten the hair clip on the back of the product to decorate, for example, curtains.
 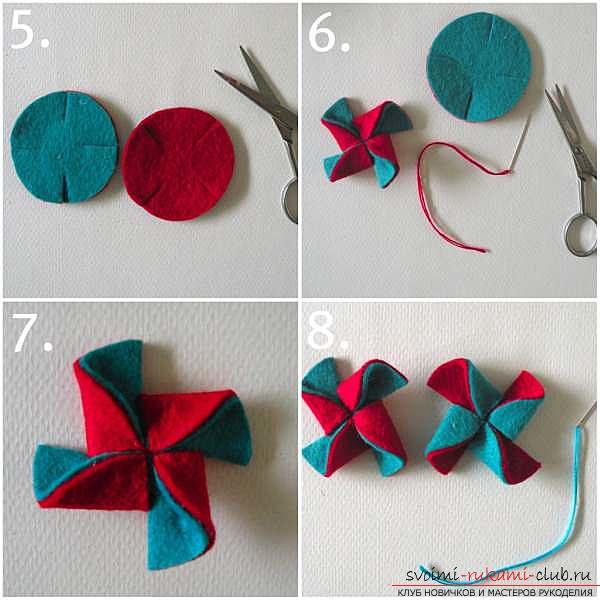 Elephant of felt All children adore elephants! And what if your elephant is made of felt? With the help of filler and beautiful fabric options, you can make a very nice elephant that can decorate your Christmas tree and make it more interesting!
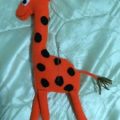
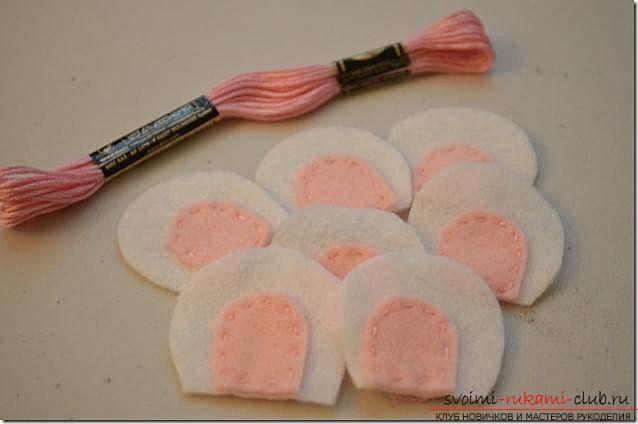
- Prepare for work the felt material
- We take some filler (sintepon or foam rubber)
- Prepare a little braid
- Buy toy eyes, or replace with small buttons
- Prepare a thread, and also a needle
Then, on the cardboard a special template is created inform of an elephant, so that we can then transfer it to our felt material. After you moved the template, you need to cut it. After that, we cut out small hearts with felt, which in the future we sew to the trunk. For the ears of the elephant, you should use light colors, as well as pink colors for the inside and outer parts of the ear. Each elephant consists of two parts of felt for the trunk, two pink elements of felt of dark and light shade for the ears, as well as two hearts and, of course, the filler itself. 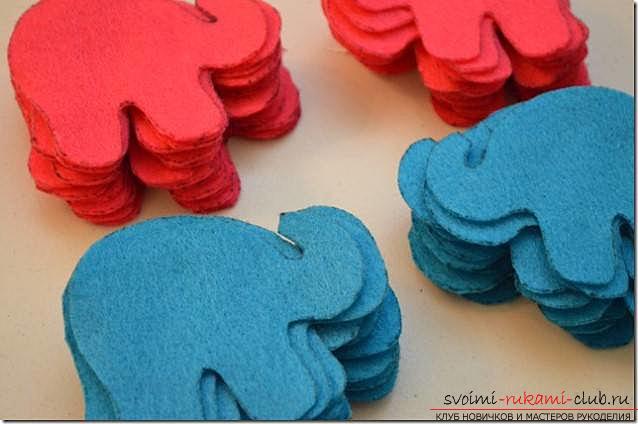 To begin with, it is necessary to take and sew togetherdetails of the ears, which consist of felt of different shades of pink. Then, sew the ears and hearts to the central part of the product - the trunk. Then, it is necessary to sew or glue the parts of buttons for the trunk, for one half - one button. Then, using a needle and thread, you need to make the information of the two halves, so that there is also room for the subsequent filling of the toy. Add our filler and sew up the hole, then make a small tail for the elephant from the strings. We sew the braid specifically so that the toy can be hung on a Christmas tree