
How to make an original wreath of solid cardboard for decorating the house to Halloween? Fresh idea of decor for a party
Feast of All Saints or Halloween - perhaps the mostmysterious, bright and unusual holiday of autumn. Although the tradition to celebrate Halloween came to us relatively recently, it has firmly established itself in our region and today adults and children enjoy having fun on this day. As a rule, halloween is arranged by noisy costumed balls and parties, they cook unusual dishes and decorate their house in accordance with the theme of the holiday. Here you can not do without original lanterns carved from pumpkin fruits, garlands in the form of mummies, ghosts, spiders and other adornments in the style of wickedness. Such decorations on the eve of the holiday can be purchased at any mall or small shop, and they can also be made independently with their own hands. For example, you can decorate your house with such a decorative wreath, and how to make it. We will tell in this master class. 
Materials and tools
So, to make an ornament for Halloween with our own hands, we will need:
- packing dense cardboard;
- fabric of orange color;
- tulle of black color;
- orange and green felt;
- colored paper of black color;
- coil threads of green color;
- sewing needle;
- scissors;
- A simple pencil;
- any yarn of black color;
- thin satin ribbon of black color;
- glue thermo gun.
Description of work
1.To begin with, we'll make a skeleton for our decorative wreath. To do this, we need a tight packing cardboard, to get it, because of this cardboard boxes for packaging different goods are made. Draw on the cardboard one circle, about 18 centimeters in diameter, and inside it exactly in the center of the second, about 15 centimeters in diameter. This can be done with the help of a compass, or using suitable stencils, such as plates, saucers, cups, lids, pots, etc., as a stencil. Painted ring, cut out on the contour with scissors. 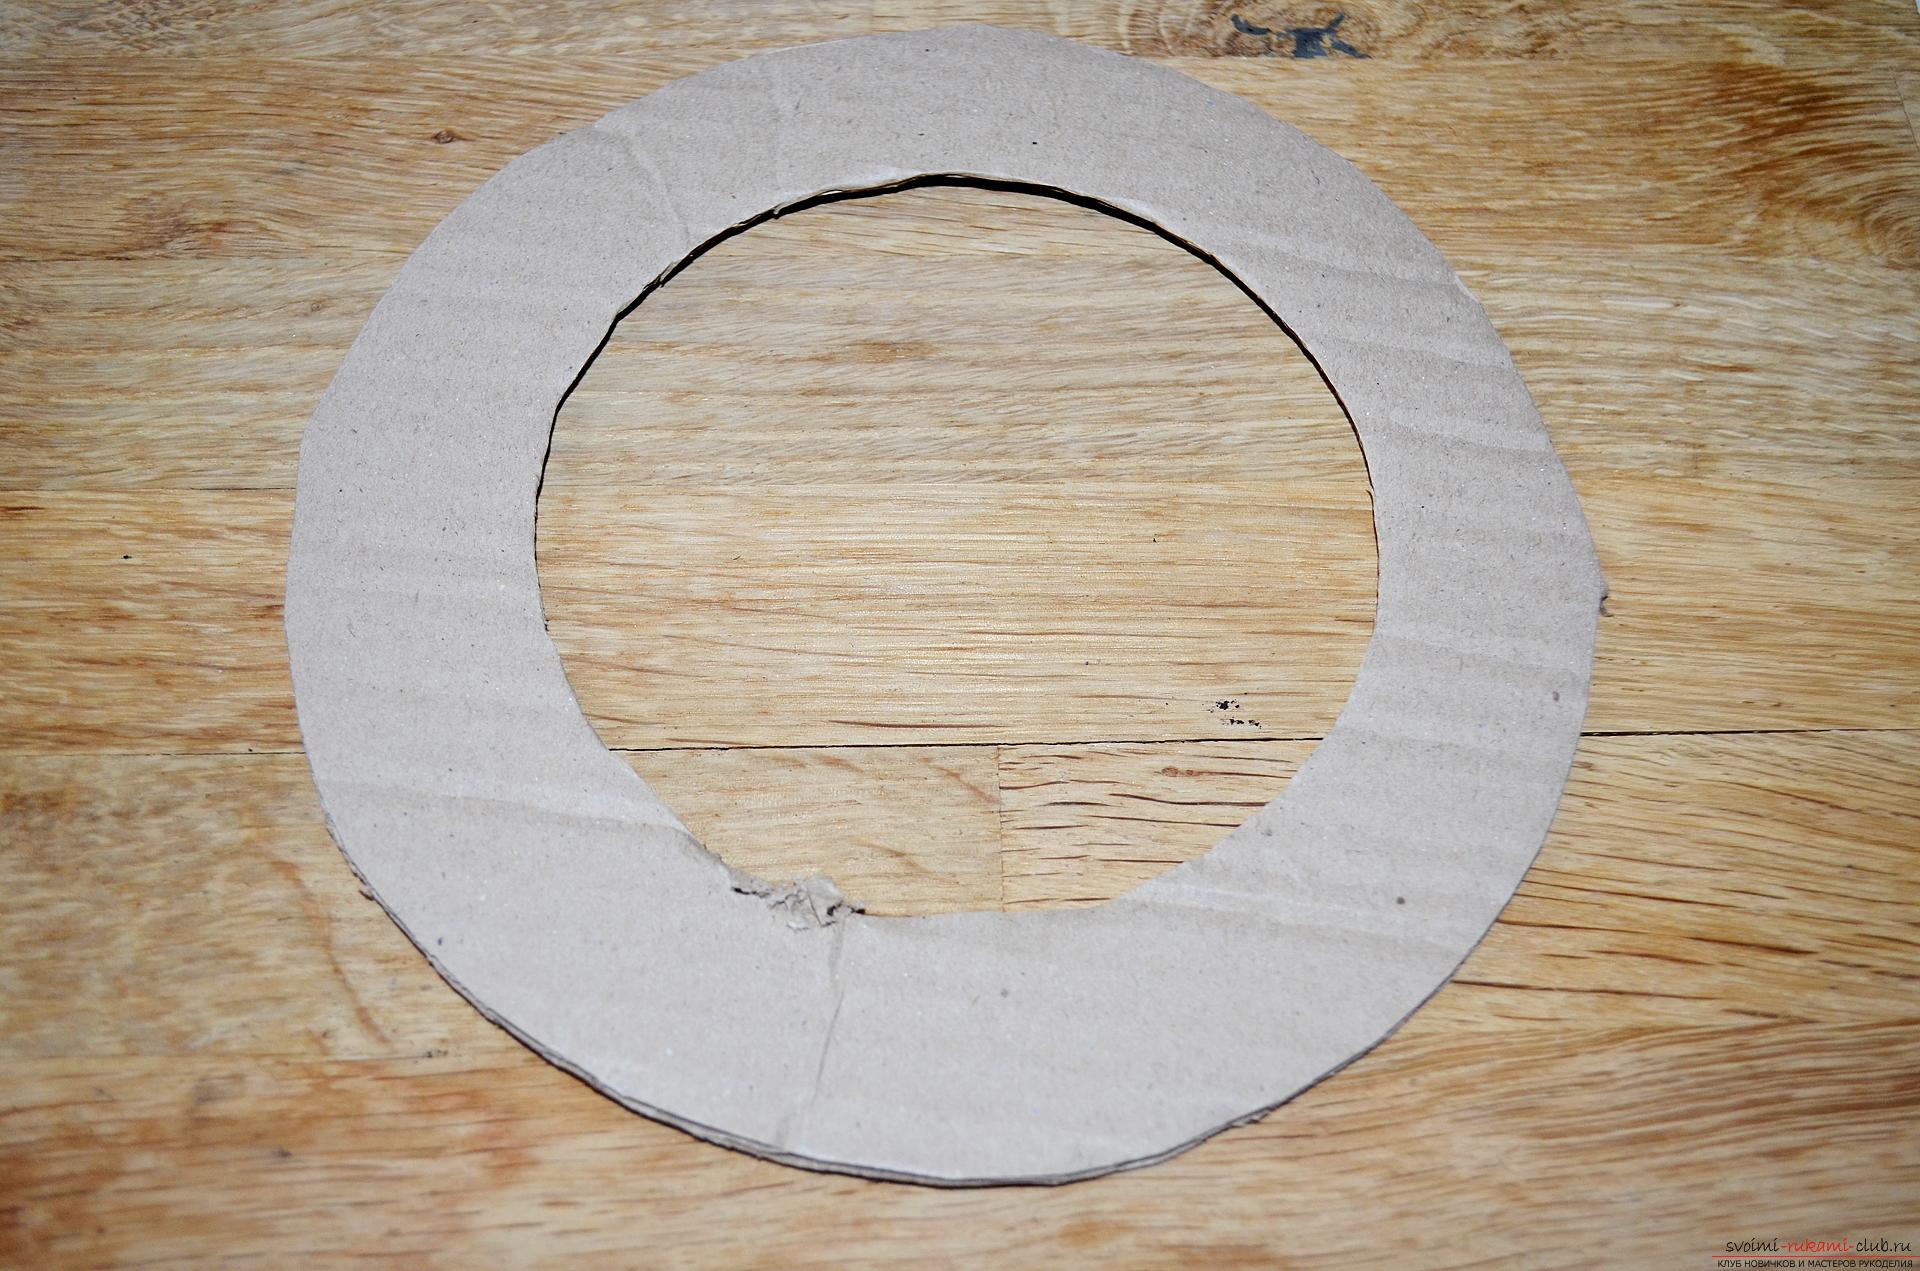 2.Next, take a piece of any suitable fabric of orange color and cut it into strips, about 2.5-3 centimeters wide. The edge of the fabric tape with a drop of hot glue is fixed from the back side of the cardboard backbone and wraps a strip of overlapping on it, thus filling a little more than half the ring. The end of the fabric is also glued to the cardboard using an adhesive thermo-gun.
  3.Now take the tulle of black color, and cut out of it a strip, about 10 centimeters wide, crumple it in width and in this form we wrap the cloth with the rest of the base wreath. The edges are also fixed with hot glue.
  4.The next stage we take black yarn, in our case it is viscose ribbon yarn and wrap it around the whole base in a circle, first in one and then in the opposite direction, as if our wreath has covered a web. To prevent the thread from bursting, we also fix it in several places, with hot glue on the back of the work.
 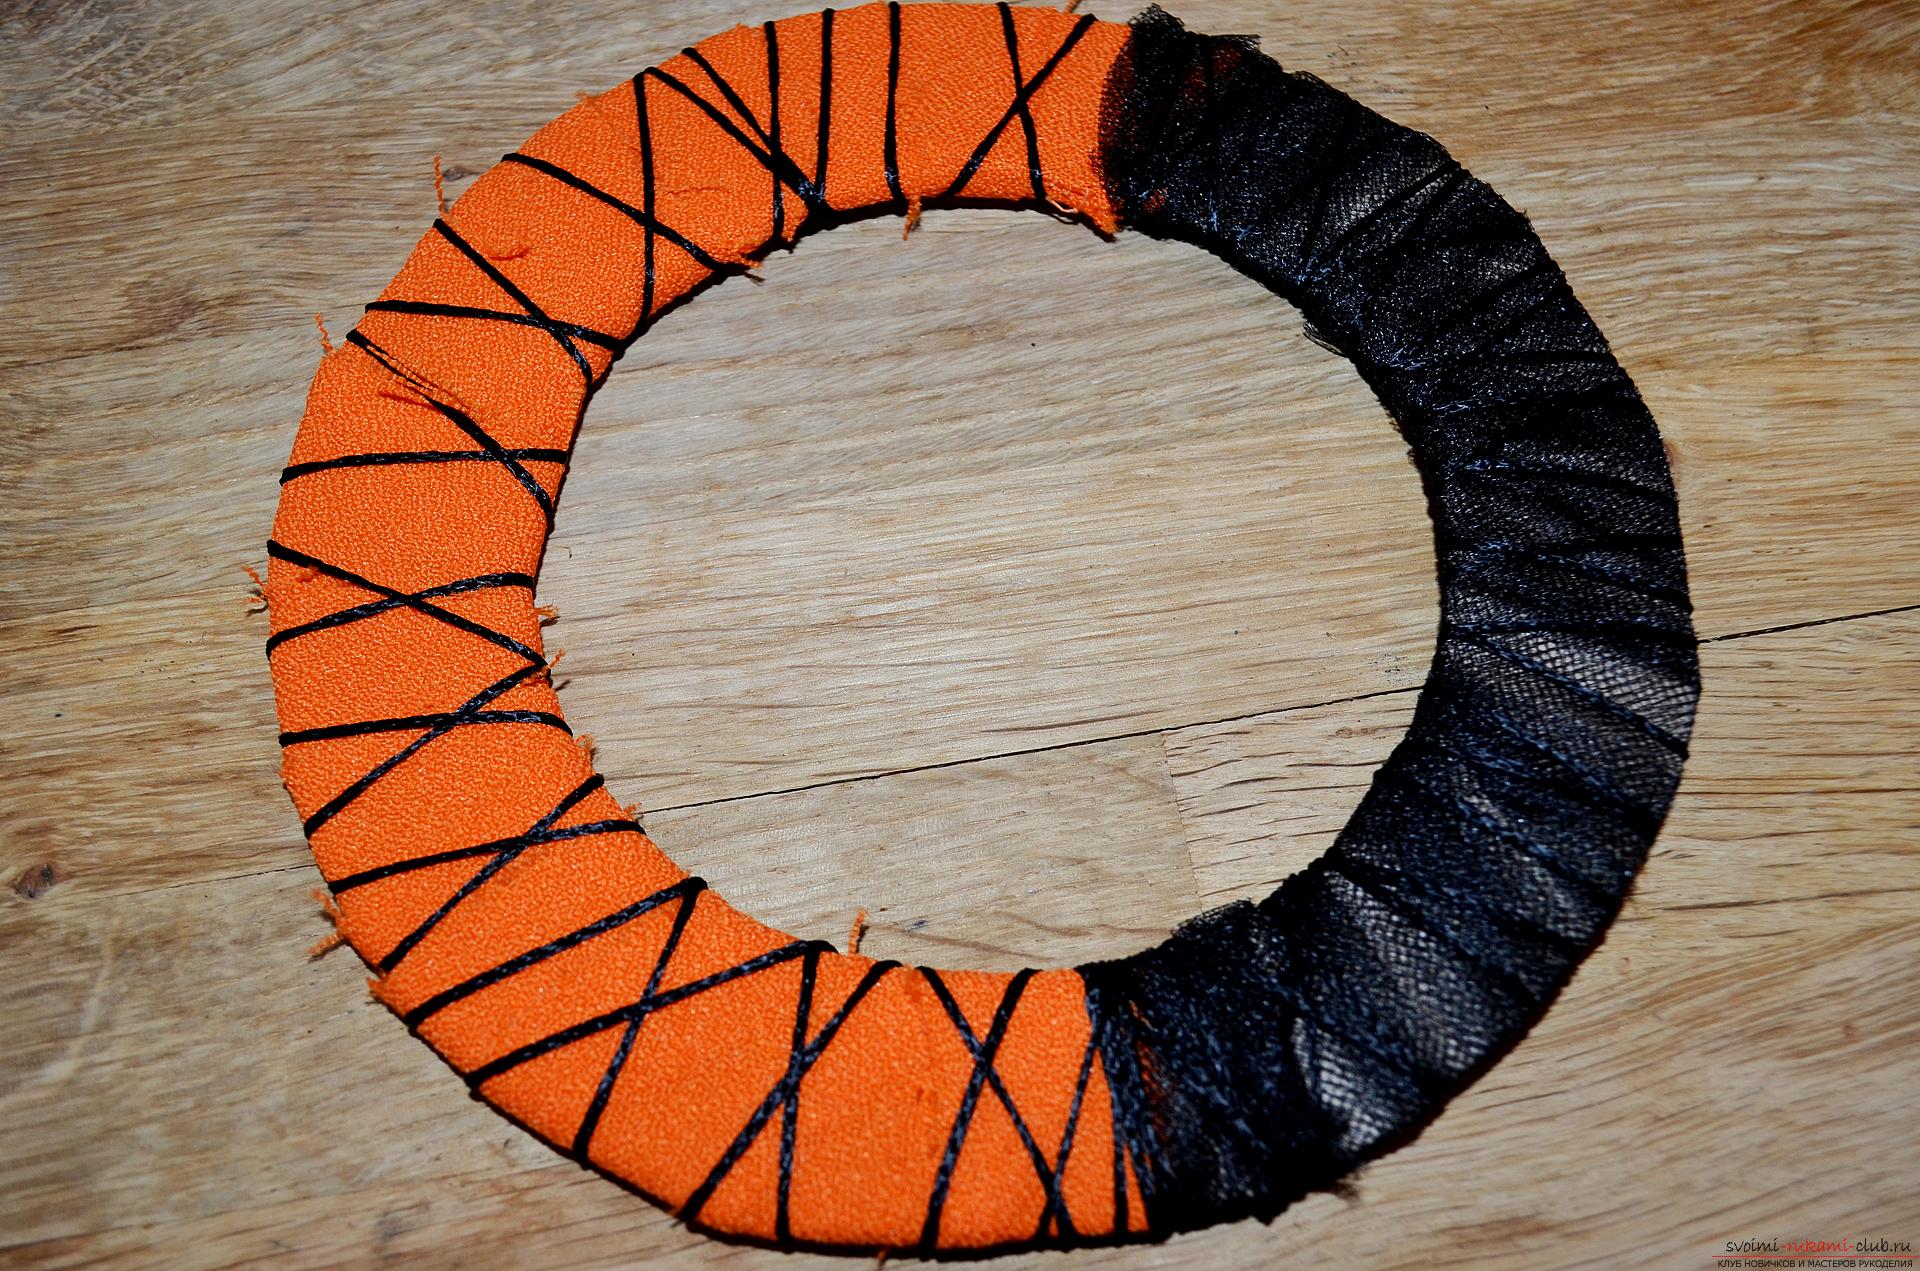 5. The base of the wreath is ready, you can go to the decorative elements. According to our idea on the decoration will be present one of the main attributes of the autumn holiday - pumpkin, for their manufacture we need a felt orange and green. Apply a pre-prepared paper stencil of fruit on a fabric and cut out two main orange details, and two green tails.
  6.To our pumpkin as much as possible to the real sew on their tails, and also embroider on each with a needle with a green thread veins. We use for this purpose the most usual seam "a needle forward", we try to make stitches small and not too dense.
 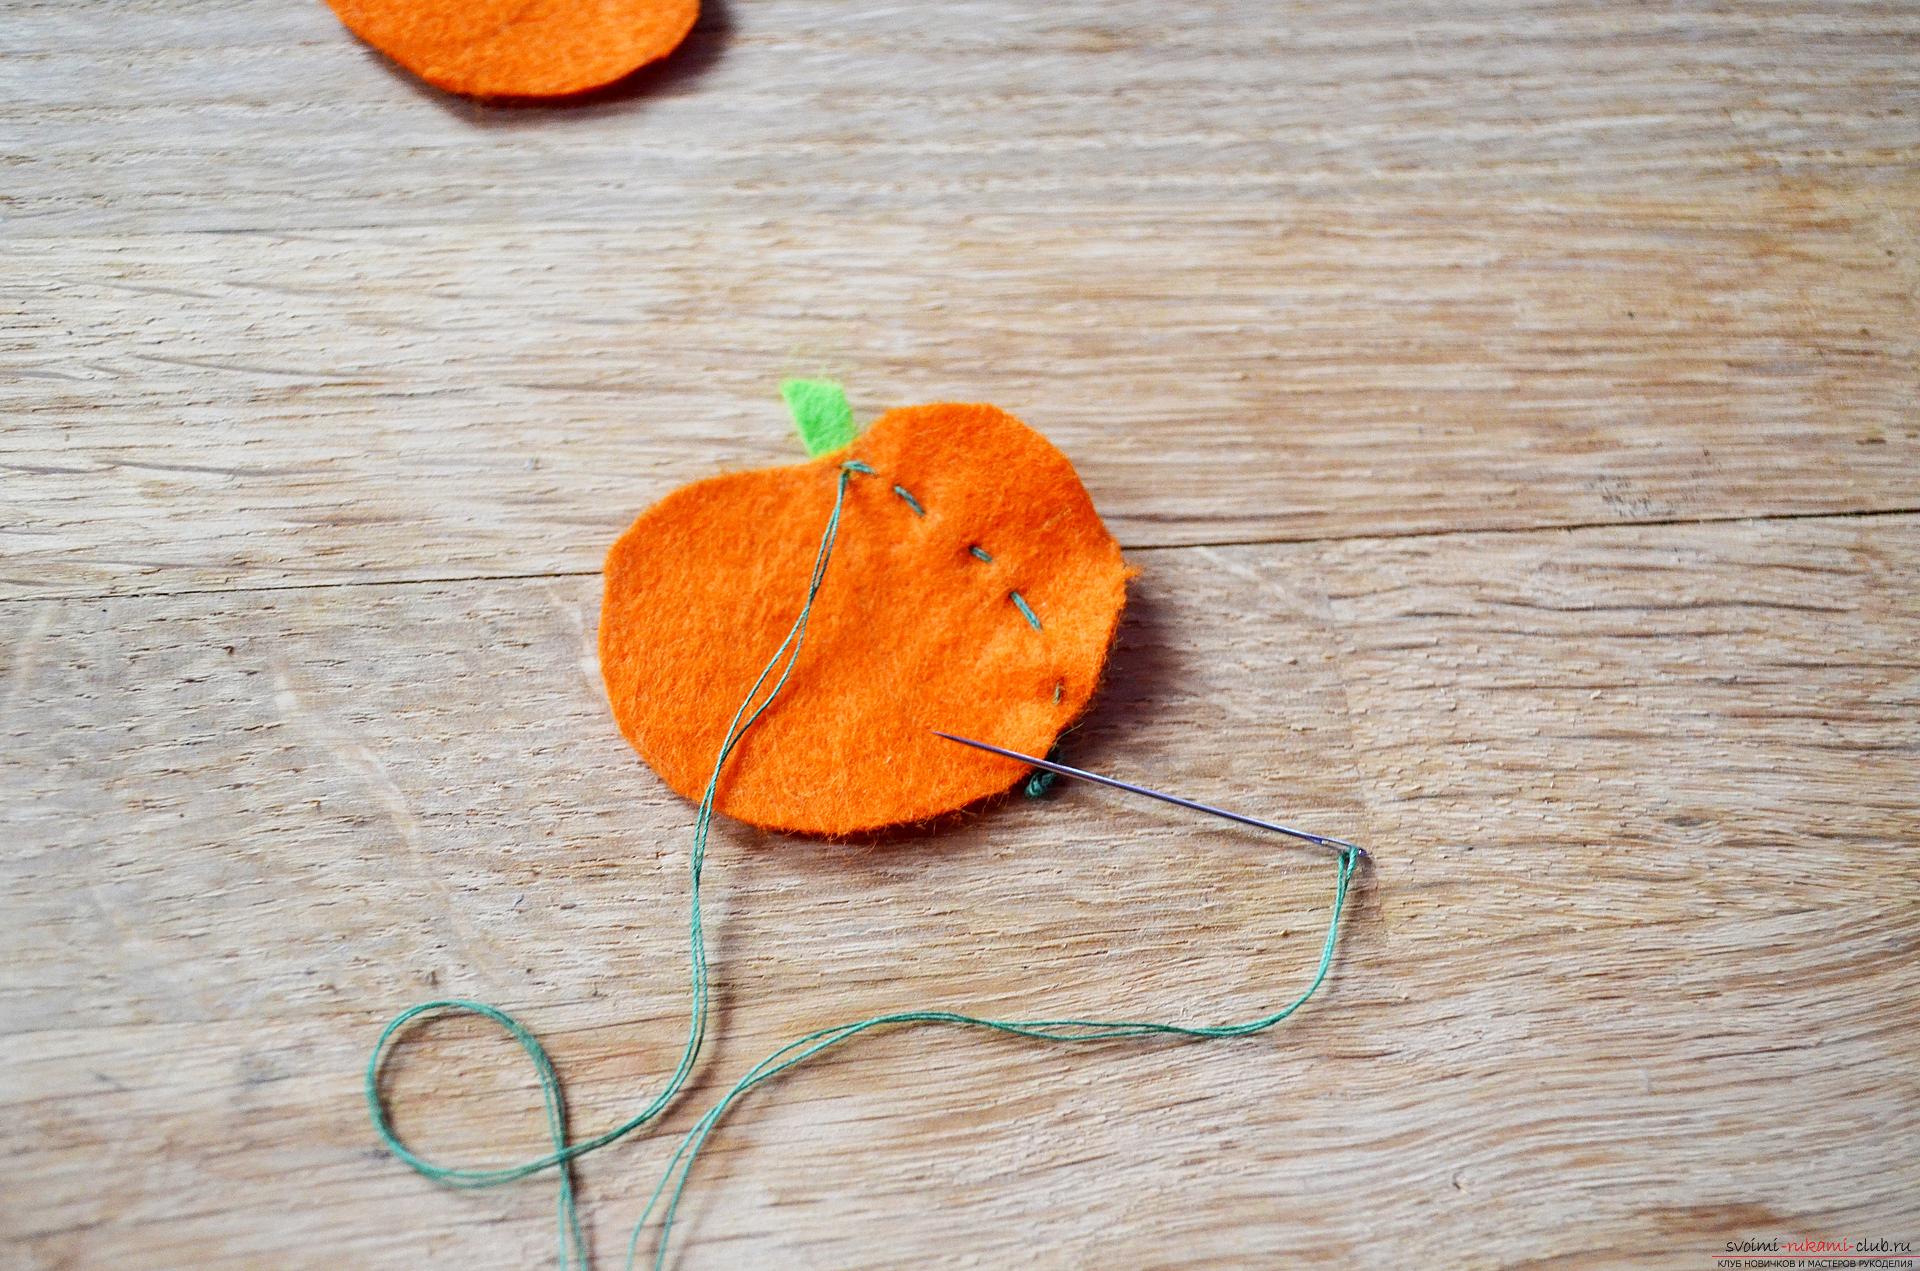 7. Here we have such wonderful pumpkins.
 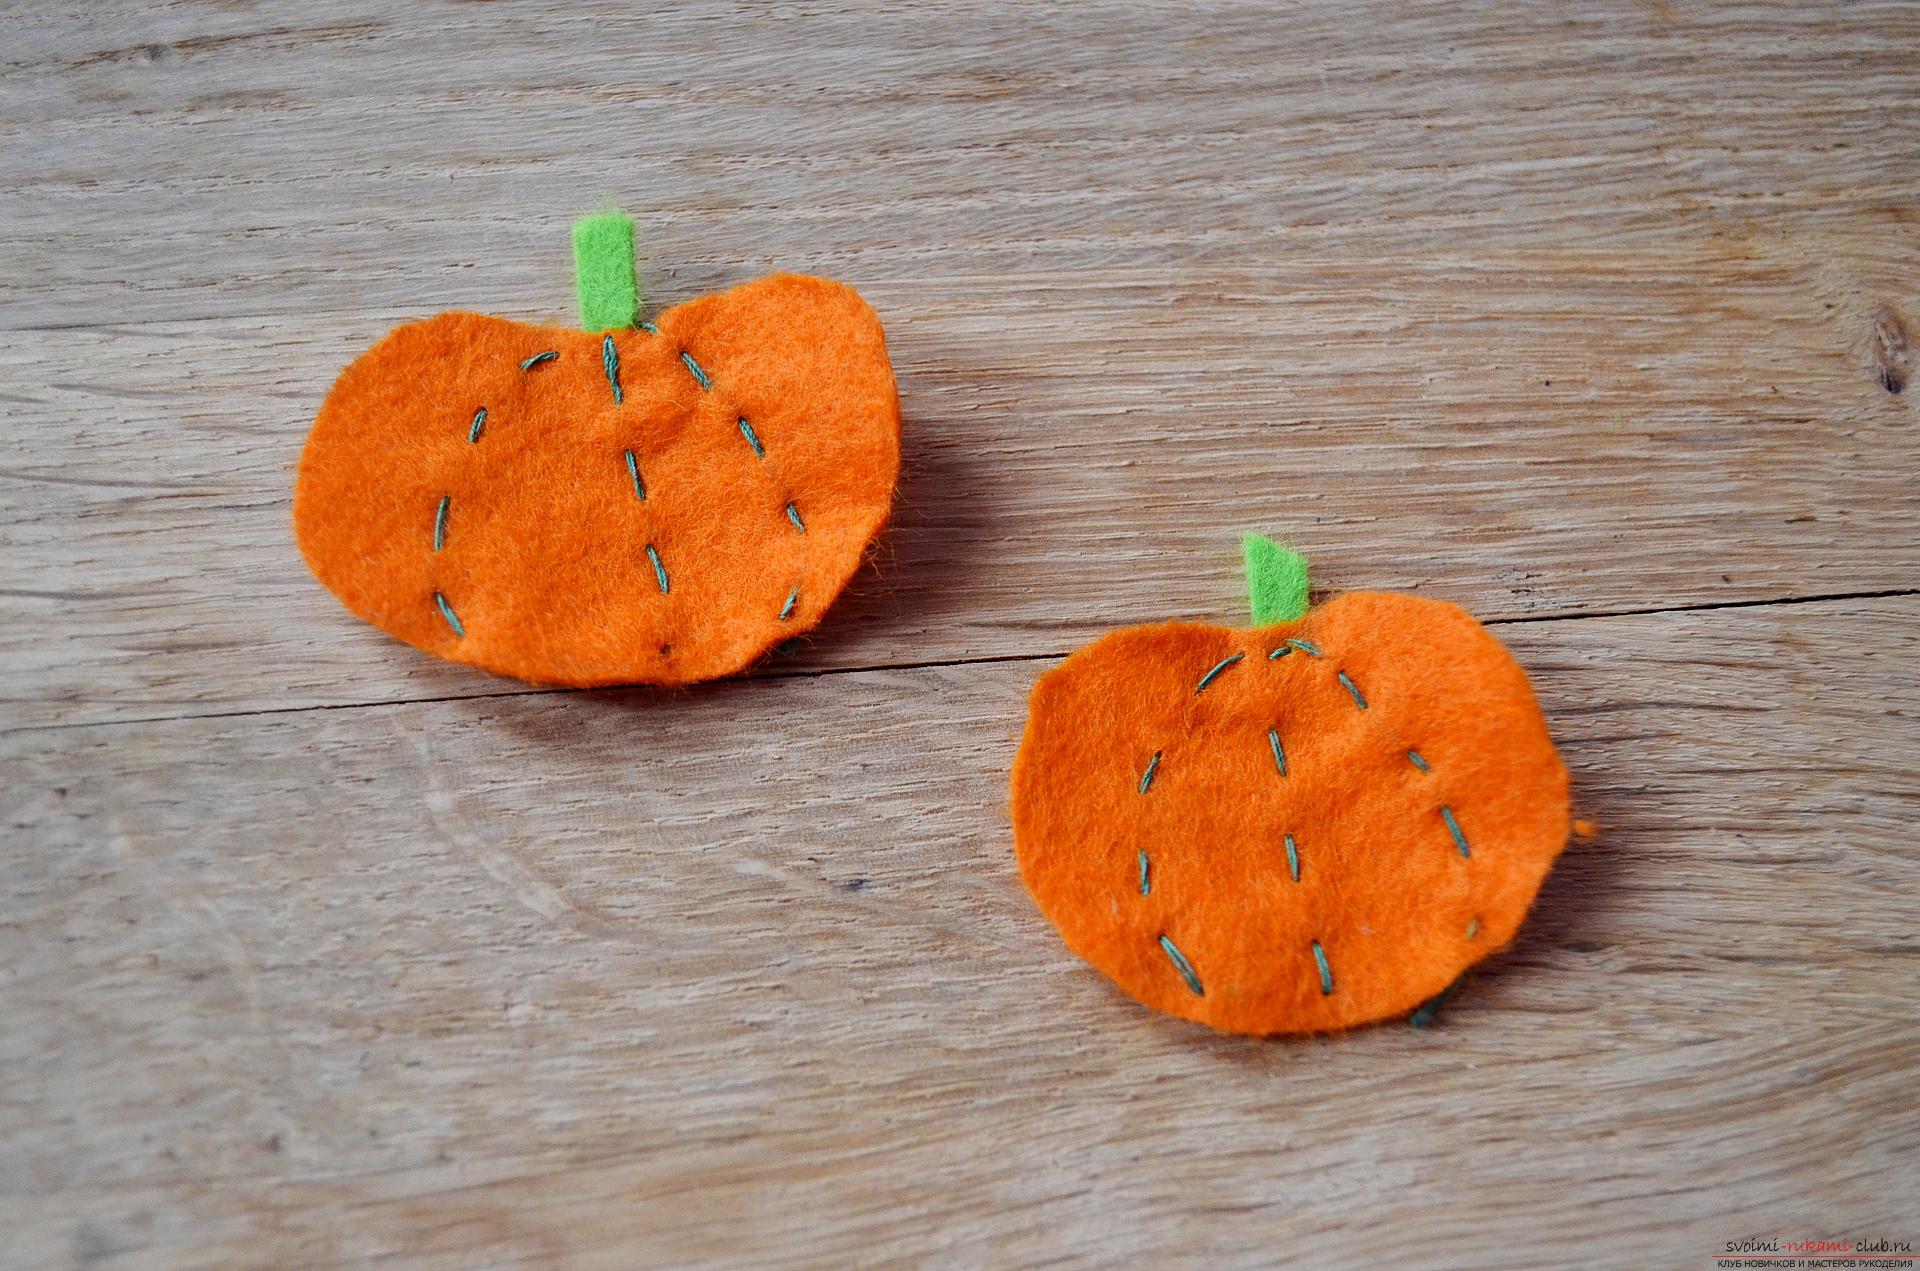 8.Also, our wreath will be decorated with several bats, to take them we take a sheet of black paper, fold it in half and draw on it with a simple pencil half of the silhouette of the mouse, and the fold line of the paper should be in the center of the future bat (see photo below).
  9. Carefully cut out the silhouette of the bat on the contour, for a wreath we need three of them.
 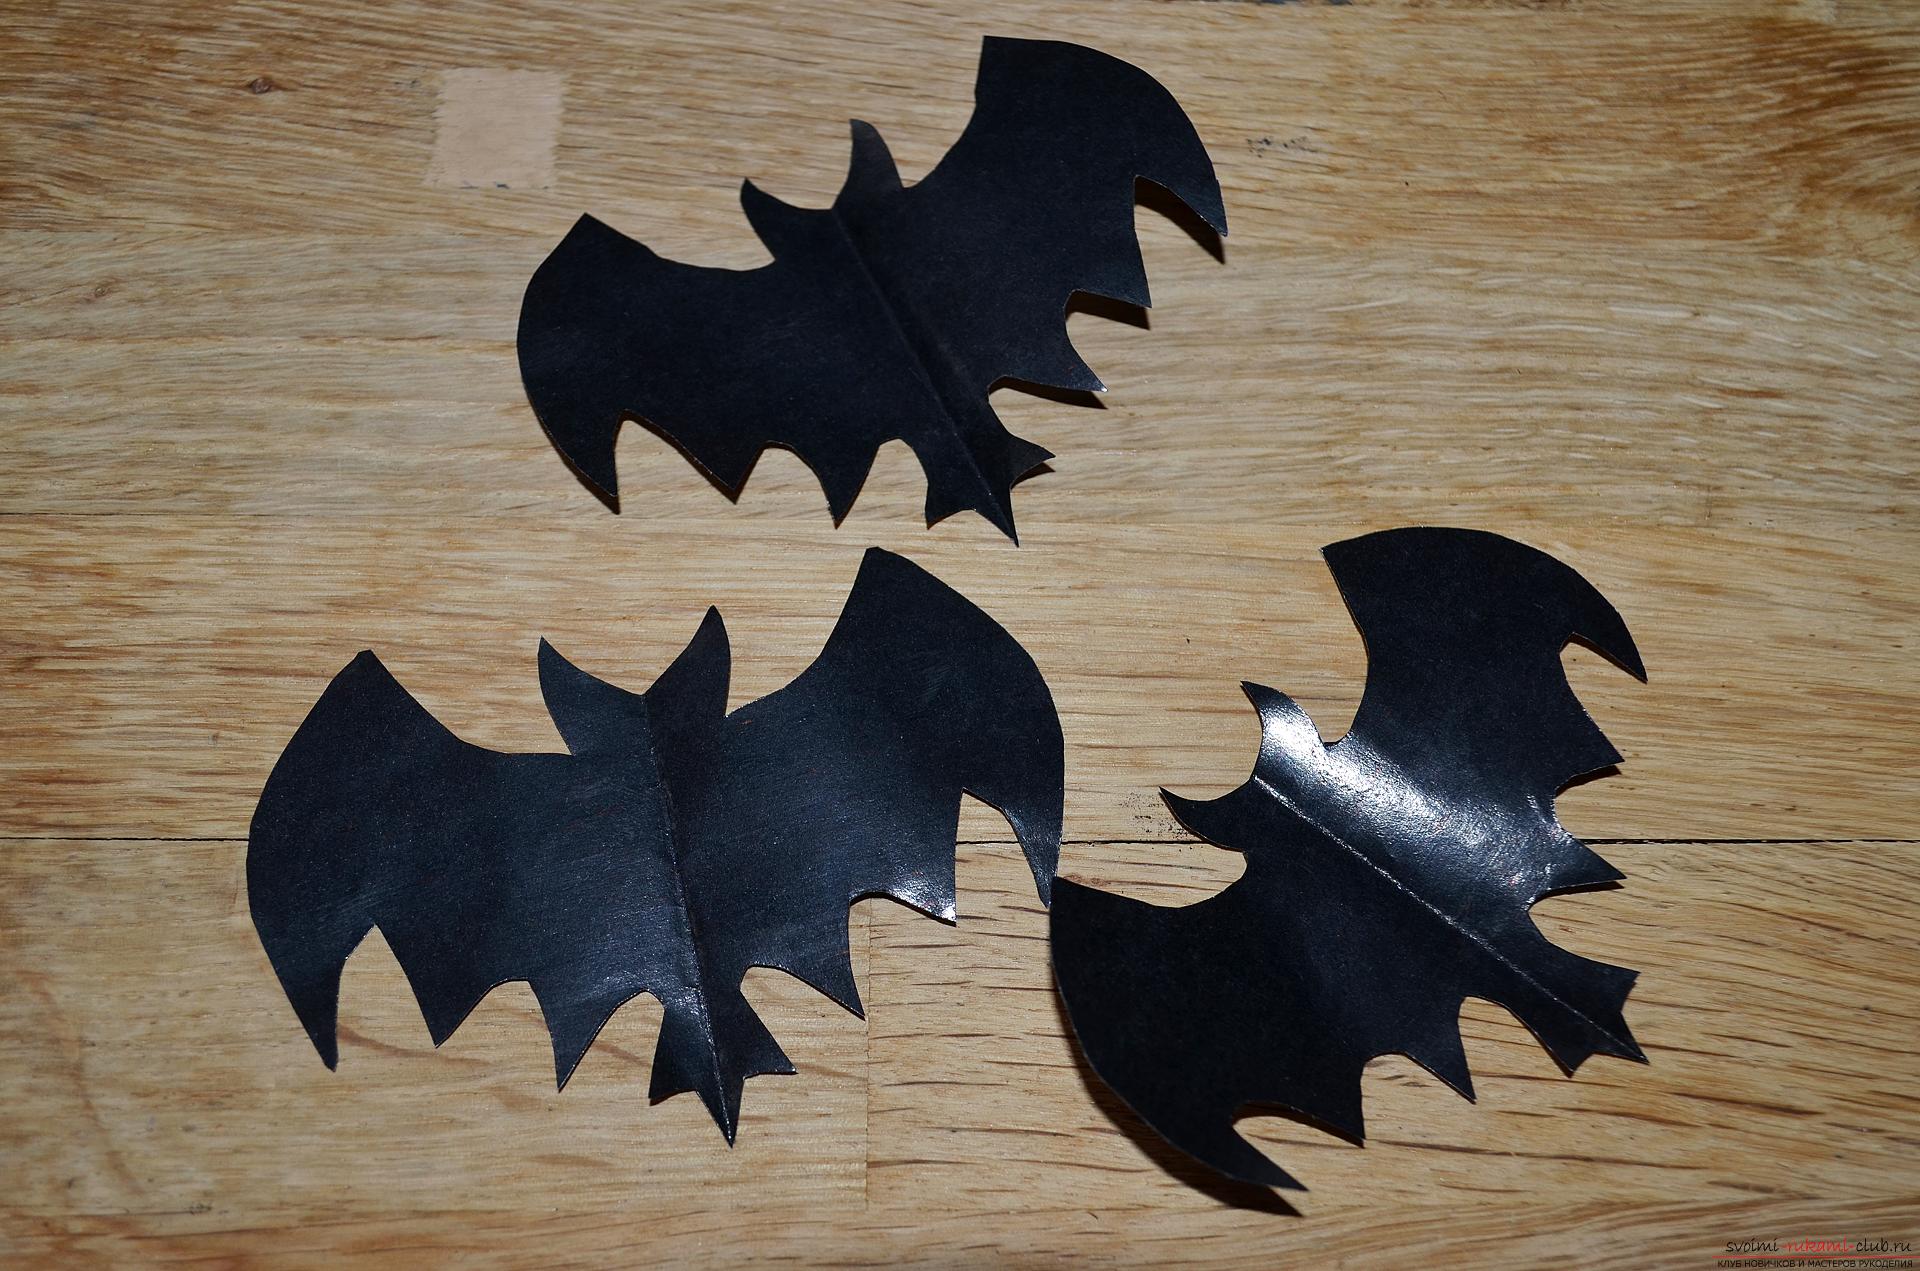 10.Which all the elements are ready, go to decorating the wreath. Let's start with pumpkins, we glue them with a drop of hot glue, each on the dark side, one higher, and the other slightly lower.
  11.With the opposite orange side glued with hot glue those paper-cut bats.
 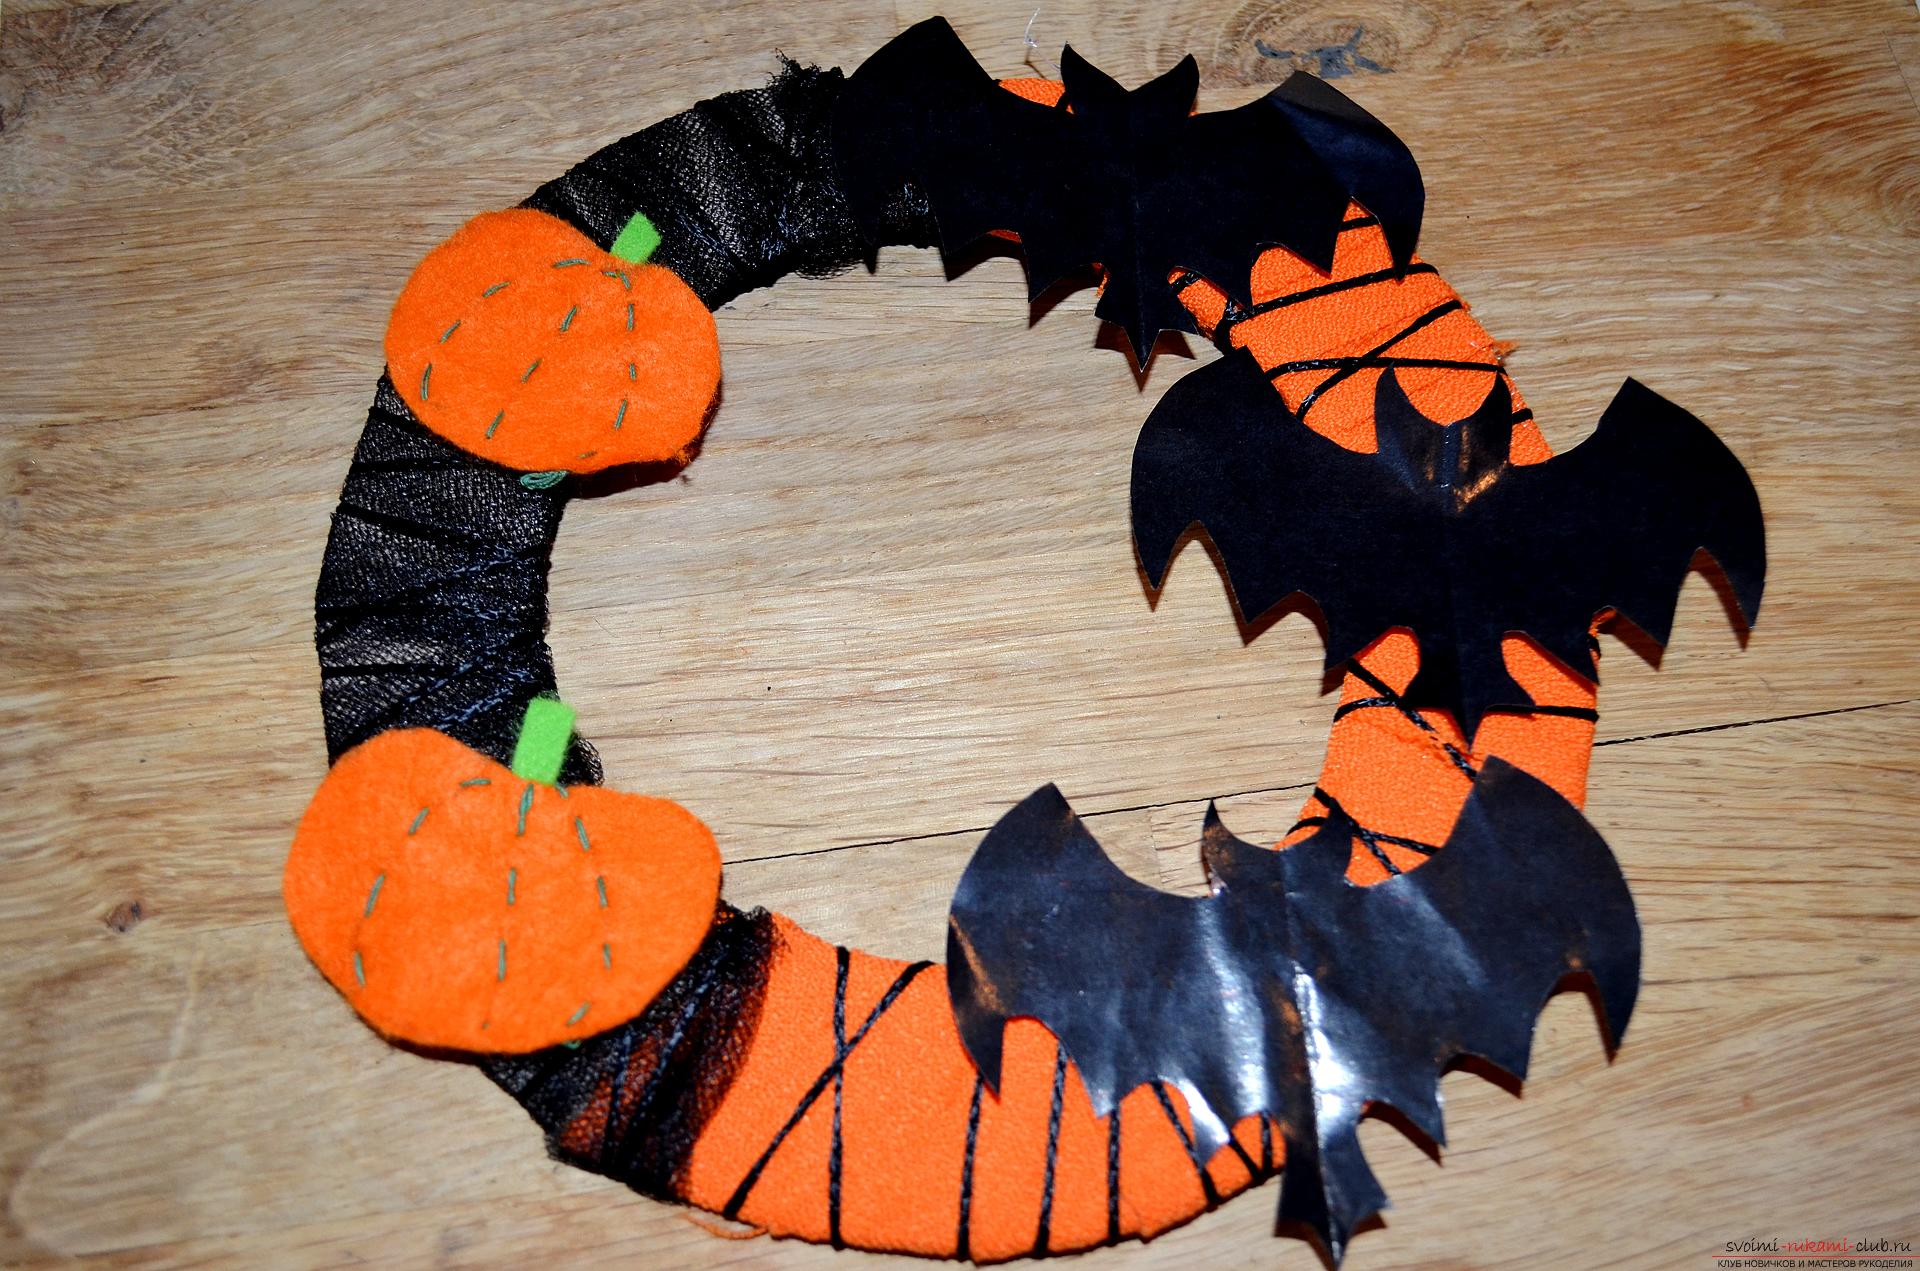 12. Next, from a thin black satin ribbon, form a small bow and glue it in the center at the bottom of the decorative wreath.
 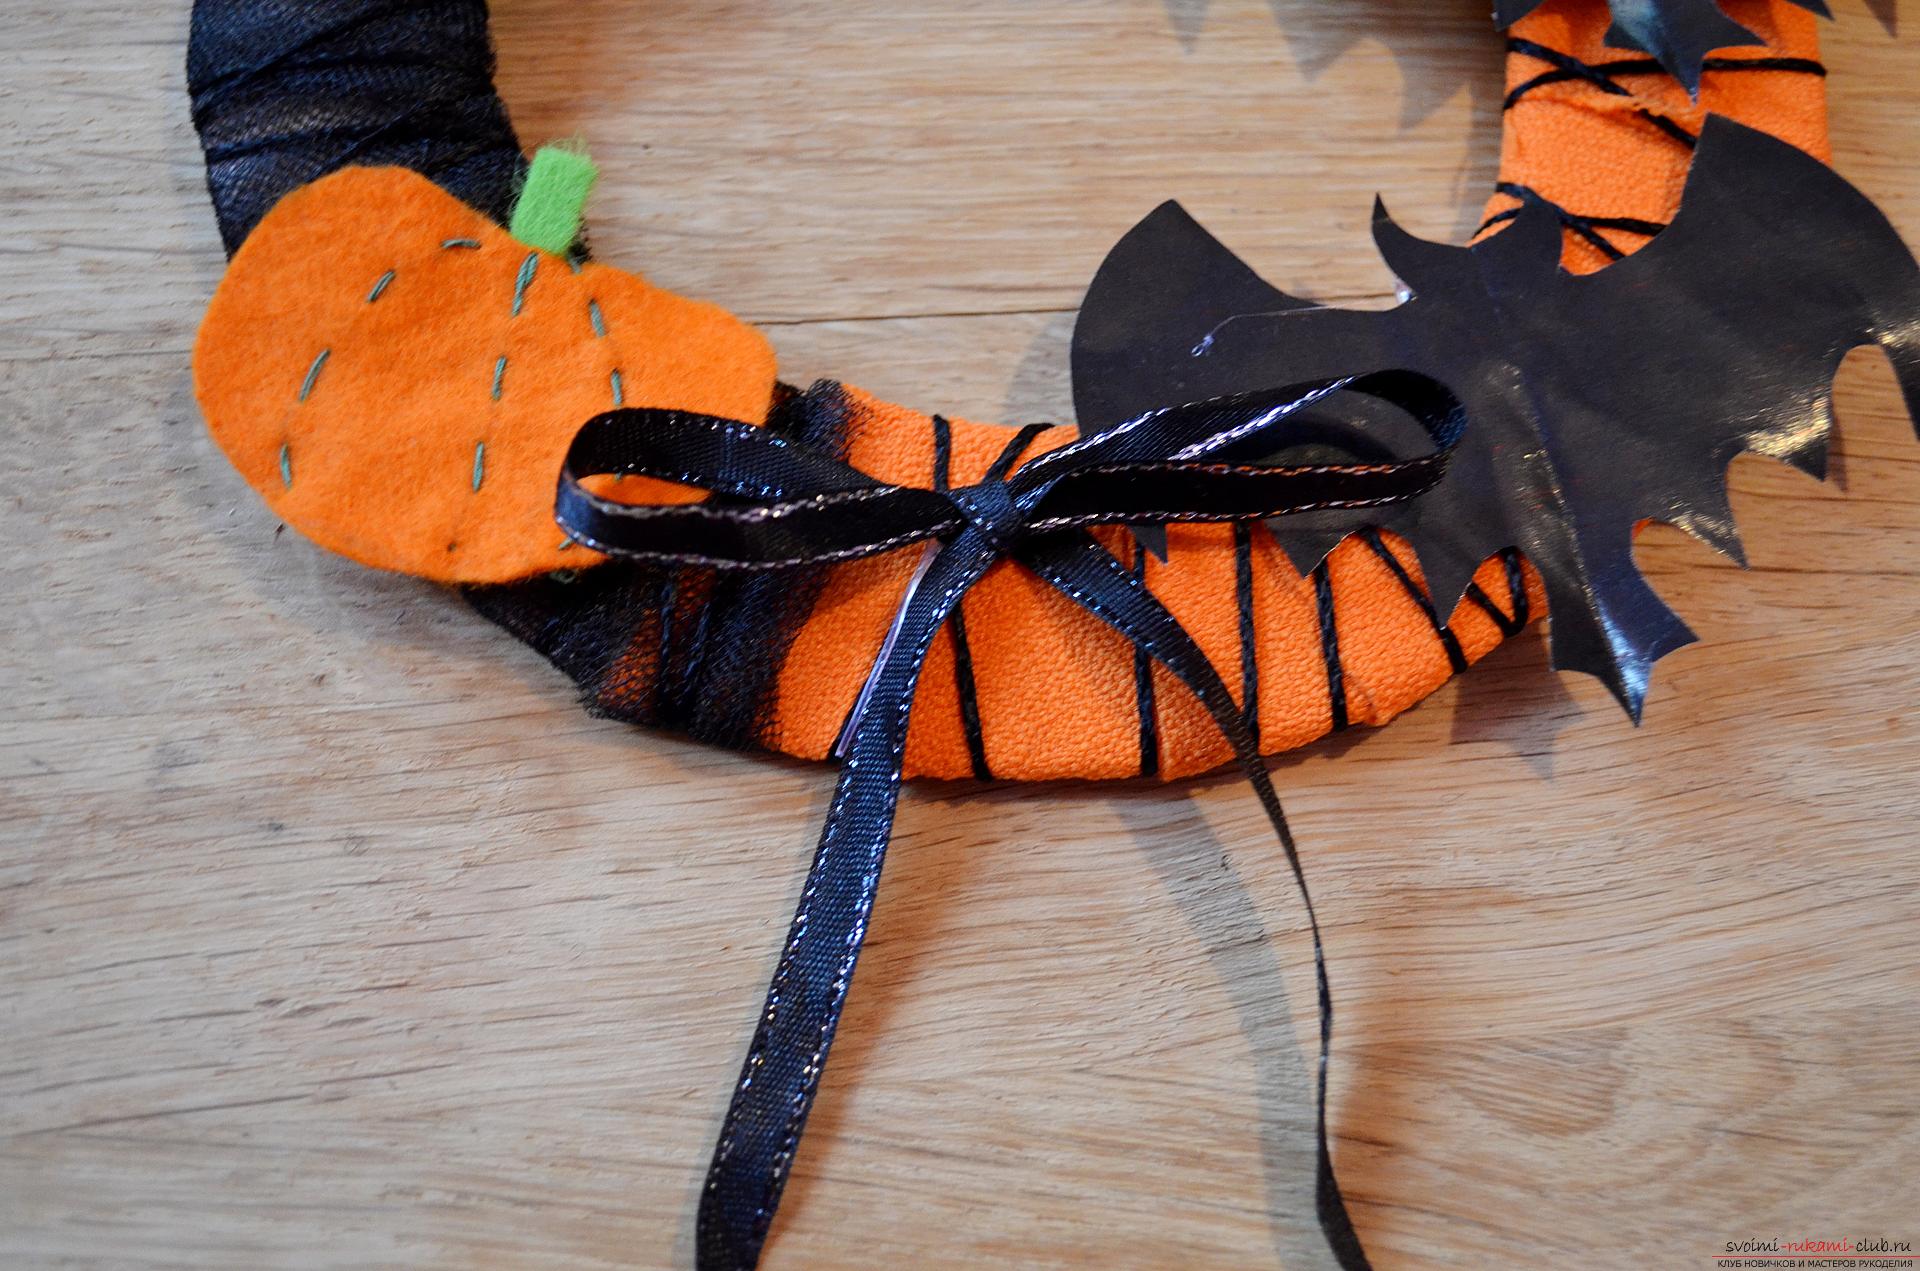 13.Also we need to make a loop, thanks to which the decoration can be hung on the front door or just a wall, for this purpose a strip of fabric, tape, strong thread, etc., is suitable.
 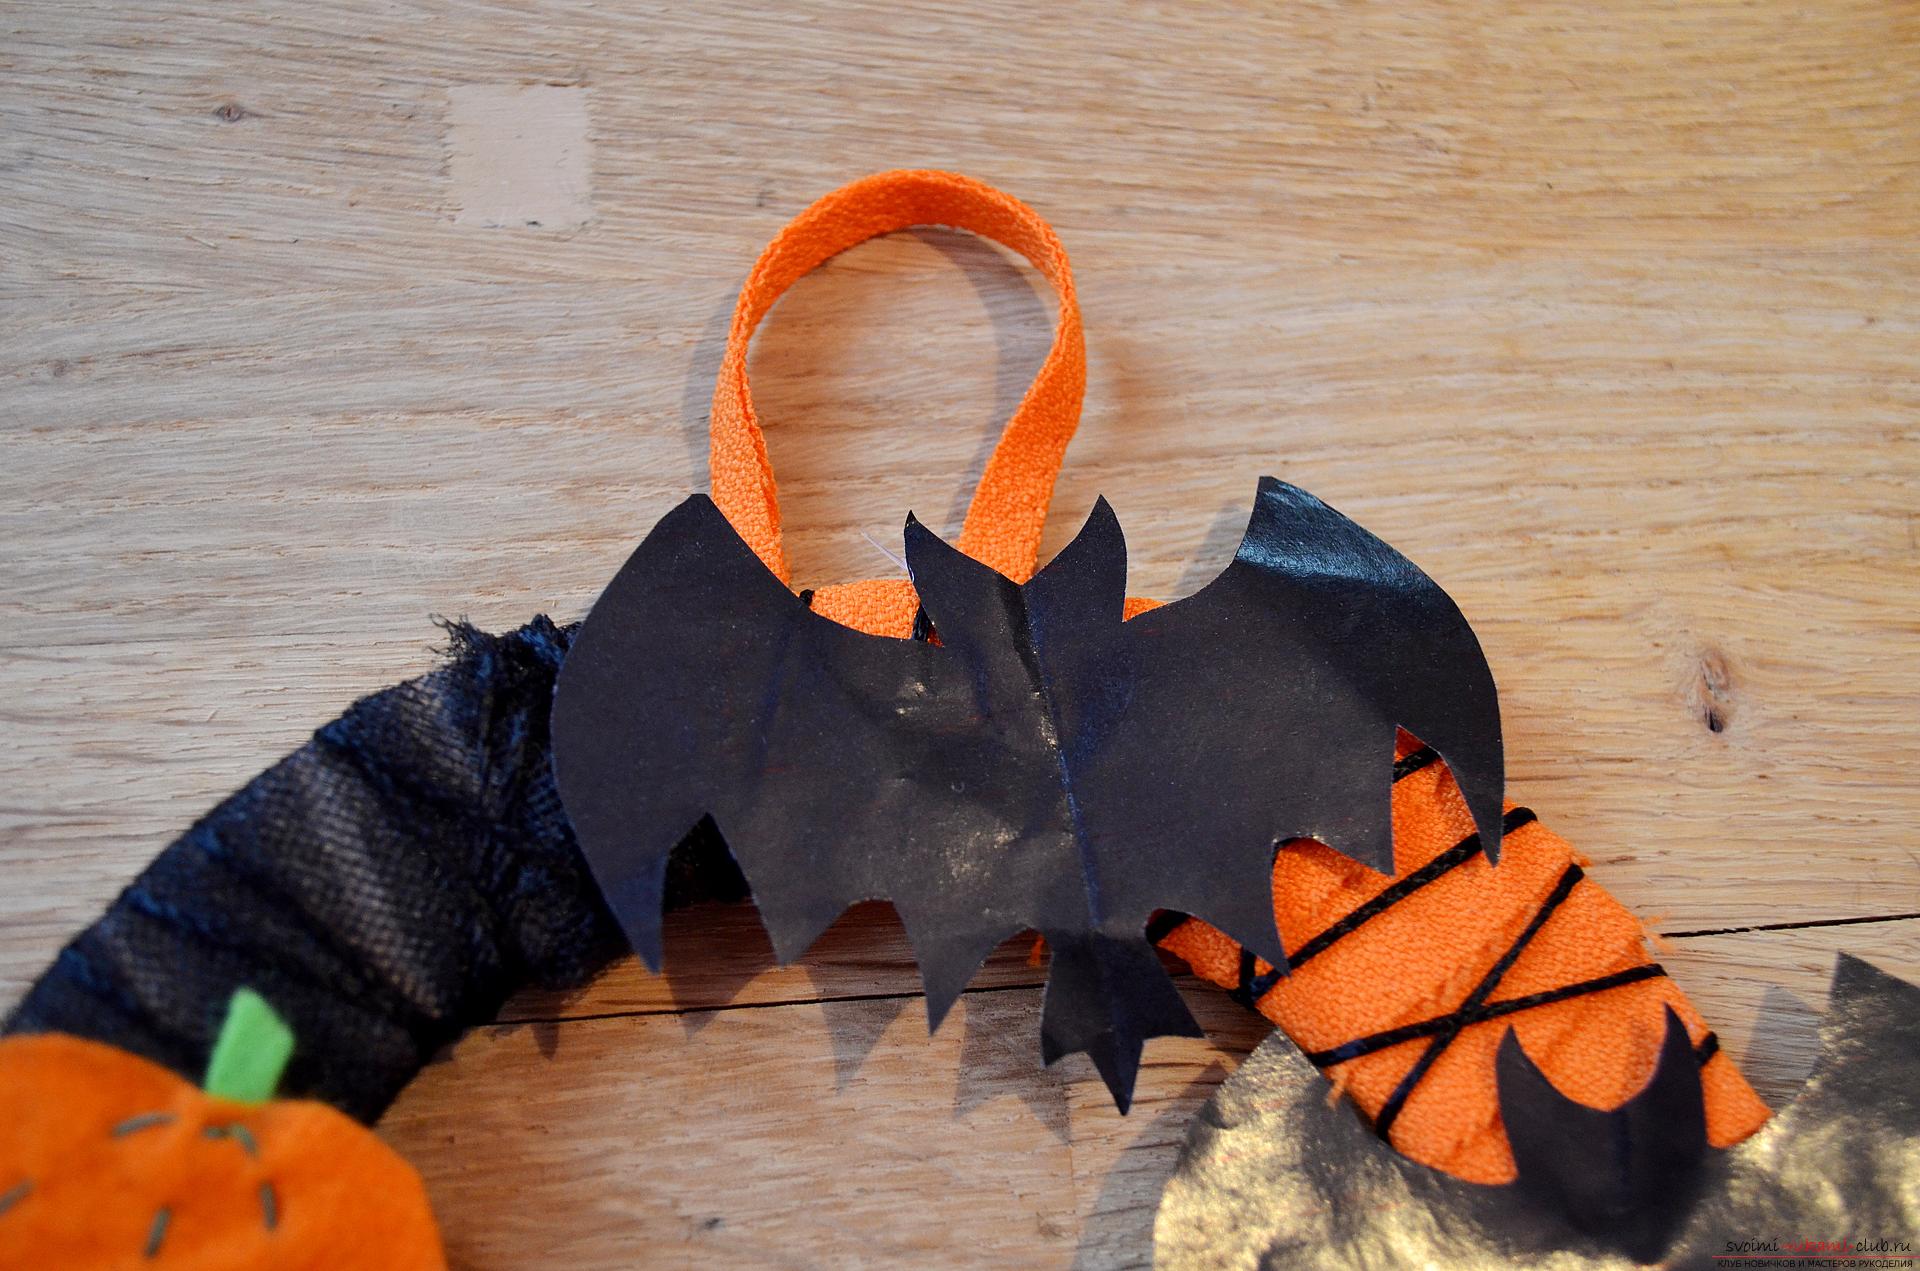 14. Our decoration for Halloween, decorative wreath - ready!
Comments
Related posts:
 How to make a New Year's wreath of napkins to decorate the house, we'll tell in the article
 This master class of Christmas crafts will teach you how to make a Christmas wreath yourself
 This master-class of flowers from foamiran tells how to make a beautiful summer wreath.
 We decorate the wall. The original idea of decor.
 Entertaining table decor idea: fruit tree