
How to make your own hands a variety of crafts for school children
Any crafts for school children with their own hands giveschildren the opportunity to create interesting things from improvised materials. You can make something out of paper (cardboard, corrugated paper, napkins), from boxes, natural materials (for example, applique from autumn leaves), from plastic bottles and plasticine.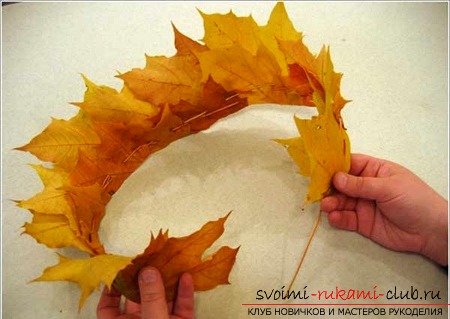 Specifically crafts can be divided into seasonal: winter, summer, spring, autumn, or those that must correspond to the chosen celebration or events such as:
- New Year
- Birthday
- By March 8
- By February 23 and others.
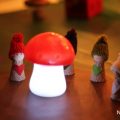
Made by own hands a toy from a naturalclay, is an easy-to-manufacture hand-made article for schoolchildren. It will be a pleasant gift for children and adults. For work it is necessary: - finished organic clay; -stack; -water; -wide brush
- A piece of clay should be kneaded well. Divide it into 3 different parts: large, medium and small.

- From a large piece of cone is the body of the toy, from the small is formed a ball-head, which is attached to the tip of the cone.
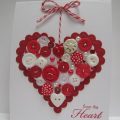
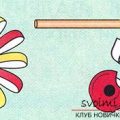
 From the middle part 2 sausages are made for the hands andtwo balls for the palms. All parts are connected. The received hands are attached to the body. Roll out a little more clay in 2 bundles, for a long and short. Stick to the head is the shorter is the hair of a figurine, a long tourniquet attached to the back of the head is a braid. Her need to bend down the bottom of the sarafan crafts. Next, a small triangle-kokoshnik is put on and put on the head. Two parts are formed from the remaining material: a small ball (nose), and from a triangle-handkerchief To the toy a spout is attached and smooth. A ready handkerchief is placed in the palm of your hand, the bottom of which is slightly bent inside. A stack is used to simulate a spit. Using a brush dipped in water, all irregularities are smoothed, the figure should find a smooth surface. The product is painted after drying and roasting. A new postcard can be considered as one of the handicrafts for schoolchildren. This manual work reveals creativity in children and is suitable for all junior classes. Materials for making postcards: paper of any tones, rice paper, a simple pencil, a small ruler, PVA glue, glue in the form of a pencil, a ribbon 20 cm long, punchers, multi-colored rhinestones, ready phrases "Happy New Year!" From paper green shades should be cut 4 squares: 5 cm, 6 cm, 7 cm, 8 cm. One square is folded diagonally, the outer side-out. The square billets are folded in half with the toned side inside. Then the part is folded in a triangle, where one of the corners is bent to the outside. Such figures must be made 4 pieces. The next step is cutting out of the toned paper two rectangles: 14.8 cm long and 11.16 cm wide. The sheet of toned paper is folded in half, the sides are glued on one side, their corners must be rounded. To make a nice decoration of the edges of rice paper, . The resulting strip breaks away from the rice paper along the ruler and is glued to the postcard. For the conceived tree, the barrel is cut out and immediately pasted onto the product. Of the 4 triangles made earlier, the tree forms. The bottom is a triangle of a larger size, then a little smaller and so on in decreasing order. Assemble the wood with glue on the card. A ready ribbon bow is attached to the top of the spruce. Decorate the middle with a bead or strassoi.Risovuyu strip to decorate with flowers and buttons made with a hole. You can sign a homemade card with your own hand or with the help of a ready-made phrase, as well as adjusting the carved letters.
Comments
Related posts:
 How to make a house. Volumetric hand-made articles made of paper.
 How to make a game yourself. Crafts for girls.
 Children's crafts, handicrafts for the school with their own hands, crafts made of natural materials, autumn crafts, crafts made of dough with their own hands, how to make a grassy little man, a school pencil case with their own hands.
 How to create different interesting and various hand-made articles from your own hands
 Easily and quickly learn how to create handmade articles for the school. Instruction for schoolchildren.