
How to make a picture of beads, different methods of creating and working methods.
Beads - a delightful and very ancient materialfor creativity. In ancient times small beads were cut from bone, cast from gold and silver, beads made even from porcelain. The first glass bead with a diameter of 9 mm was found in Egypt on excavations of the ancient city of Thebes. Egyptian beads and beads were popular and known almost throughout the ancient world, then the glassmaking center moved to Rome. It was the Roman artisans who began to blow glass. Gradually it became not a luxury item, but a material for everyday use, home appliances and windows were used to make it. Gradually, the secrets of glass passed to Byzantium, and then to Italy, where Venice for a long time became a supplier of beautiful beads to all countries of the world. Then the competition was Venetian Bohemian beads. Over time, glassmaking and the manufacture of beads have become widely available. In the modern world, in addition to glass, beads are also made of plastic. In this case, the main thing in beads from any material is the quality - good calibration and not dimming colors. As shades and formats of beads, there are many variations of products from it. In this article, pictures from beads will be considered. The first, and in some way the simplest, option for creating pictures with beads is to glue it. First of all, he is attracted by the absence of hours of laborious work on embroidering or weaving. At the same time correctly selecting the materials and getting acquainted with the recommendations of our Club, you can create wonderful and unusual pictures.  The first stage of creating such a picture is the choicedrawing. This should not be a complex motif with smooth lines and closed contours. You can choose a pattern suitable for stained glass or mosaic. Also look good silhouette drawings. After the drawing is selected it must be printed in the scale and color in which the picture will be created.
 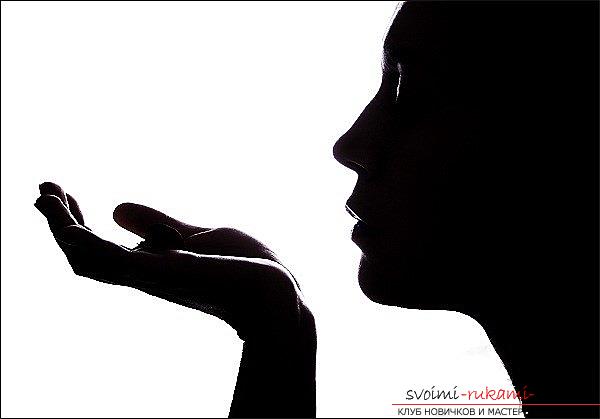 The printed blank can be glued tocardboard, and then insert into the frame or use already ready frames. Of these, you will need to pull out the glass, it will not be needed, since the work from the beads is voluminous and the glass will not have enough space in the frame. The next step is the designation of contours. To do this, you can take a thin wire or thread. This will make the picture more clear and paste the beads will be much easier. To use for contours nevertheless it is better than a thread or thin cords (all depends on the chosen beads), they will better repeat contours, and to paste from much easier. An important point is the choice of glue. For gluing and contours, and beads, quality transparent glue is needed. Do not use PVA, it will not be able to fix the beads securely, superglue stiffens too quickly and you will not be able to correct any errors, and besides, the beads can fade under its influence. For pictures, polyurethane glue Moment Crystal is perfect. It is transparent, does not give unnecessary color solutions to the picture and freezes just enough to have time to correct the shortcomings and do not expect a complete drying all day. There is one nuance - a tangible smell, so the working room should be ventilated more often or just take a break for a cup of coffee. The last step is gluing. It is necessary to wait until the contour has dried. Then apply a layer of glue to the small fragment of the picture and begin to attach the beads. Beads stack very tightly, you can smooth out the shortcomings with your fingers or toothpick. If nevertheless there were small gaps in the bead coating, do not be upset, because the color base completely conceals this defect.
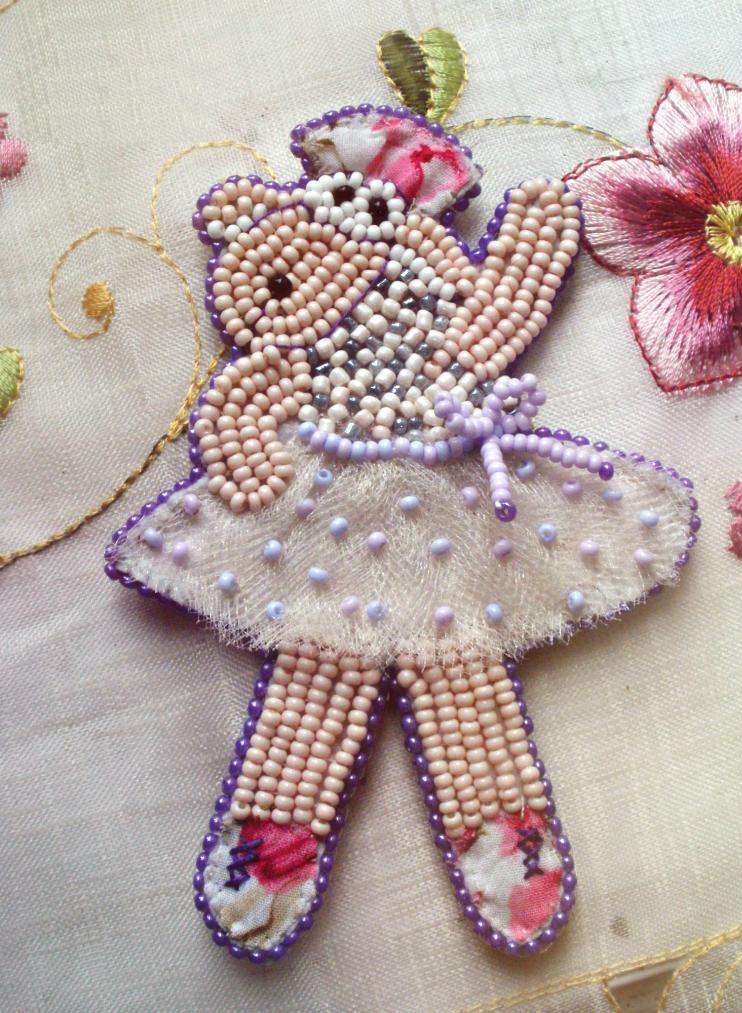
 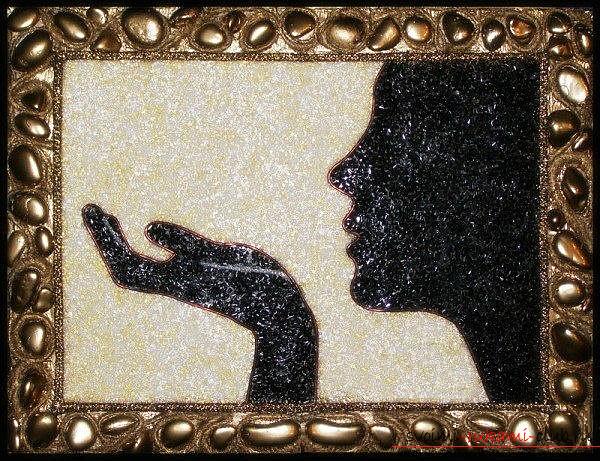 Wait for complete drying and set the picturevertically. This is a test, because in some places the layer of glue could be insufficient and some where beads will fall off. Just glue them back. After re-drying the picture is ready, it remains to insert it into the frame. The next method of creating pictures from beads is embroidery. Embroidery - in itself a fairly laborious kind of needlework, and embroidery with beads requires even more attention, effort and concentration. At the same time, the result - a beautiful bright and vivid picture - is worth it. The first thing you need is, of course, tools and materials.
- Beads of different colors and shades;
- Waxed wicks;
- Canvas;
- Needles;
- Frames (for large paintings);
- The nit-picker;
- Special containers for beads.
Beads. In order for the picture to turn out to be beautiful, it's worth to buy beads of one shade and at the same time, different textures, transparent, grated and with a metallized effect. You can express the expressiveness simply by putting two different beads next to them. Transparent beads can add an additional shade to the picture if you take a thread that is darker, lighter or different in color. An important point is the calibration of the beads. All beads must be the same size, otherwise the product will warp and bug in those places where the beads will "push" each other. Canvas. In order for the picture to look neat, the beads must match the size of the canvas cells, provided that you embroider the pattern on the finished pattern. In order to check the correspondence between the beads and canvas, it is enough simply to attach the beads to the cells. Another important aspect in embroidering pictures with beads is the workplace. That the rolled beads could be found easier, it is better to cover a table with light material. Also, beads should be sorted in several containers in advance and take care of good lighting. When everything is ready, you can embroider. Stitching can be done using different types of stitches. Seam "needle forward". 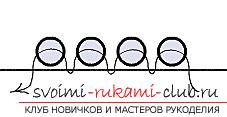 Seam "needle back".
  Seam "needle back" arched version.
 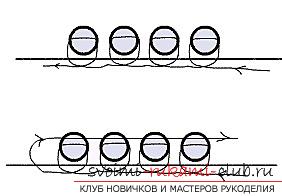 In the latter two variants, the beads are closer to each other more closely. Another option for tight fit is the "lower" seam.
 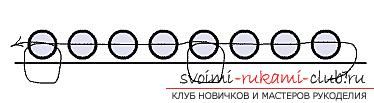 If you need to fill a large space fit seam "smooth"
 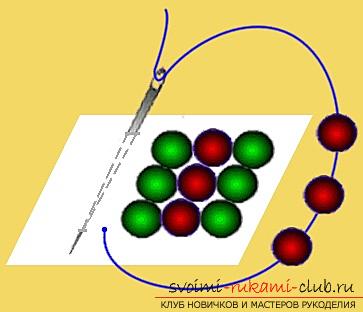 A popular and often used seam is "monastic". It is used for embroidering paintings on the canvas.
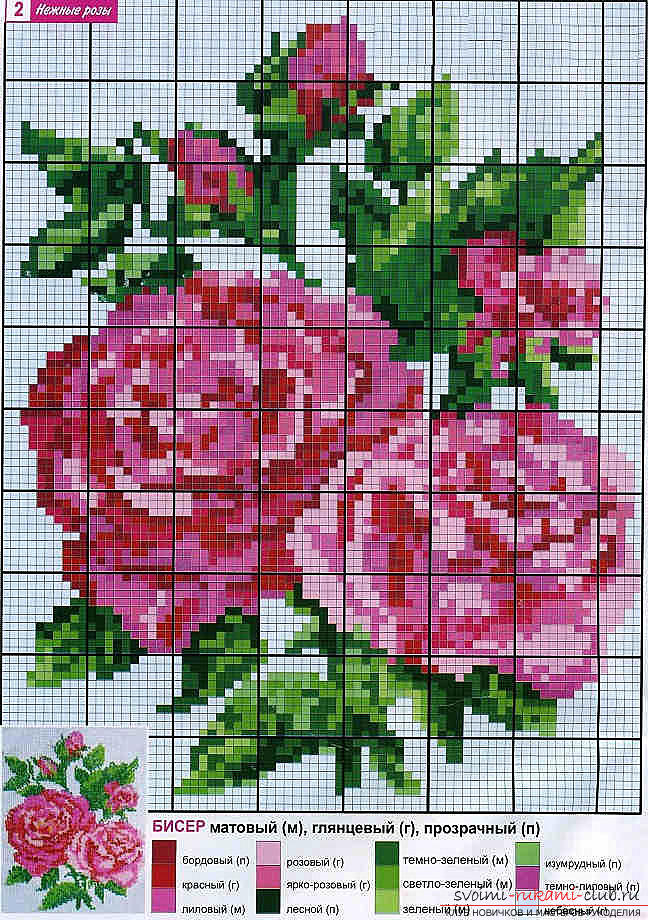
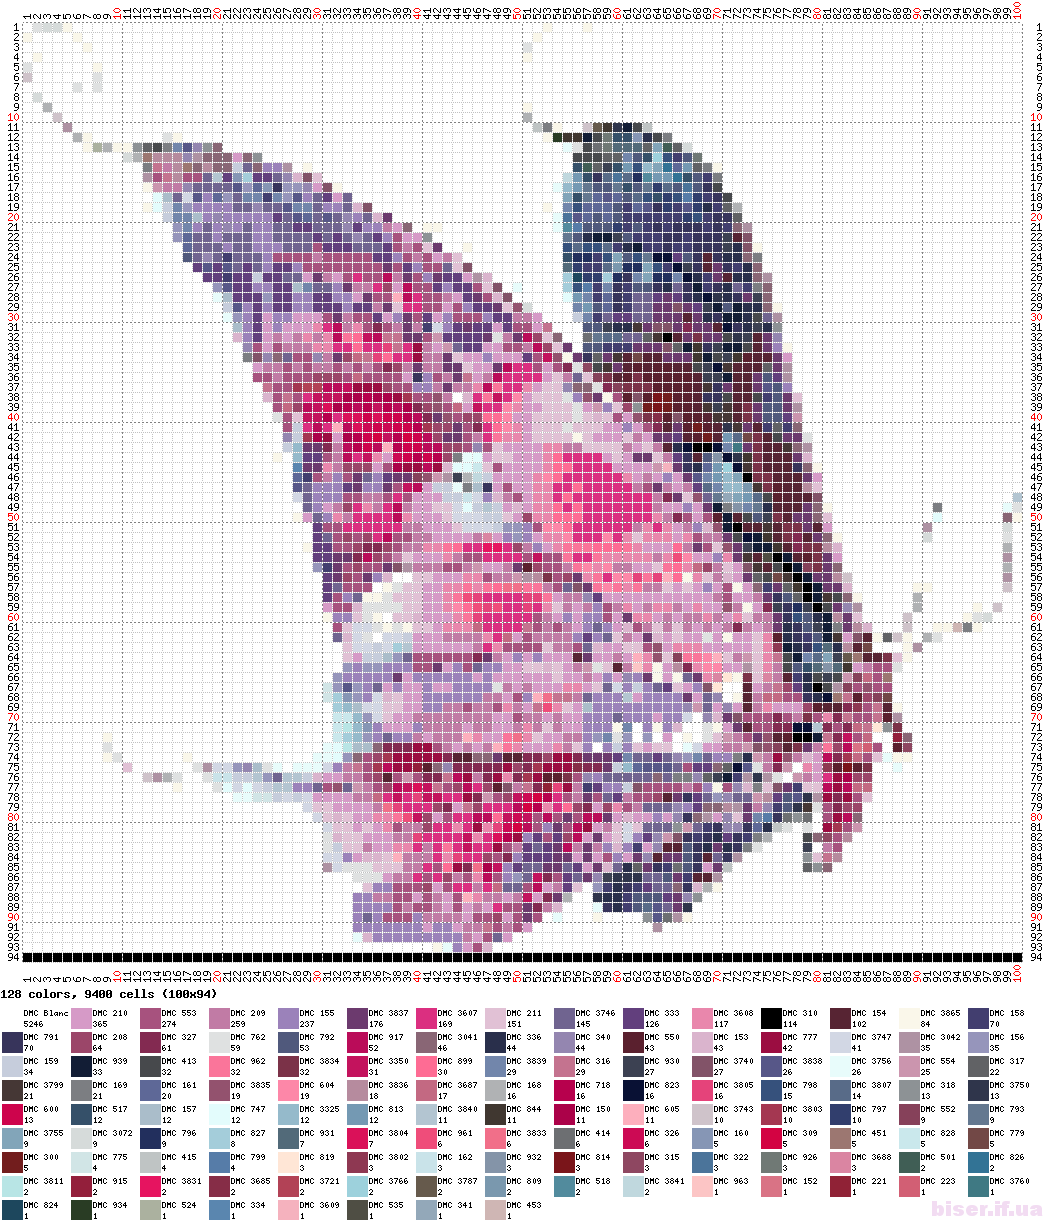
 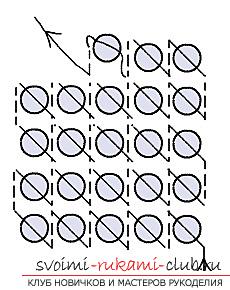 Several schemes for embroidery.

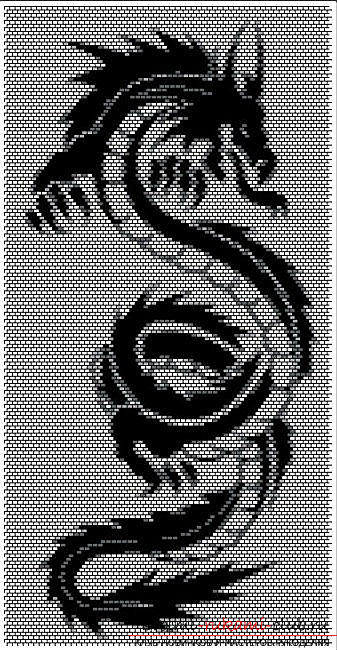
 To fix the thread at the beginning of the work follows withusing several stitches. Try to avoid nodding. At the end of the work, perform a few stitches and thread the last row on the underside of the product. After the embroidery is finished, the finished work must be soaked in warm and soapy water, thoroughly rinsed and dried on a towel. Smooth the face down, straightening the edges and aligning the width and length. Another method of creating paintings from beads is weaving. Used mainly "mosaic" and "brick" methods, weave pictures. You can also flatter in the technique of "cross". An important aspect is the length of the line. If it is too long, then at the end of the work its tail will be quite weak and can lead to the ripping of the craft. If the length of the line is short, the nodules will also be a threat of rupture of the canvas. This can be corrected by dripping a bit of universal glue on each such bundle. In mosaic and brick technique there is one nuance - beads in even and odd numbers go in checkerboard pattern above each other. This slightly complicates the weaving, but recently there have appeared a lot of schemes adapted for these weaving methods. For the technique of weaving "cross", which is one of the simplest and longest developed special programs, so that weaving will not cause any special problems. Several schemes for weaving.
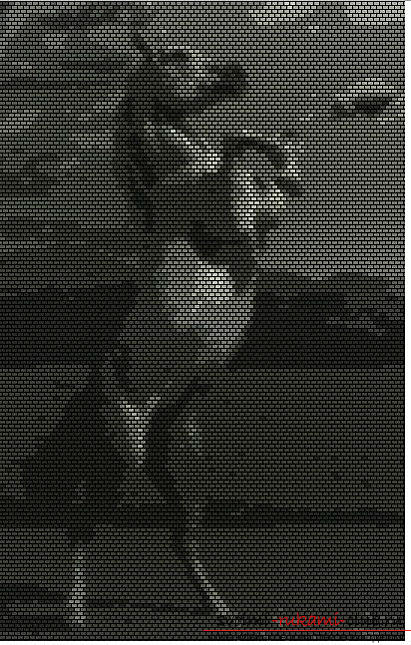
Comments
Related posts:
 How to make a variety of jewelry from satintapes with their own hands, lessons with step-by-step photo creation of jewelry for hair, creating decorative items for the interior, decorating bottles of champagne
 Sheep from beads: different ways to create your own hands (diagram)
 The master class from beads describes and shows on the photo the process of creating jewelry from beads with your own hands, we make earrings.
 Making a flower from beads for beginners, lessons of creating a flower from beads
 How to make a tree of beads with your own hands? Schemes and a master class for work