How to make snowflakes with your own hands made of paper, in the technique of killing, from dough, beads and beads, from tapes in Kansas technique or crochet, turn-based photos and ideas for inspiration
The arrival of winter is always associated with snow. Well, on the eve of the New Year holidays snowflakes want with redoubled force. And what if the weather outside the window is not snowy? You can take it in your hands and make snowflakes yourself. In this article, we will offer you ideas for creating snowflakes from beads, dough, chart paper stitches and snowflakes in the technique of tinkering, as well as crocheted snowflakes, or made from buttons and rhinestones. Such crafts will not take much time and will not entail special expenses. But they will bring a lot of joy and allow a good time for creating their own snow fairy tale. Besides, you can attract children to create many crafts. Kids will happily make snowflakes from paper or dough and decorate their house.
Snowflakes from beads
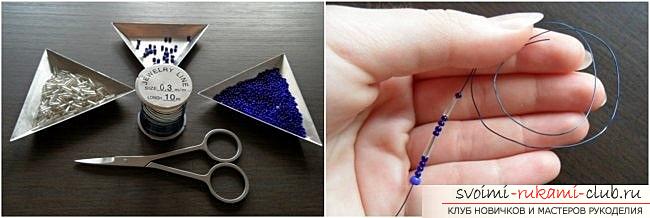
One of the most ancient materials for needlework -beads. Of the small beads of different colors and sizes, surprisingly beautiful things are obtained. Due to the fact that there are a lot of shades of beads and beads, for snowflakes from beads it is possible to choose natural, icey and transparent tones, as well as bright and unusual shades for original handicrafts. Beads are of various shapes, and in such products as snowflakes, it will be especially advantageous to look like a glass bead. It is a long, thin hollow tube. It can be smooth or twisted, which can also be beaten in snowflakes from beads. Another stroke can be the different size of the beads in one snowflake. Snowflakes from beads can become an ornament on a Christmas tree, decor elements of curtains, lamps or walls. Small items will be unusual earrings or a central element of the necklace. Such decorations are perfect for any New Year's party. And, of course, light and shiny beauties will be an excellent gift or decoration on a postcard. Below, three step-by-step master classes for beginners in beadwork and several schemes and photos for experienced needlewomen will be offered. Snowflake from transparent white large beads 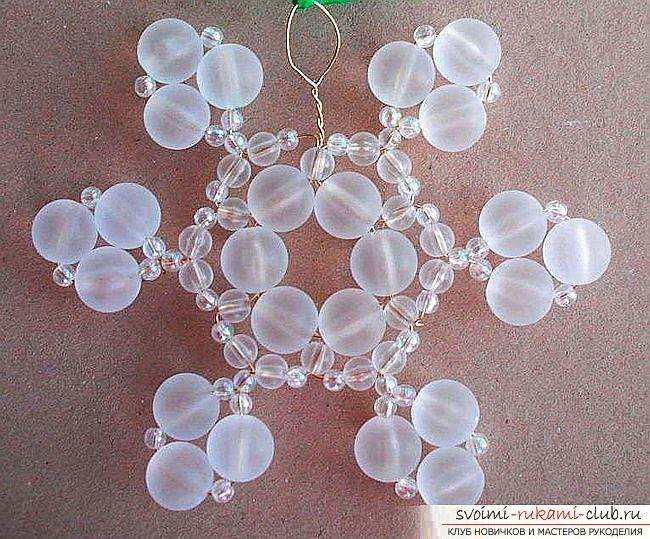 To create the first snowflake we need:
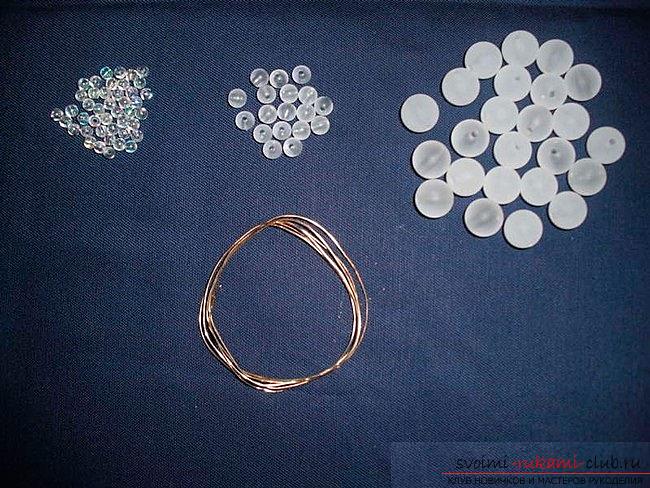
- Thin wire (in the master class a snowflake is padded from a copper wire, but you can use steel, it is silvery, and the snowflake will get even more frosty);
- Transparent white beads (matte) of three differentsizes (24 pieces of the largest, 18 pieces of medium and 42 small pieces. As the last you can use seed beads 6/0 (refer to the size of the remaining beads);
 We will weave in one thread (in our case into onewire end). On a piece of wire string the 6 largest beads and move them closer to one end of the wire. Now we need to cross the wire tails inside the first bead. To do this, we take the end and pass it to the first bead so that it comes out from the opposite side. Tighten the ring. Now on the long end of the wire string 1 medium bead, 1 small, then again 1 middle, 2 small, then 3 times (1 large + 1 small). The last one on the wire should be a small bead. Our low should be closed in a ring. This will be the first "ray" of snowflakes. To do this, take the wire end and pass it to the first of the two small beads on the low. The wire end is in front of the middle bead. Now, do not thread 1 medium bead, 1 small one, and 1 middle one again, and pass the wire tail on the other side into the same big bead from which the weaving started. Next we pass into the middle bead, which was the first in the low "ray". Now we put on the tail of 1 small, 1 medium, 2 small and 3 times again (1 large + 1 small). Next is a tat as described above. After creating the sixth "ray" it is necessary to thread on the wire 1 medium and 1 small beads and pass the tail into the middle bead of the first ray (see photo).
 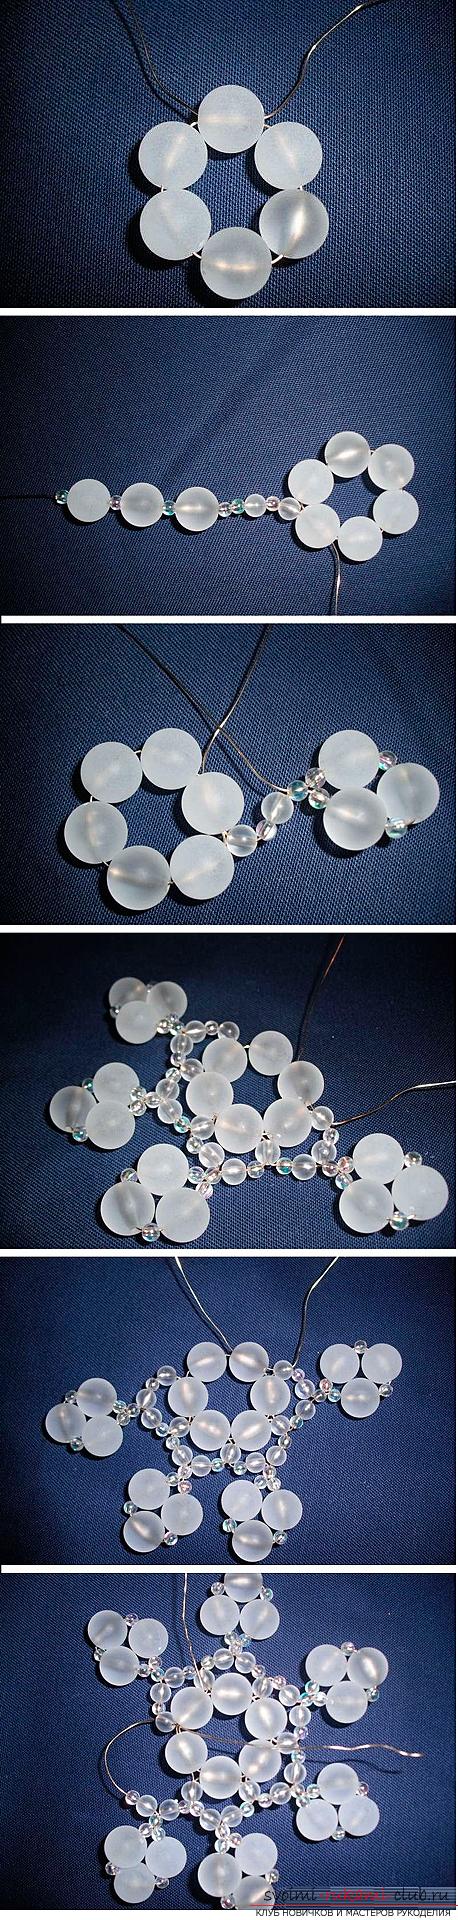 Further from the ends of the wire you can twist the loop and decorate the snowflake with a room. Snowflake from beads and bugles
  To create this snowflake in silvery blue tones you will need:
- Waxed thread of blue color;
- Silver bugle or chopping;
- Beads of two sizes and shades of blue.
 On the string we sew 1 bead of a larger size,4 small, 1 bugle, 4 small beads and 1 more bugles and 1 small bead. Now we take the end of the thread and pass in the opposite direction through the last 1 bead and 1 glass bead. We do not tighten the thread until the end, we leave the loop, we will fasten the snowflake on the tree for it. We thread on the thread 1 glass bead and 1 small bead and pass the thread through this bugle in the opposite direction. We got a little needle. The thread is located on the opposite side. Again, string 1 bugles and 1 small bead and pass the thread through the glass beads. Now the thread passes through the beads on the low (4 small blue and 1 bugle). Again, make 2 needles opposite each other and pass the thread through the remaining 4 small and 1 large beads of the original low. Plait the next "ray". On the thread bottom 1 large, 4 small, 1 bugle, 4 small beads and 1 more bugles and 3 small beads. Now we pass the thread through the last strung glass beaker and then the needle thread is like the first "ray". The difference with the first only is that in the second and all the rest, instead of a loop for fastening on the end of the "ray," there will be 3 small beads.
  Similarly, weave the remaining rays. You can change the colors of beads and beads or weave not 6, but 8 "rays", everything depends only on your imagination. Snowflake from transparent blue beads and bicones This icy beauty does not melt in the palm of your hand and will certainly please you in the New Year. It will take:
- 6 bicones of blue color;
- Beads in tone;
- Steel wire;
- Tools for working with wire.
On a piece of wire string 6 beads and cross inside the first ends of the wire. Tear further, following a step-by-step photo. 
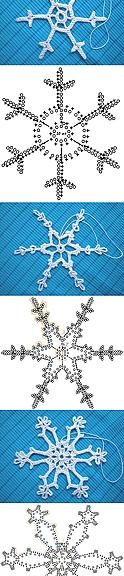
Paper snowflakes
The most popular for many yearsare snowflakes made of paper. They can be cut by ready-made patterns and patterns, come up with your own, and also make wonderfully openwork snowflakes from paper in the technique of tinkering. Snowflakes for cutting with scissors There are many cutting schemes. They can be found on the Internet or come up yourself. Important aspects on which the beauty of a snowflake depends will be: the thickness of the paper, the sharpness of the scissors and the correctly folded sheets. Very often you can face the fact that after unfolding the cut out workpiece, the snowflake does not have the right amount of "rays" or some patterned elements. We will offer several snowflake schemes and step-by-step photos of the correct folding of the paper stock. 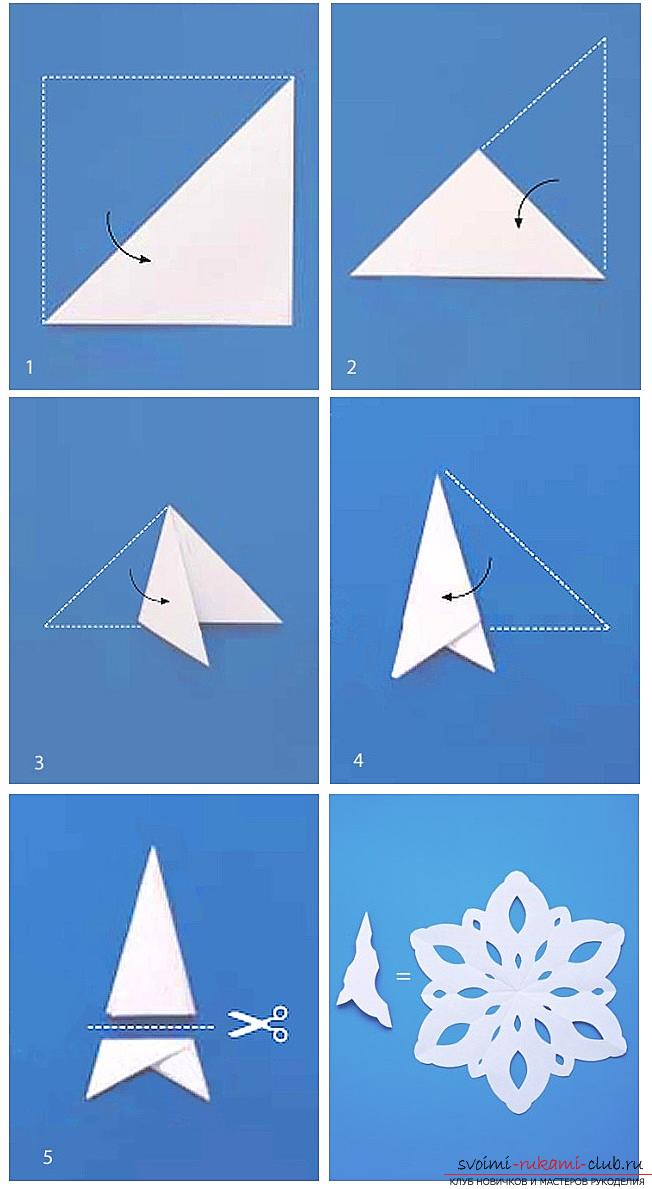 Cutting snowflakes from paper is not onlythe creation of a festive mood. Kids will be happy to make such crafts, which will have a beneficial effect on the development of fine motor skills and, as a consequence, the memory, speech, care and perseverance of the child. Give the baby a small pair of scissors and let him do it. Below are the step-by-step photos of the folding of the paper stock and the scheme for beautiful snowflakes.
 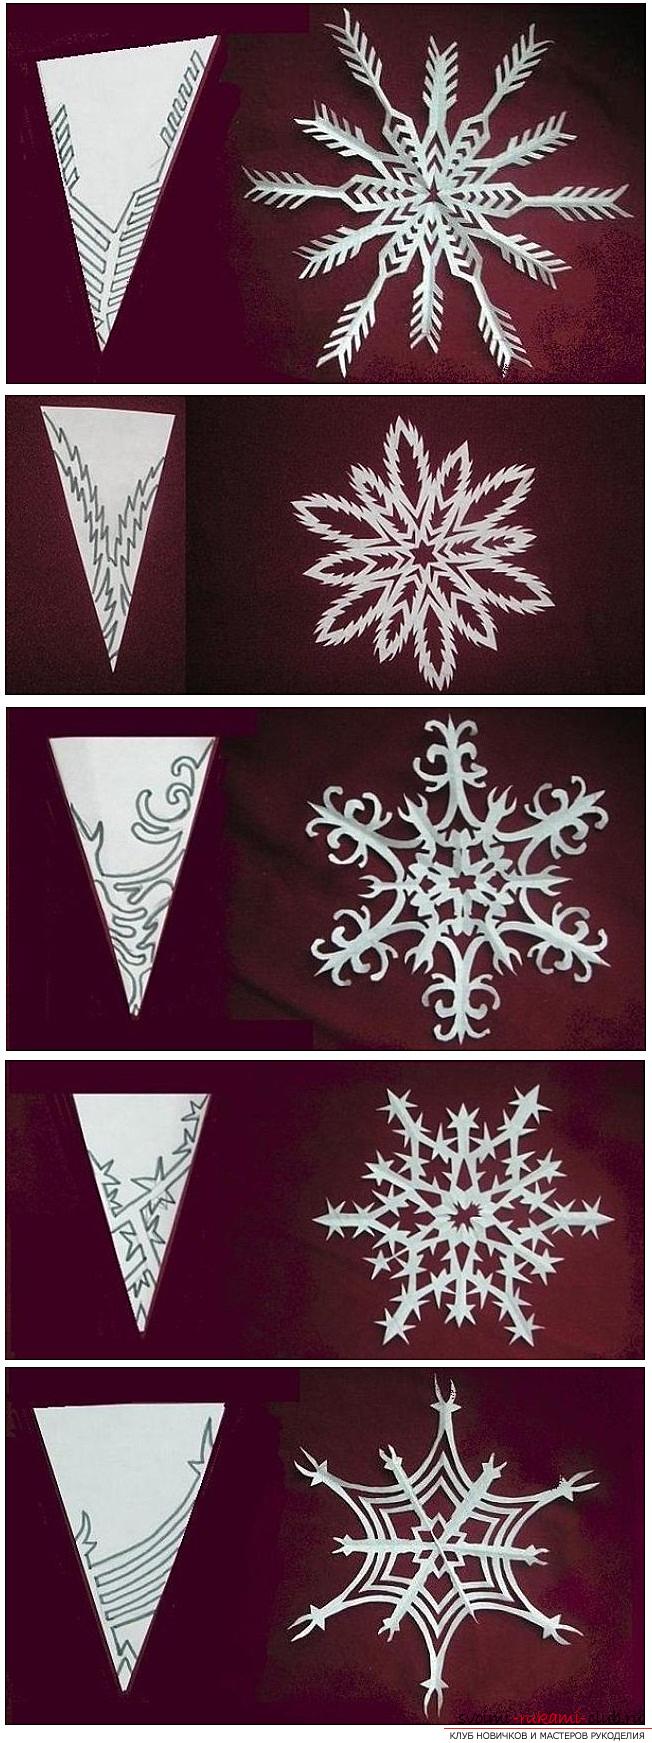 Paper snowflakes in the technique of tinkering
 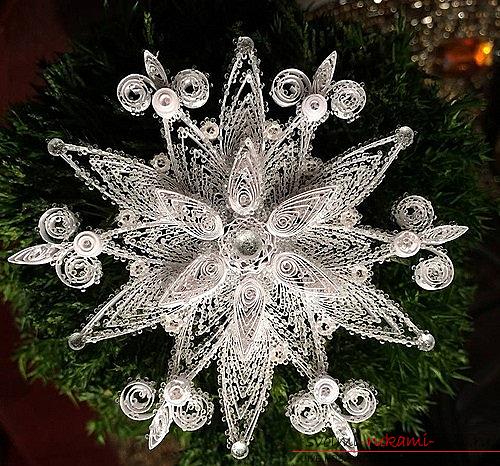 Looking at the amazing interlacing of such openworkbeauties, it seems that it is very difficult to create such products. But you only need thin strips of paper, glue and a tool for winding. You can cut the paper by yourself. The width of the blanks 0.7 - 1 cm will be optimal. Also it is possible to buy ready-made sets for crafts in the technique of killing in the shops for needlework. In order for the winding to be smooth and accurate, use the usual wooden skewer. It is fashionable to make a small cleavage along it, where it will be very convenient to insert the tip of the paper strip. Wind it tight. It is necessary to twist an even workpiece, similar to a washer. To remove the workpiece, it is enough just to turn the skewer. Now it remains only to release the workpiece, and it will dissolve. The tip is glued. Closed forms
 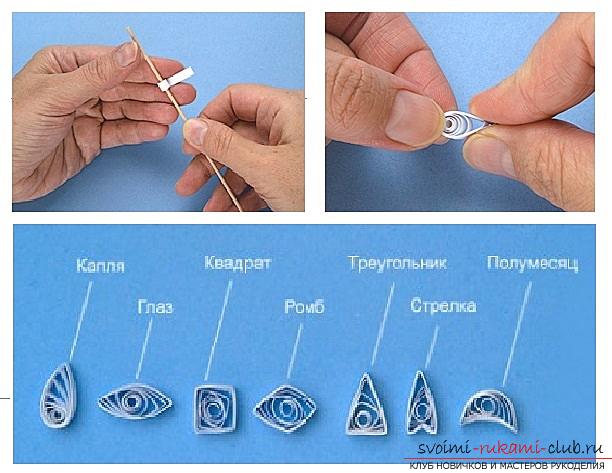 To get a droplet of the middle of the washerpull in one direction, and a few outer layers in the other and compress with your fingers to make a point. The triangle is obtained by squeezing the drop from two sides. To get a figure similar to a diamond or a square, simply pinch your fingers on 4 sides. For the eye with two opposite. Rings with a displaced center can be made by releasing the twisted spiral and gluing the inner turns at one point on the outer contour. The arrow is obtained from the triangle, pushing its base into the middle. Crescent is obtained as well as the eye, but it is necessary to scrape the sides with displacement. Open Forms
 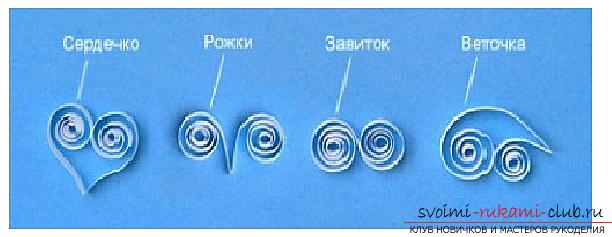 To make horns, you have to fold the strip in halfand twist both ends outward. The heart is performed similarly, only the ends are screwed inward. The twig will come from a preform, folded 1: 2. Both ends are twisted in one direction. The curl is made as follows: mark the center of the strip, without bending and twisting both ends in different directions. It is very clearly visible in the photo that most of the elements are quite simple in execution. Advice for beginners. If you want to make an article with the same elements, such as a snowflake, prepare the same strips of paper for these parts in advance. Ready-made crafts can be decorated with sequins or rhinestones.
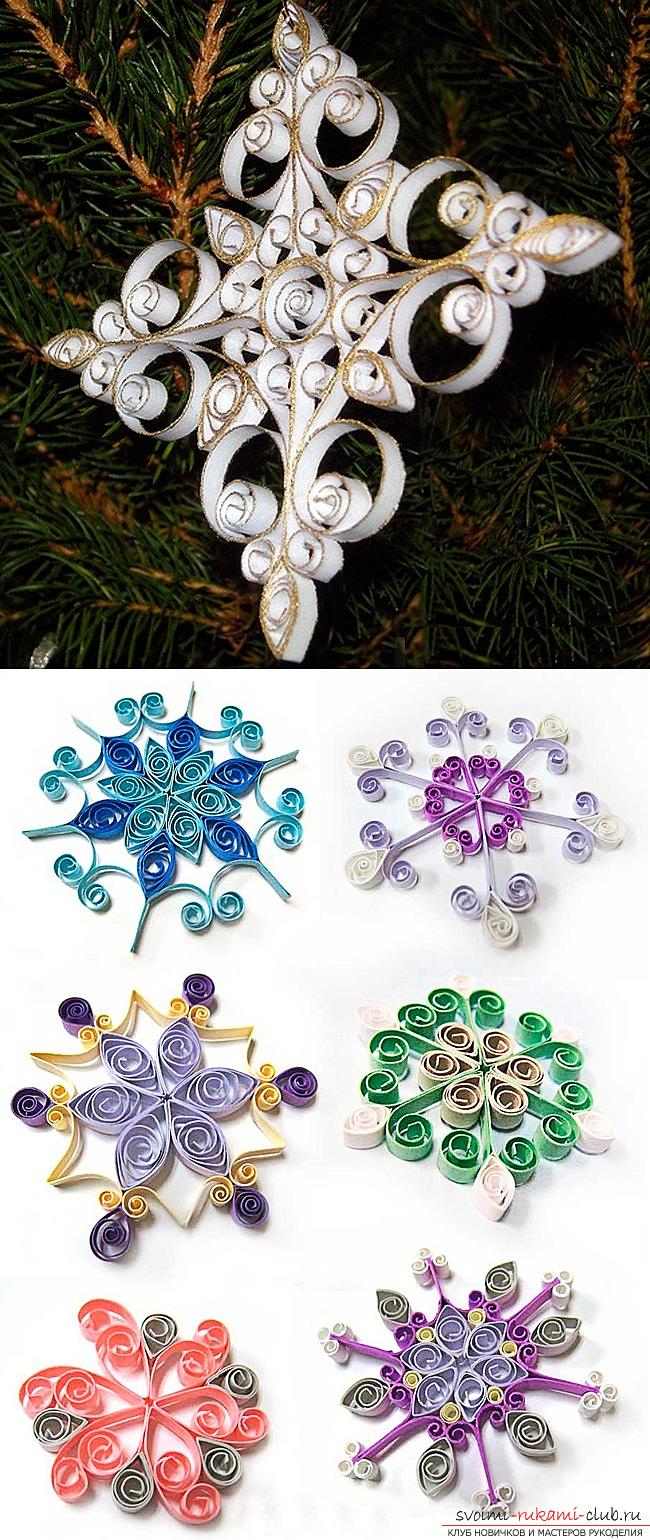

Snowflakes from ribbons in Kansas technique
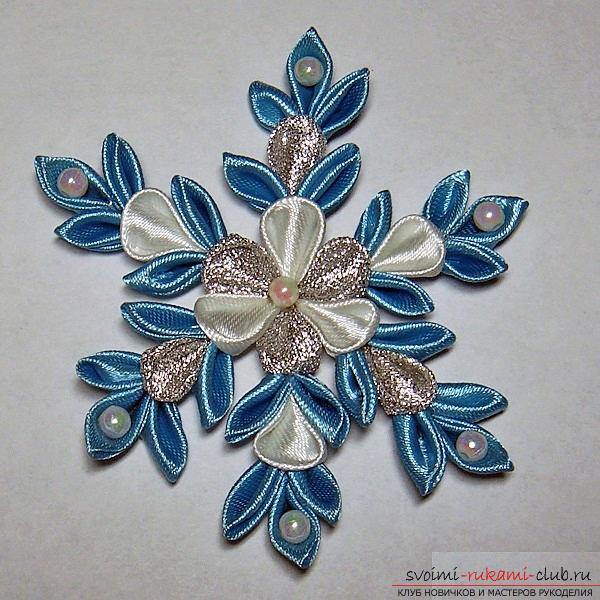 The ancient oriental art of folding silk squares in amazing compositions of the master and needlewoman was brilliantly adapted to create the most beautiful snowflakes in Kansas technique. It will take:
- Satin ribbon is 2.5 cm wide (blue, white, silvery);
- Glue gun;
- Candle or lighter;
- Needle with threads in tone tapes;
- Elements of decor (beads, beads, rhinestones, sequins).
From the blue tape we make 30 pieces of narrow petals. From white and silvery we make 6 rounds. With the help of a thread, we collect the circular lobes in the middle of a snowflake. We alternate silvery and white. Procurement of 6 petals. Now, on the back of this flower, attach a circle of white tape. We begin to create "rays" of snowflakes. We glue together 2 blue sharp petals, and between them we glue 1 white or 1 silver, or 1 blue. Now take the triple blanks with round petals and glue them (from the wrong side) to the core in the following order: to the silver petal of the core we glue the workpiece with the white petal in the center and vice versa - to the white petal of the core we glue the silver. The next stage will be gluing (again to the wrong side of the circular lobe) blanks of three blue narrow petals.  It remains only to glue the beads or any other decorations to your taste and attach (if desired) the eyelet so that the snowflake can be hung.
Snowflakes from dough
Another great material for craftsis a dough. It can be a special dough for modeling or ordinary, edible. The main thing is that, as with paper, snowflakes from the dough can be created together with the kids. Children love to sculpt and will be happy to take part in the manufacture of such hand-made articles. Snowflake from salted dough 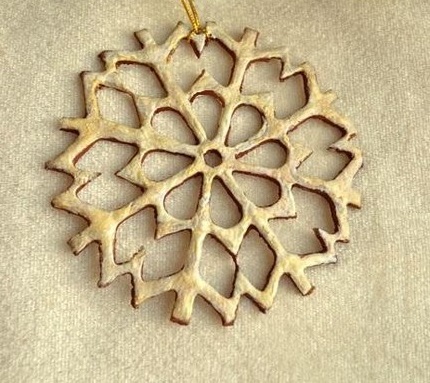 The dough for modeling can be bought in the store or prepared by yourself. To create a snowflake you will need:
- Dough;
- Rolling pin;
- Forms for baking tin (they are conveniently cut);
- Paints;
- Knife (you need sharp, better to take a scalpel or clerical);
- The shape of the circle.
When creating a snowflake, it is important to remember that the layertest should be rolled evenly. It is also necessary to strictly observe the axial symmetry and the middle. When everything is ready and the dough is rolled out, just start creating. Cut as fantasy tells. If desired, you can print out and cut out the stencil, put on the dough and walk with a sharp knife. 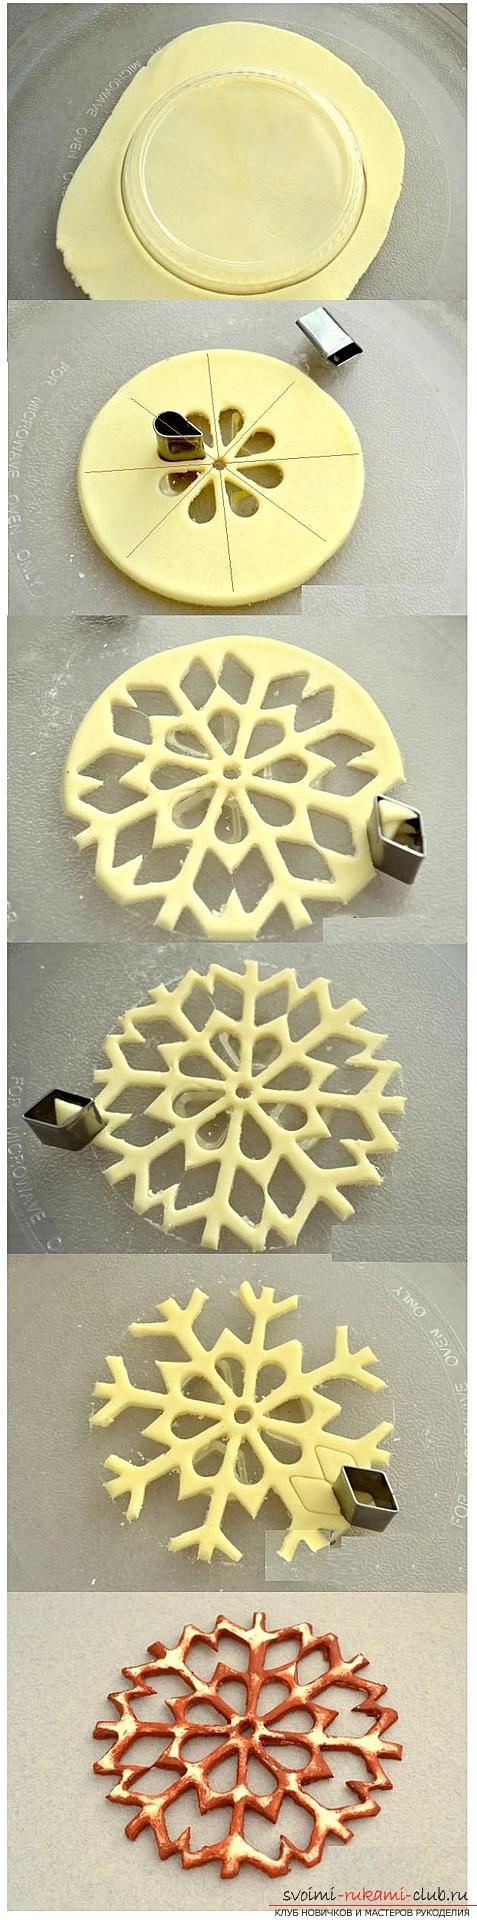 Council. Cut the snowflake better right on the baking tray, with a foil or parchment. You can also bake a snowflake in a microwave oven. If you prefer the second option, you need to put a container of water in the microwave with the test. This will not allow overheating due to the small volume of the heated thing. When the snowflake cools down, you can paint it.
Snowflakes crocheted
Creation of decorations and ornaments on the thresholdNew Year's holidays are very inspiring. Many needlewomen who know how to crochet create very beautiful snowflakes with the help of "magic sticks". Bound from thin threads, they really resemble the kind of real creations of winter. You will need thin cotton thread, hook No. 0.5 - No. 1 and a little patience. If desired, the finished products can be starched, decorated with sequins, beads or any other elements to your taste. If you knit a snowflake from cotton threads, then to make it firm, you can use starch. Hairspray, a solution of PVA glue with water or even a syrup of their sugar is suitable for threads made of acrylic. How to starch a snowflake: Take ordinary food starch (2 tablespoons) and pour a small amount of water. to stir. Now, in a thin trickle, pour boiling water, stirring constantly. The water needs about 1 glass. It remains only to immerse the snowflake in the solution, allow the solution to soak it and dry it in a straightened form. Use only a flat surface and pin with pins. 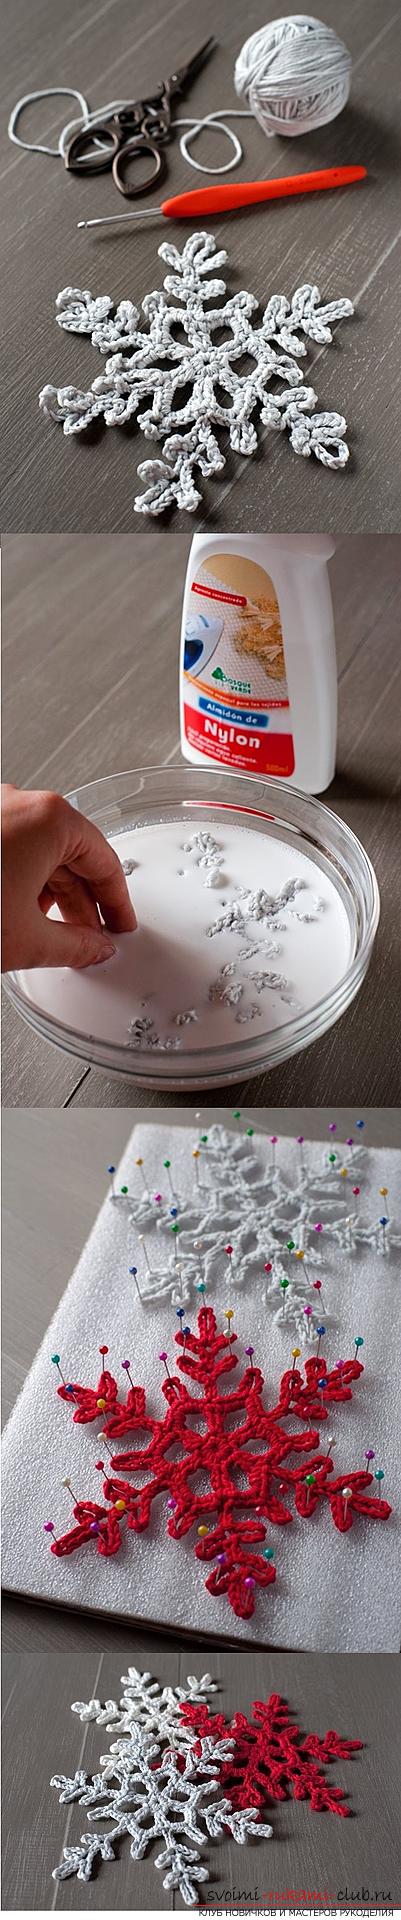 Below we present some simple crochet crochet patterns.
  New Year's holidays are a time of miracles, and make them very easy with your own hands.
Comments
Related posts:
 How to make your own hands a toy snowman that does not melt, a step-by-step photo of making a snowman from dough, cloth and crocheted crochet
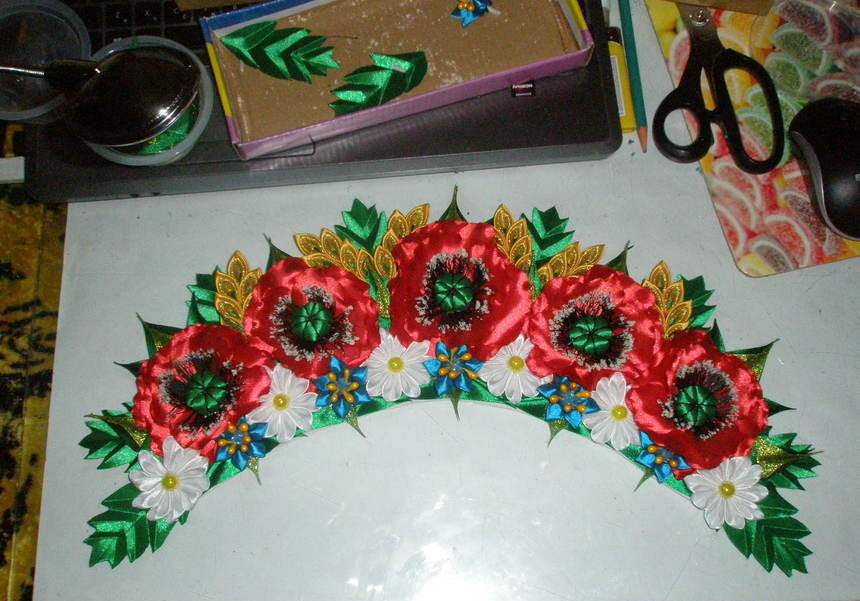 Headbands with flowers ribbons technique kanzashi (photo)
 Original and beautiful snowflakes from paper with your own hands
 How to make a tourniquet from beads, weaving braids of different sections, crochet crochet, step-by-step photos and a detailed description of the creation of beaded harnesses and ornaments on their basis
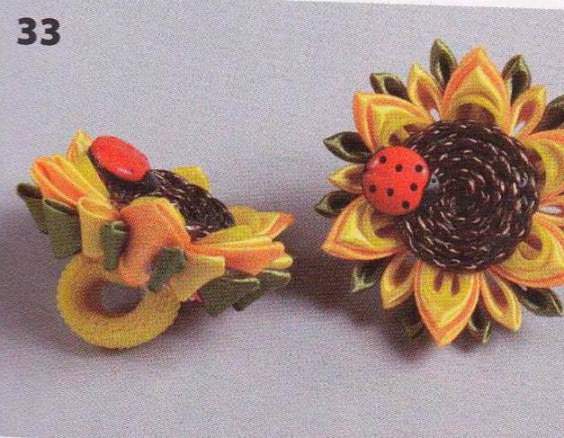 Kanzashi sunflower from ribbons with his own hands (photo and video)