How to make neckties and a bow tie in Kansas technique, detailed master classes with step-by-step photos and a description of the process.
Ties - the decoration is very ancient. His first prototypes are depicted on terracotta warriors, whom he wished for his afterlife, one Chinese emperor in 220 BC. The statues depict handkerchiefs tied around the neck with a bow. Similar accessories were worn by warriors in ancient Rome. In those days, the tie served not as an ornament, but as a defense of the throat from the winds and coolness. Its role of decorating the tie was received in about 16 - 17 centuries. During the Thirty Years' War, the French King Louis XIV saw on the Croatian officers invited for negotiations beautiful neckerchiefs. He liked this accessory so much, that a royal decree was issued so that the courtiers would wear La Cravat at all board meetings. At the end of the 17th century, women began to wear a tie. And until now, this elegant piece of the wardrobe adds to any matching alongside a special chic. In this article, we suggest that you make several ties in Kansas technique. Elegant jabot of ribbons for a charming lady or a strict black butterfly for a young gentleman. The first two tie brooches we propose to do for girls. Such wonderful accessories are perfect for a first school day or a solemn event. So, the necktie is a jabo in Kansas technique. 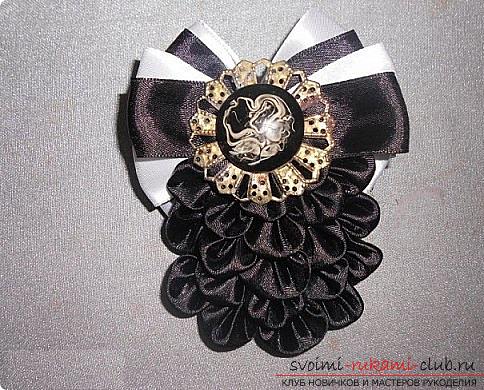 Materials for work:
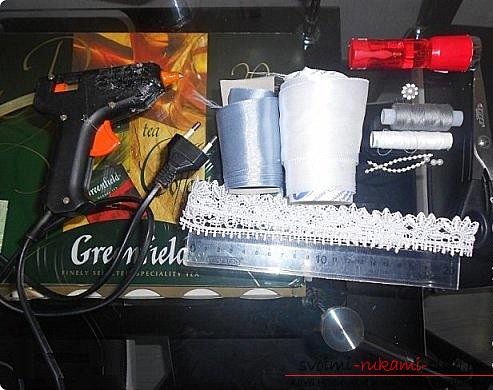
- Satin ribbons black and white 5 cm and 2.5 cm wide;
- A small piece of black lace;
- Round decoration (an old brooch or decorative big button fits);
- Thread and needle;
- Lighter or candle;
- Glue gun;
- Hairpin for brooch.
It is necessary to cut off from a white tape 5 cm in width two pieces of 18 cm in length and 1 piece of 20 cm in length. From a black tape 5 sm in width to cut off one piece 18 sm in length. Ribbon edges to melt over fire. 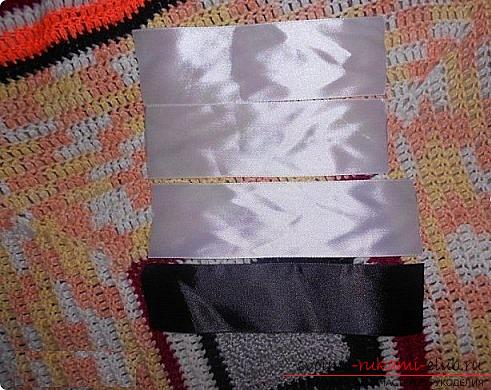 From a black ribbon with a width of 2.5 cm, cut 2 pieces 18 cm long and 1 piece 20 cm long. From a white ribbon 2.5 cm wide cut a piece 20 cm long.
  For beautiful frills that create a jabot effect,it is necessary to make 21 pieces of round petals as follows: cut a square of a ribbon of black color 5x5 cm. Cut off the edges over the fire. Fold it diagonally (the fold line is on top). Make sure that the corners exactly match. Now take a needle with a thread of black color and pass it to the right corner. Now you need to go through the usual stitches in a semicircle to the left corner of the triangle. The semicircle bends to the bottom corner of the triangle. Now it remains to tighten the thread and the triangle will gather in a beautiful petal. Fasten the thread. The lower part of the lobe is cut evenly and melted. That's what happened.
 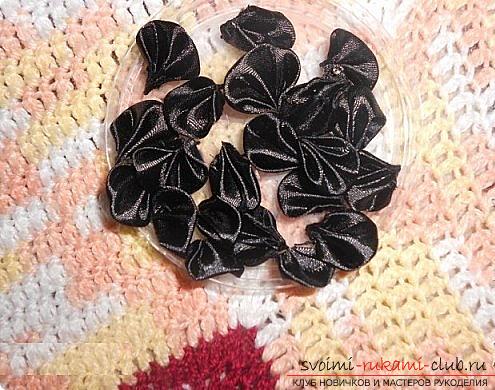 Now you need to make a bow base. To do this, previously prepared pieces of ribbons are sewn on the front side, making a small overlap. The thread can not be cut off.
 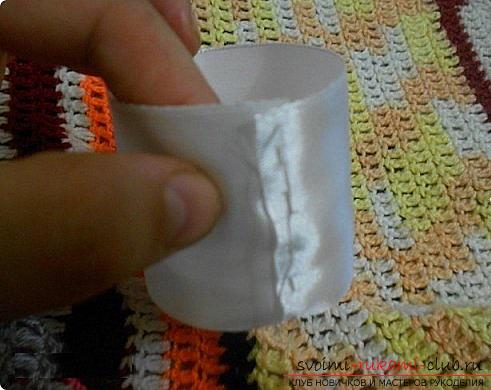 Now fold the workpiece in half, placing the seam in the center of the future bow.
 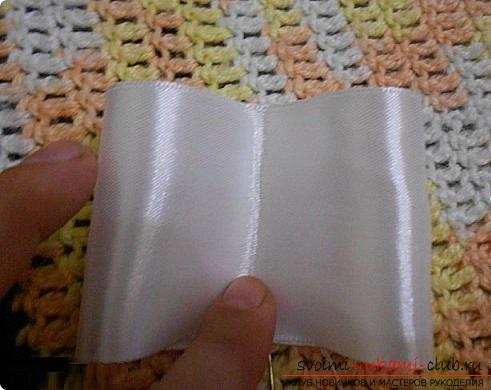 The next step is winding the thread. Tightly twist the bow in the middle. Sew for fastening several times, pull the thread to the wrong side of the bow. Freeze.
 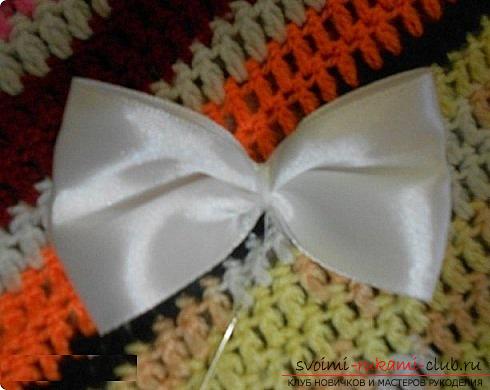 Do the above manipulations with all the blanks. That's what happened.
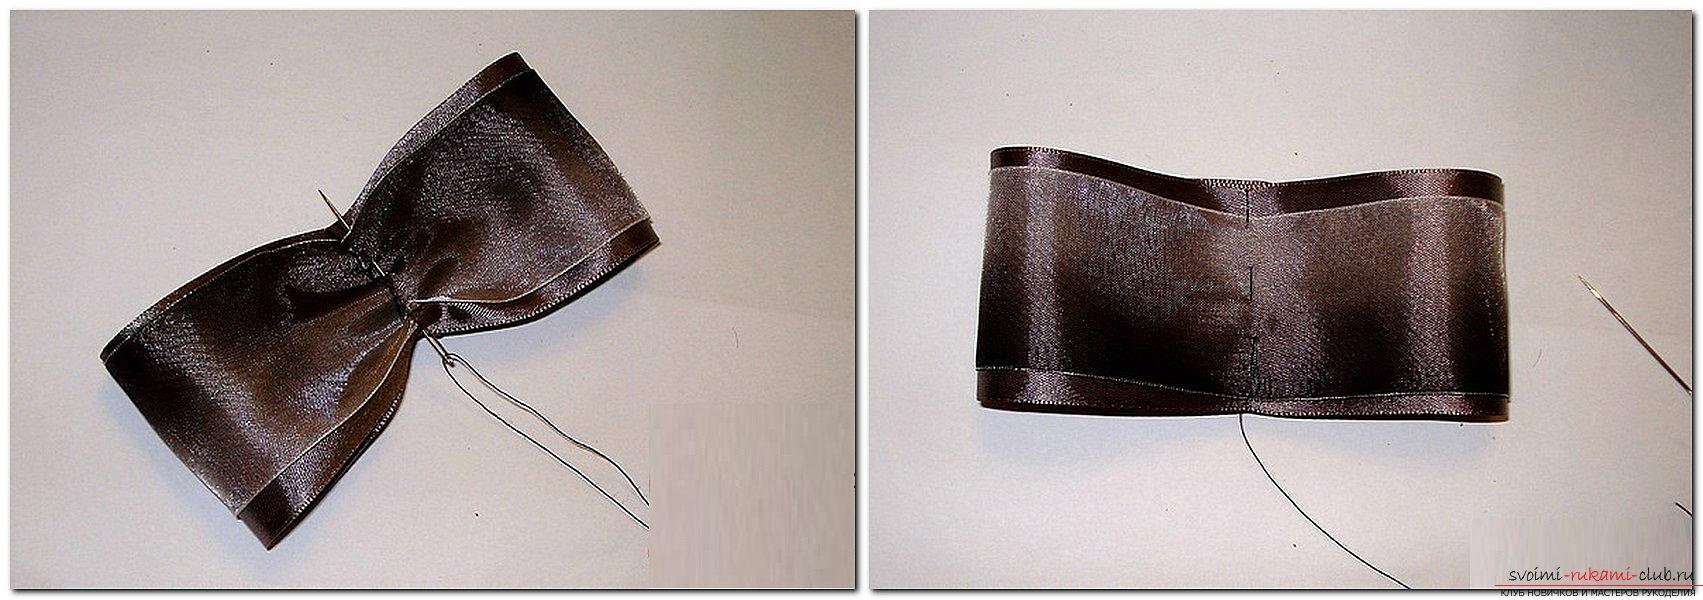
 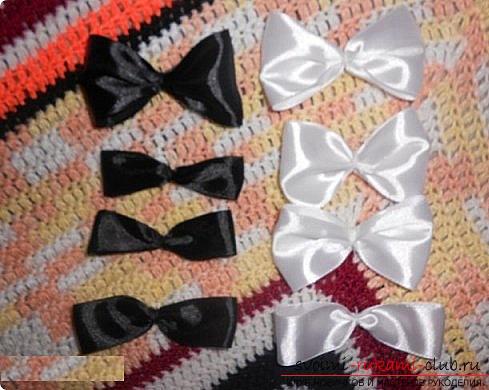 Now you need to sew the bows of the same size from different ribbons to 2 together. Like this.
 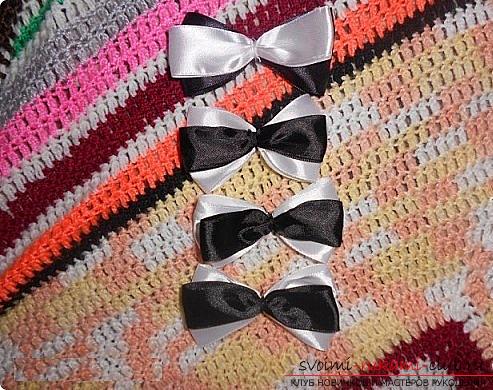 Now we sew a double bow of two pieces of 18 cm ribbons.
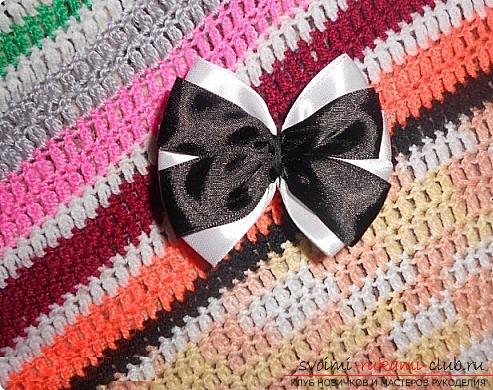
 Now on the resulting double bow on the top to sew the biggest black and white bow of 20 centimeters ribbons. If it is more convenient for you to work with glue, you can glue the blanks.
 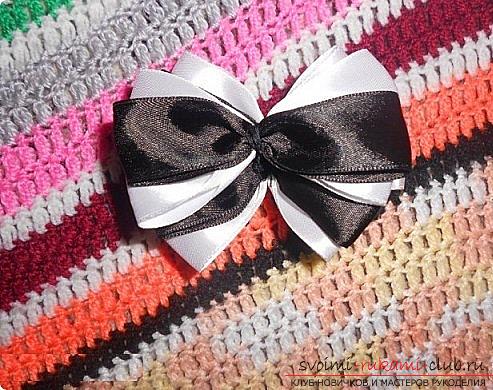 Now let's start creating jabots. Here you need a glue gun. Glue the 3 blanks of the petal together.
  The resulting three must be glued between the two upper layers of bows. (see the figure).
 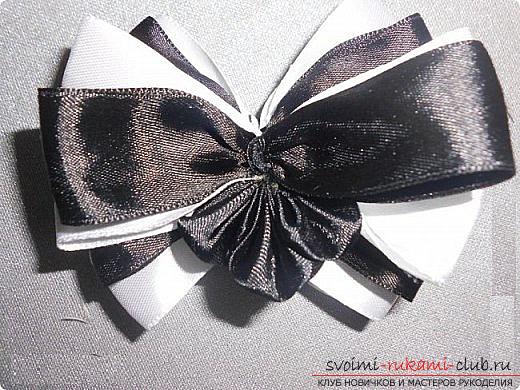 Similarly, stick another 4 threes one under the other.
 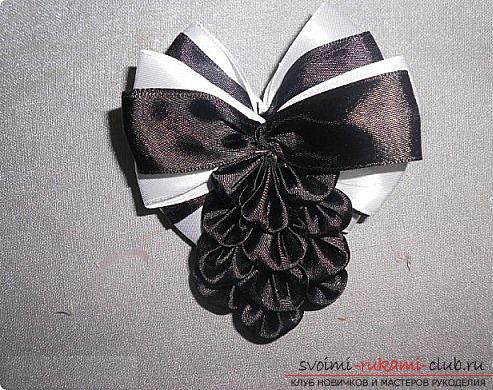 Now we complement the triples with the remaining petals. That's what happened.
  Attach a clip to the wrong side.
 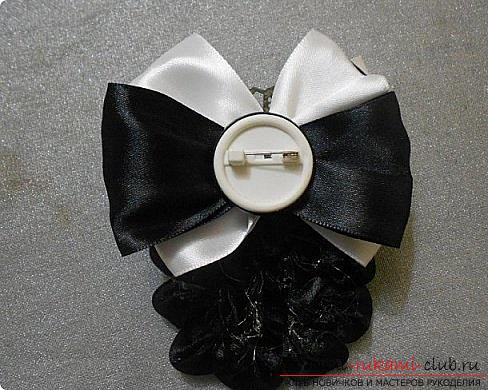 To mask the place of the joints of the petals of the toad on the wrong side, glue a piece of lace.
 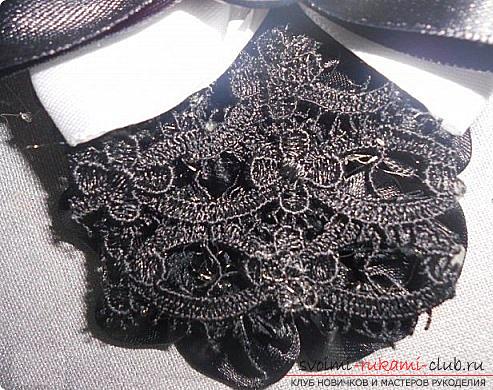 It remains to attach on the front of the decoration and wait until all the glued parts have dried completely.
 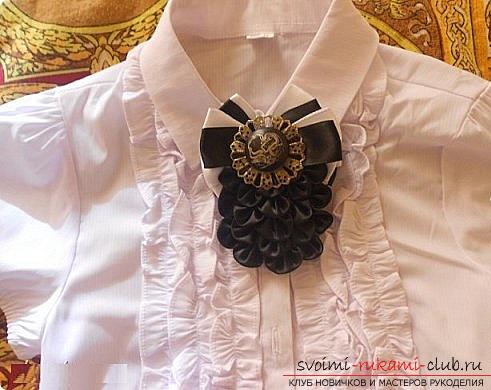 The next tie brooch made of ribbons is so easy and simple that even novices will cope with it.
 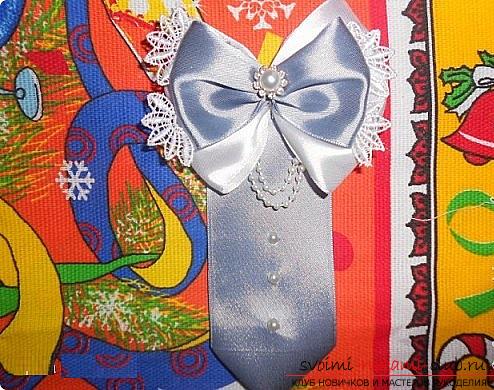 Materials for work:
- Ribbon 5 cm wide white and gray colors. (Of course you can choose any two to your liking);
- Hairpin for brooch;
- Needle and thread;
- Lighter or candle;
- Scissors;
- White lace;
- Half-beads and beads of pearl color.
 From the white tape you need 2 pieces of 20 cm in length, from 18 cm in gray and 28 cm in length.
 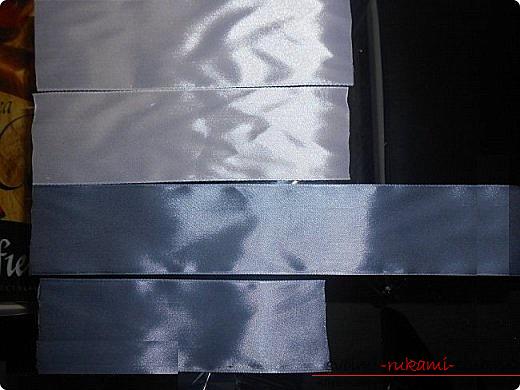 Now from two segments of white color and a short segment of gray color, make bows in a manner similar to the one described in the previous master class. That's what happened.
 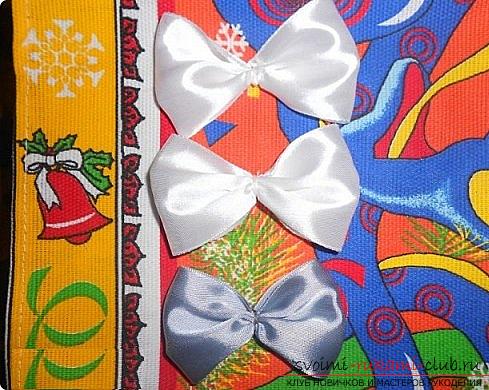 Now we will make a straight necktie from a 28cm long piece of tape.
 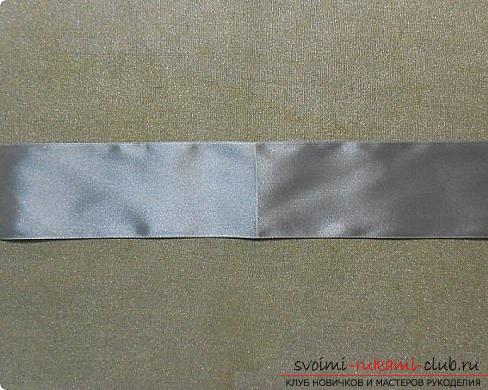 Arrange the ribbon with the wrong side to yourself and fold it in half so that the ends of the ribbon are perpendicular to each other (see picture).
 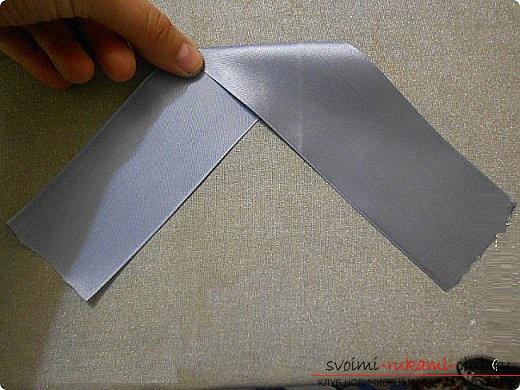 Fold in half and iron with an iron. It turned out a tie with a triangular end. Here such.
 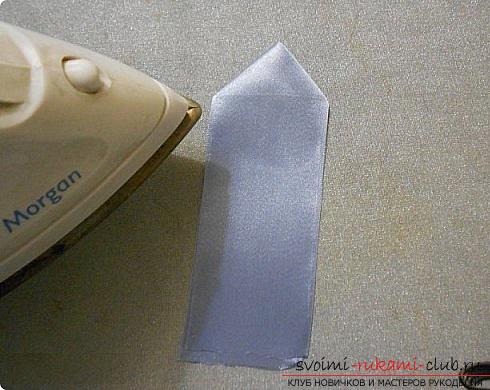 All the elements are ready to be collected and zadekorirovat.
 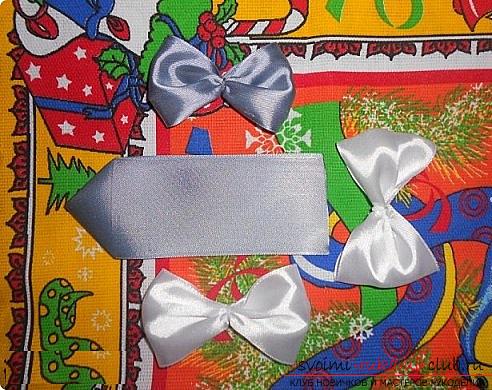 To a gray bow is to sew small pieces of lace. White bows to fasten in one big. Now you need to sew a gray billet from above on a white double bow.
 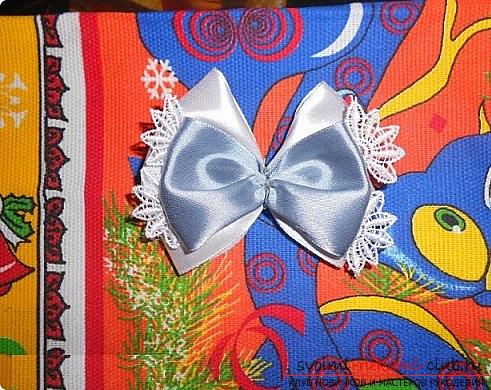 From the wrong side, glue the tie with hot glue and disguise the place of the connection with lace.
 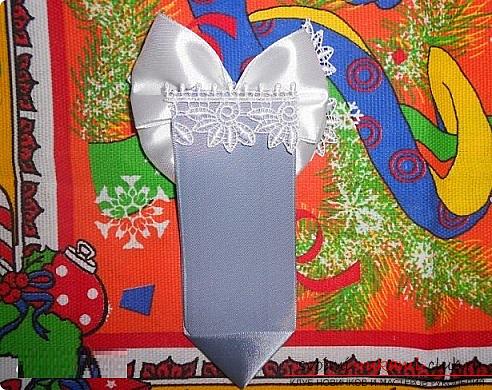 Attach the clip.
 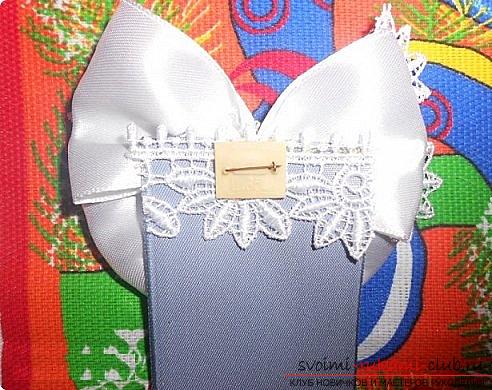 It remains to decorate with beads. Here's how it happened. You can decorate to your liking.
 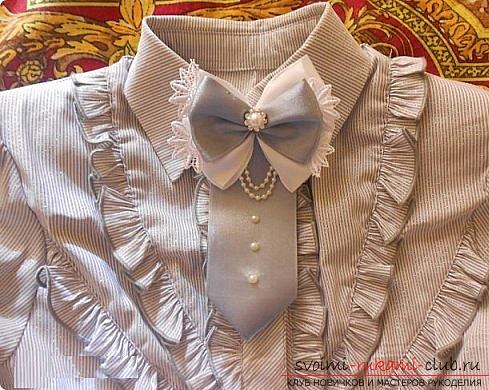 These wonderful two options are suitable for fashionable ladies. For young gentlemen, we propose to make such a wonderful tie a butterfly.
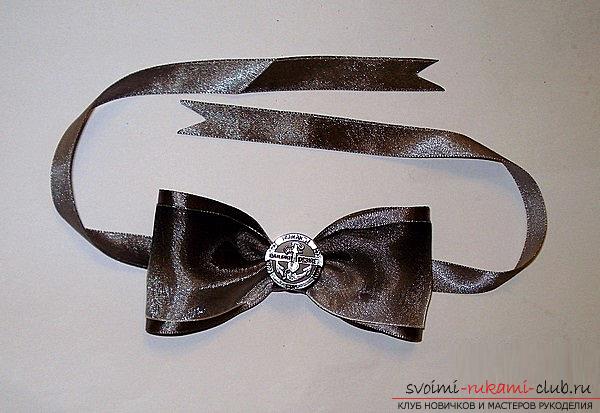
 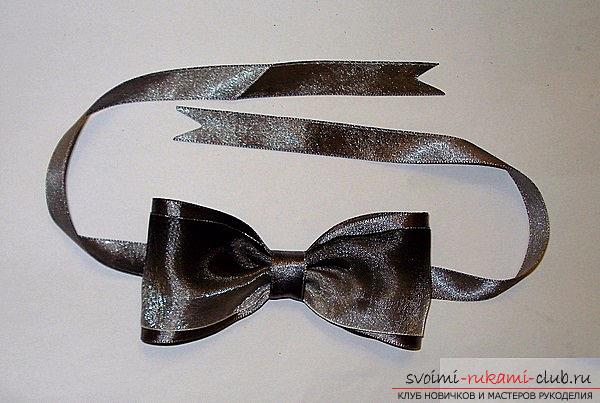 Materials for work:
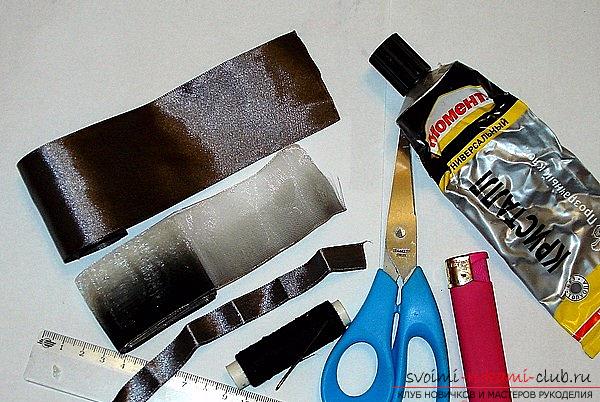
- Satin ribbon 5 cm and 1 cm wide;
- Tape made of organza 4 cm wide;
- Threads and the needle;
- Pins;
- Glue;
- Elements of decor and lock (if you want).
 Make two lengths of 26 cm from wide tapes of satin and organza.
 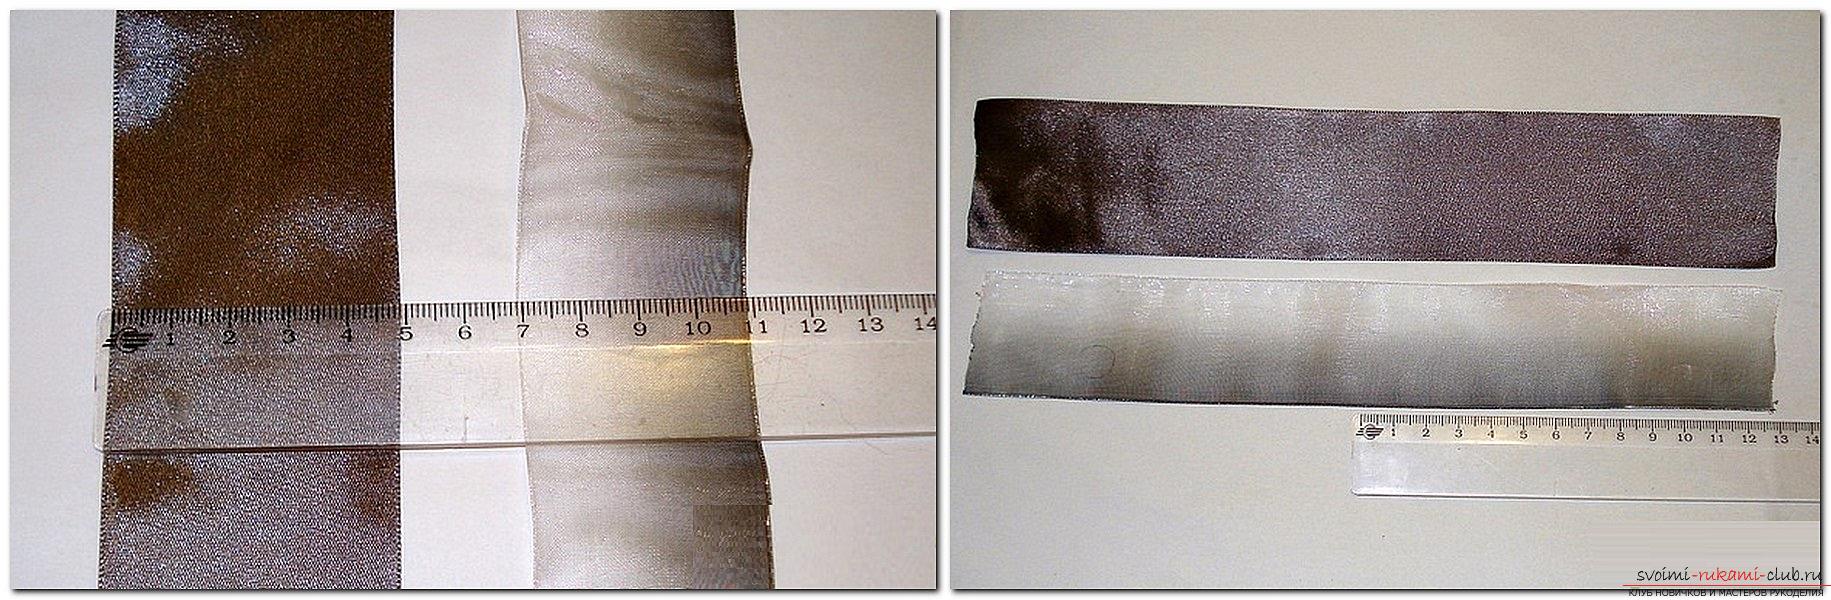 To the tape from the atlas face upplace the ribbon from the organza also face up. Align the edges (if desired, lock with pins). Now you need to melt the edges of the folded ribbons together. Organza is very flammable. So it is necessary to melt properly. It is important not to overstrain the workpieces, especially if you work with light materials. You can get darkened and "smoky" edges.
 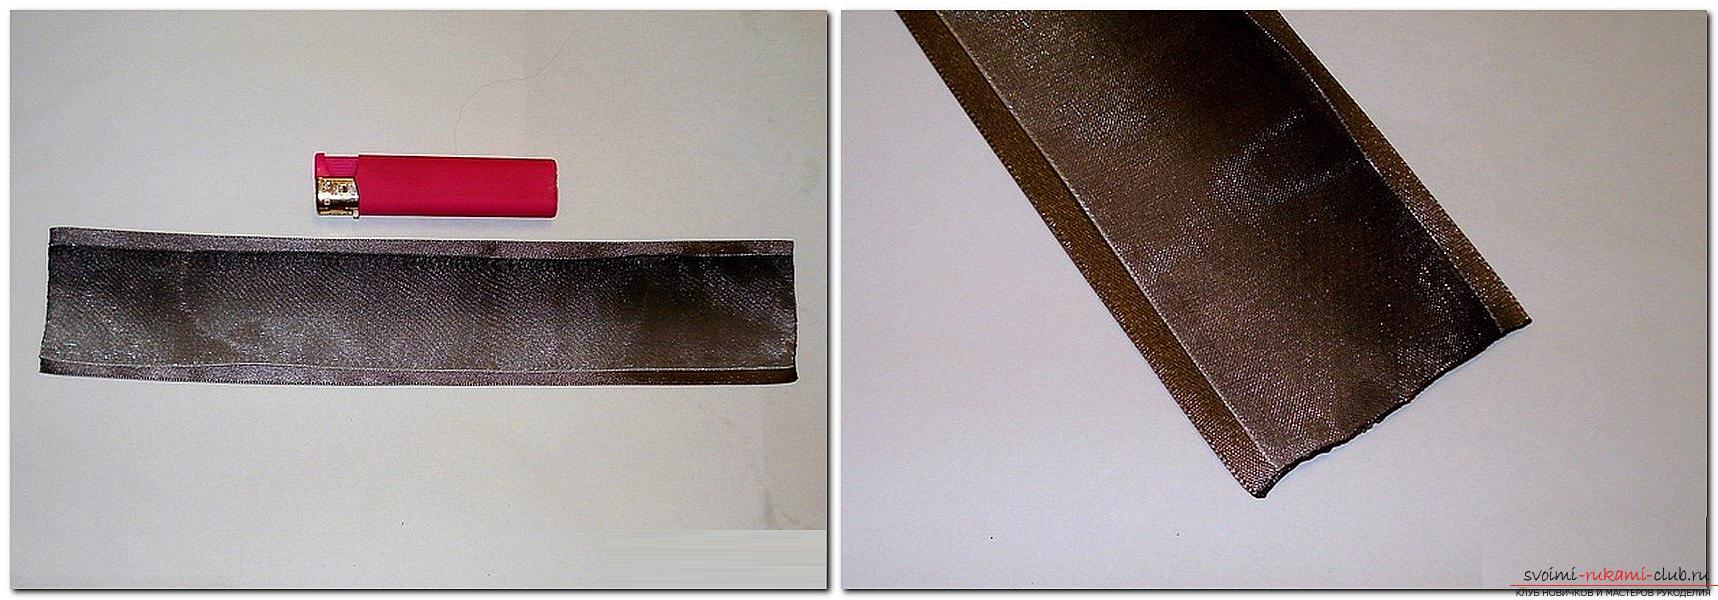 Unscrew the side to itself and join the melted edges in the middle. You can iron the workpiece with an iron. The sides should be slightly overlapped (max. 1 cm).
 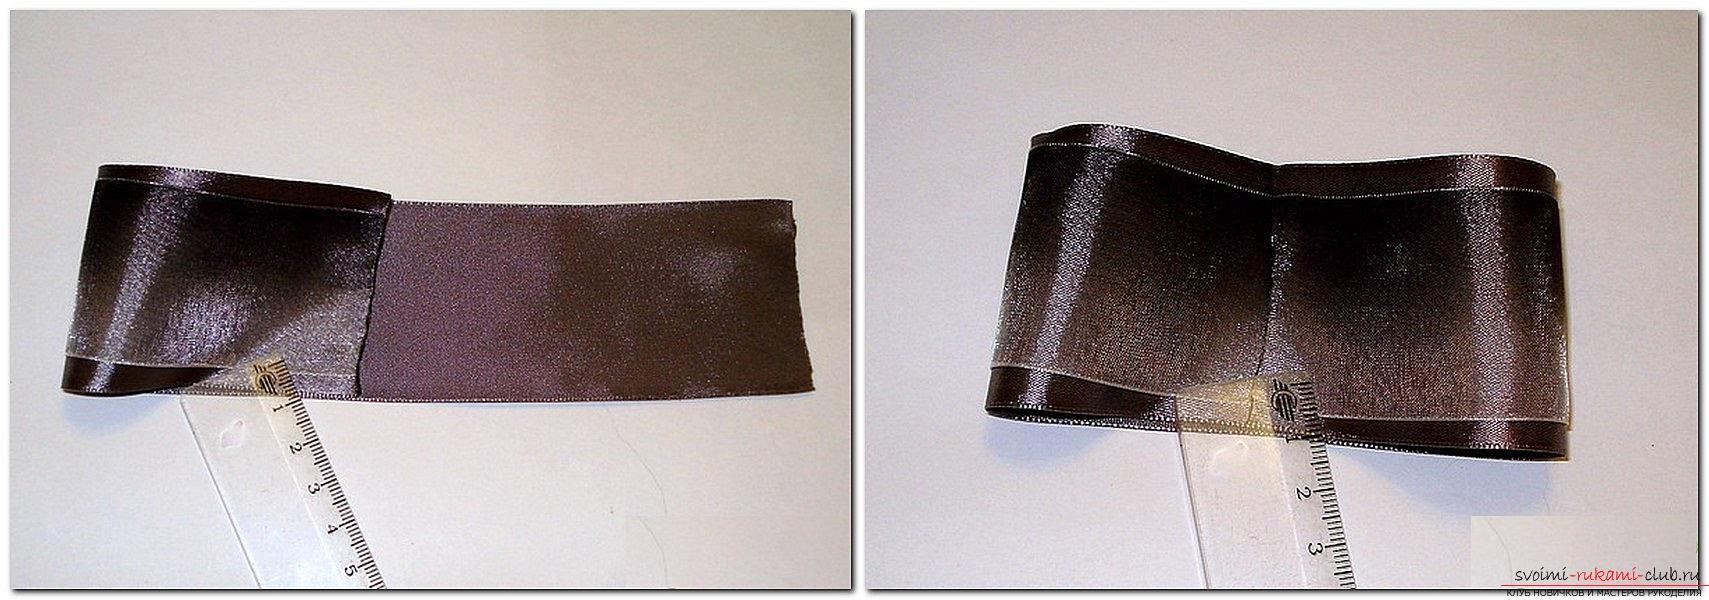 Next, you can make a bow, as in the previous two options, but you can do the following: Cut the workpiece with a pin and stitch in the middle (where the sides are lapped) in large stitches.
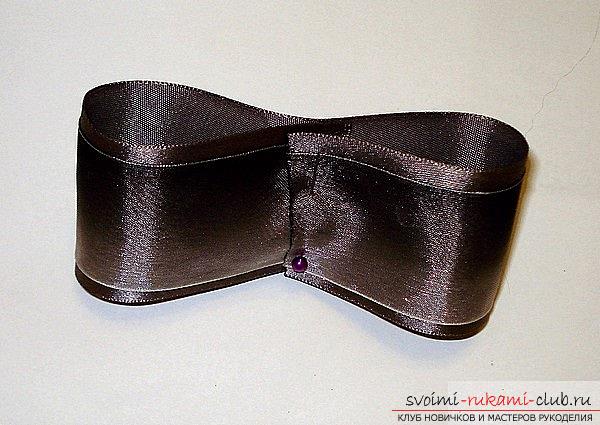
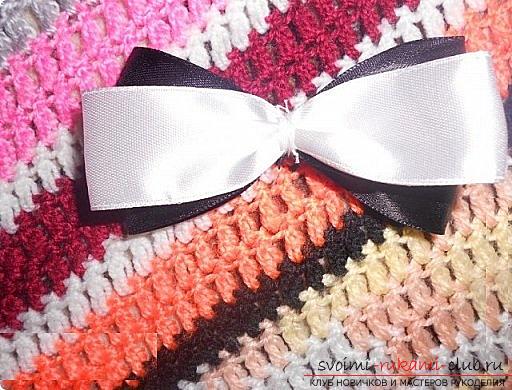
 Now you need to tighten the thread and fix it. That's what happened.
 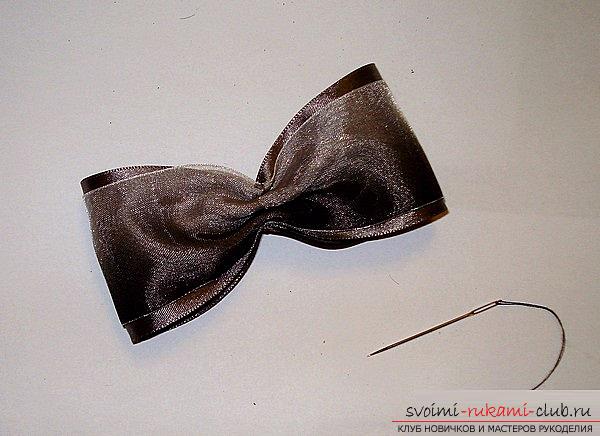 It remains to assemble a bow tie. In our master class, a variant is suggested for any neck girth, but if you know the parameters of the baby, which makes a tie, then be guided by them. So, the tie. From a narrow ribbon of satin cut a piece about 4 cm. He will mask the seam in the center of the butterfly.
  Measure the tape necessary for the string and center it with glue on the front side. Glue to the glazed face of the tie on the wrong side of the bow.
 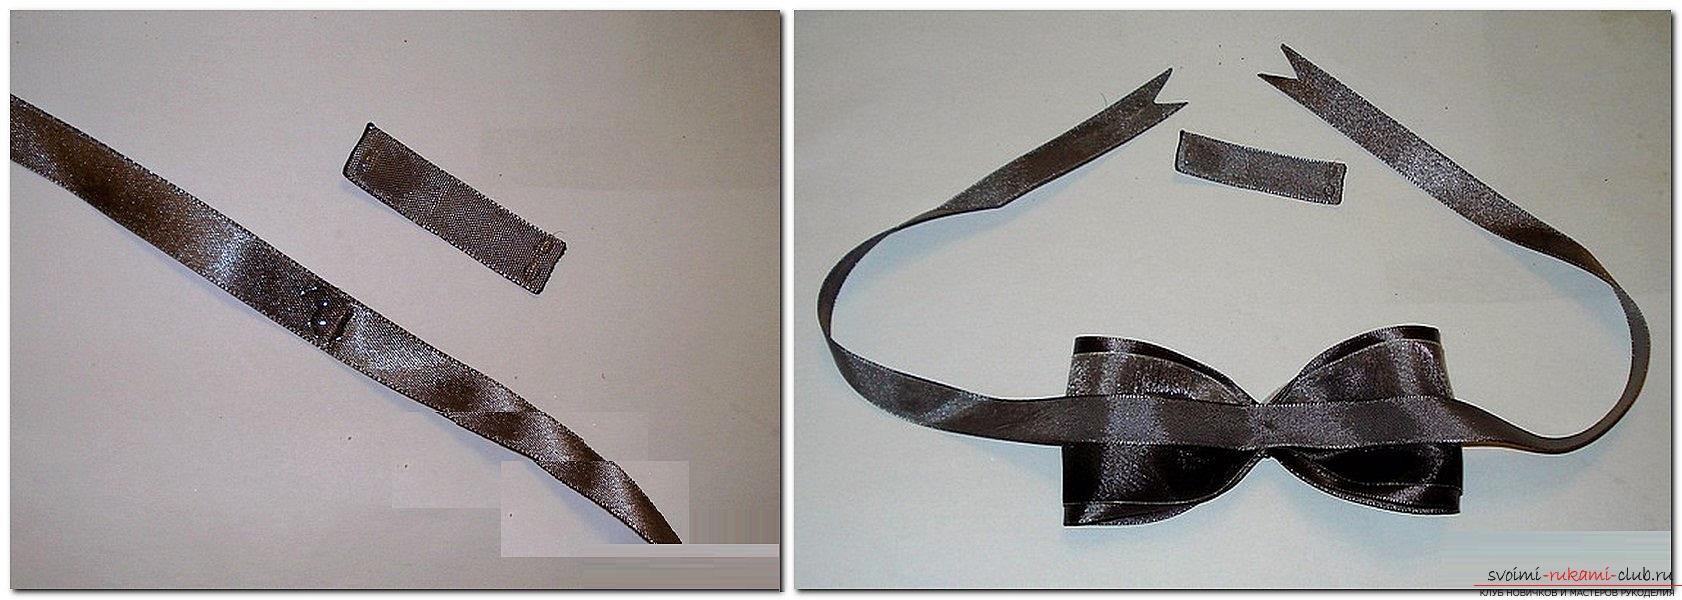 Leave the adhesive to dry completely. Now apply a little bit of glue on the center of the edge of the ribbon at 4 cm and wrap around the center of the tie. It is enough to tighten, but so that the ribbon is not deformed, and so that it does not wrinkle.
 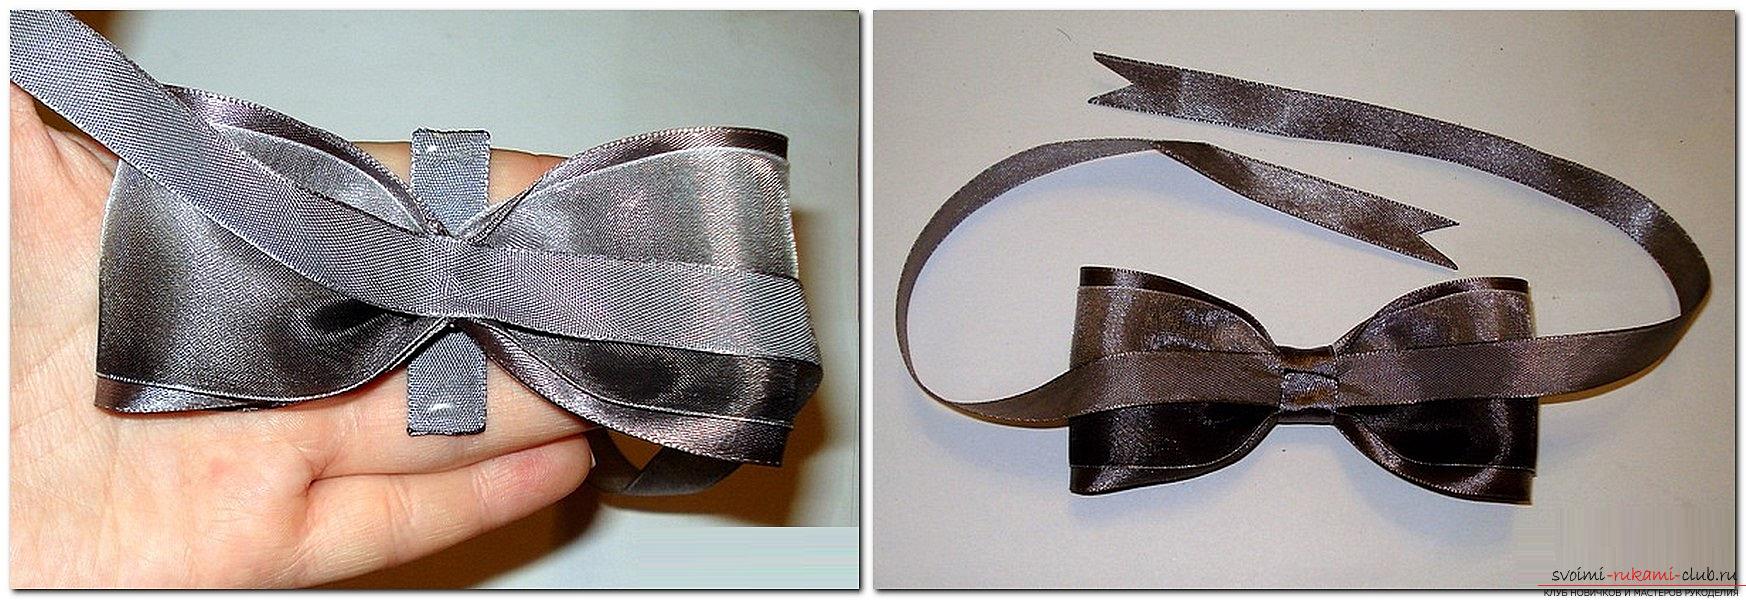 Bow tie made of ribbons ready. If desired, the center can be decorated with different fittings.
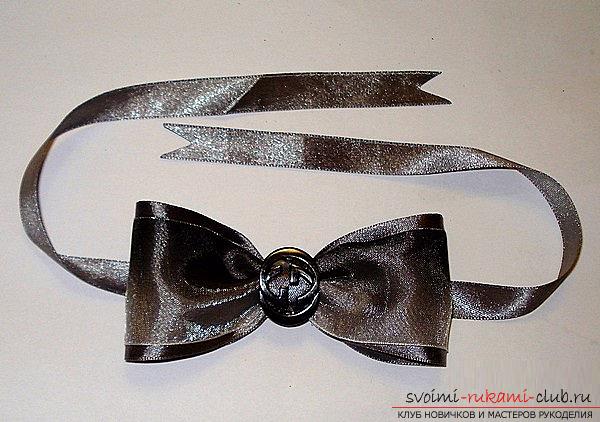
Comments
Related posts:
 How to make Kantashi bows with your own hands, detailed master classes with step-by-step photos
 How to weave sakura from beads, detailed master classes with step-by-step photos and descriptions.
 How to make an original accessory - a tie with your own hands with Kanzash elements? Lesson with step-by-step recommendations and photos
 How to make a butterfly in a quilling technique? Create a master class with a photo
 How to make Christmas-tree toys: balls, snowflakes and much more by yourself, master classes on creating Christmas tree toys with step-by-step photos and descriptions