
How to make a toy of a Christmas angel from beads with your own hands - a master class
The New Year holiday is a symbolic miracle anda parade of magic, to which every person is invited. Waiting to feel and see this very magic, we often put our hand to create something new and unique. First of all, we are talking about unique crafts that you can do with your own hands. Various techniques of needlework help to recreate toys, which for us will be interesting.
How to make a toy of a Christmas angel from beads with your own hands - a master class
First of all, it's worth talking about symbolictoys that are needed for the Christmas tree or decorating the house. New Year's Angel is a popular toy that is used both for the New Year holiday and for the Nativity of Christ. It is sometimes difficult to make, but the technique of needlework will tell a simple and universal way of working. Using small beads in different colors. Using threads and special schemes, as well as these beads, we can create the most unexpected and interesting works. Preparing the beadwork of the angel for the toy - materials As before, to design a unique and interesting beadwork, we need special material that will help in the work. You need to collect a certain amount of beads, as well as the necessary things to connect them. Use them to make your little magic in your house.
- Prepare the beads of white color in two sizes: large to number 8 and small to number 10
- Prepare also beads of gold color in number 10
- White bead on a diameter of 6 millimeters
- A wire for a diameter of 0.2 millimeters.
- Wire should be taken in the amount of 50 centimeters
Torso formation 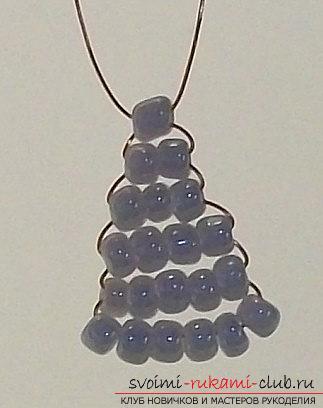 In the first row we make six beads. For the second row, apply five beads. For the third row we use four beads. For the fourth row, we use three beads. For the fifth row we use two beads. For the sixth row, we use one bead. After, we are engaged in the formation of hands. In one end of the wires you need to collect eight pieces of white beads in small size, as well as one bead of golden color.
 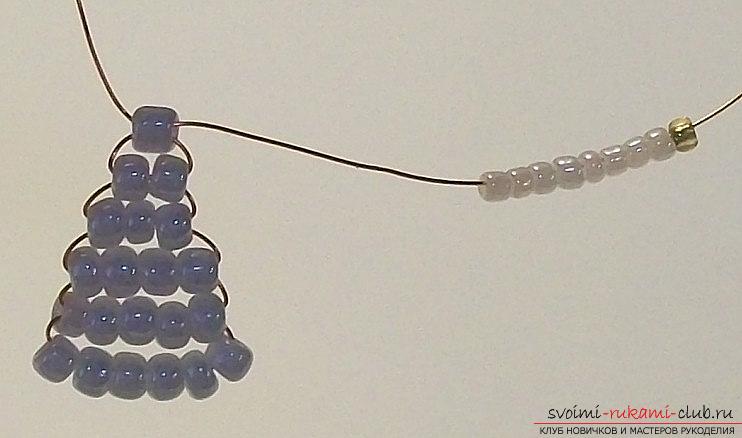 Forming hands
 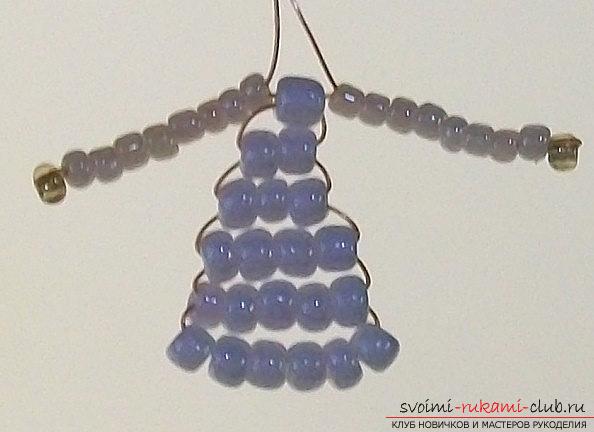 Then, holding the format of a gold beadcolor, we must pass the wire in the opposite direction, using all the beads of white color. Afterwards, it is necessary to tighten the wire to get the arm element for the future angel. A similar action is repeated for the other end of the wire to form the two arms of the future angel. Then, the ends need to be twisted together, using three turns
  Wings and end of work Wing formationrequires threading on one side of the end of twenty-six golden beads. Then, they need to be twisted along a loop, with the help of which in the future we will have a porch. We repeat this action on the second side, we make the second version of the loop for 26 beads in gold color.
 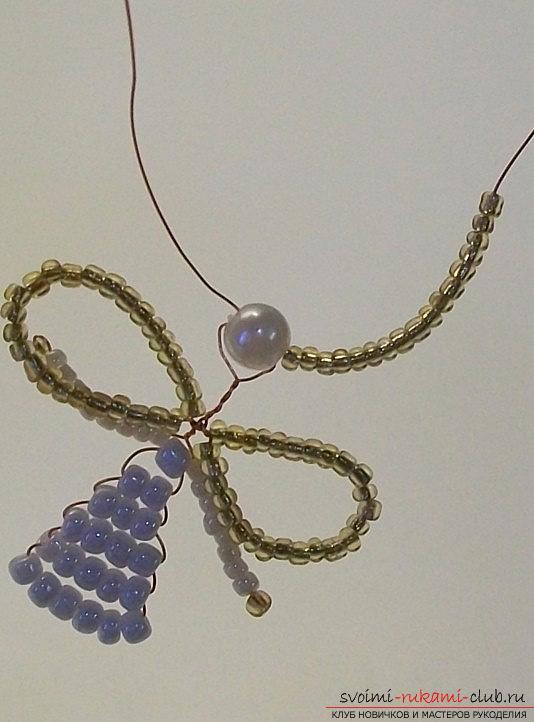 The two ends must be twisted together,using four turns. Then, on one of the ends we must string a bead of white color. We take the next end of the wire and pass the object in the opposite direction. Take one of the ends of the wire to get 17 beads in gold. The same end must be passed through the bead, so that the shape of the half ring around this bead element is obtained. Further, all the wires are twisted and clipped. Wings must be leveled for greater beauty. Thus, the figure of our angel is over!
Comments
Related posts:
 Master-class with a photo will teach you how to make your own hands earrings-snowflakes - decoration of beads
 How to make a magic toy out of felt with your own hands? Master-class of products
 The master class will teach you how to make your own hands a developing toy from improvised materials
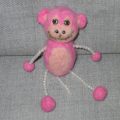 This master class felting of wool will help make a toy monkey with your own hands
The master class will teach you how to make a toy for your children with your own hands - a rattle tied with a crochet.
This master class felting of wool will help make a toy monkey with your own hands
The master class will teach you how to make a toy for your children with your own hands - a rattle tied with a crochet.