
How fast and high quality knit booties for baby crochet? Lesson on knitting pinets in blue and white with photo and video instructions
Every mom wants to put on her baby the mostbest, sweet things. Children do not wear shoes for up to a year, so often their feet are decorated with booties, which are easy to bind with their own hands. Such "shoes" do not shake a leg, always warm and take care of the comfort of a small treasure. 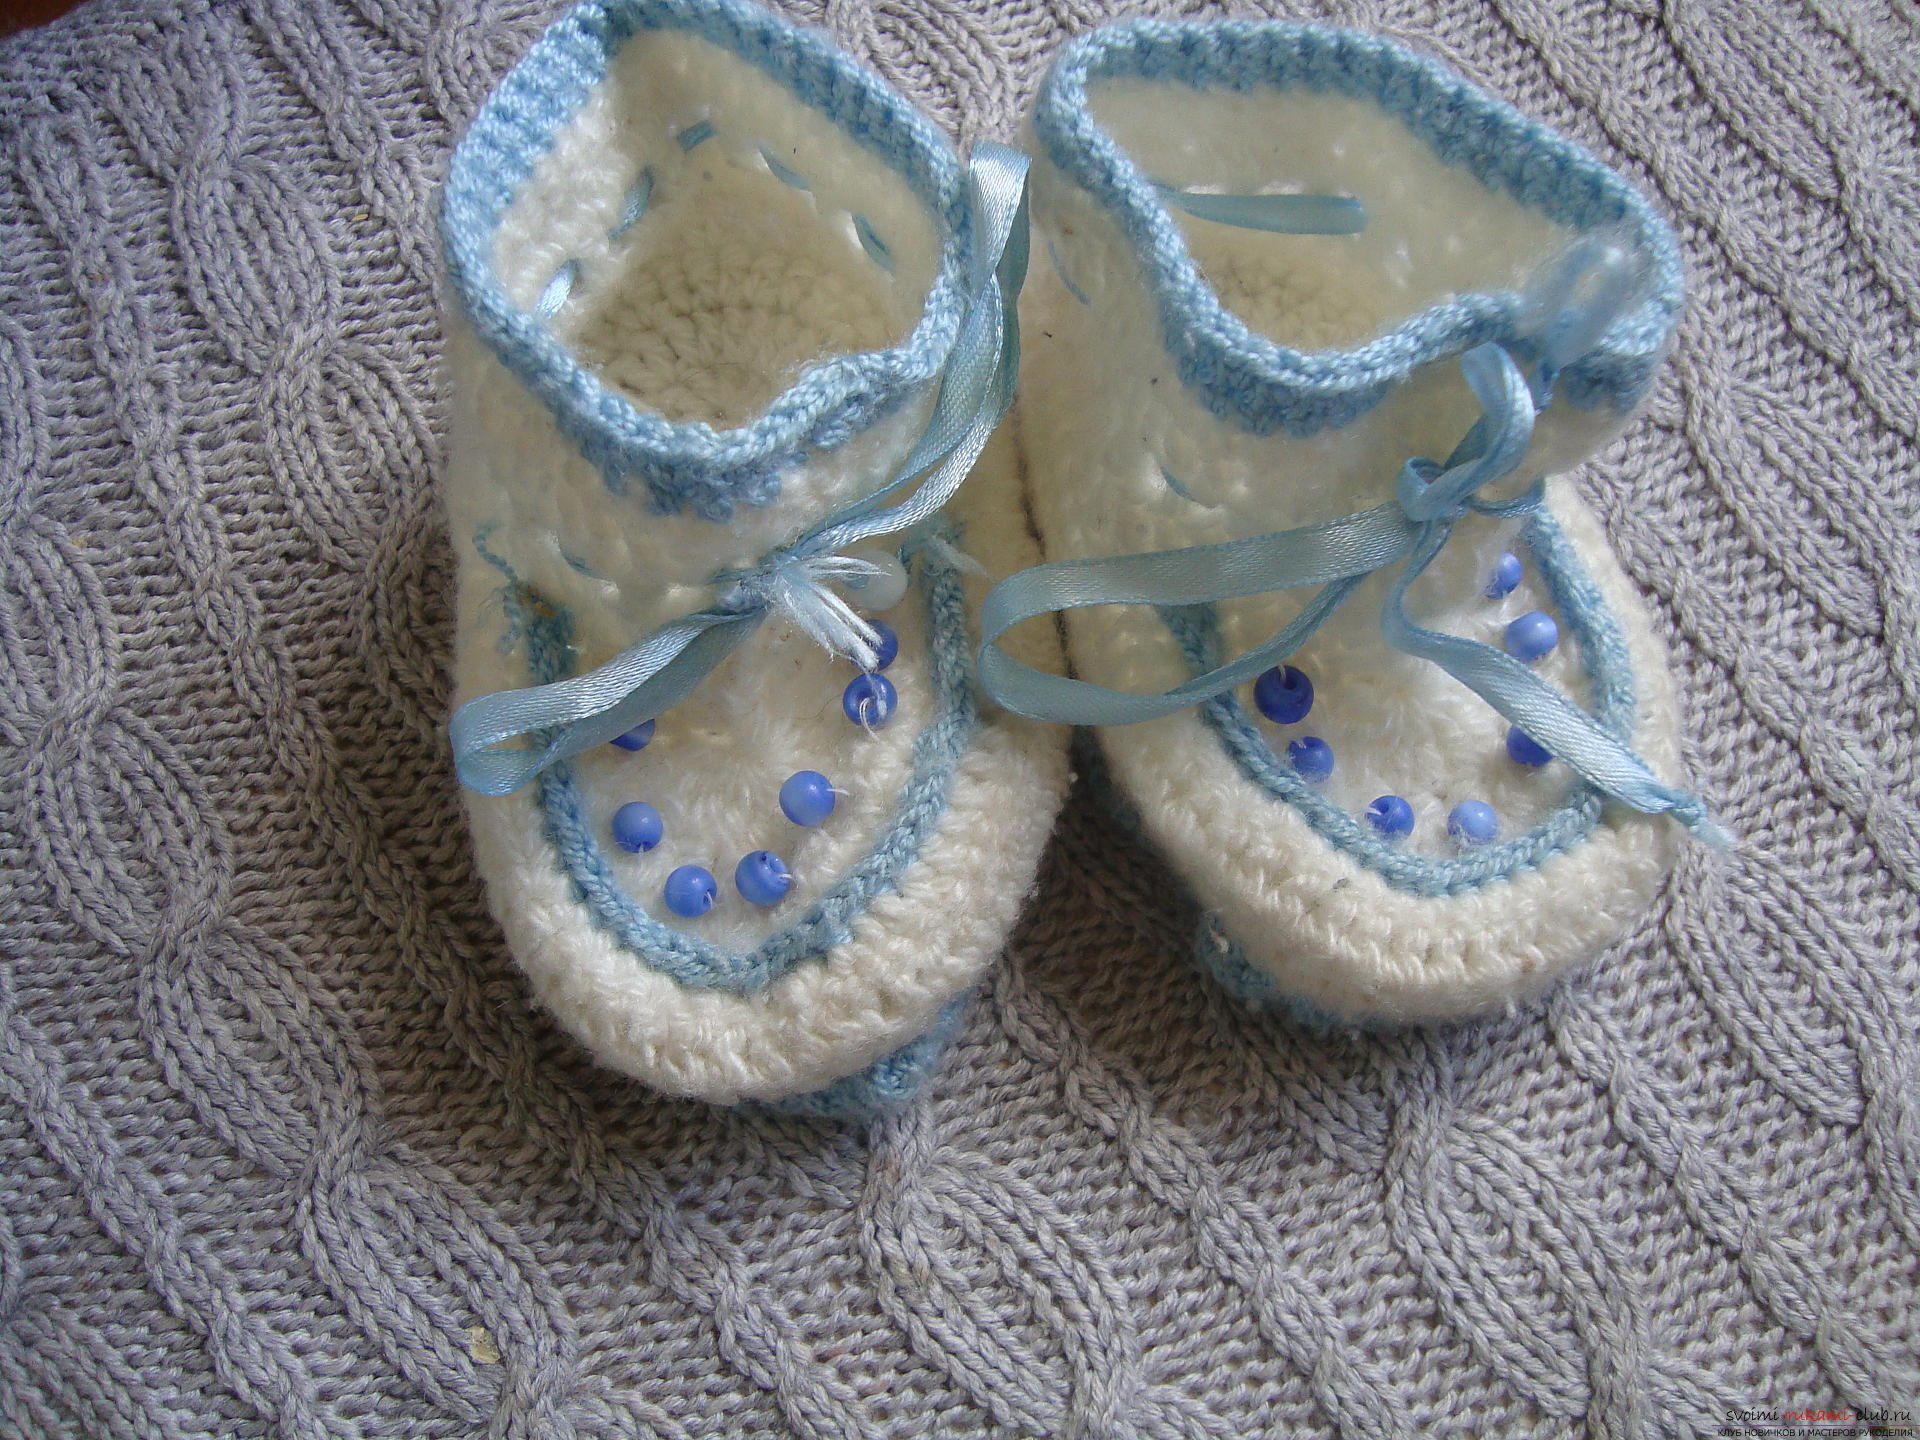
What should I cook?
Linking booties with their own hands is not difficult at all,the main thing is to find time for the creative process and a little gentle yarn. For more beautiful products, you can combine two colors of the thread, for example, blue and white, and also use inserts made of beads, ribbons and other types of finishes. Prepare 50 grams of the main yarn of white color and four times less string of blue or other tone for finishing. For the yarn, select the hook number. Do not rush the loops from the thick thread with a thin hook, it will be inconvenient, and if you do the opposite and tie a thin thread with a large hook, the binding will be loose and the product will not look beautiful. The number of decorating elements is not the key in the finish, but it's better not to overdo it with an emphasis on beads and ribbons.
Video instruction
Stages of work
 Begins knitting pinets from creating a flatthe sole of the oval shape, from the edges of which then the front and side parts of the products begin to form. At the last stage you can start decorating the cute shoes. To start creating the product, dial 15 air loops from the white yarn. The last three elements must be tied into a ring, for this, attach the last loop to the second one. The next row is the tying of typed loops as simple stakes without a crochet. To do this, you need to hook the hook of the air loop from the first row, grab the thread and pull the hook back a little so that a new loop forms. Then thread the yarn again and tie two loops that are on the hook. When strapping, fifteen side loops should be made, and six bars should be tied in the ring, first they will be crowded, but in the next row the elements will be straightened and become in their places. On the second side of the braids, fifteen elements are also fastened, and four bars are fastened in the zone of the last loop. Such an unequal number of loops along the edge of the row will make it possible to create a heel and toe of the product, since the foot has uneven expansion in the anterior and heel areas. The third row is tied in a circle according to the number of loops of the bottom row. At this stage, the sole acquires a more actual appearance, similar to the sole of the shoe. The next row on the basis of the product is also knitted according to the type of posts and forms the final appearance of the sole. The series is formed closed in a circle, more precisely closer to the oval form.
 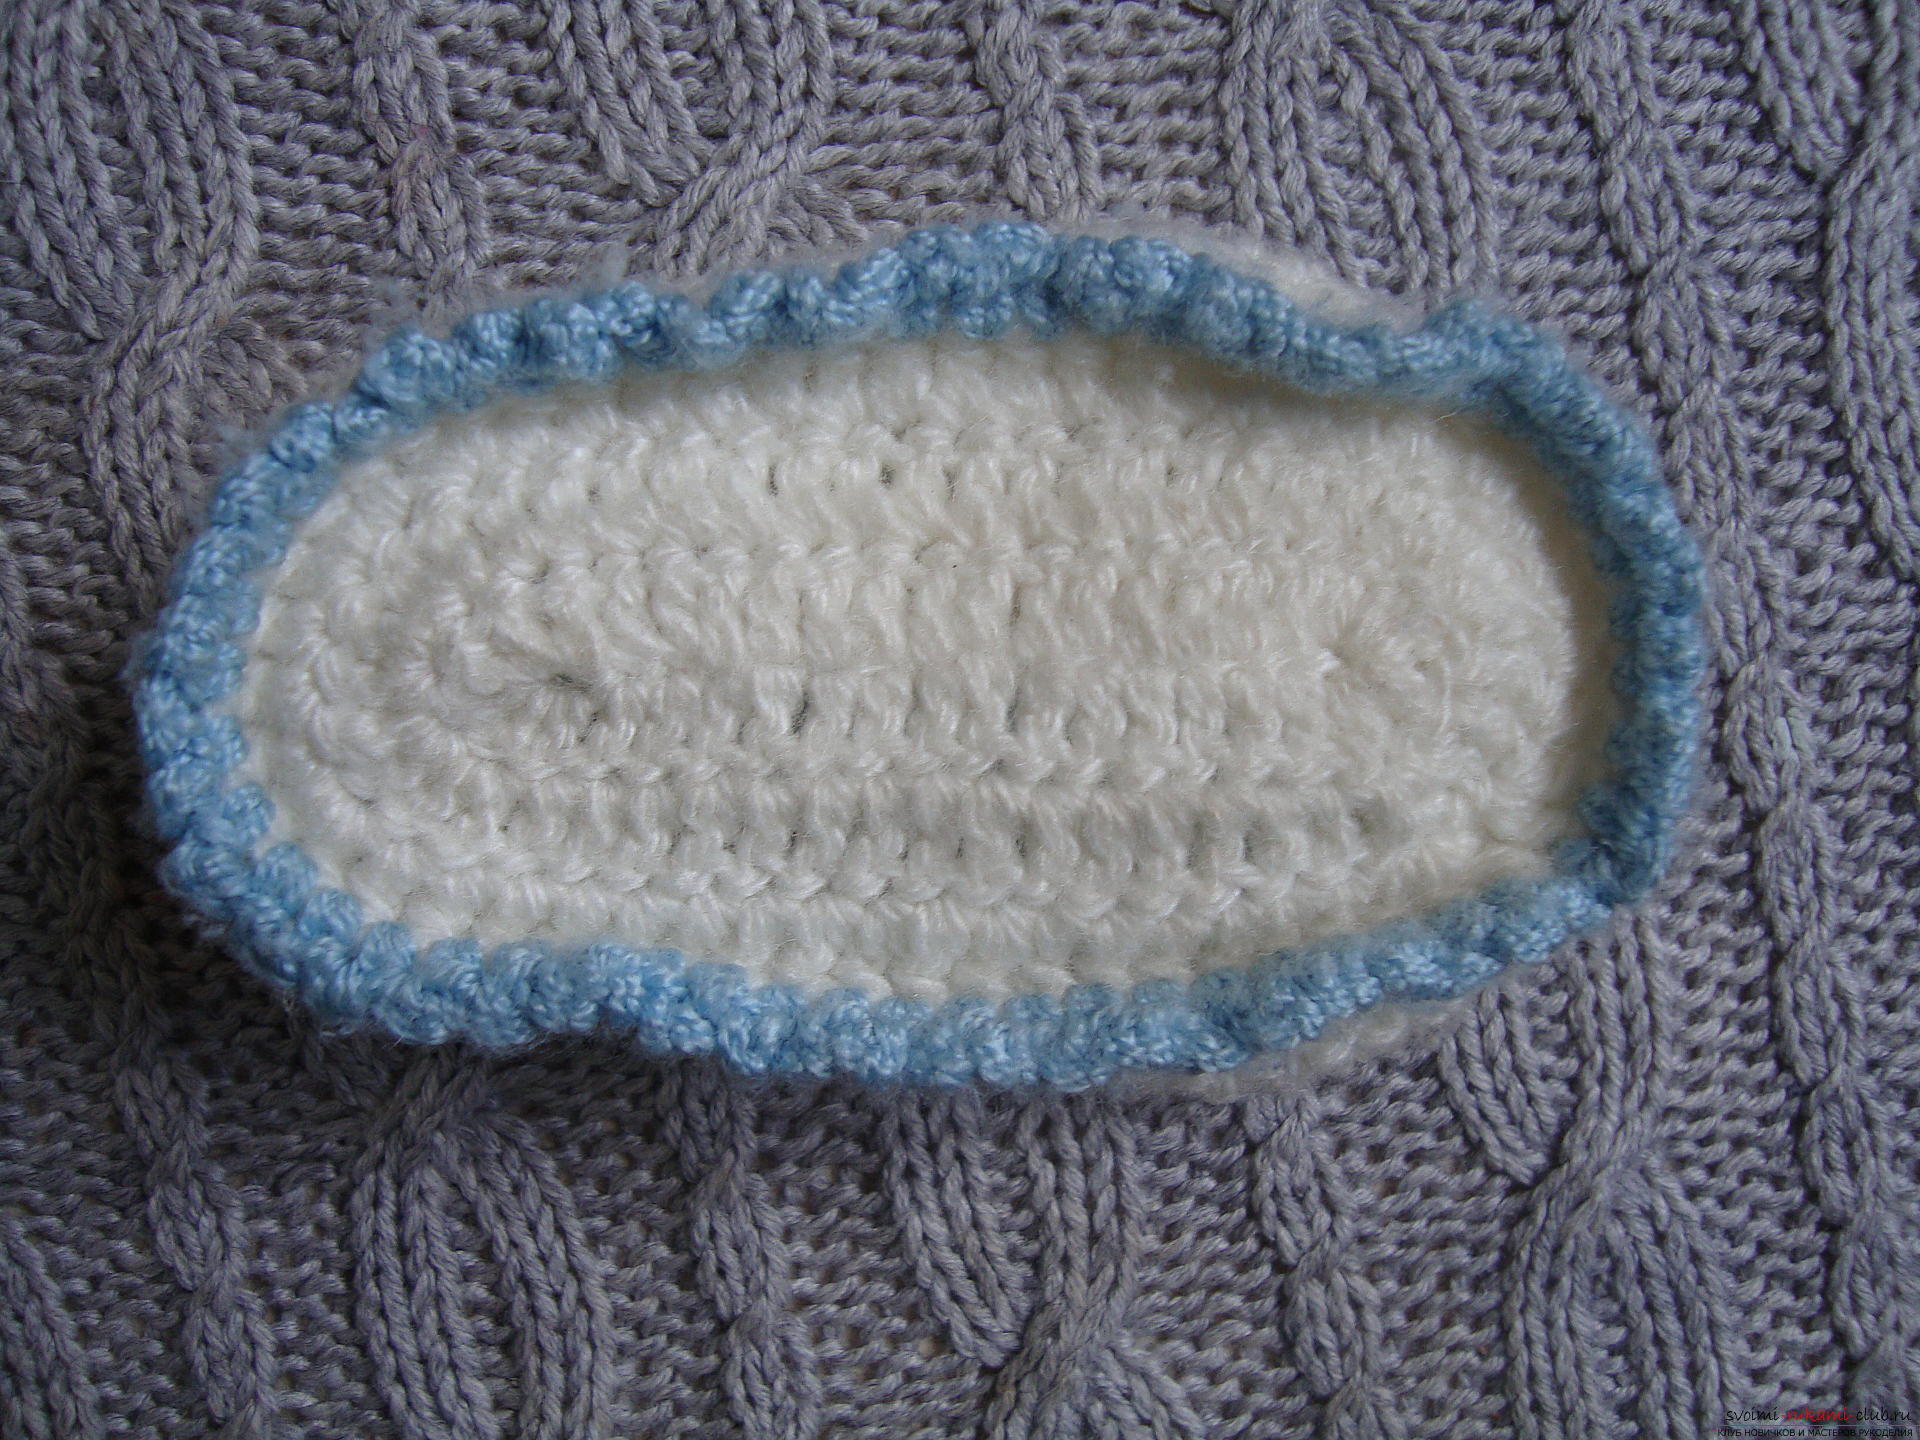 The following series consists of the strapping, whichis formed by the type of polustolbikov. To do this, tie a loop in each pigtail, which immediately pokes through the previous loop, which is on the hook. The tie should be a little tight, it will make it easier to form further rows in the vertical direction. Next we begin to form the edge of the product. For this we make the strap around the circle from the high posts. The first three vertical rows are formed along the entire edge of the product and must be located exactly and symmetrically.
  The next row is also a column, but theiryou need to tie in half a pin. To do this, bend the work in half along the longitudinal line from the heel to the toe, mark the center of the fold and tie the middle around the heel area, and the sock will be formed according to a different principle. Now you need to type and tie loops along the remaining half of the product, where the front part is formed. Bars across the entire semicircle, but in the center of the toe area, loop through one pigtail. This method allows you to narrow the top of the product and connect it horizontally, closing the remaining gap. The next row should be connected even more dense, in the center again take the pigtails through one to tie the remaining space. The last row on the toe closes a small semicircular gap.
 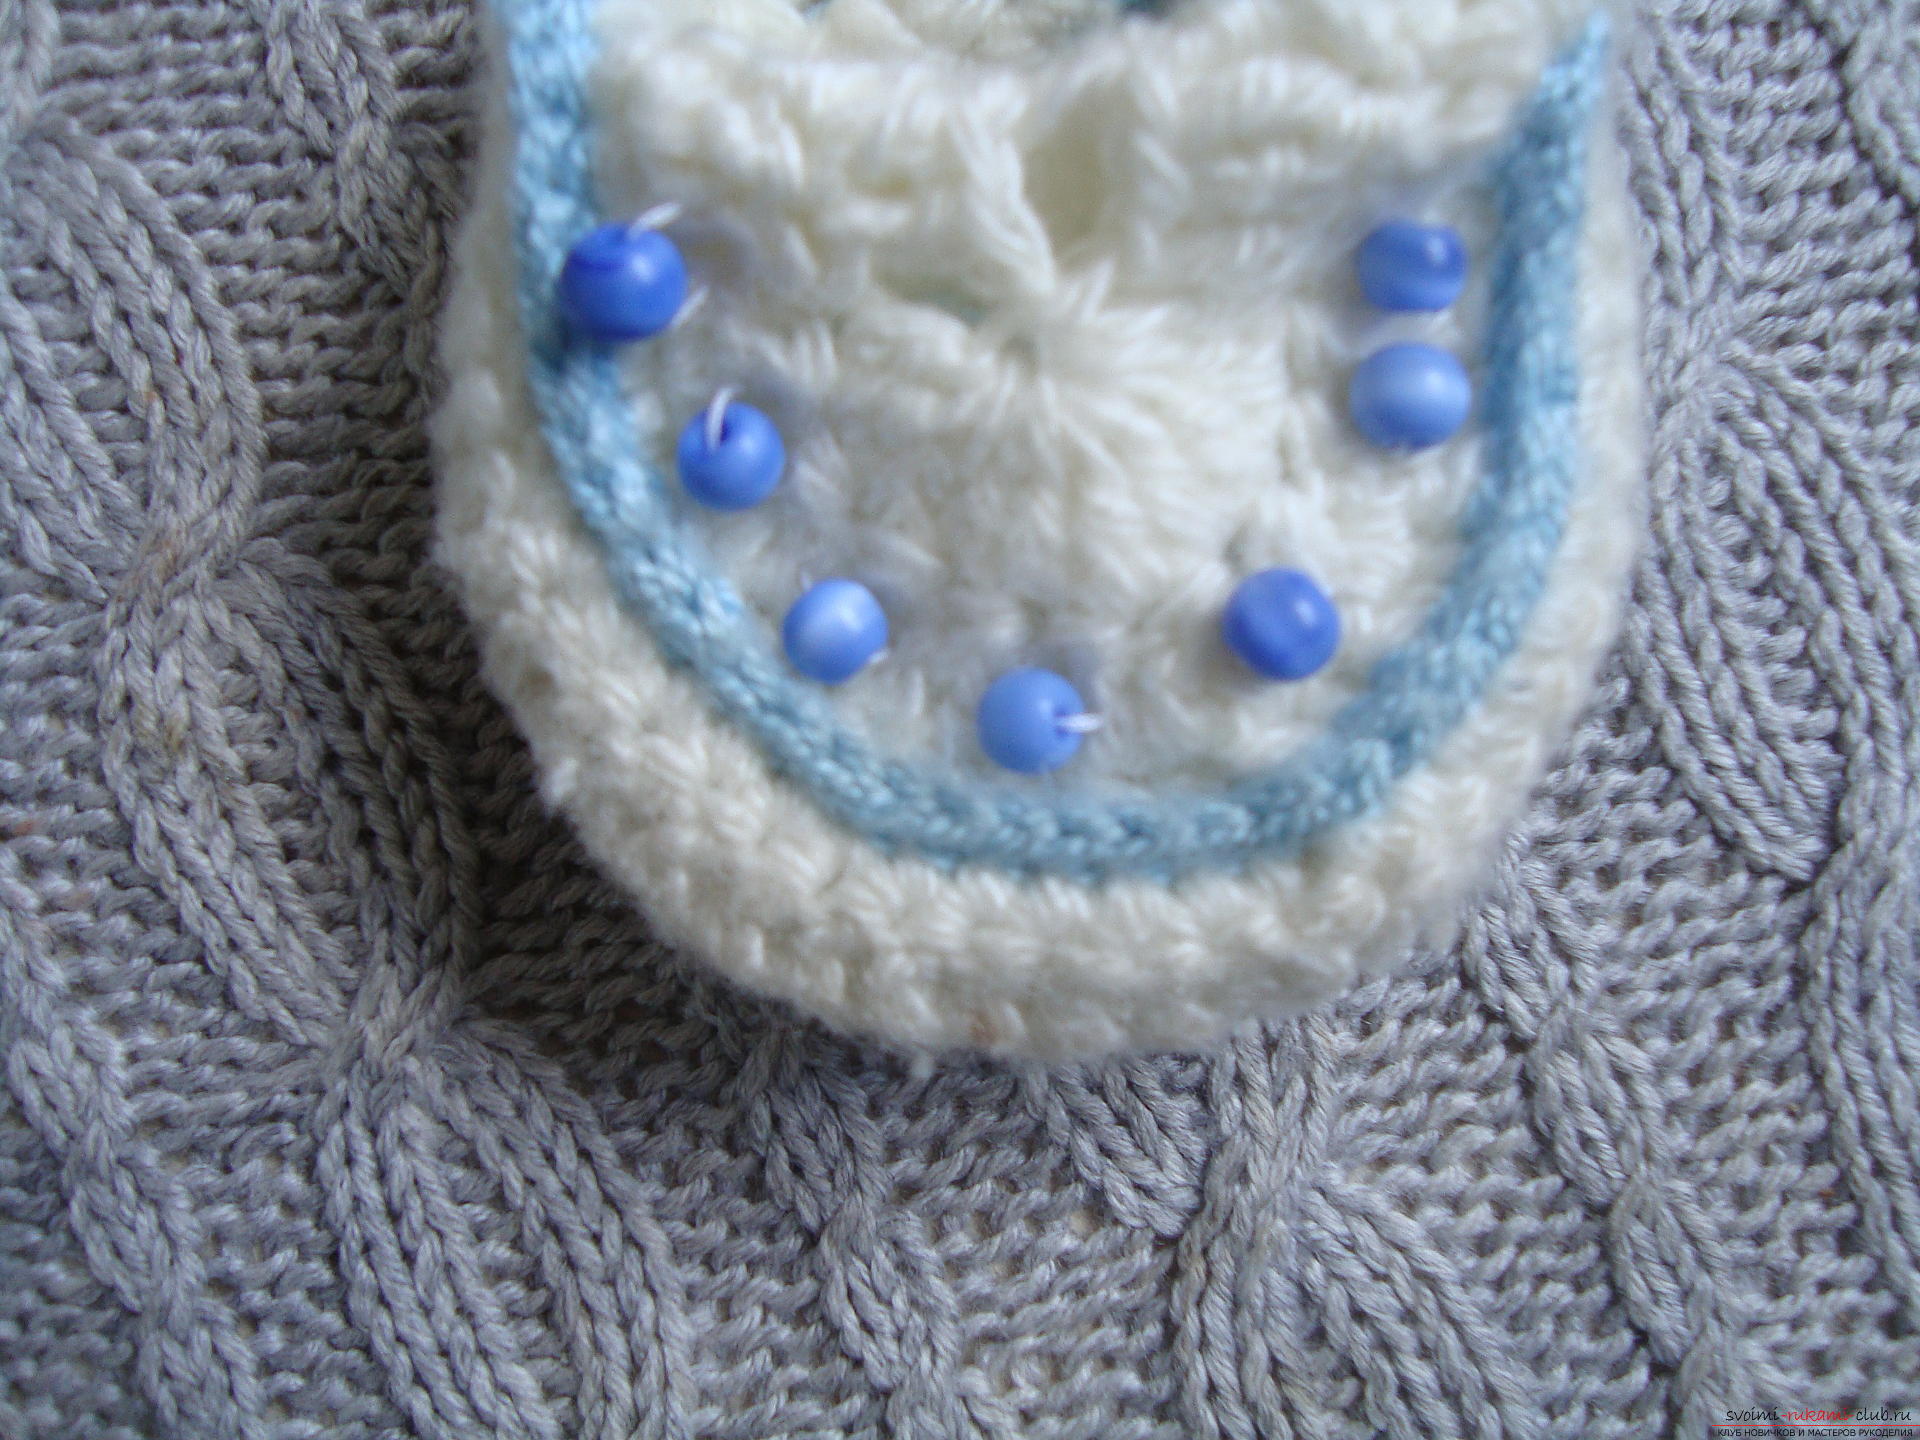 Now you need to form the top part of the pins,it is tied from all the remaining loops in a circle. Knit a part of the pinets in the ankle area. Try not to tighten the hinges tightly, otherwise it will be inconvenient to push the leg of the baby. In this part, three rows of stitches are tied together. Each row is made of white yarn, and the upper two rows of semi-corks must be tied with blue yarn.
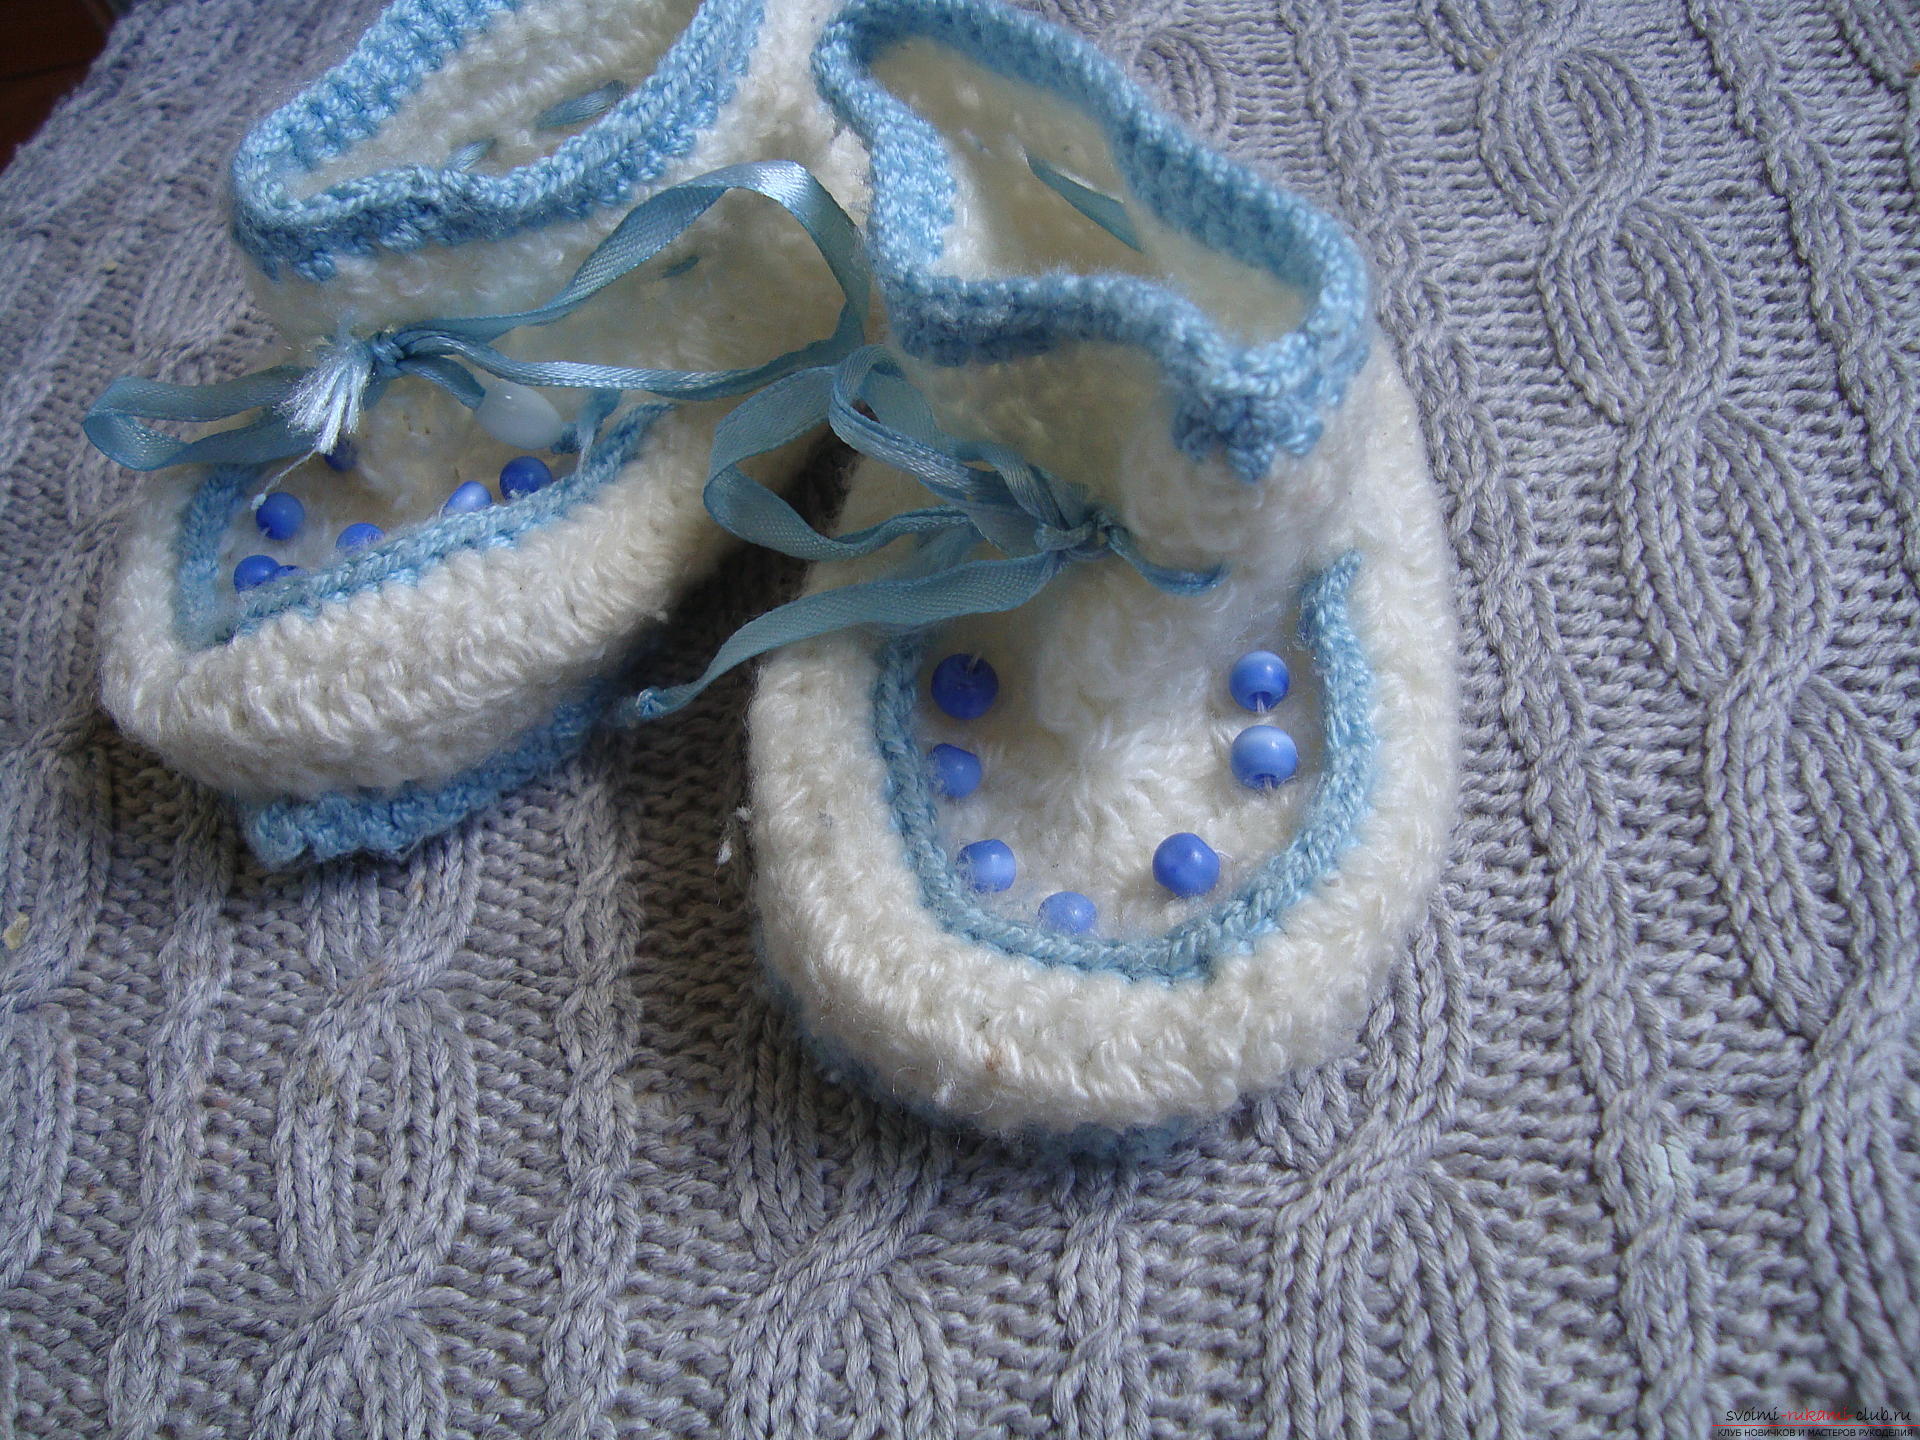
 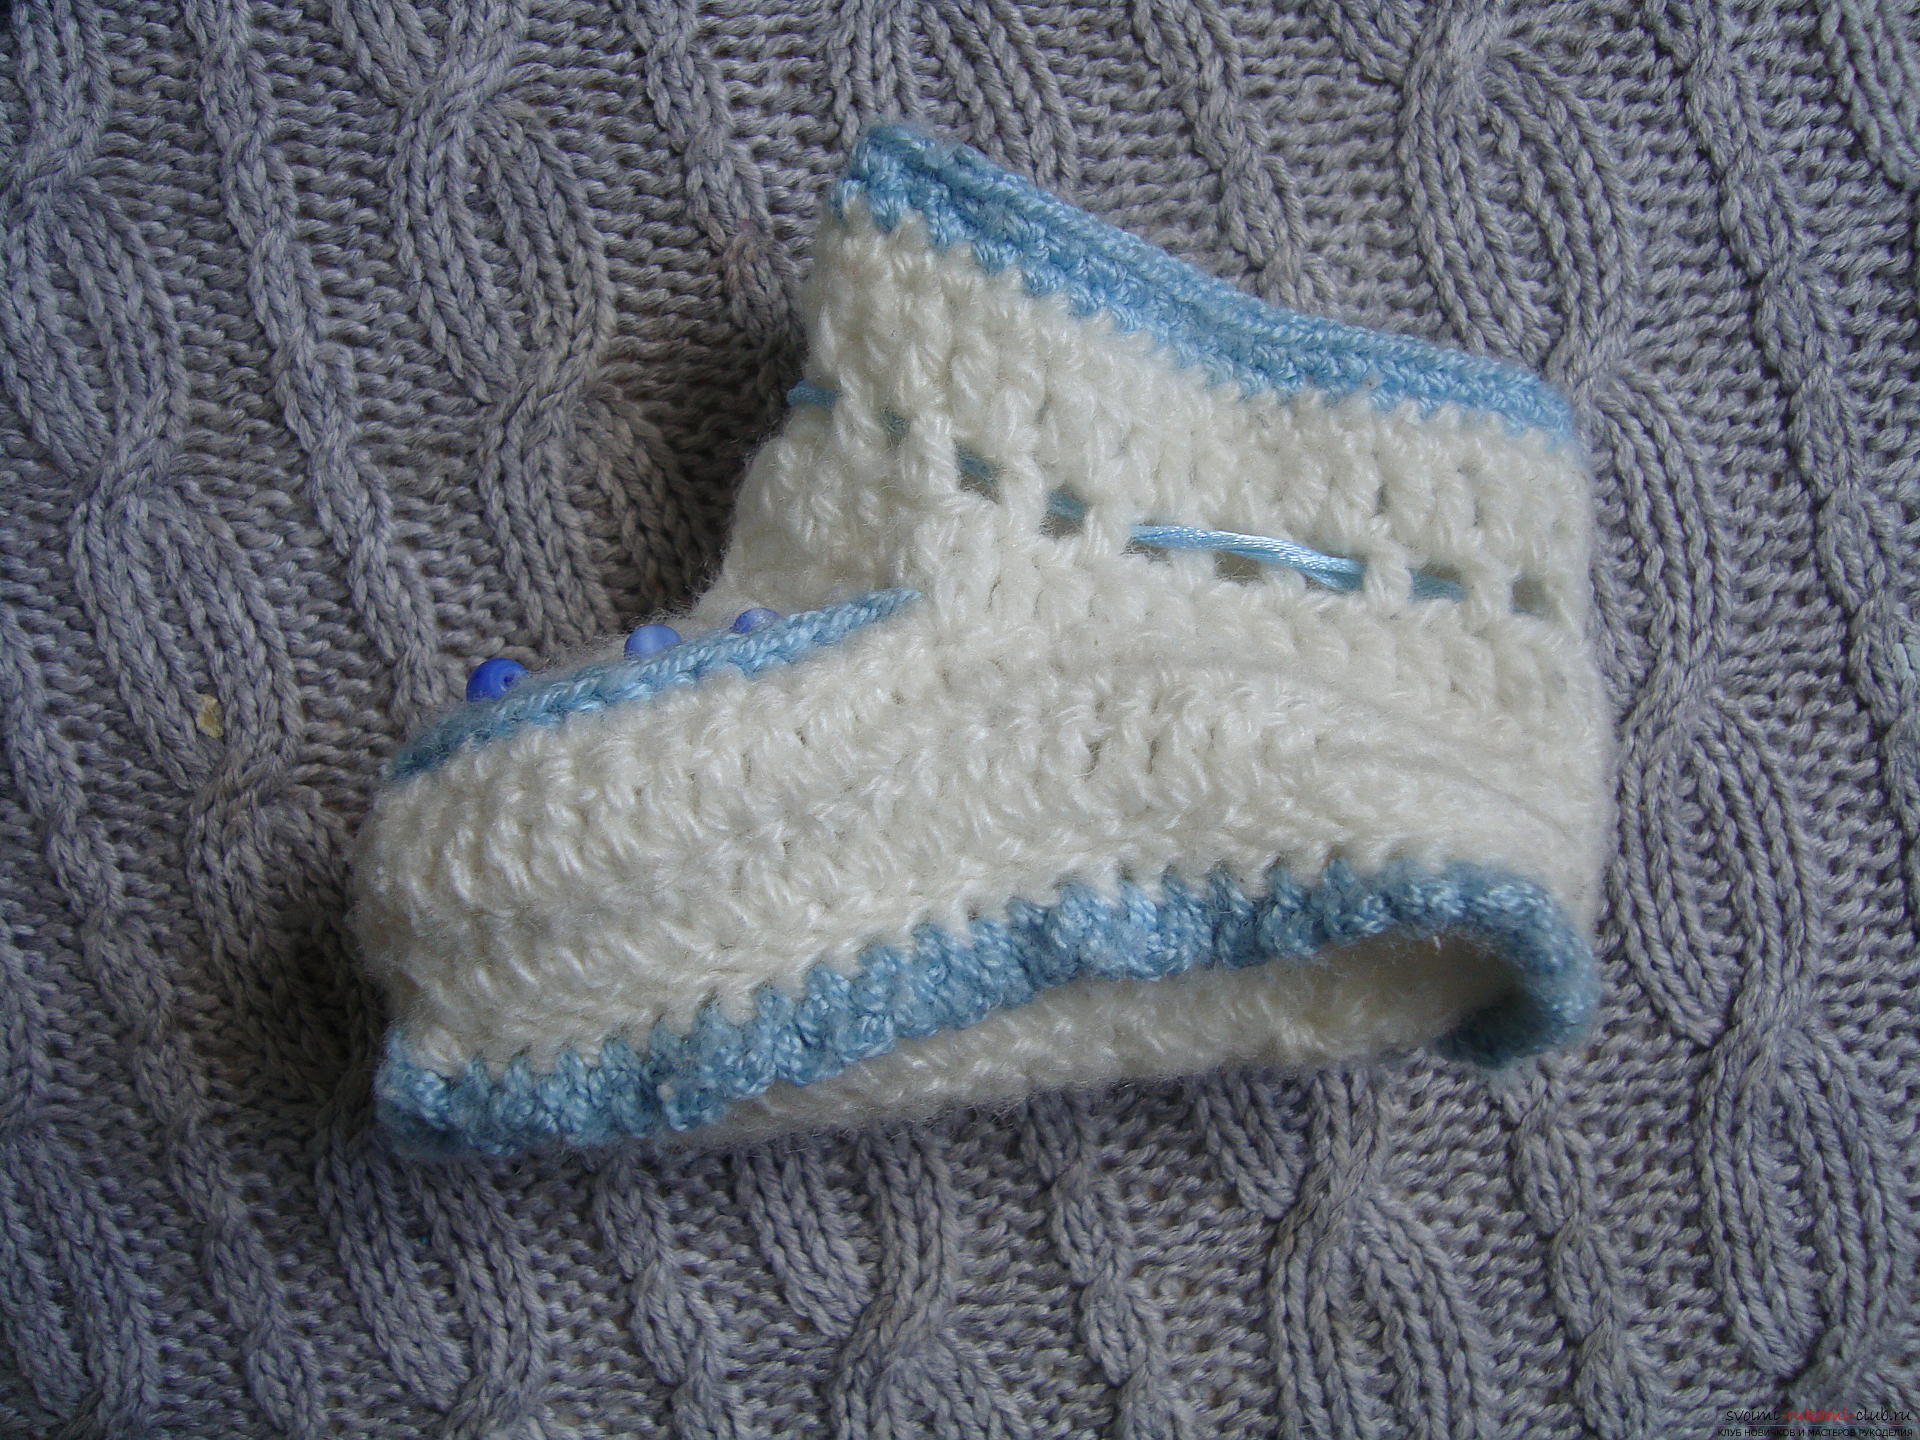 Blue yarn when creating the upper strapping lightlystretches so that you can give the desired shape of the product. When the thread is pulled together, the top takes a strict vertical form and does not fall down. The second row of blue yarn is tied into each pigtail of the previous row, that is, it is not necessary to reduce the number of loops for drawing the product. When the main work is done you can start finishing. It will help to decorate the product several rows of contrasting blue yarn. One strapping from polostolbikov it is recommended to make on edge, where the sole goes up the product. To do this, tie the blue thread to the loop, located behind the product, and create loops around the circle. When the row is finished, tighten the loop and put the end of the thread on the inside of the product. Another strapping should pass along the edge of the spout, where the front part was formed. For her, also tie the thread on the edge of this row and create polustolbiki by the place where the connection of the vertical junction and the horizontal part that closes the front area of the foot passes. A thin tape can be inserted into that part of the pinets, which will grab the ankle of the baby. At this point, three rows of bars were created, the ribbon was best placed in the middle row. The edges of the ribbon can be decorated with beads, but in any case knotted on them and you need to burn the ribbon cut so that it does not dissolve under the curious play of the baby with blue tips. Another blue beads are sewn on the toe in the form of a semicircle. Such unpretentious elements give a gentle look to the product, make it more unique and interesting.
 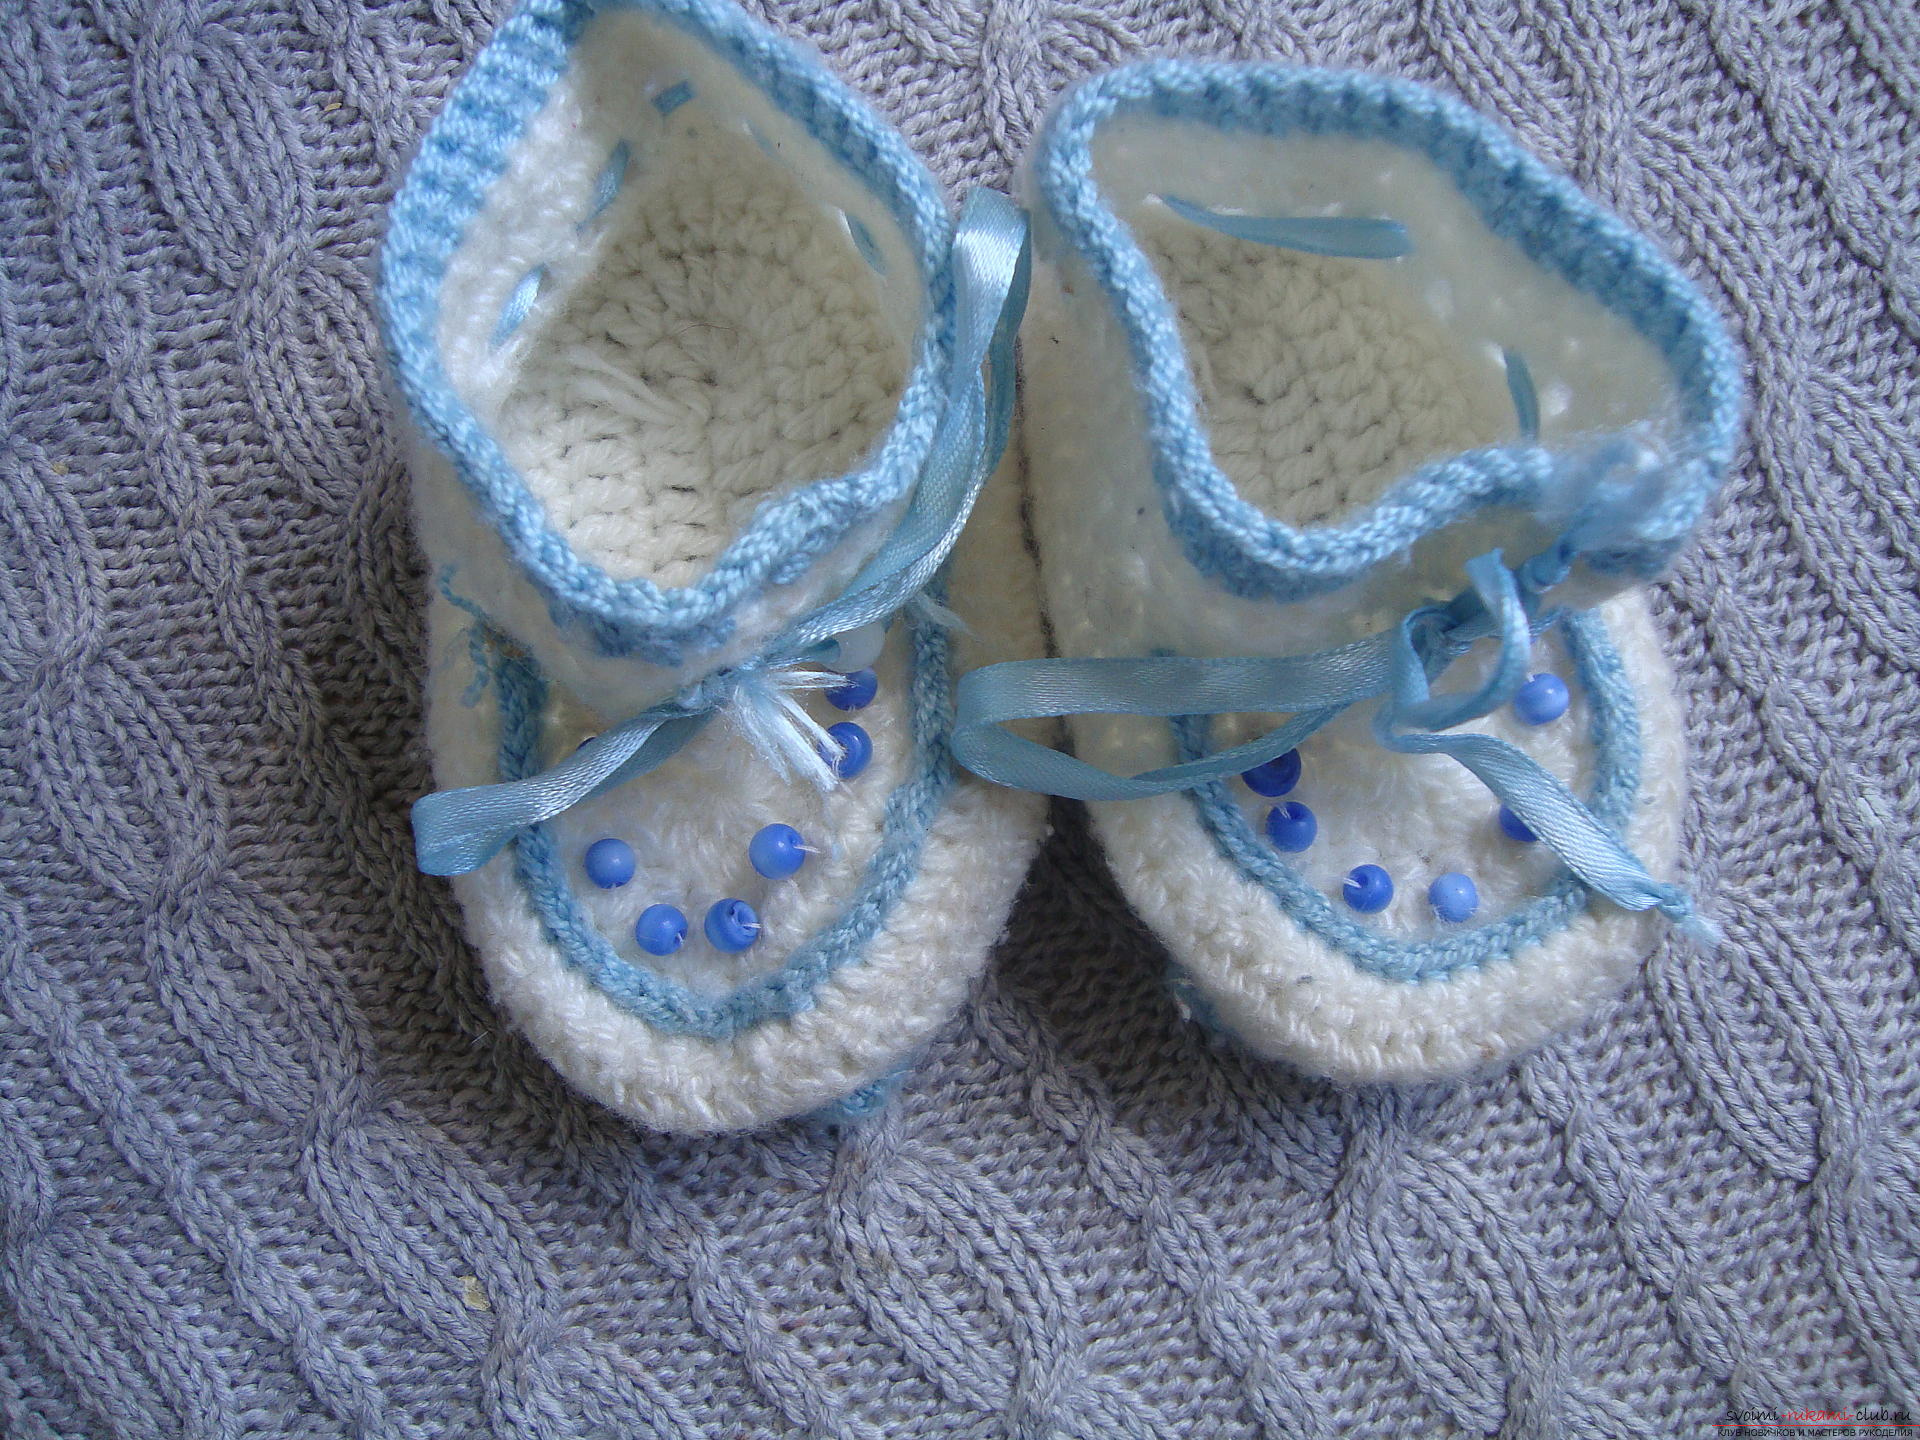 Knitted booties are ready. They will not only warm the baby's legs and serve as a bright accent in the wardrobe of the crumbs. Such booties are suitable for a very small child, who only lies in a stroller and for children, students stomp their feet.
Comments
Related posts:
 Booteki "Boats" for the youngest. How to tie booties? Lesson on knitting pinets with step-by-step instruction and photo
 How to bind booties for a baby with their own hands? Knitting lessons on knitting needles for a boy
 How to crochet booties "Bunny" for your baby? Detailed description of the steps with photo and video instruction
 How to crochet a warm vest for a boy? Step-by-step recommendations for knitting a vest with an original pattern with a photo and video instruction
 How to quickly connect small openwork napkins "under the hot" crochet? A lesson on knitting napkin napkins with your own hands