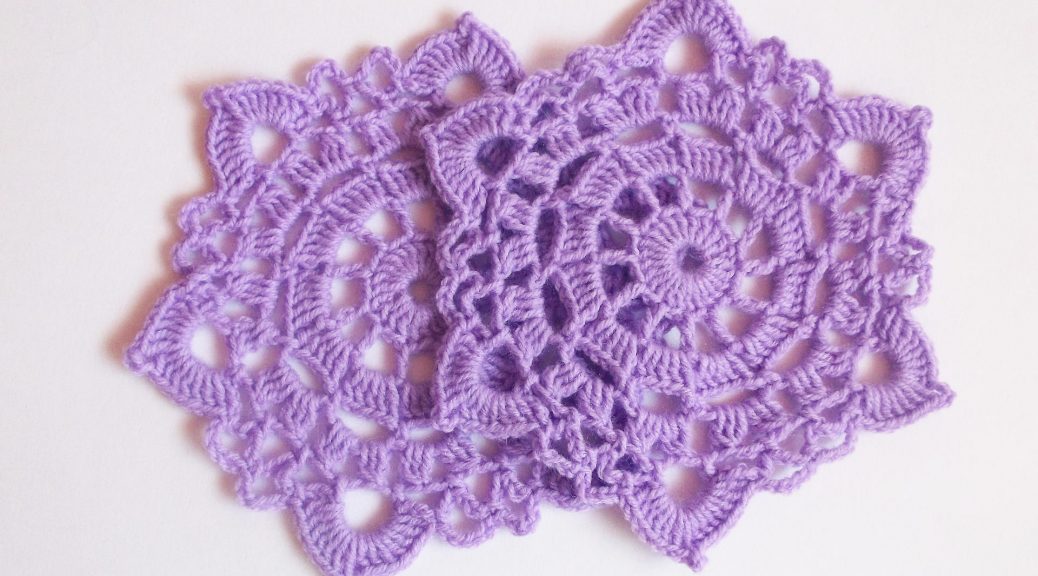
How to quickly connect small openwork napkins "under the hot" crochet? A lesson on knitting napkin napkins with your own hands
Beautiful openwork napkins crochet alwayswere popular with needlewomen. They can be large and small, multicolored and monophonic. They perfectly complement the interior and emphasize the style and personality of the owner of the dwelling. Now, small napkins are very popular. They knit quite fast, but look very nice and original.
What is necessary?
To knit one of these napkins - supports we need:
- hook;
- yarn.
Yarn you can choose any color you like. At me lilac. It is better to take not very thick yarn. Since napkins from thick yarn do not look very neat. You can use for napkins, for example, children's yarn. It is soft and not thick.
Stages of work
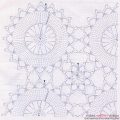
We begin knitting napkins from the middle, from the center. We need to dial five air loops. We will close them in a ringlet. Now we will tie in the resulting ring of twenty-four pillars with a crochet. But the first column will be replaced by air loops. We will make them three. In the end we will need to join the air chain, which we did at the very beginning of knitting, to its third loop. 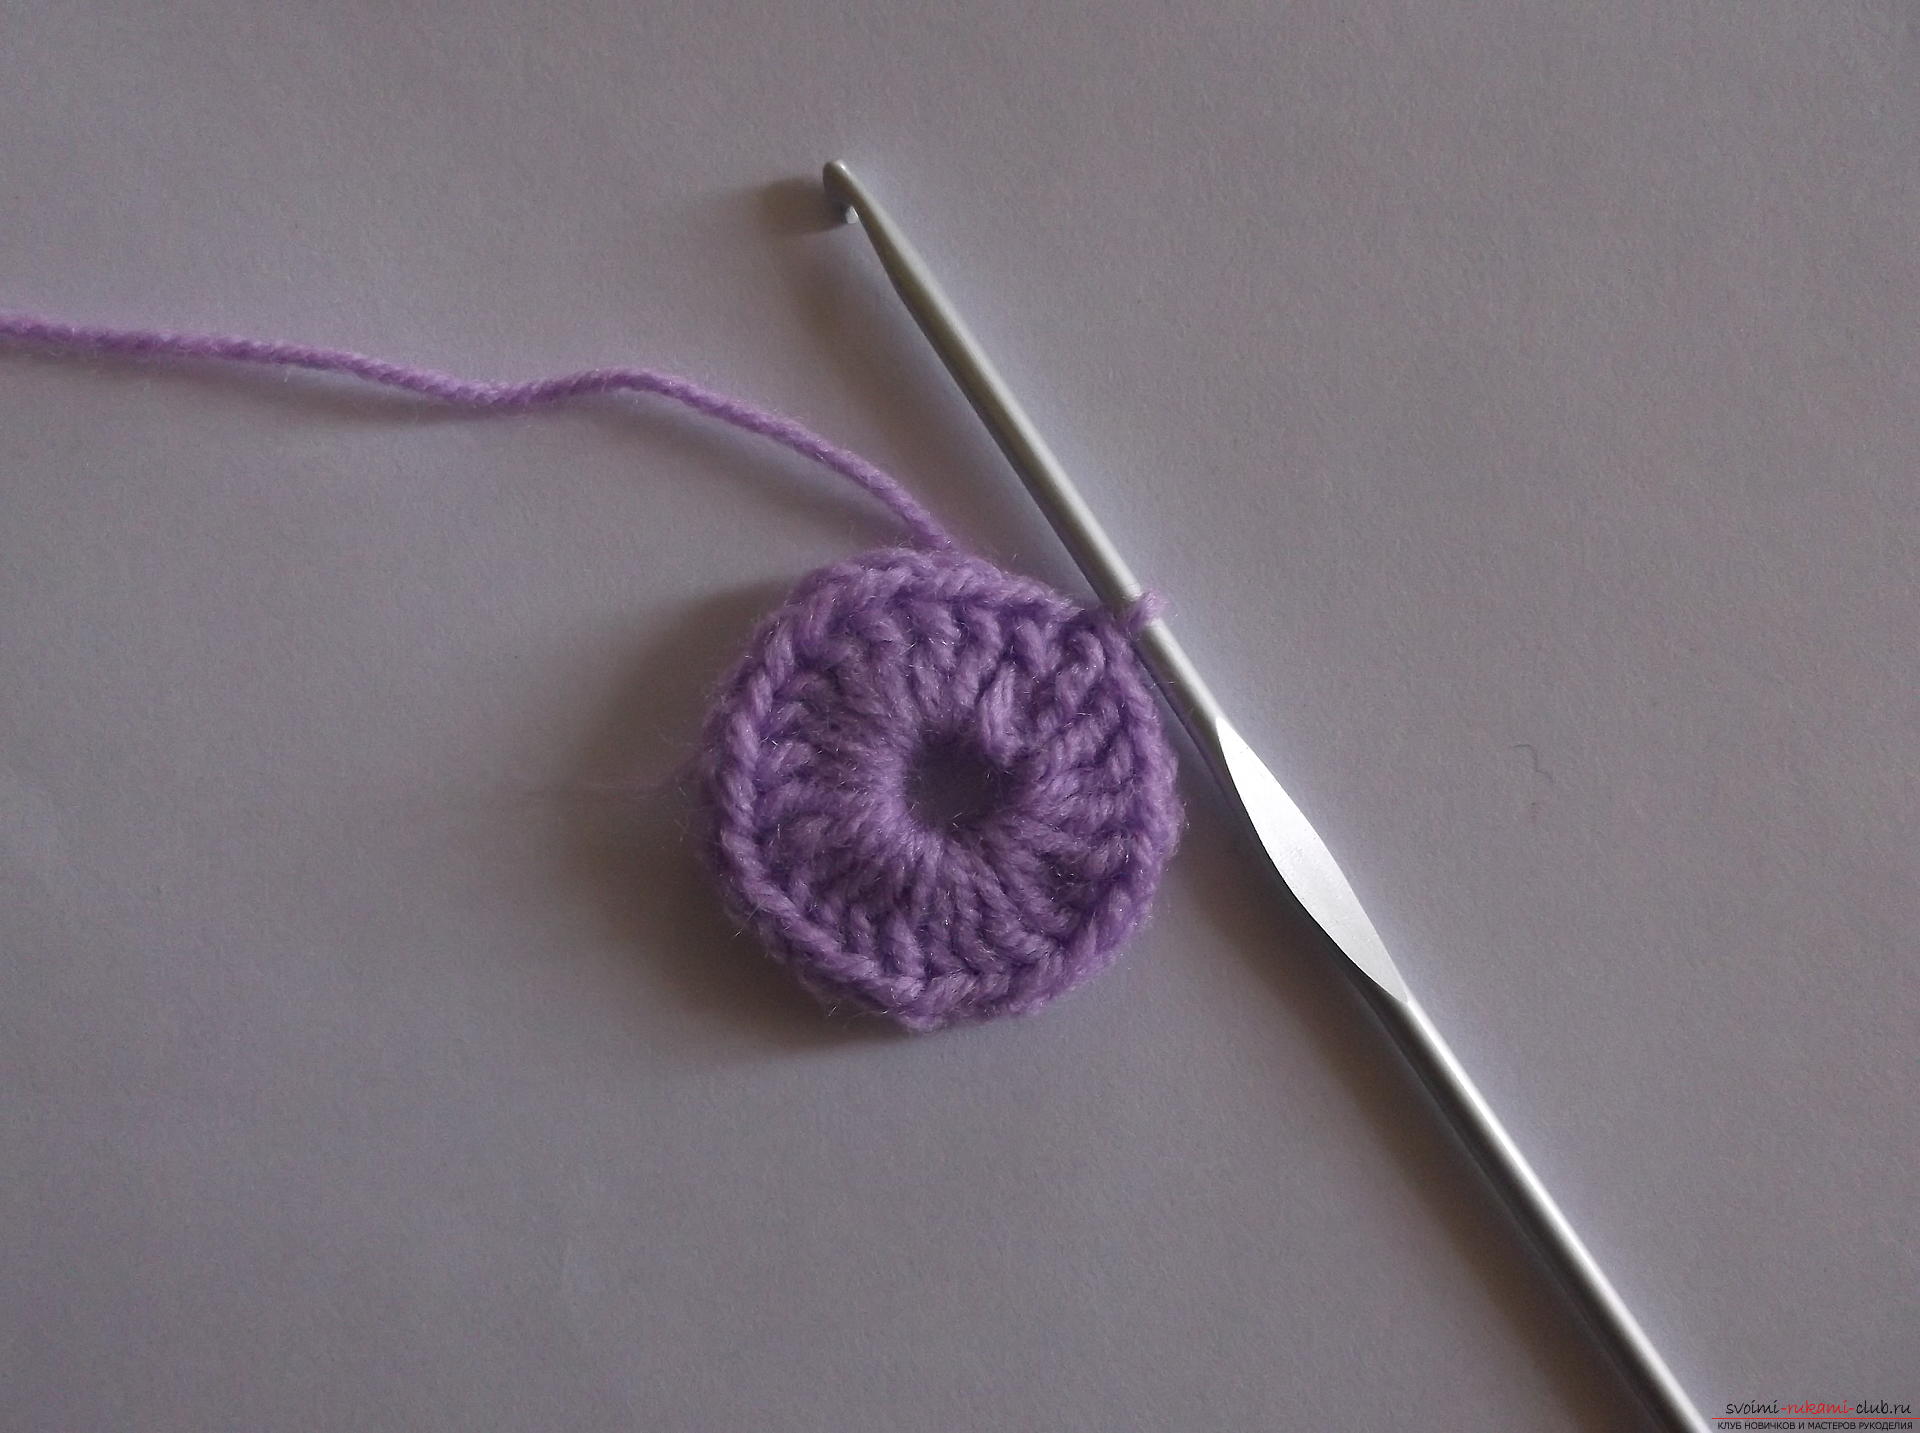 We pass to the second row. We make three air and another loops for lifting. In knitting let's skip one loop, and in the next we'll tie one bar with a crochet. After that, we will again make three air loops and skip one loop of the previous row. And in the next we'll fasten a column with a crochet. So we will continue to knit in a circle.
  Now we go on to knitting the third rownapkins. We make three air loops at the beginning of the row. They will again replace us with one crochet with a crochet. And in the cell (or arch) we will fasten four columns with a crochet. We will make one air and we will fasten five columns with a crochet in the next arch. And so we knit further.
 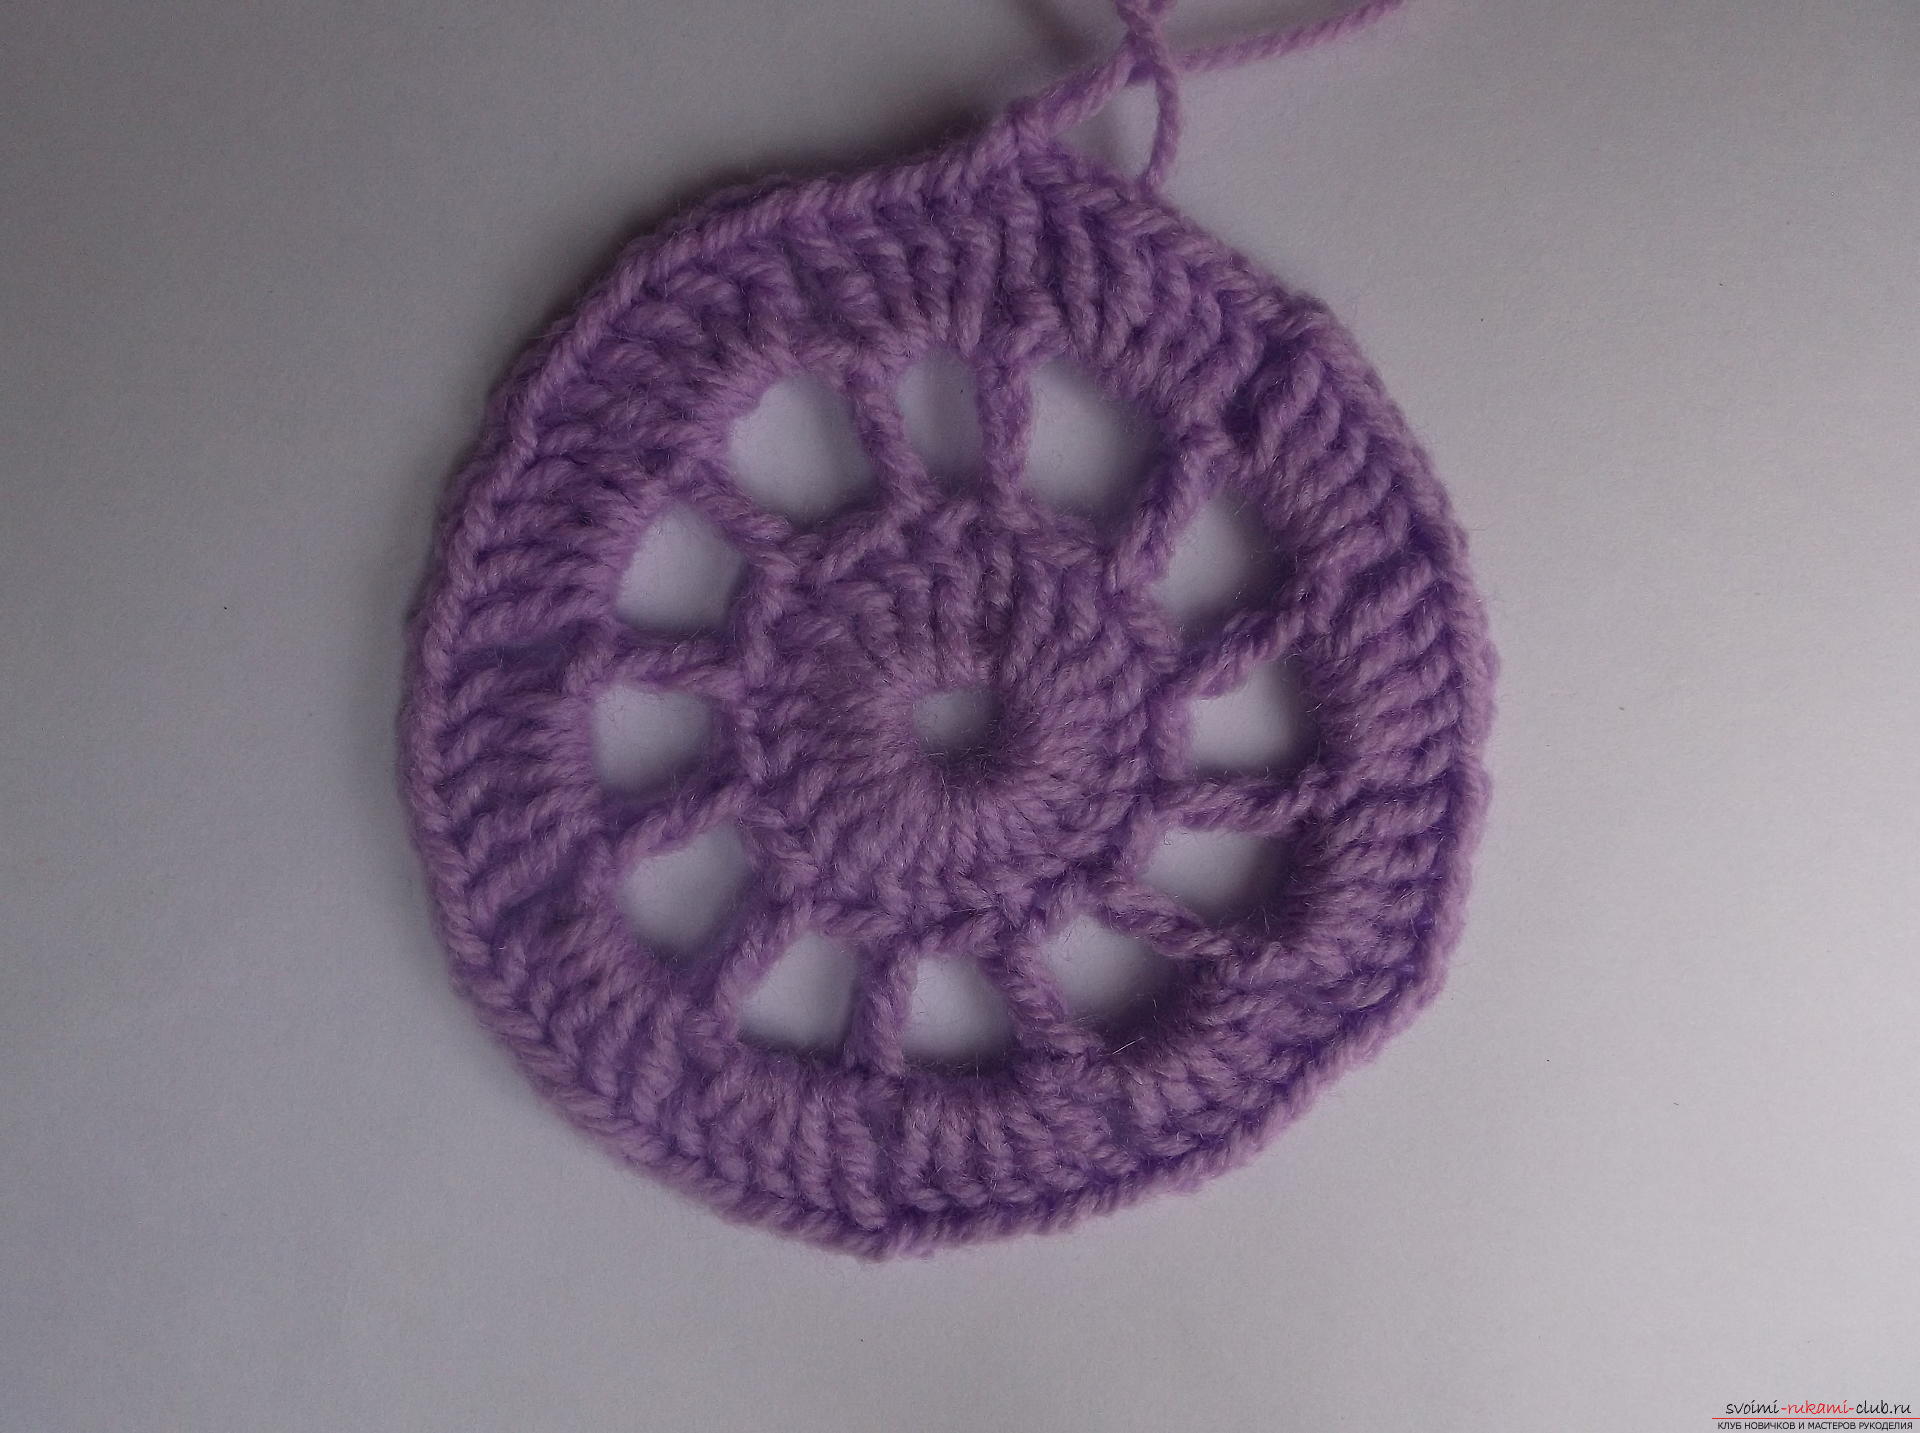 Let's go to knitting the fourth row. In this row we will knit arches from five air loops. We will make five air and we will fasten a column without a crochet under an air loop of the third (previous) number. So we will knit to the end of this series.
 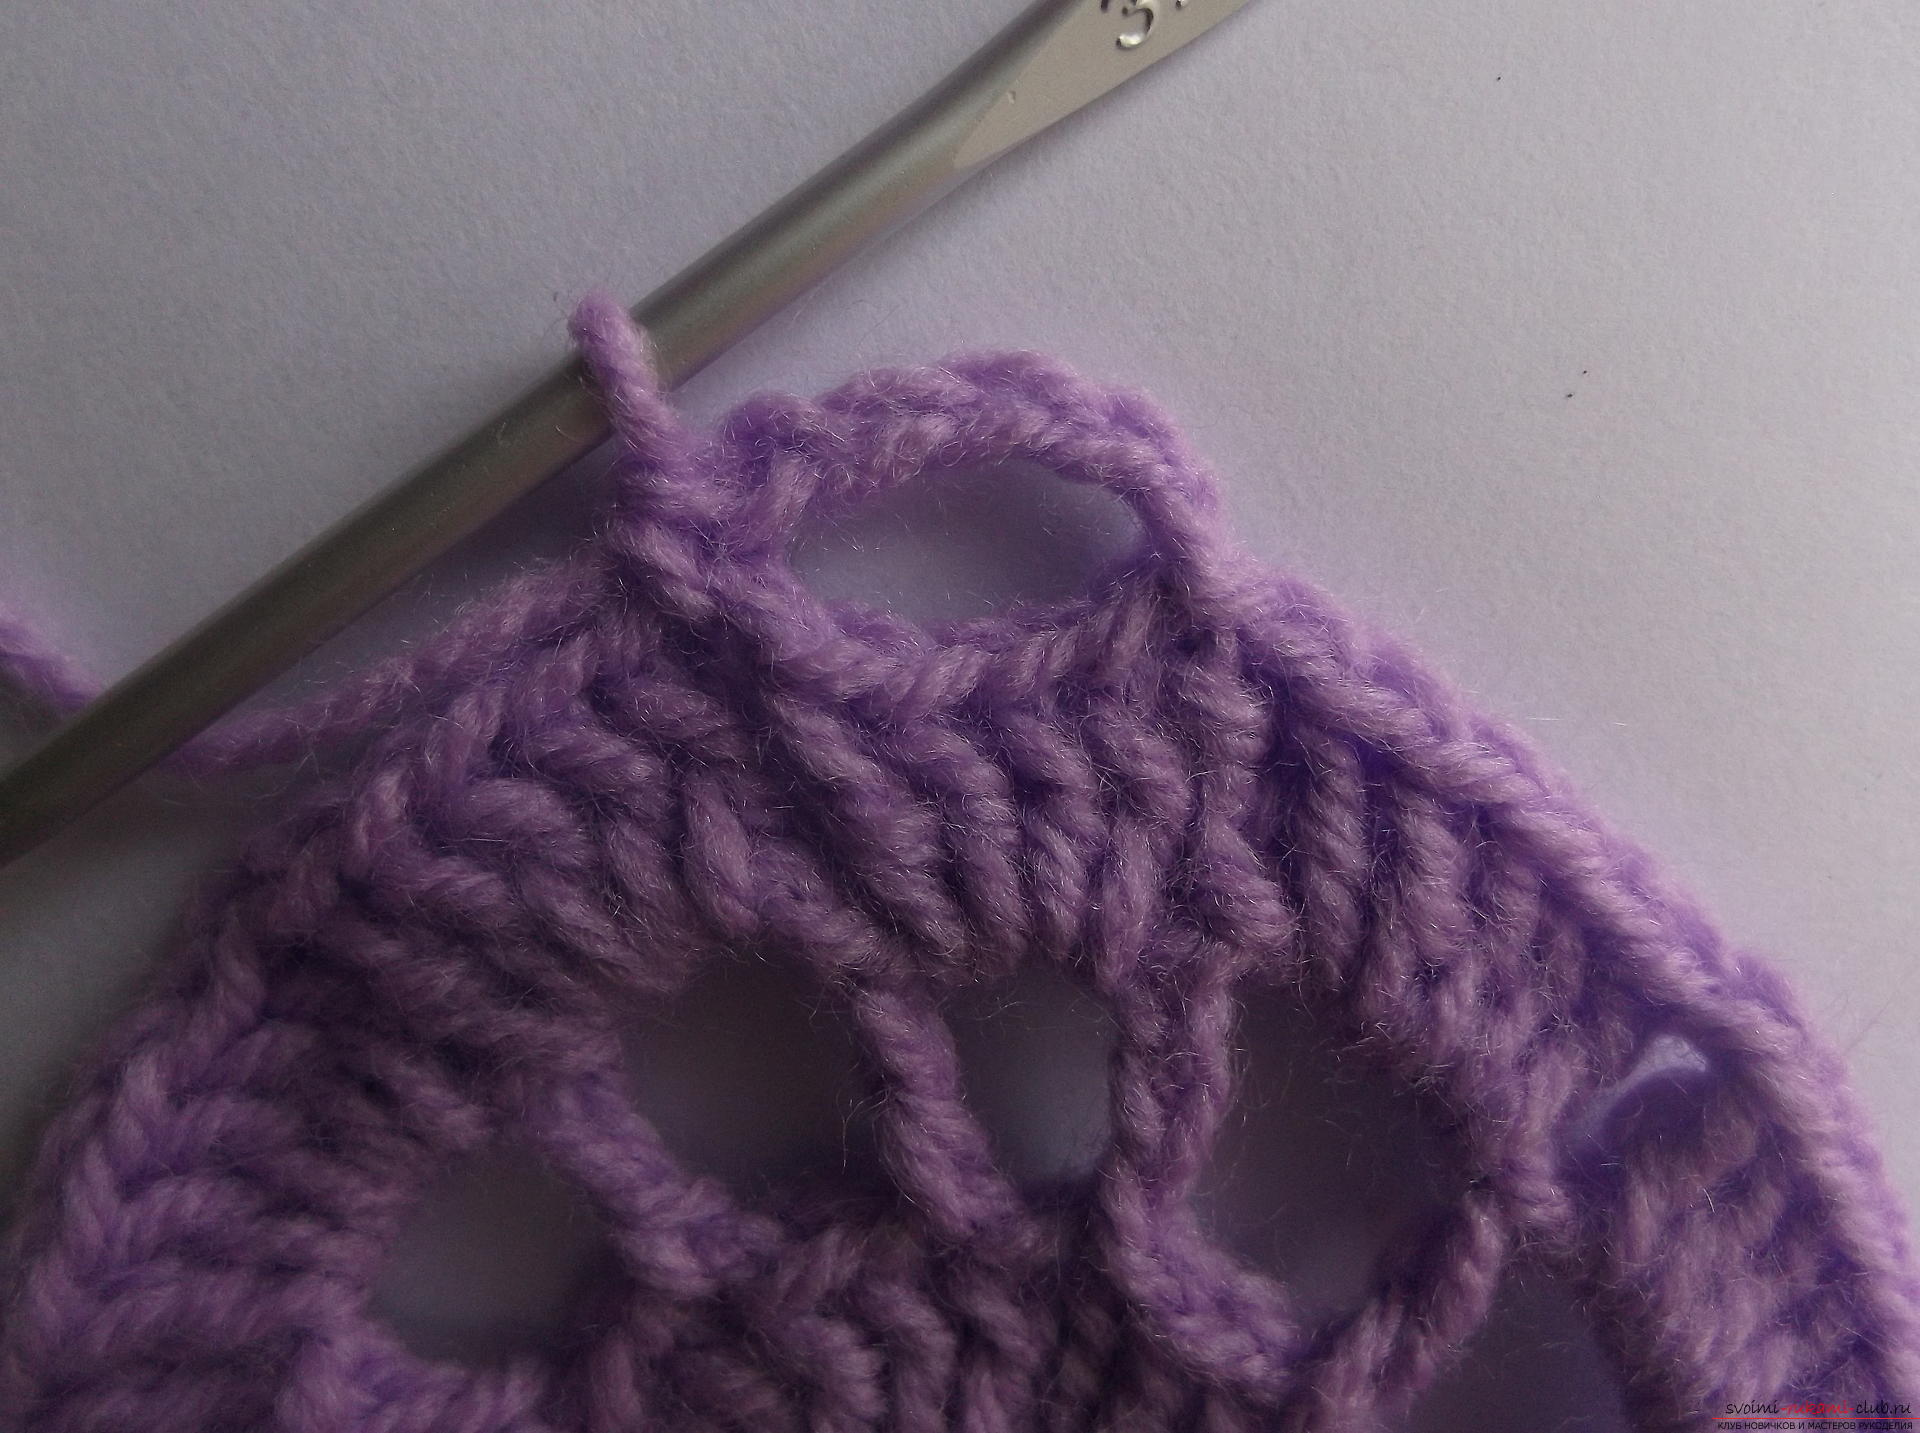 Only the last arch will be tied in another way. Here we will make three air and we will fasten a column with a crochet. So we will be in the middle of the arch.
  Let's go to knitting the fifth row. We make three air loops and in the arch we will tie two columns with a crochet. But we will not fasten each post to the end. That is, we will fasten two loops from each column. So, on the hook we will have three loops. We'll tie them together.
 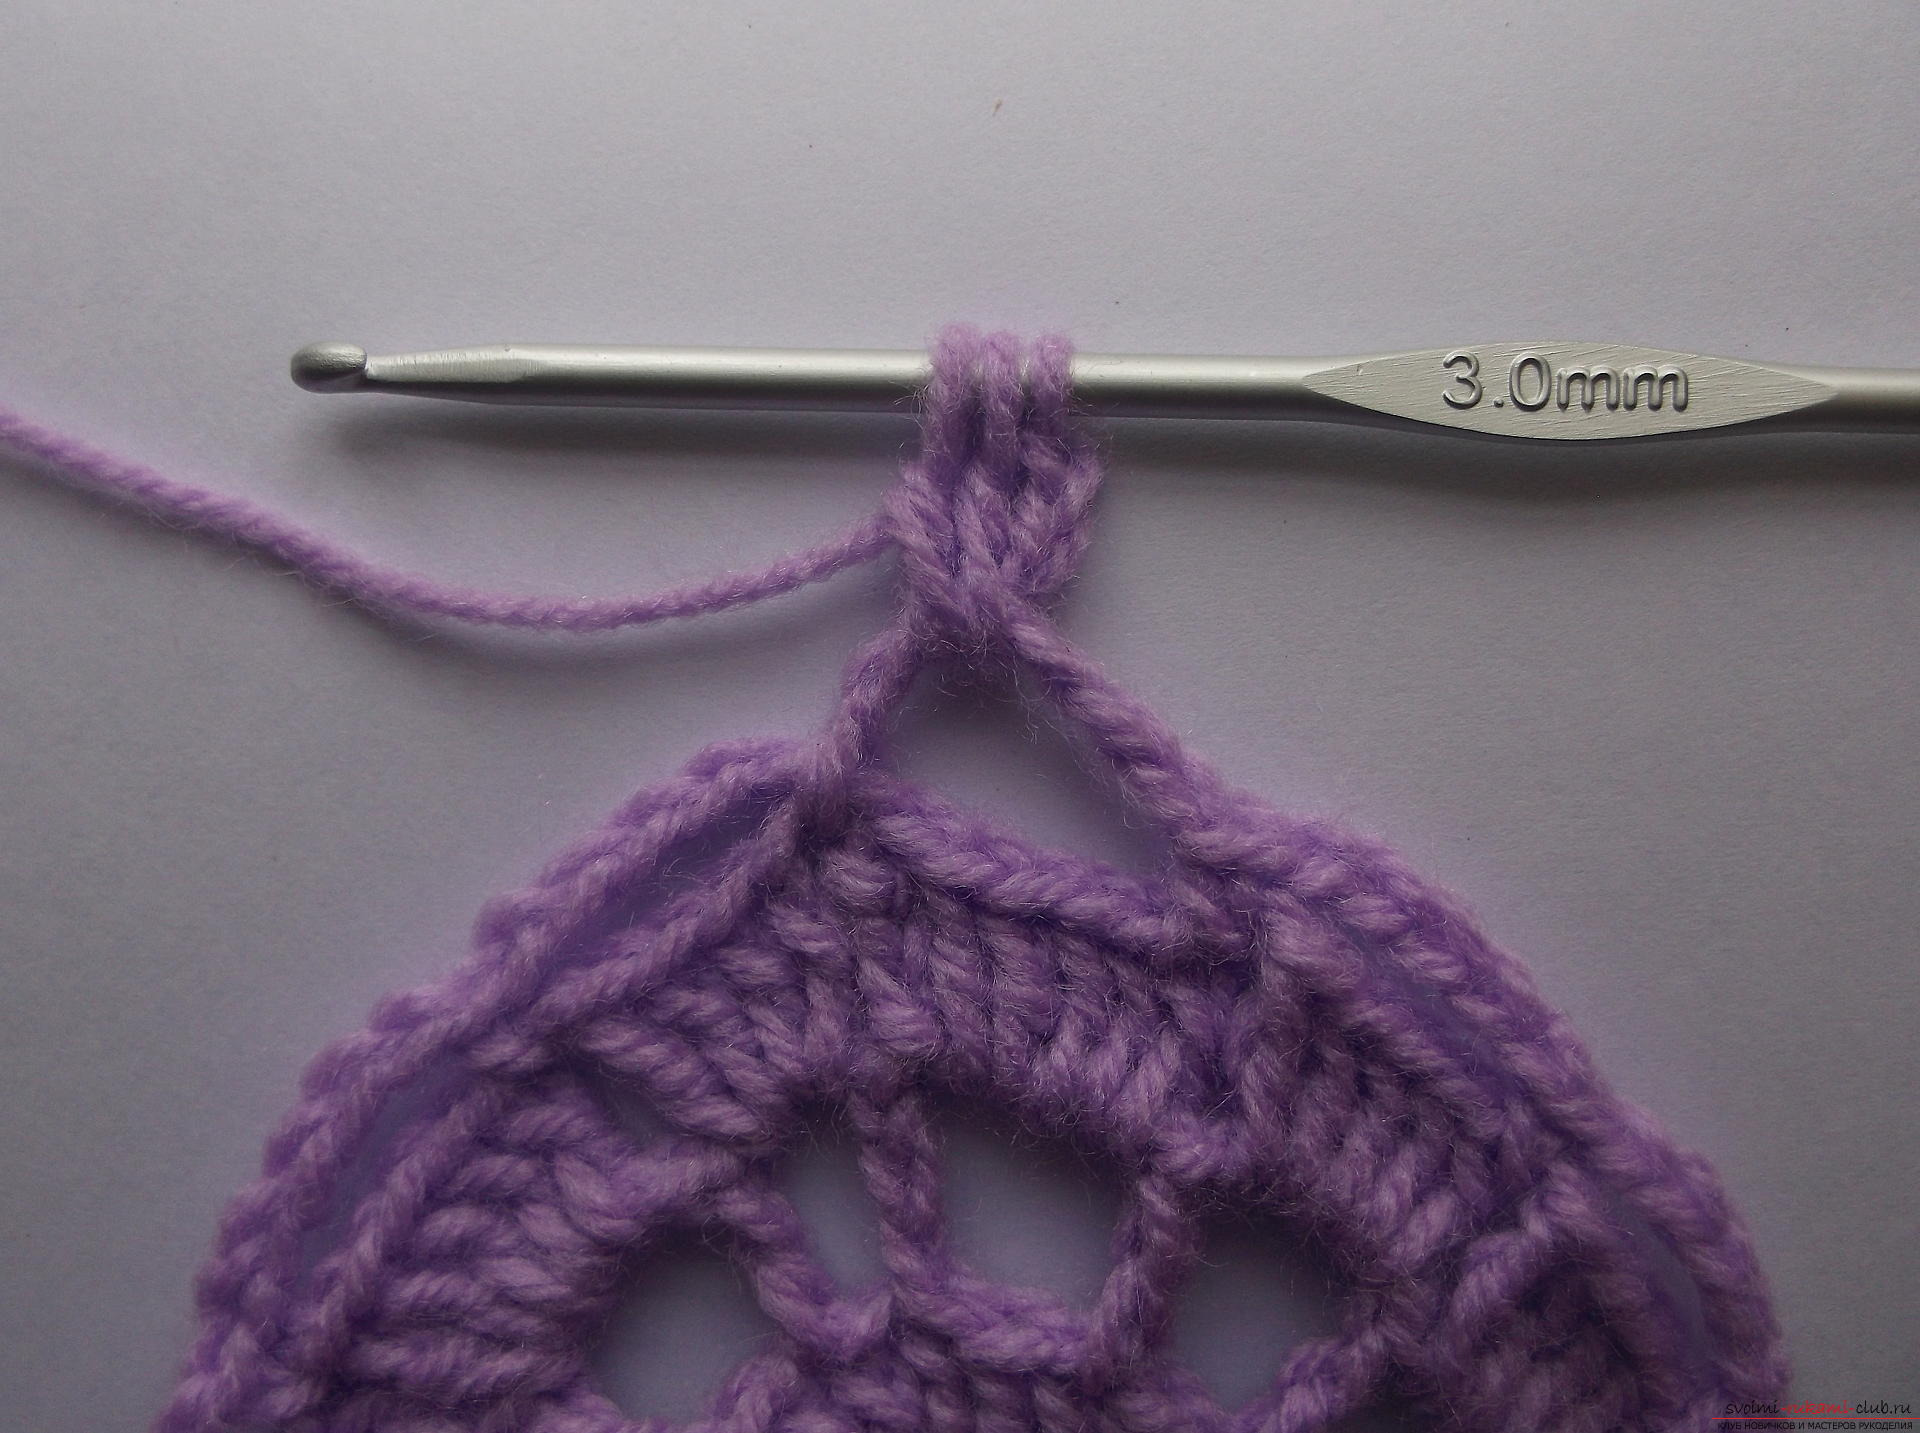 This is a magnificent column. We will make three air loops and we will fasten a magnificent column to the second arch. And again we will make three air loops. We'll make another magnificent column in the same arch.
 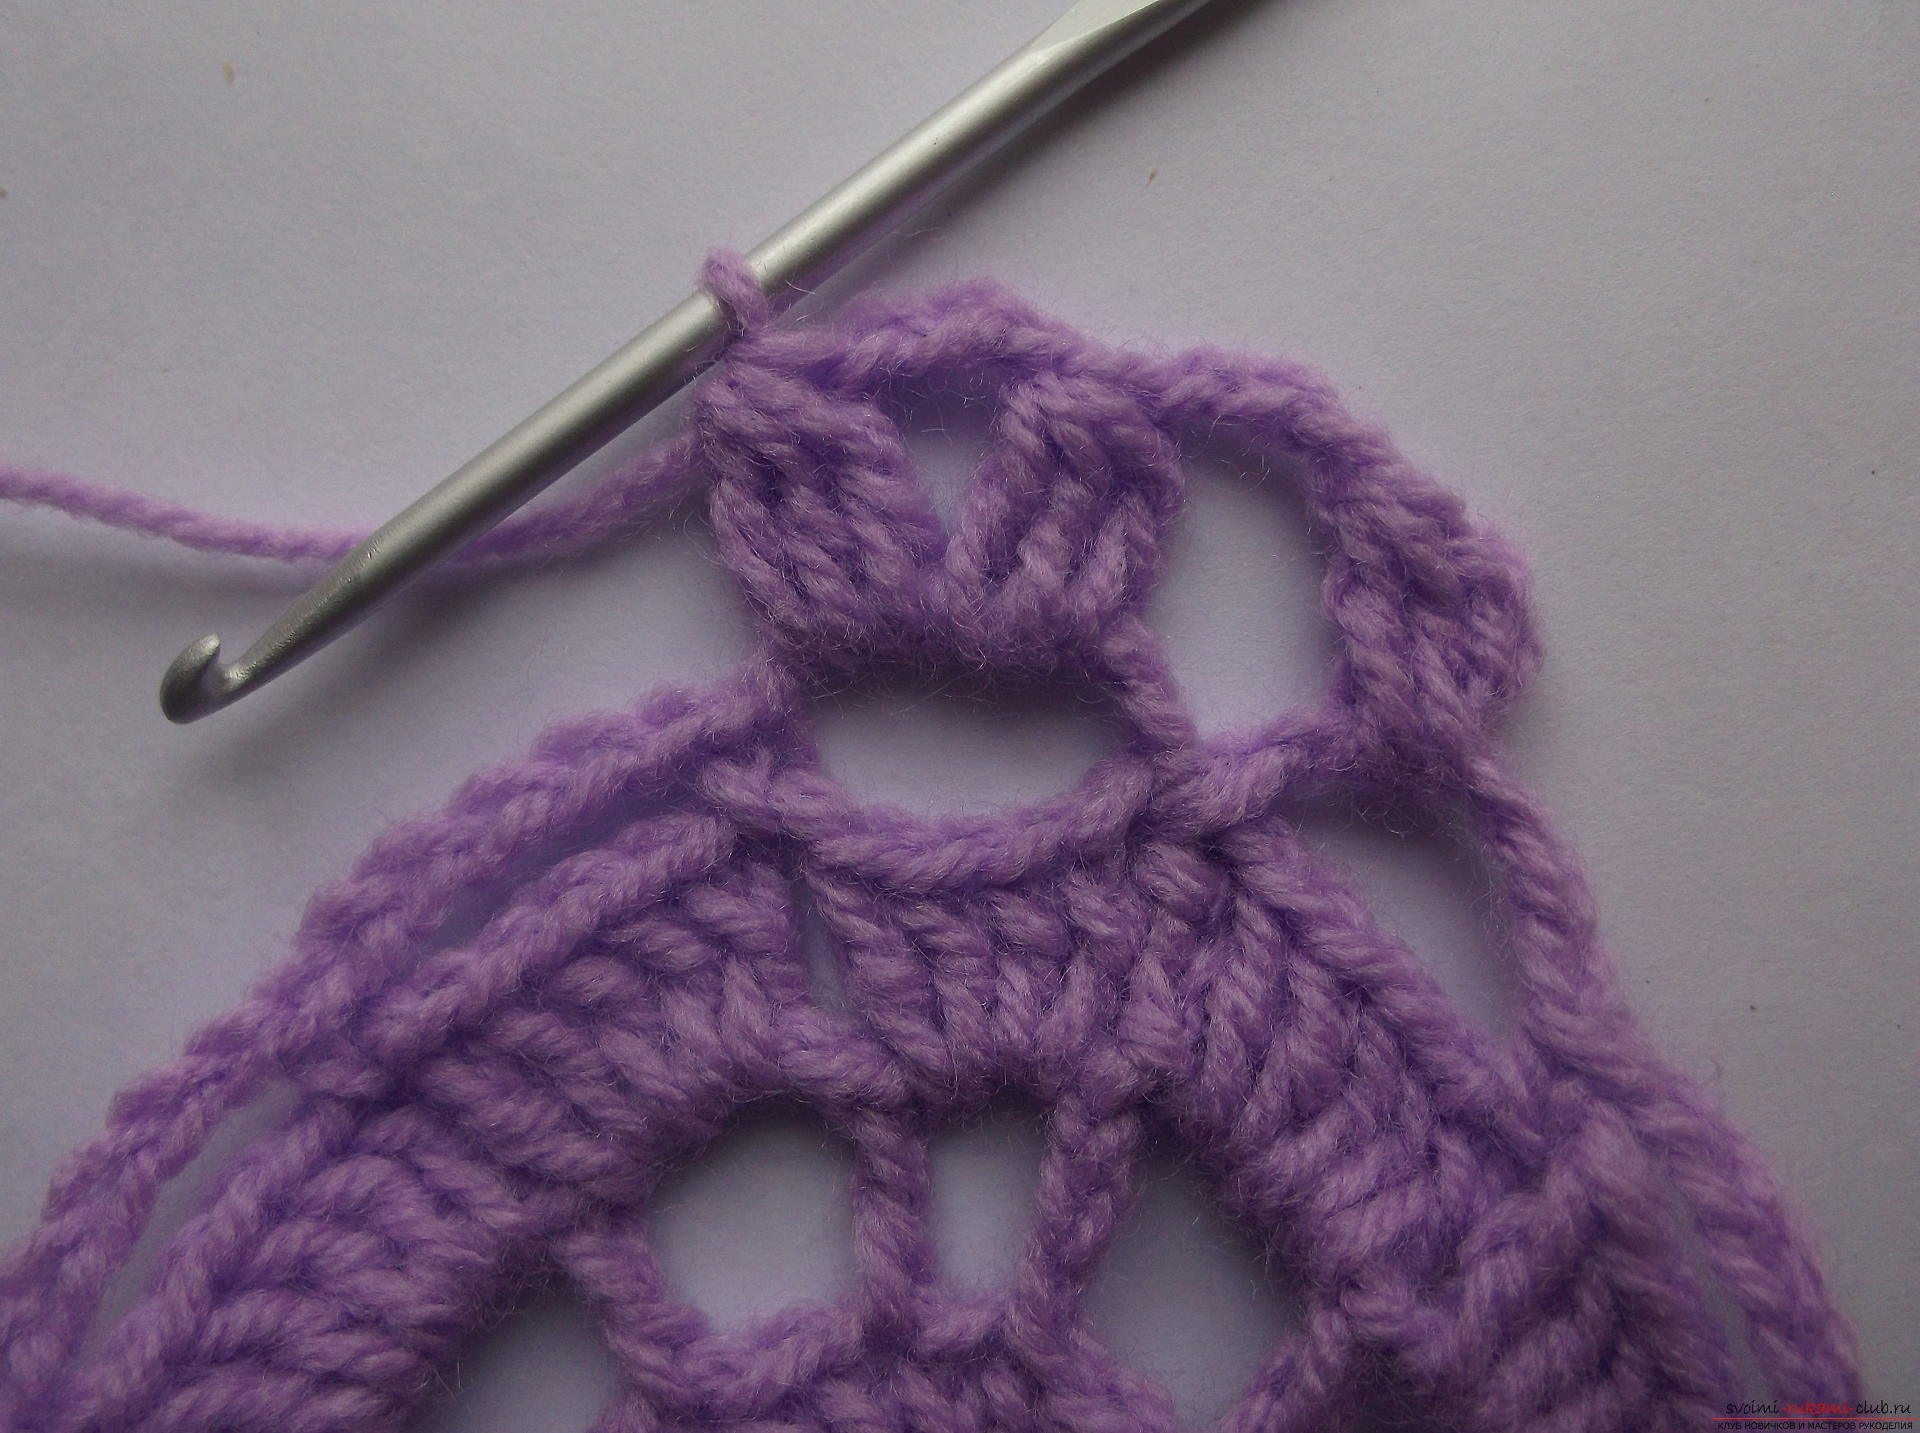 Again, make three air loops and move on tothe next arch. So we will tie all the arches of the previous row. At the end we will not fasten three air loops, but one and a column with a crochet at the top of a magnificent column. This is necessary in order to get back into the center of knitting.
 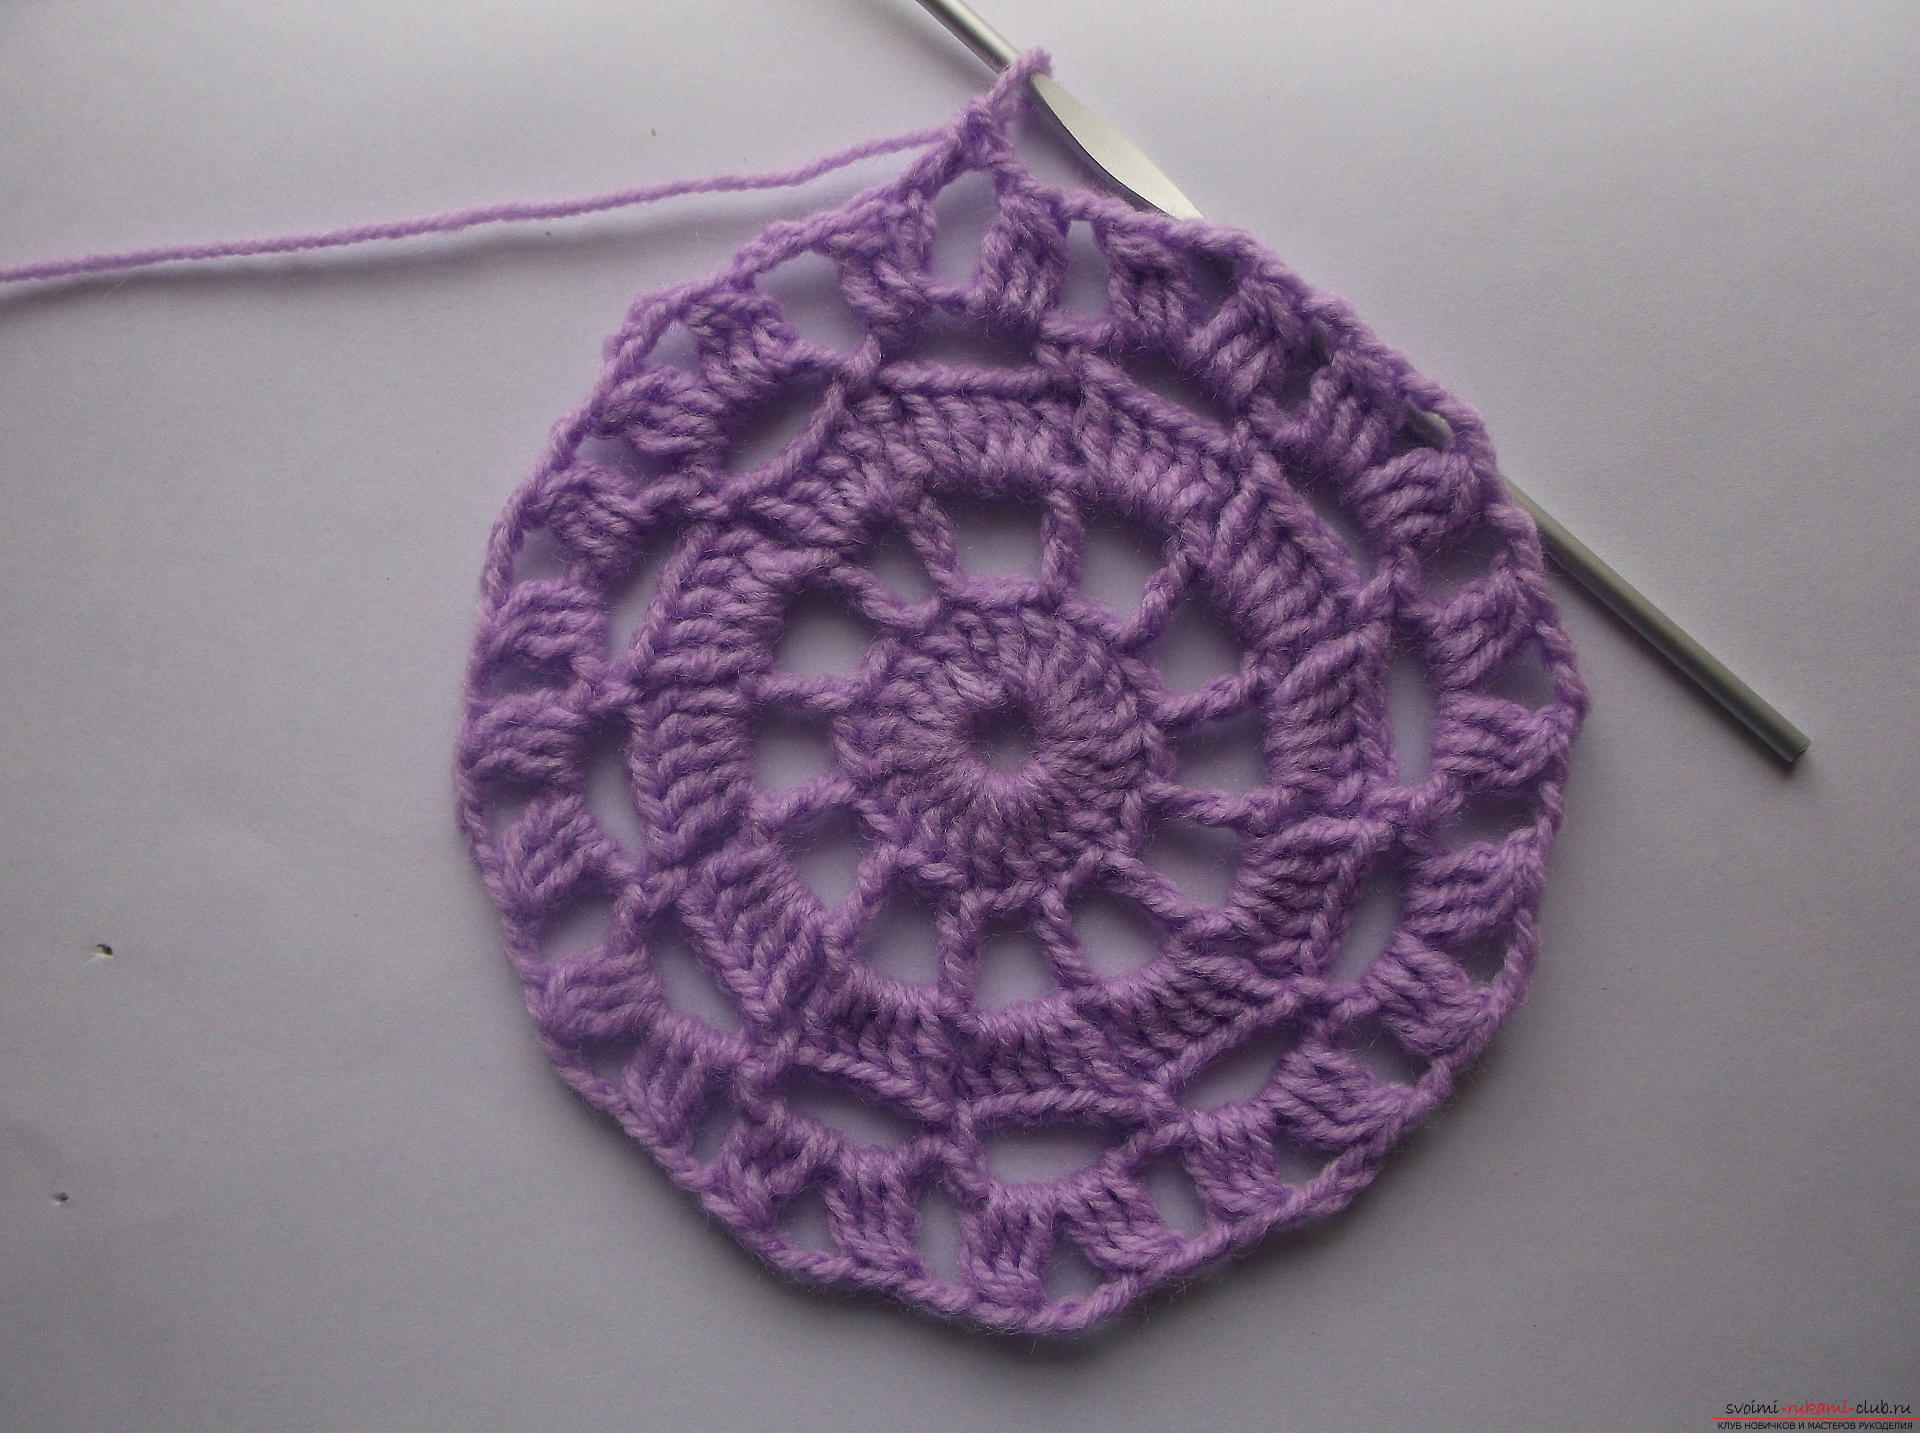 Let's go to the sixth row of knitting. Now we will connect the arches of the five air loops. We will make five air and we will fasten a column without a crochet under an arch. And so we tie the future napkin in a circle. At the end of the row, make two air loops and tie a column with a crochet to again be in the middle of the element.
 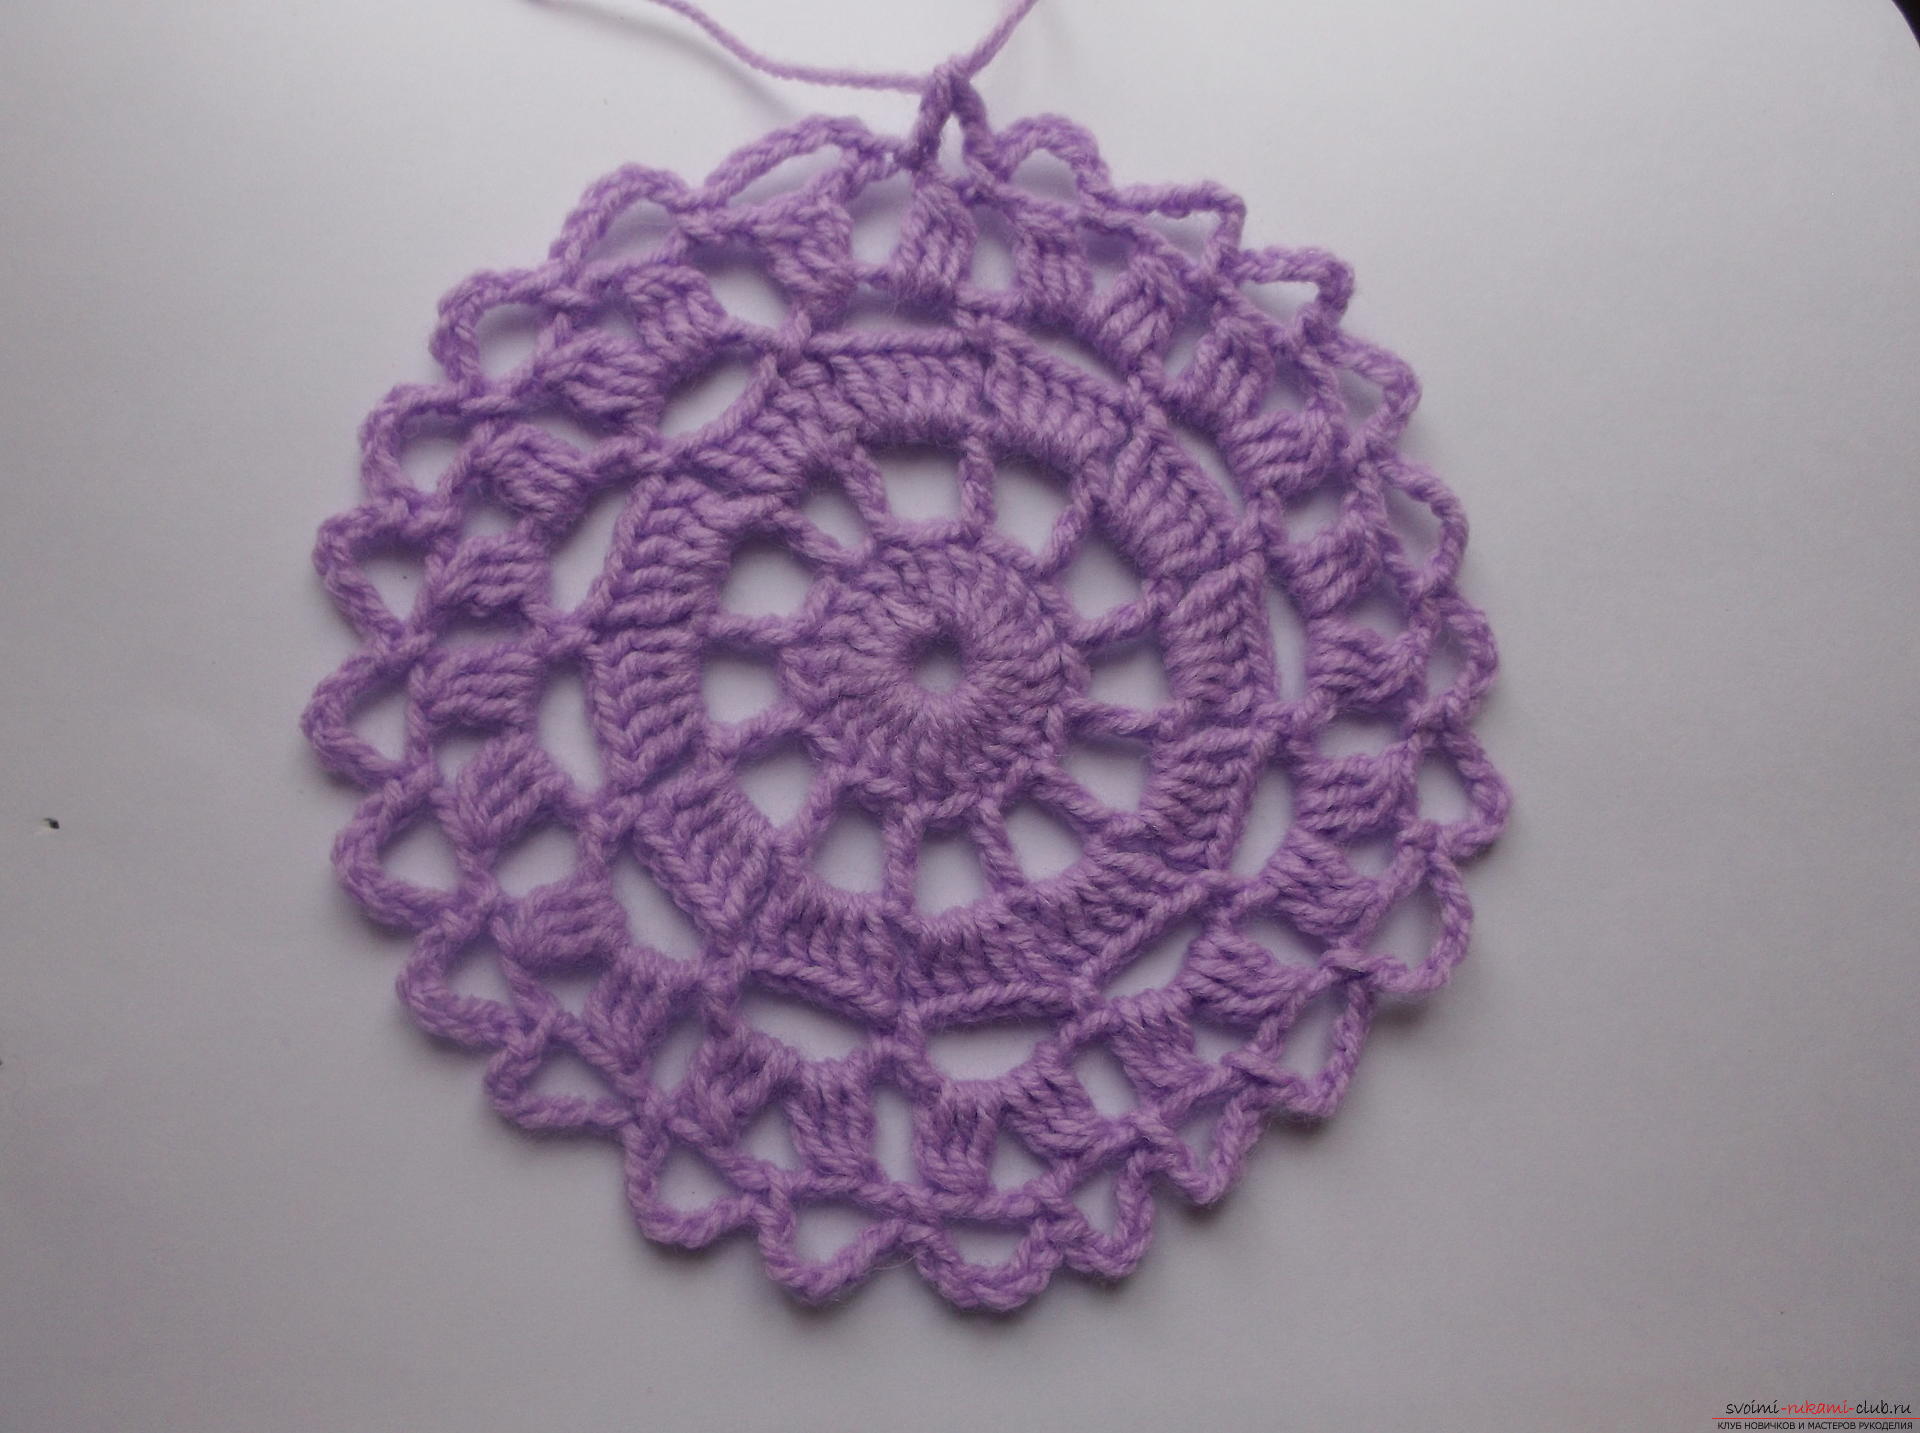 Let's go to the knitting of the seventh (last) row. In the arch we will fasten seven columns with one crochet. We will make three air loops and for the same arch we will fasten seven more such columns. We will connect to the next arch with a column without a crochet. Next, we'll fasten the five air loops and join the next arch with a column without a crochet. And once again we will fasten five airs and connect to the next arch. In the next arch we will again fasten the same element. So we'll knit to the end of the series.
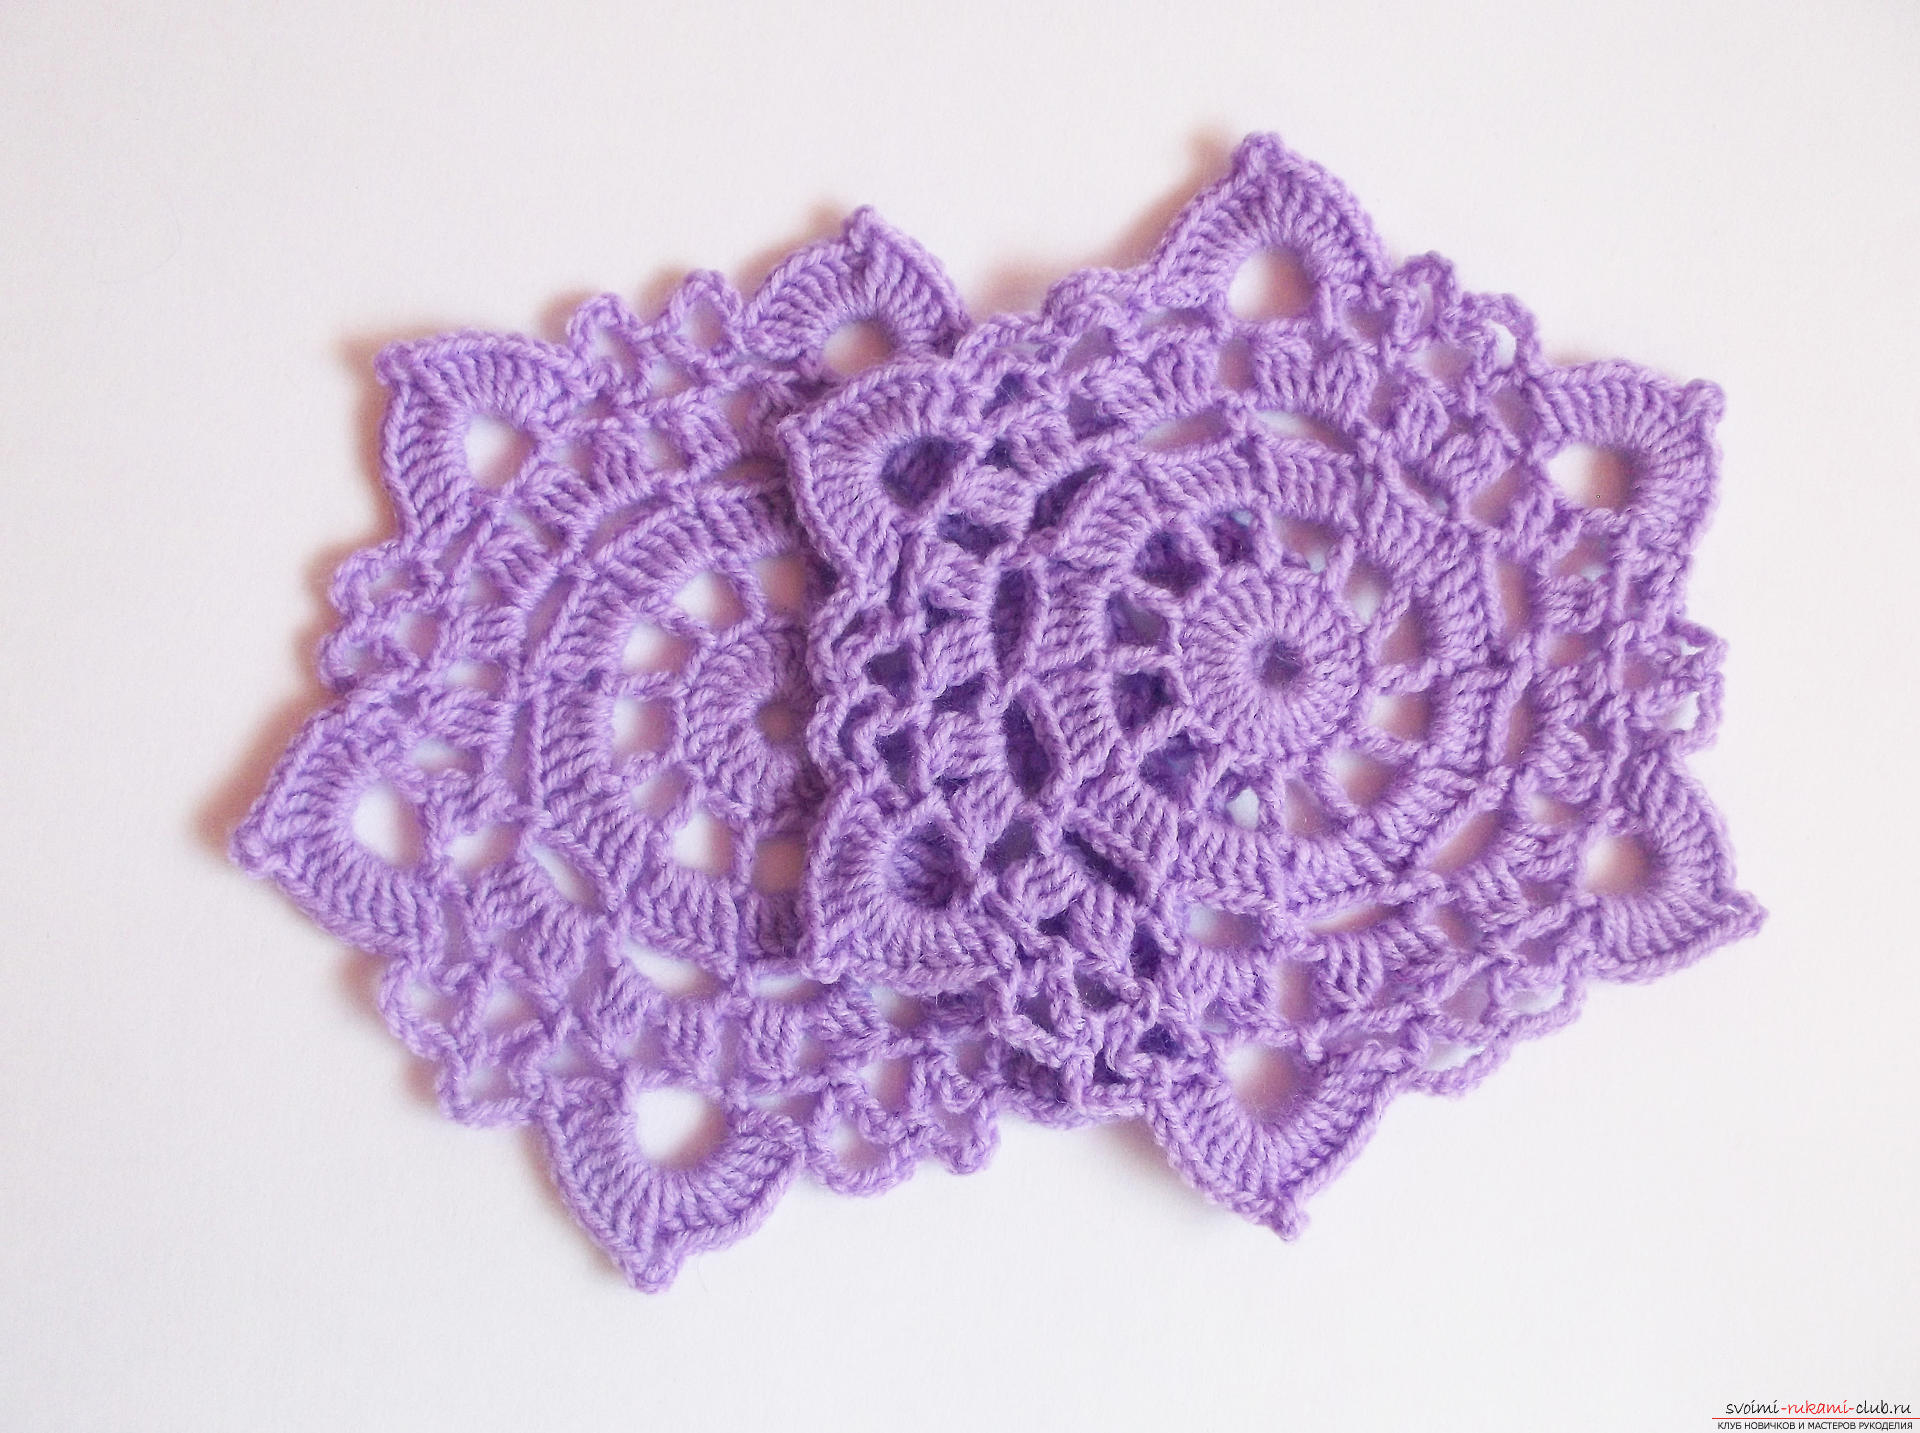
  Here's a napkin - a stand under the hotter we get! Such napkins can be tied up a few and serve coffee or tea, placing cups on such stands.
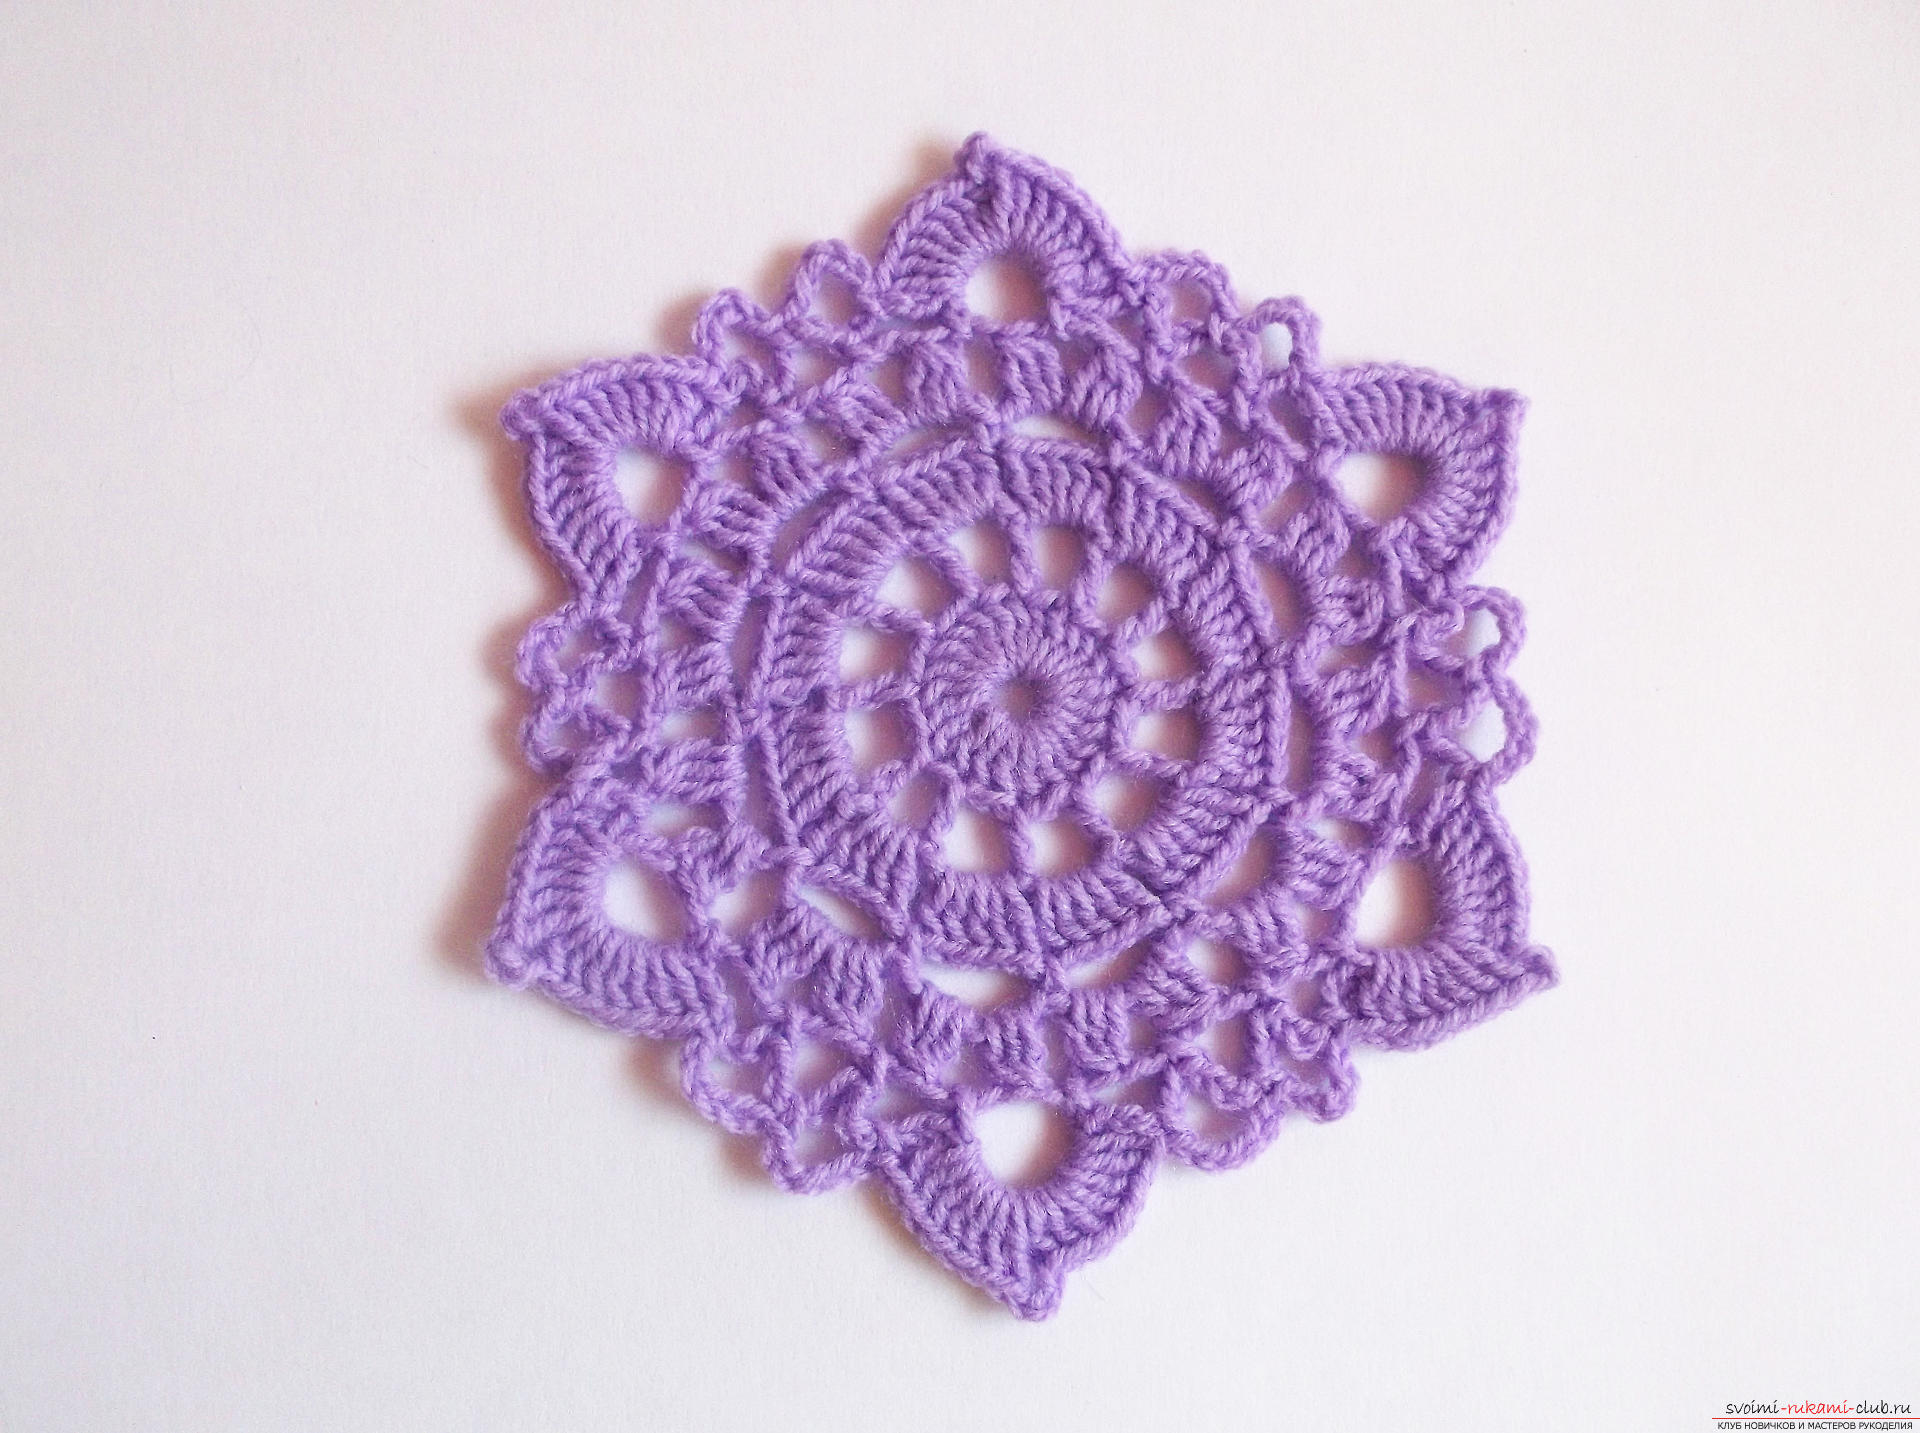
Comments
Related posts:
 How to tie a snowflake with a crochet for the New Year's decor of the interior? A crochet lesson on the openwork snowflake with detailed recommendations and step-by-step photos
 How to tie a Christmas tree crochet? Crochet crochet lesson with detailed instructions and photo
 How to tie an original soft toy with your own hands? Crochet crochet tutorial "Marousi", in a fashionable dress
 How to crochet lace napkins, charts, photos and job description.
 How to tie a napkin, simple schemes for napkins crochet.