How to make a jewelry gift for my mother? Here we will consider in detail the beautiful decoration design
Decided to give my mother earrings? Try to arrange a gift at the highest level. Mom - this is the person who will certainly appreciate exactly your efforts, and not the actual value of the gift. A postcard made with your own hands plus a hand-sewn pouch - these are the things that you will need if you give a pair of earrings. Following a detailed briefing with a lot of photos, you will perfectly cope with the task. So, the postcard. You can buy a postcard in the store - and cut out a portion of it with the size of a calendar, by signing it by hand. You can also take the cardboard and paint it with pencils, or better - with felt-tip pens. I would prefer to prepare a postcard on the computer and print it. In it it is necessary to pierce two holes for earrings - an awl or a pin. 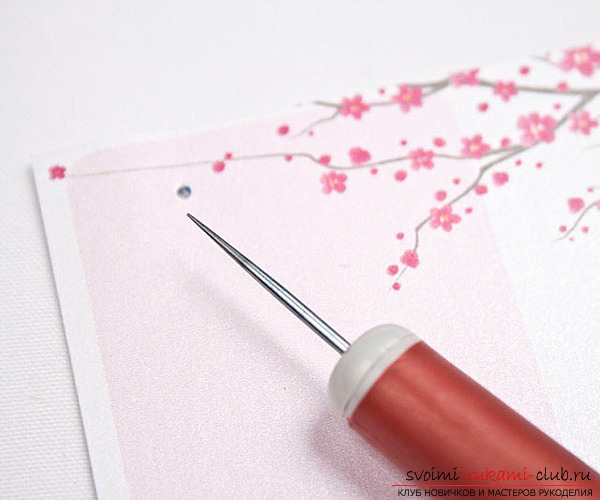
 And here's what you need to create a bag for jewelry:
- - The sewing machine or skillful handles
- - Iron
- - Fabric (preferably silk, satin, brocade)
- - Sewing centimeter or ruler
- - Scissors
- - Thin satin ribbon
- - Threads
- - Sewing marker

How to sew a bag? 1. To create a luxurious fabric bag for jewelry, you should start by laying the fabric on a flat surface with the wrong side up. 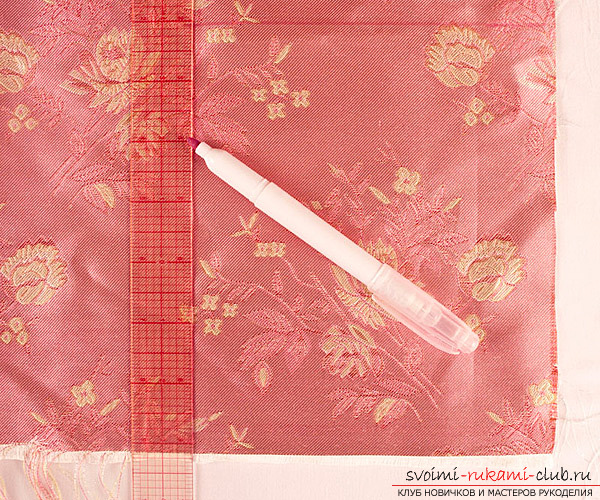 2. Cut two rectangles 17 by 15 cm.
  3. Fold the rectangle by 2.5 cm inside and iron. Repeat this step with another rectangle.
 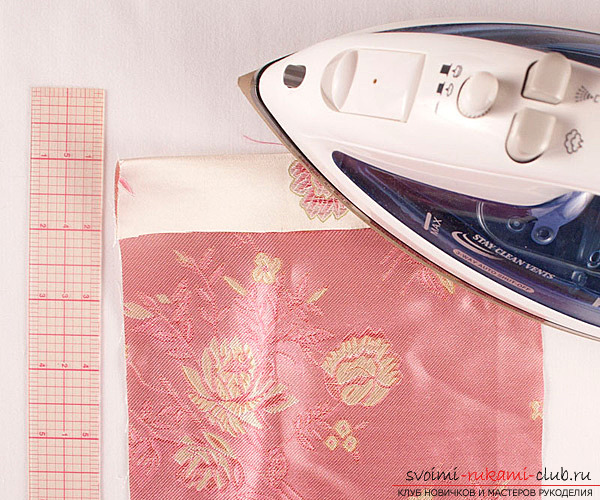 4. Stitch the fabric that was bent. This is necessary in order to draw the tape.
 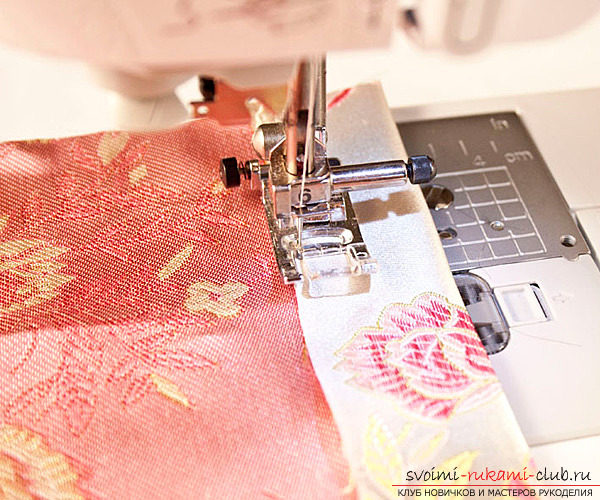 5. Place the rectangles face-to-face with each other and secure with pins around the perimeter, except for the upper side.
  6. Sew the two rectangles with a straight stitch, stepping back from the edges of 5 mm. Do not ask the top where the ribbon will be inserted.
  7. Cut the corners at an angle of 45 degrees (be careful not to cut the line).
 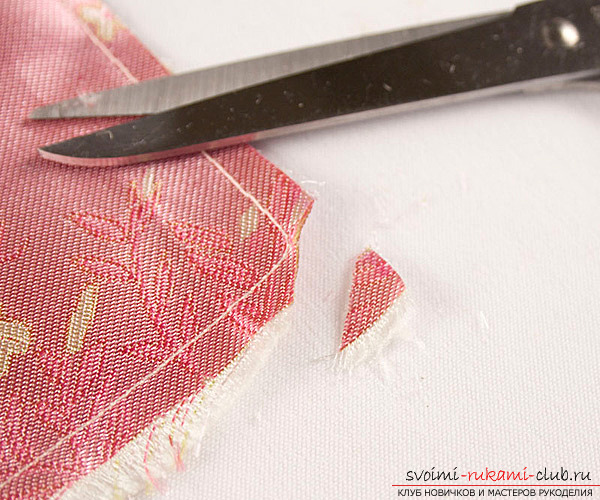 8. Turn out your bag. 9. Use any blunt pointed object to gently push out the corners.
  10. Smooth out the pouch, especially the edges.
 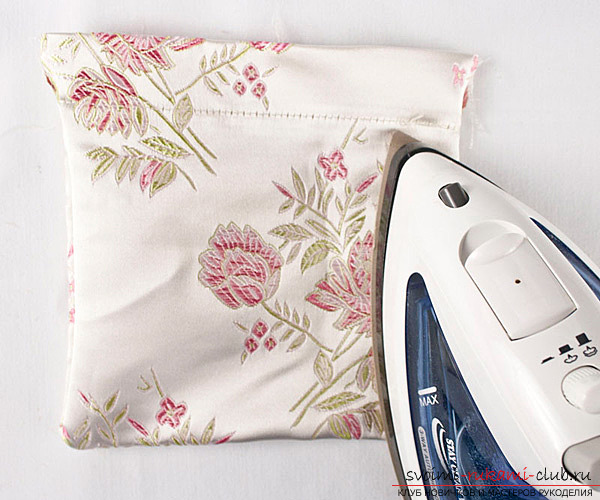 eleven. Measure and cut two pieces of tape each 45 cm. 12. Pass one tape on both sides of the product. Start on the left side, make a turn on the right side - and back, so that both ends are on the left side.
 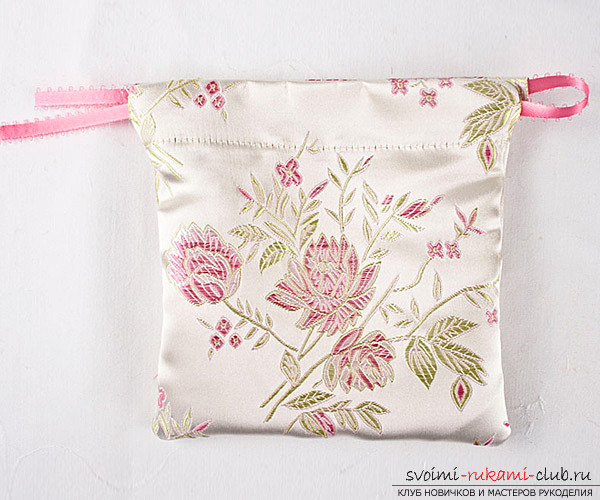 13. Do the same with the second piece of tape, just start on the right side so that the ends are on the right. 14. Tie the knots, tied the two edges together.
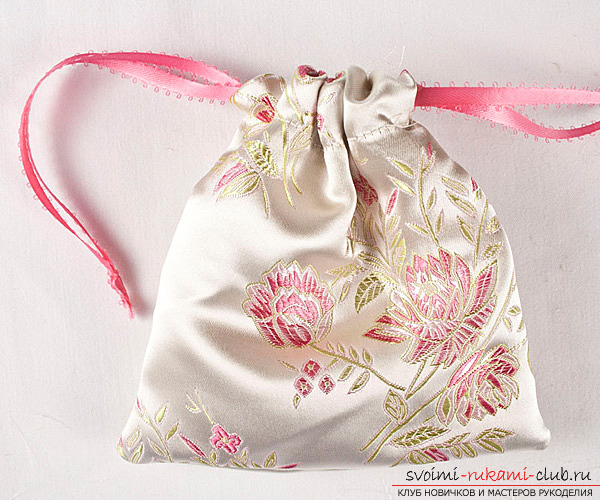
  15. Insert a card with earrings in a tissue bag to impress your mom.
  Carefully tighten the ribbons. I hope you liked this master class. In the same way, you can sew bags for other purposes.
Comments
Related posts:
 Gifts for mom with their own hands, how to make a gift on March 8 with their own hands, advice and recommendations for making crafts with children.
 Gift for dear mother with their own hands
 Gift for March 8 from the child. Crafts for mom and grandmother own hands.
 Registration of a unique ornament of a New Year's tree by own hands - a master class
 The finest decorations for the house with your own hands will perfectly fit into your interior, and perfectly fit for a gift