How can an old light bulb and salted dough become ornaments for a herringbone? Master Class
A special and distinctive feature of the New Year holidayyear is an opportunity to pose and come up with something really new and interesting. One day we wake up and see a big snow storm on the street, which covers our streets, houses and grounds. At this moment you start to think about the holiday and, as a rule, the first thing that comes to mind: it is the decoration of your own house.
How can an old light bulb and salted dough become ornaments for a herringbone? Master Class
Prepare a home for the New Year holidays by no meansnot the easiest task. But, even if you do not have time to go shopping in search of unique and interesting jewelry, there are always outlets and solutions. Your friends will be surprised by talented ideas and, of course, they will perceive otherwise completely customary, seemingly things. In this article, we will discuss two options for a non-standard approach to work on the creation of a New Year's toy. 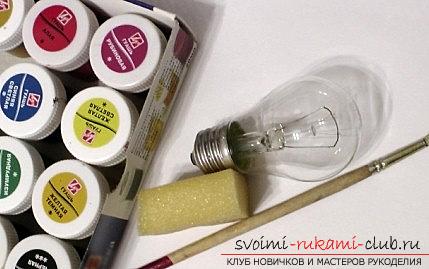 We have to use two, it would seem,very strange, but very comfortable materials for creating a Christmas tree sparkling beauty. Have you ever thought that an old light bulb that has long been extinguished and requires an ejection can find a new light in the form of a small but fabulous New Year's toy? And what about the usual salted dough? A small amount of colors, a bright idea and a set of tools can make ordinary fun with kitchen accessories a real art, which will not be embarrassing to dress our ever green! To begin with, we will have to get acquainted with these options and maybe even two solutions of such toys you will like. Go! Toy-bulb in the style of a monkey This toy is also suitable for those who want to attract their child to work. This fascinating and creative process will attract the attention of the child. Beautiful and cute adaptation of the light bulb will be a real apple of the New Year tree decoration.
- It is required to take a normal light bulb for processing
- It takes paint from acrylic, you can take gouache
- It will take a brush for work
- It will take a piece of sponge
- We take a napkin made of viscose material, or a substitute in the form of a felt for the hat of a toy
- Color paper will be required to form the eye and ears of the animal
- Adhesive PVA, or glue Moment
- Threads in white and red design
- Felt-tip pens
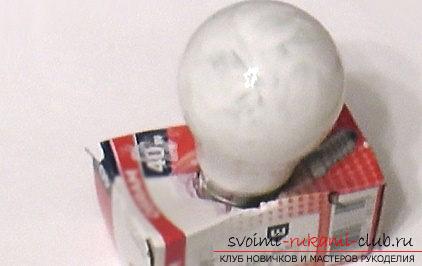 To begin with, we take the simplest light bulb. It is desirable that the lamp cap is bulky, convex (long bulbs are not the best option) and convenient for processing. Of course, the light bulb should not work, but not be cracked. It must be primed with white gouache. But, before that, you need to add a little sticky substance PVA to the paint. We are waiting for that time, until the redness dries and then, we paint on our future work structure our muzzle for the monkey. Next, we wait until the paint surface completely dries and recolor the light bulb in a new color design.
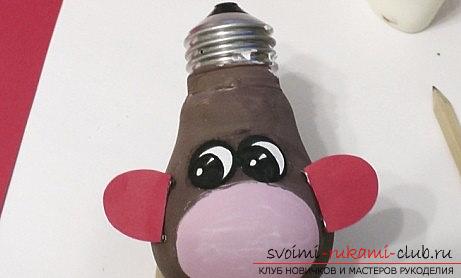
 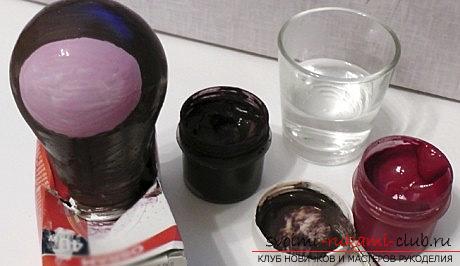 We took a red and brown color. We wait until the lamp dries again. Use the face to paint the individual elements and wait until this layer of paint also dries. We use white paper and cut out the eyes we need. Red paper is used to form ears. Then, draw eyes to glue them to our muzzle. Forming a toy-bulb Then, take the blanks of the ears and bend them to make incisions in the middle. This element will become a necessary part for fixing to the lamp. After, it is necessary to glue the ears, and then, to color them according to the tone of the decoration. After, take the black felt-tip pen and draw the nose of the animal, its mouth.
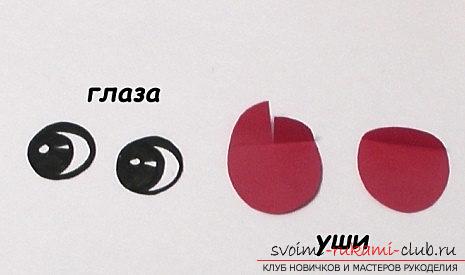
 The main element of the design of a unique craft inthe form of a lightbulb is the creation of a cap. She will make the toy more lively and interesting, and the process of creating such a cap is extremely simple and easy to learn, even for beginners in this field. The cap is cut using the usual shape of a rectangle on paper. Then, using the fabric, we form the necessary layer for the cap. The upper part of the lamp is glued with double-sided tape - especially to fix our product. The fabric needs to be spread out for the shape and then - tighten.
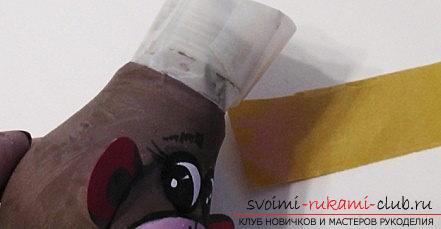
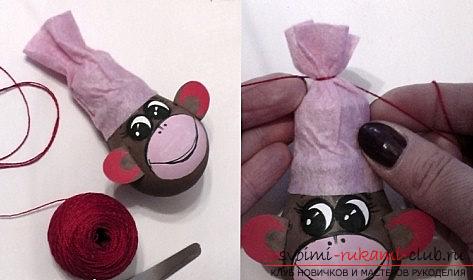 The top part of the cap is cut off and now, withhelp edge incision we form a small pomponchik for beauty. The hat is decorated to your liking. You can add a rhinestone or brads, tie a cap with a tape. Here everything depends on your taste. So, the craft is completely finished!
 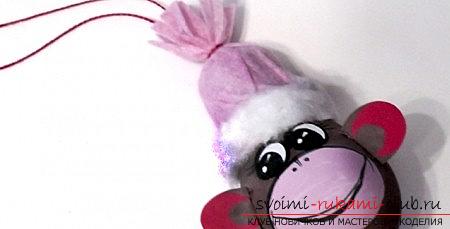 Modeling a New Year's Toy Something, and plasticallows us not to think about how difficult it is to realize the idea. Salty dough can be plenty, ideas - too many. The threshold of such a delightful holiday as Christmas makes it necessary to actualize the issue of manufacturing their own toys. First of all, you can create beautiful decorations, interesting souvenirs and, of course, a Christmas tree toy for your house! This kind of craft can be easily taught both by children and by yourself.
 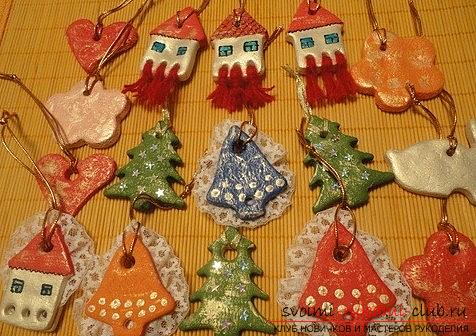 Let's try to prepare your own form of modeling from the dough, using a salty dough as a basis. To make a salted dough, we need:
- Take the salt type "Estra" in the amount of one and a half cup
- Prepare a glass of flour for work
- Take half a glass of starch
- Take a vegetable oil in the amount of one tablespoon
- It will take half a glass of cold water
- 2-3 tablespoons of adhesive PVA
To form a decoration:
- Prepare paints from acrylic
- Take the colors of pearl acrylic
- Prepare for work acrylic lacquer
- It will take contours and glitters in golden and silver decorations
- Threads for knitting, thick
- Decorative Stars
- Lace
How to make toy molds:
- Common baking set
- Figures on a self-stencil
- Special set of New Year's stencils
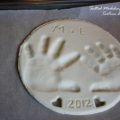
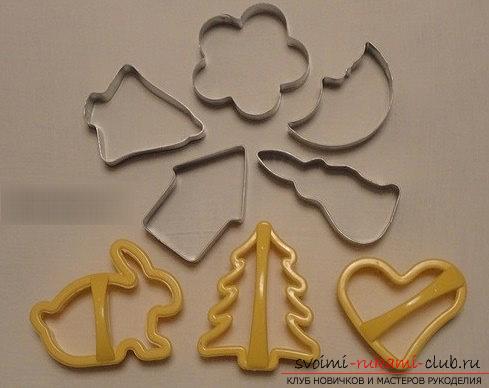 You should be aware that conventional acrylic paints canreplace gouache, which must first be mixed with sticky substance PVA. The result is a paint that can resist the moisture. It is necessary to take forms of toys of this type that there are no details on the border. Fragile parts of the body of animals or figurines just fall off after a while. The forms of the heart, bells and fir-trees last longer, since they have a solid form. Prepare the dough and create a form To begin with, you need to mix the salted dough using the above listed ingredients. The composition of the test should be uniform and soft enough to be pleasant at the time of touch. In this case, the material should be well-shaped, but not sticky. Next, we prepare the surface, where the drying of the finished crafts for the Christmas tree from the dough will be made. With the help of an oven - the best option. Therefore, we prepare the baking sheet, which is covered with foil, or using a special paper for baking. After that, on the table you need to roll out our finished dough sheet and form it in a thickness of not less than 1 centimeter. A thinner layer will break down and crumble in the future. Also make blanks from a finer dough for the connecting elements. Between them we will place the elements of lace. Then, carefully shift the sheet of dough to our work surface and there, we make the excision, squeeze out our molds for future crafts. Do not need to work on the table, and then - put on a baking sheet. Work immediately on the surface for baking, so that the craft does not lose its shape. Then, the excess dough from the future toy is completely removed. Also, you should initially make holes for the hangers, as well as for additional decoration elements. You can pierce with macaroni and pull out immediately after drying.
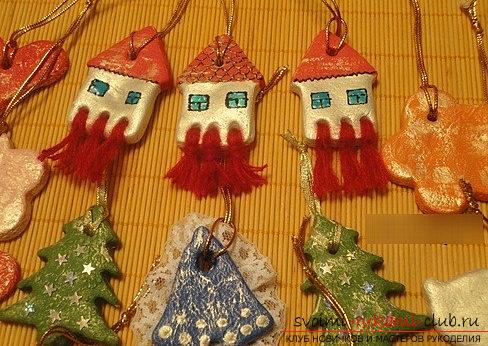
 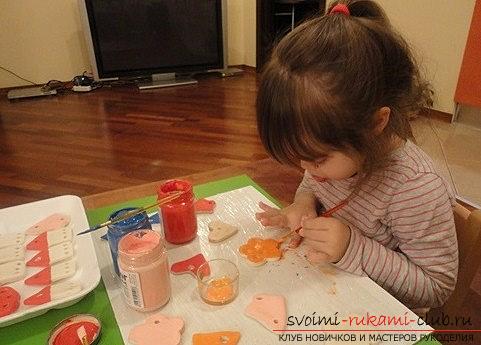 Drying the salted dough takes a long timetime. Initially, we expect baking in the oven at a temperature of 100 degrees, until golden shades are obtained. Also, you can act according to the method of preparation for 3 sessions of baking with a temperature of 80 degrees. In this case, crafts will be white. For the gas oven, you should dry it by opening the door slightly. Sushi is not less than 3 hours and using a low temperature. The craft must be firm to the touch. After we baked our material, you need to wait until the workpieces "lie down." This process takes a week. You can close them in the closet, or on the shelf, where they can not be reached. Decoration of salted toys We use acrylic paints in order todecorate our dried versions of toys. Otherwise, they will spoil like bakery products. then, we wait for the moment when the paint dries. After using a colored toy, apply the mother-of-pearl paint on it, using a practically dry brush (lightly moisten it). This is necessary for the craft to look slightly wiped. Decorating toys from the dough is fun. But, the process can be done monotonously. To do this, simply decorate the product by using a mother of pearl paint. We also want to add a little creativity to the process and, therefore, such ideas will be interesting: - In the product of the houses you can add windows, and also outline the roof and walls using glitter elements. Using patterns and gold paint, you can draw a tile for the house. Also, at the bottom of the houses you should make three holes, so that you can stretch the threads through the products and tie the knots, which is even more serious decoration of the product. - For bells you can draw points, using again the same contour, or glitter. - You can use the lace, which can be laid out by joining the two halves of the dough while working on it. Halves are required to be joined, and the edge of each lace will protrude along the sides and create an entertaining version of the decoration. Christmas decorations on Christmas trees in the shape of small stars - this is the best version of the decoration. After the paint dries, the toys for the Christmas tree from the dough can be covered with a varnish, thus - keep them for many years. But, this procedure is not mandatory and remains at your option. Ready-made figures of toys we should dry and after, tie up with gold ropes, then after - hang on our Christmas tree. However, such toys can be given to their friends as small souvenirs or even to sell, for example - at New Year's fairs. Thus, on New Year's holidays, even the most simple ideas can turn out to be very interesting creativity, which expands your boundaries of skills and allows you to fantasize at full power!
Comments
Related posts:
 How to make a salted dough. Crafts made of dough for own children.
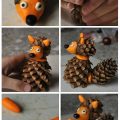
 New Year's articles made of cones - a natural material for herringbone and a master class
 Christmas decoration of the Christmas tree: a decorative Snow Maiden with her own hands - a master class
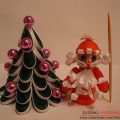 Creation of an artwork of Santa Claus and herringbone by own hands - a master class of quilling
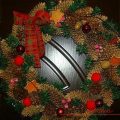
 Christmas tree bells with their own hands: new ways of decorating a Christmas tree and a house