How to sew a skirt with a smell: ways, constructing a pattern with a description
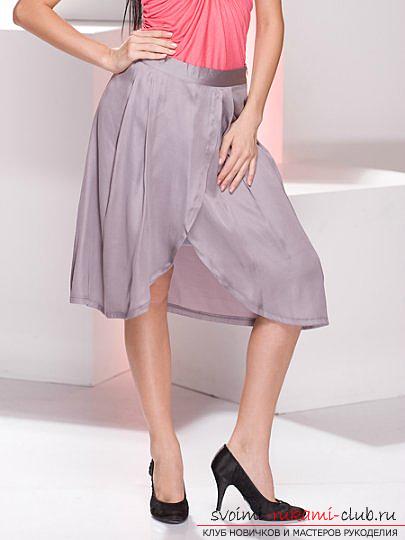
A skirt with a scent can harmoniously blend inthings almost all styles: from classics to ethnic. The main thing to consider in this case is the fabric from which it is sewn, as well as the skirt model itself. Therefore, when you start sewing such a skirt, you need to think carefully about what and under what circumstances you will wear it. And depending on this, choose the fabric material for it. 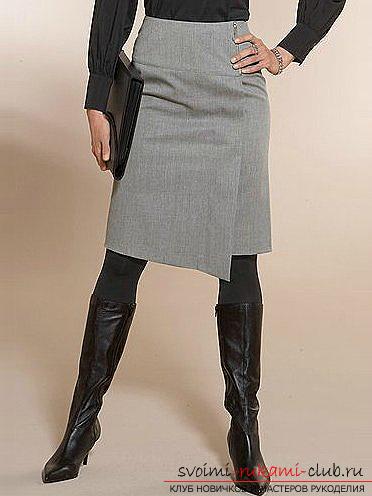
 Before you start modeling skirts, you needto create a pattern-basis, taking into account its own measurements. Stage of modeling. Today we will dwell in detail on the manufacture of a slightly flared skirt with a smell. Make a calculation of the consumption of fabric taking into account the chosen skirt model.
 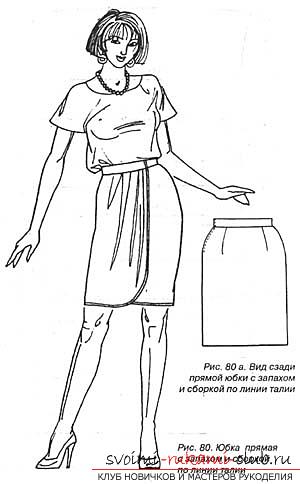 Stages of tailoring. 1. First, you must hold the darts, then the seams on the sides. 2. Puffs of the smell itself should be wrapped on the wrong side and swept.
 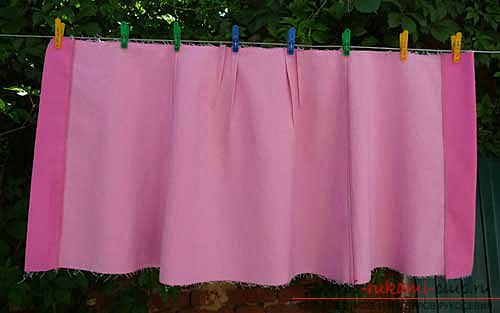 3. Next, we sharpen the belt (the front part of it). In our case, the belt is cut from the skirt drawing itself, retreating five centimeters from the waist, cutting off and getting a belt. You can make a rectangle that is equal to the length of the skirt waist.
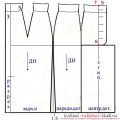
 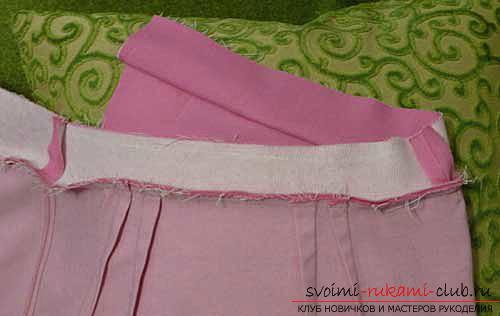 4. Then you should sharpen the bottom of the belt to the top, folding them face to face. 5. Turn the bottom of the belt to the wrong side, then sweep it. Straighten on the front side by the "groove" method between the product and the belt. If the fabric you have chosen is airy, then simply treat the top of the belt with a ruler, and then tie it. 6. Go to the hem of the skirt. You can treat it with an overlock, then turn it and go through a stitch seam. And you can just twist and tighten twice. Everything will depend on the density of the tissue. In the required points, create loops and attach buttons. Stages of building a pattern-drawing Pattern based on a 2-suture straight skirt. 1. We will leave such a part as the backrest without any changes. 2. On the front of the panel, it is necessary to postpone a segment equal to the smell size (line T1T5) to the right side of point T1. We advise that this segment overlaps the dash on the left side of the front fabric, so that the product looks more aesthetically ready. 3. Draw a perpendicular line from T5 in the direction of down to the moment of intersection with the straight line. Following the pattern, gently create the curvature of the lower part of the front skirt of the skirt.
  4. We make a mark for the lines of expansion with the help of parallel straight lines tangent to the center line of the front cloth. We make a cut starting from the top to the bottom. Next, move the waist line to the desired width, given the number of assemblies that rely on the shape. Naturally, the more a large slide you make, the more assemblies will be released. The recess itself will pass into assembly. 5. The skirt of the skirt, located on the left, we leave unchanged. On the level of the dart there is a straight fit of the edge of the right edge, which will close the dart. Given the style, round the bottom of the canvas.
 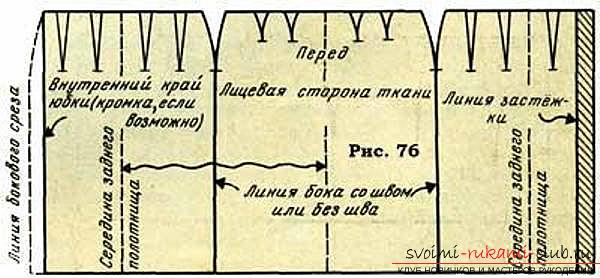 Technique of processing We are assembling on 2 linesmachines are not less than four to five millimeters. We process the edges of the side edges with the imitated brushes. To do this, it is necessary to attach the nonwoven fabric on the side of the underside of the collar to glue. Next, place the bottom and edge of the border with the faces. Carry out grinding with a sovchik half a centimeter from the edge. Then it is necessary to hold the podbotyvanie podborta on the wrong side, and then vymytyvayem kantik from the side for one millimeter. After that we proceed to grinding darts on the back and front left parts of the skirt. Then you need to treat them with an iron towards the middle. Make joints at the sides. Fold the face inward front and back. First sweep, and then stitch on the sewing machine. Shovchik obsmyotyvaem and fold in the direction of the panel, located behind. Create a belt, on which we make a loop, then sew on the button.
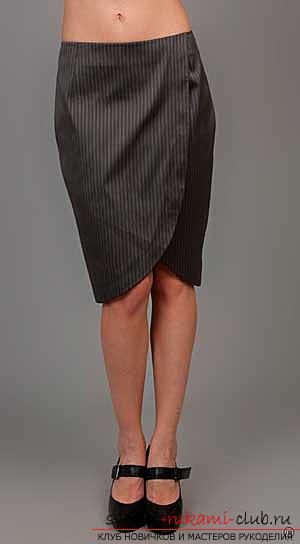
 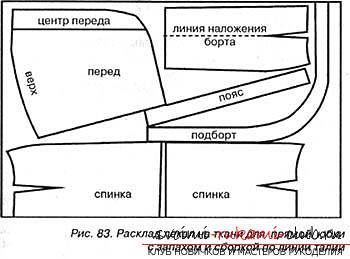 And here is another model of a skirt with a smell - a straight lineskirt, which has an asymmetric undercut and drape. This skirt is suitable for those who have figures with different hip configurations. On the side of the asymmetry there is a cut and drape that comes out of it. It is useful for you for everyday wearing, and you can create it from any kind of fabric.
 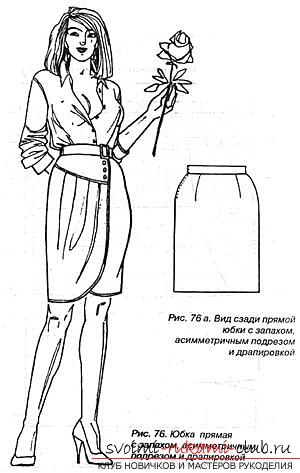 Stage of drawing-drawing drawingon the basis of a straight skirt. 1. We will leave such a part as the backrest without any changes. 2. At the front part of the panel, the approach of T1T3 is the segment before the dart on the panel on the left. We draw a perpendicular line from T3 in the direction of down to the moment of intersection with the straight line. Following the pattern, gently create the curvature of the lower part of the front fabric of the skirt, as well as the panel on the left. 3. We make a marking for the trimming lines of the coquette, then the tuck, located in the coquette, needs to be closed. 4. Make a mark for the lines of expansion with the help of parallel straight lines tangent to the center line of the front cloth. We make a cut starting from the top to the bottom. Next, move the waist line to the desired width, given the assembly under the coquette, which relies on the shape. 5. The skirt of the skirt, located on the left, we must take out of the drawing. By the level of the dart there is a straight fit of the edge of the right side, aligning the central part to the central part. 6. The lower part of the rim needs to be drawn in the same way as the right element of the floor. 7. Make a pattern of the belt.
 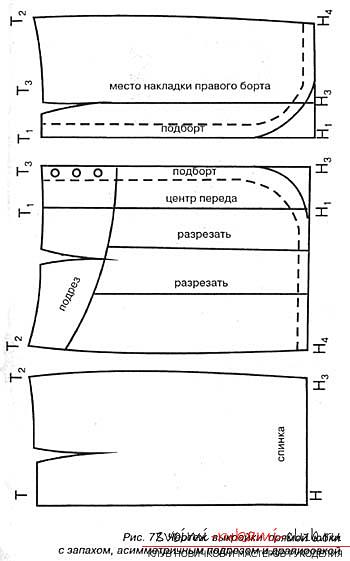 Stages of tailoring. 1. First it is necessary to carry out grinding of the darts, then to treat them with an iron towards the center. 2. In the case where the back sheet has a seam in the middle, then it must be swept, stitched and ironed. If it is missing, then it is necessary to mark the center line of the canvas with stitches or a piece of soap. 3. We spend assembly on 2 lines of the machine not less than four - five millimeters. 4. We process the edges of the side edges with the stitched flannel. To do this, it is necessary to attach the nonwoven fabric on the side of the underside of the collar to glue.
 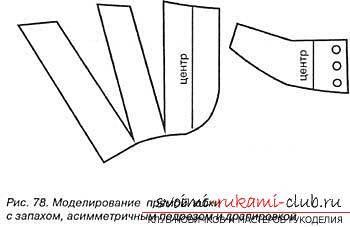 5. Next, place the bottom and edge of the border with the faces. Carry out grinding with a sovchik half a centimeter from the edge. Then you should hold the ironing in the direction of the coquette. 6. Make joints on the sides. Fold the face inward front and back. First sweep, and then stitch on the sewing machine. Shovchik obsmyotyvaem and fold in the direction of the panel, located behind.
 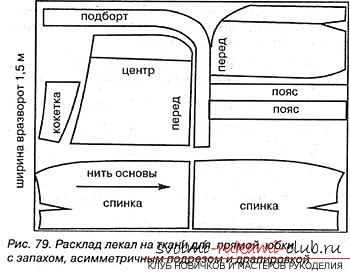 Go to the hem of the skirt. You can treat it with an overlock, then turn it and go through a stitch seam. And you can just twist and tighten twice. Everything will depend on the density of the tissue. In the required points, create loops and attach buttons. All. Skirt with a scent ready.
Comments
Related posts:
 Sew a summer skirt for a full woman with her own hands, using a pattern, step by step instructions with a photo and description.
 Detailed construction of a pattern of a skirt with an overstated waist.
 Construction of a bodice pattern with a one-piece short sleeve for a woman with step-by-step instruction, description and photo.
 How to sew a gypsy skirt with your own hands on a pattern and description.
 Building a pattern of shoes for the doll and making them.