
How to knit crochet flowers, tips and master classes with a photo.
If you decide to learn to crochet, thenflower is a great option for training. A small product is easy to bind, a successful result will undoubtedly please, and you will want to try to create more and more wonderful products from the "magic loops". Flowers are a wonderful gift of nature. They entered the life of mankind from the very beginning of its existence. At first flowers were not so much decoration, but served for rituals and religious rituals. Many deities of the ancient pantheons had flowers dedicated to them only, beautiful roses, capricious lotuses. Our ancestors believed in the magical power of certain plants. On the night of Ivan Kupala they were looking for a flowering fern, in order to find a treasure, they kept a clover flower with a certain number of leaves, believing that it would certainly bring good luck. Flowers have been widely used, and are still used in perfumery. Aromatic oils, soaps, perfumes and much more are created from delicate petals. And of course flowers are a wonderful decoration. Chic bouquets in vases, will give any holiday even more solemnity. The gazebo with its flowers will be a great place for rest or a romantic date. The application of flowers to a great variety, they can serve as a wonderful gift for any celebration, and, of course, bouquets have long become a symbol of recognition of male wrong and apology. Be that as it may, gorgeous and bright or modest and discreet, the flowers are so beautiful that people have always wanted to preserve their elusive beauty. Therefore, jewelers, sculptors, artists, all craftsmen give their due in their creative works to these gifts of nature. Flowers draw, molded from clay, cut out of marble and wood, weave from beads, embroider and knit. And if you make an ornament from gold in the form of a flower can only be a professional jeweler, then everyone can crochet it. It will be necessary to apply a little effort, patience, get acquainted with the advice of our club in this article, as well as view detailed master classes with step-by-step photos, and you will definitely get to make your own masterpiece. To begin with it is necessary to be defined for what purpose the flower will be intended. Conditionally they can be divided into flat and three-dimensional ones. The latter can be attached to artificial stems and used as an element of the decor of the room. Such a bouquet in a vase will not fade and will delight bright colors for a long time. Volumetric flowers look great in the form of brooches, they are attached to hair clips and hoops for hair, they are used in the form of decoration, decoration of belts, hats or handbags. 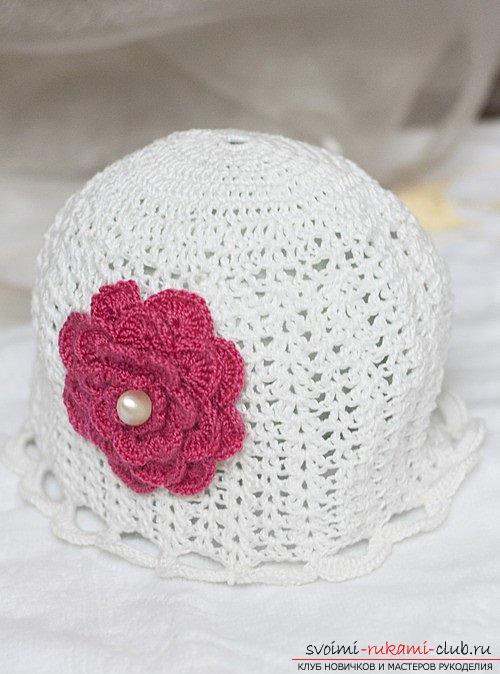 Flat flowers, often act asa composite element of the canvas or individual motifs, an example is the Irish lace or plaid. And of course they can also decorate blouses, dresses, bags, make a decoration in the form of a small flower for a children's cap or, tie several dozen tiny flowers, create a chic shawl or stole. Also, flat florets will be excellent supports for cups or vases, and a ring of several items will serve as an original holder for curtains or a ring for napkins. In general, in the application of colors of the frame creates only the imagination of the needlewoman.
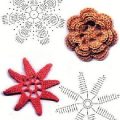
  So, when with the purpose of a flowerdecided to think about the characteristics of yarn. Modern manufacturers produce hundreds of different types of threads, from natural, artificial raw materials and mixed variants. There are no weighty arguments for or against any specific quality and composition of threads. Just remember that if the product is intended for wearing on the body (for example, a blouse in the technique of Irish weaving or a lace insert on the dress), it is better to give the yarn out of natural components - cotton, silk. Bulky flowers can be knitted from almost any thread. When creating a flower from cotton threads, the product can then be starched to give the desired shape. To do this, mix 1 tbsp. l. starch with 1 glass of water, heat on the fire without boiling, when the mass becomes a jelly-like cool, soak the petals and leaves of the flowers with this solution and leave to dry completely, giving it a pre-designed shape. If the flower is knitted from acrylic or other artificial yarn, it can be impregnated with a mixture of PVA glue with water (1: 1). Just to create the right contours, for example, for irises or orchids, a thin wire or line is tied to the last row of petals. In order for the flowers to turn out as intended, you need to correctly select the hook. Manufacturers indicate the number of the hook on the label with the yarn, if the information is not enough to measure the diameter of the thread and the head of the hook in the thinnest place, if they match, then the hook is suitable. Another plus in favor of knitted flowers is training to beginners. To create a small product with your own hands is easy enough, knitting colors does not have complicated or difficult to implement loops or schemes. Ready-made flowers are always there. Below are a few lessons on creating colors. Small and bright flowers.
 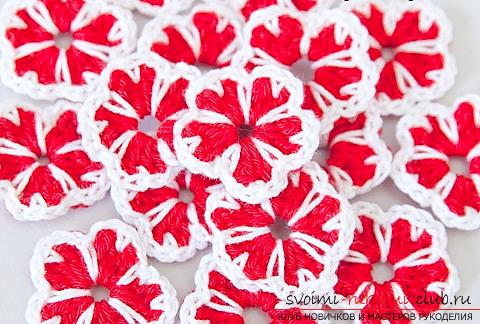 From such crumbs you can make jewelry for the pins, handbags or caps to the little princess.
 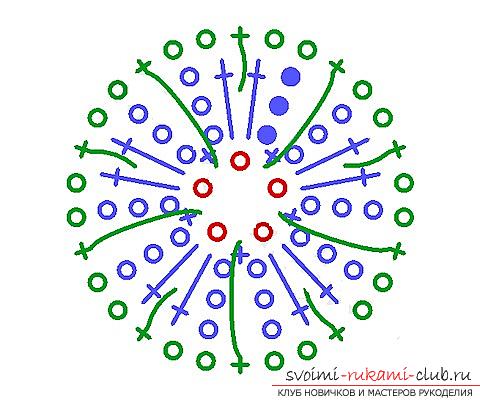 It will take:
- Thin threads of red and white;
- Hook No. 1 - No. 1.5.
A chain is typed and 5 bp. and is closed in the ring by a connecting loop. 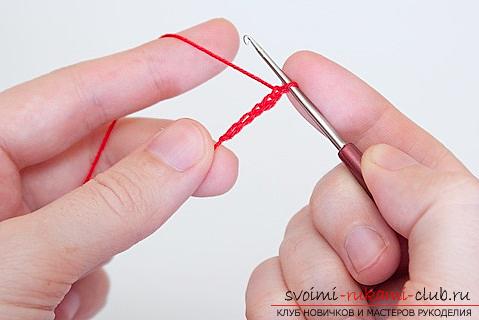
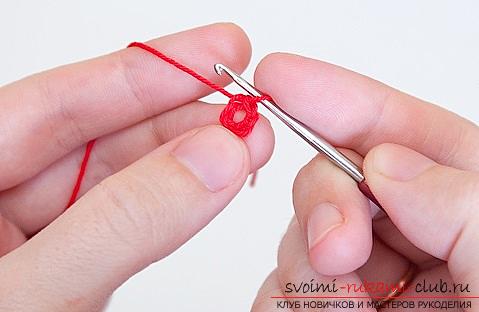 First row. Produced with 3 ppp, 2 tbsp. sleep in the center of the ring, 3 cp, 1 tbsp. in a ring. This is one petal.
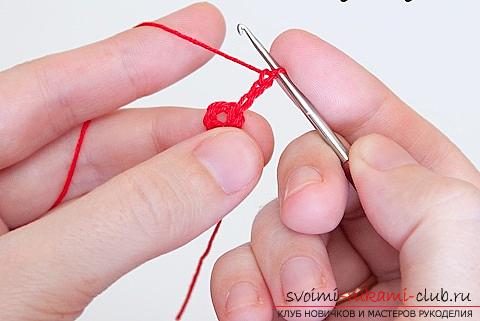
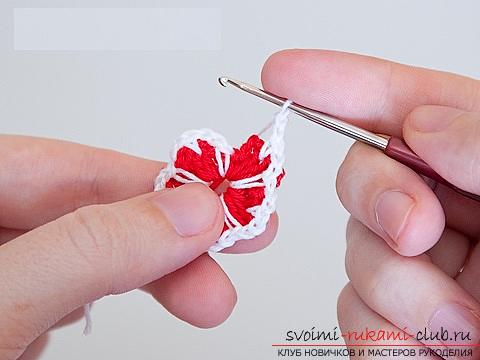
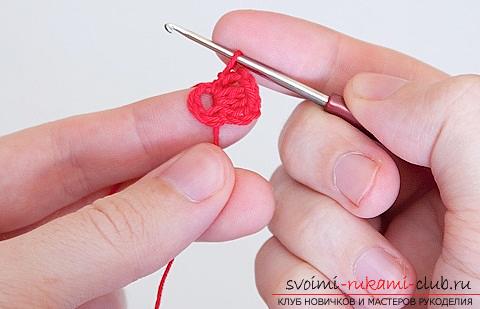 The next petal is exactly the same * 3 ct, 2 tbsp. sleep in a ringlet, 3 cp, 1 tbsp. in the ring *. Repeat from * 3 more times. A total of 5 petals.
 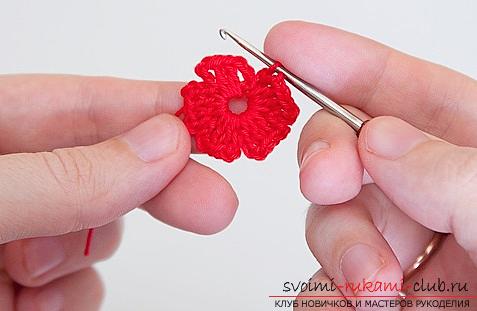 After the last st. in a ring, a thread of white color is taken, stretches into it and is fastened 1 st.
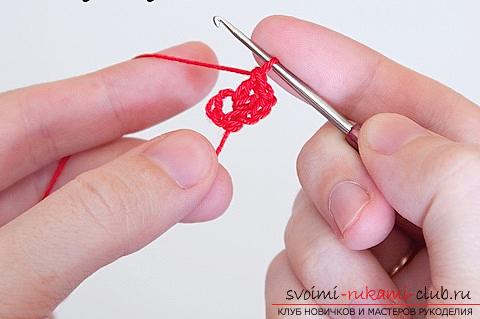
  Second row. Prolonged elongated st. бн, for this purpose the hook is introduced into the ringlet, the working thread is grasped and 2 loops are sewn, like the usual st. bn, then 2 bp, 1 tbsp. bn (the hook is inserted between the 2 st lines of the row of the row below), 2 sts, elongated st. bn (the hook is inserted into the ringlet).
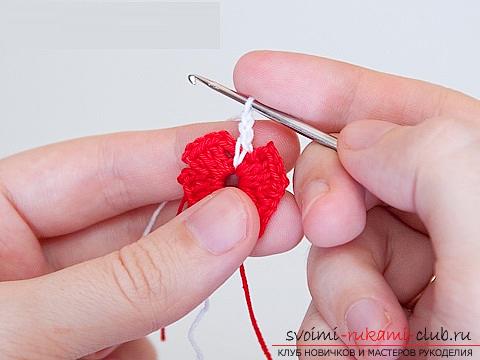
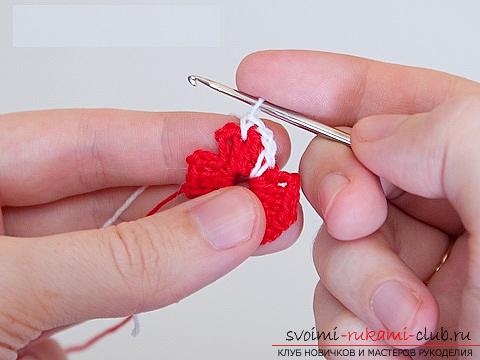
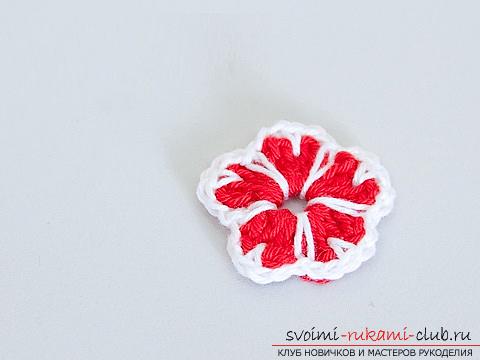
 All other petals are tied in the same way. 2 years, 1 tbsp. бн between 2 tbsp. сн, 2 в.п., 1 elongated st. in a ring. The row 1 closes with a connecting column. The thread is fixed, trimmed, the tail is hidden from the wrong side, and the flower is ready.
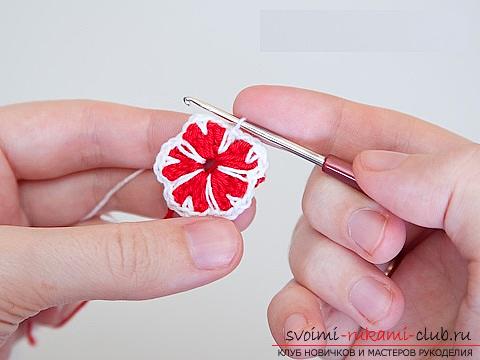
 To create the next flat flower you will need:
- Fine yarn (for this master class YarnArt Acrylic was used);
- Hook No. 1.5.
A chain of 6 bp is transmitted. and is closed in the ring by a connecting loop. 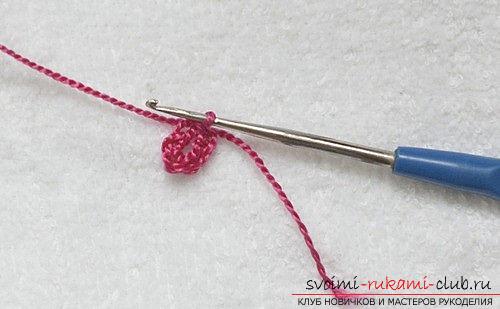 First row. Then, 3 tpp are fastened. and 23 tbsp. sleep in a ringlet. Ends with 1 connecting column.
 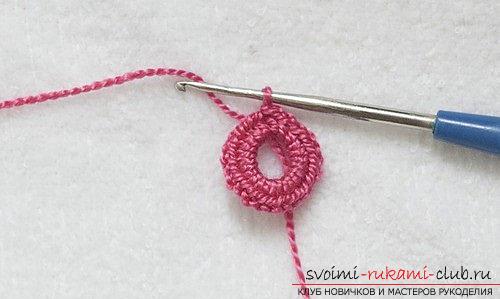 The next round begins with 3 ppp, then is st. sn in each loop behind the back wall.
 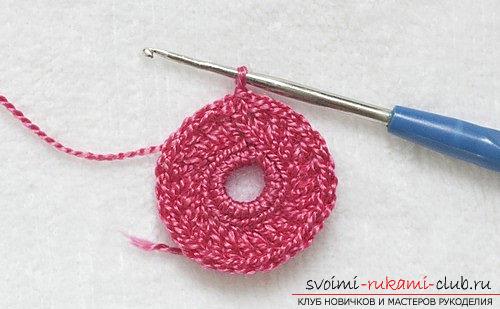 Second row. It is transmitted as follows: 3 in.pp, then alternate 1 tbsp. sn, and 2 tbsp. sn in one loop of the row below. Ends with 1 connecting post. All eyelets are tied behind the back halves of the loops.
 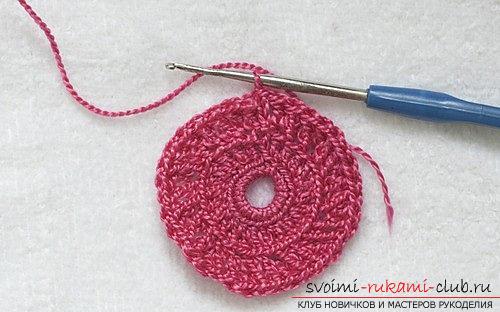 Third row. Provjazyvaetsya similar to the second: 3 ppp, then alternate 1 tbsp. sn, and 2 tbsp. sn in one loop of the row below. Ends with 1 connecting post.
 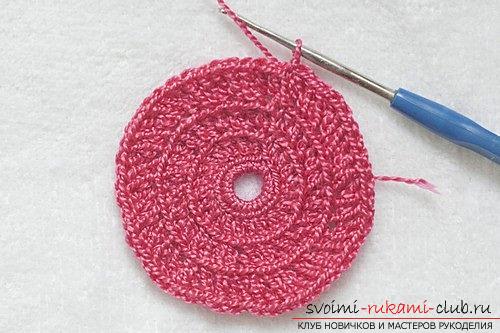 Fourth row. 1 ppp is transmitted. and further art. bn into each loop of the row without adding. Ends with 1 connecting post.
 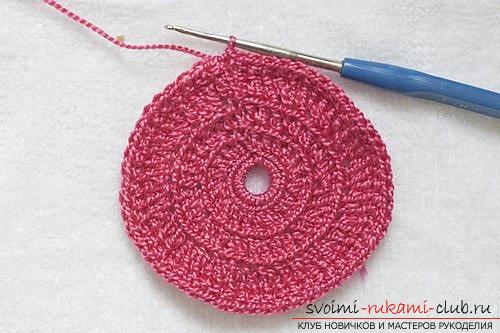 Fifth row. Beginning knitting the first row of petals.
 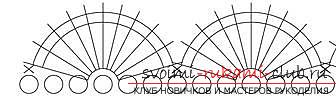 1 ppp is transmitted., * then the 2 loops of the previous row are counted and the 11th st. with 2N, 2 more loops are counted, in the third one is tied. bn *. continue knitting from *. The row 1 ends with a connecting column. The thread is fixed and cut off.
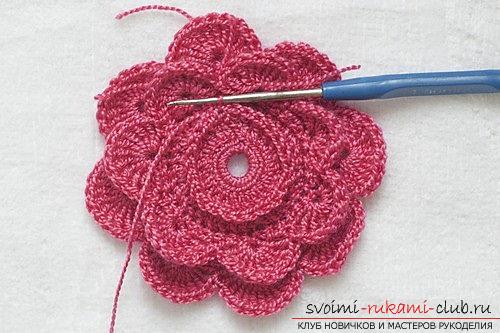
 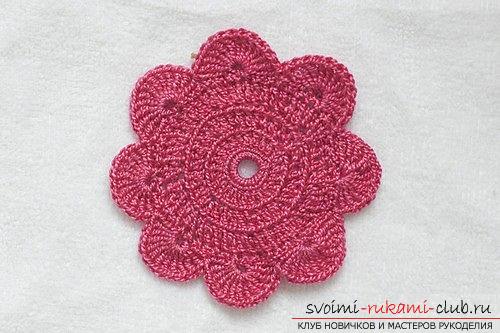 The sixth row. The second circle of petals begins with the tying of art. bn in the front half of the loops of the second row. Circle 1 closes with a connecting post.
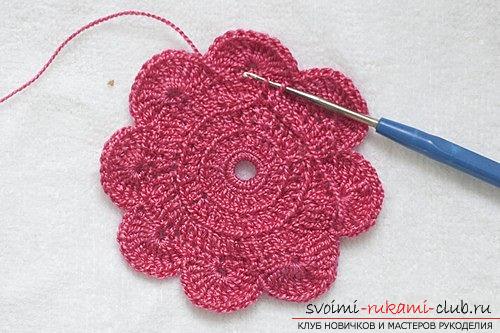
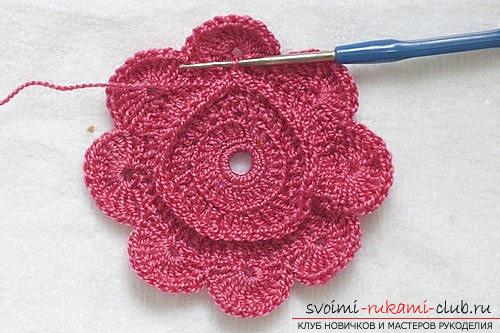 The seventh row. The second row of petals begins to be knotted.
 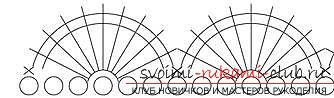 1 ppp is transmitted., then 2 loops are counted and in the third is sewn 9 st. with 2N, then again counts 2 loops and the third is sewn 1 st. b. work continues by analogy with the first series of petals.
 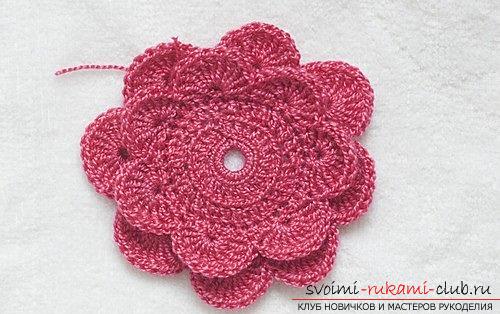 The eighth row. The art. bn for the front wall of the first row of st. the dream of our middle. The series of 1 ppp begins. and ends with 1 connecting loop.
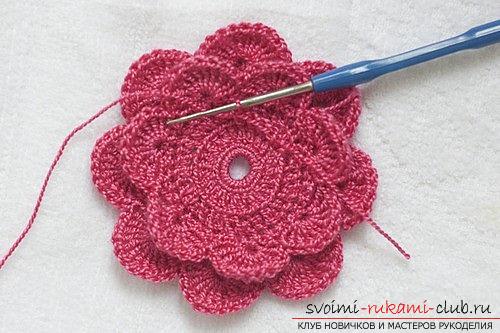
 Ninth row. Knitting of the third circle of petals begins.
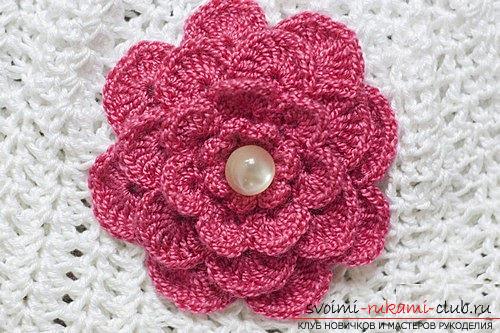
 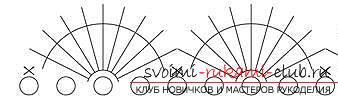 1 ppp is transmitted., * then the 2 loops of the series are counted down and the 9th st. sn, again counts 2 loops and in the third is tied 1 tbsp. бн *, work continues from *, ends with 1 connecting loop. The thread is fixed and cut off. Tenth row. Begins knitting the last row of petals behind the front wall of the very first row of the middle, consisting of Art. sn. 1 ppp is transmitted. * counts 1 loop, the second is tied 5 tbsp. sn, again the loop is counted and the second is tied with 1 tbsp. b. knitting continues from * and ends with 1 connecting loop. The thread is fixed and cut off.
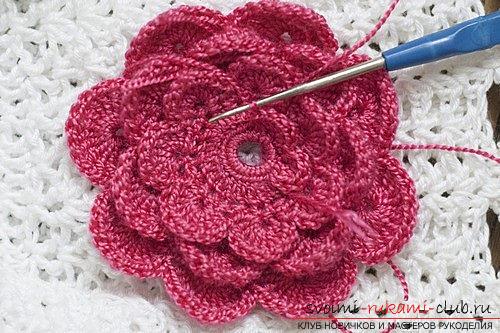
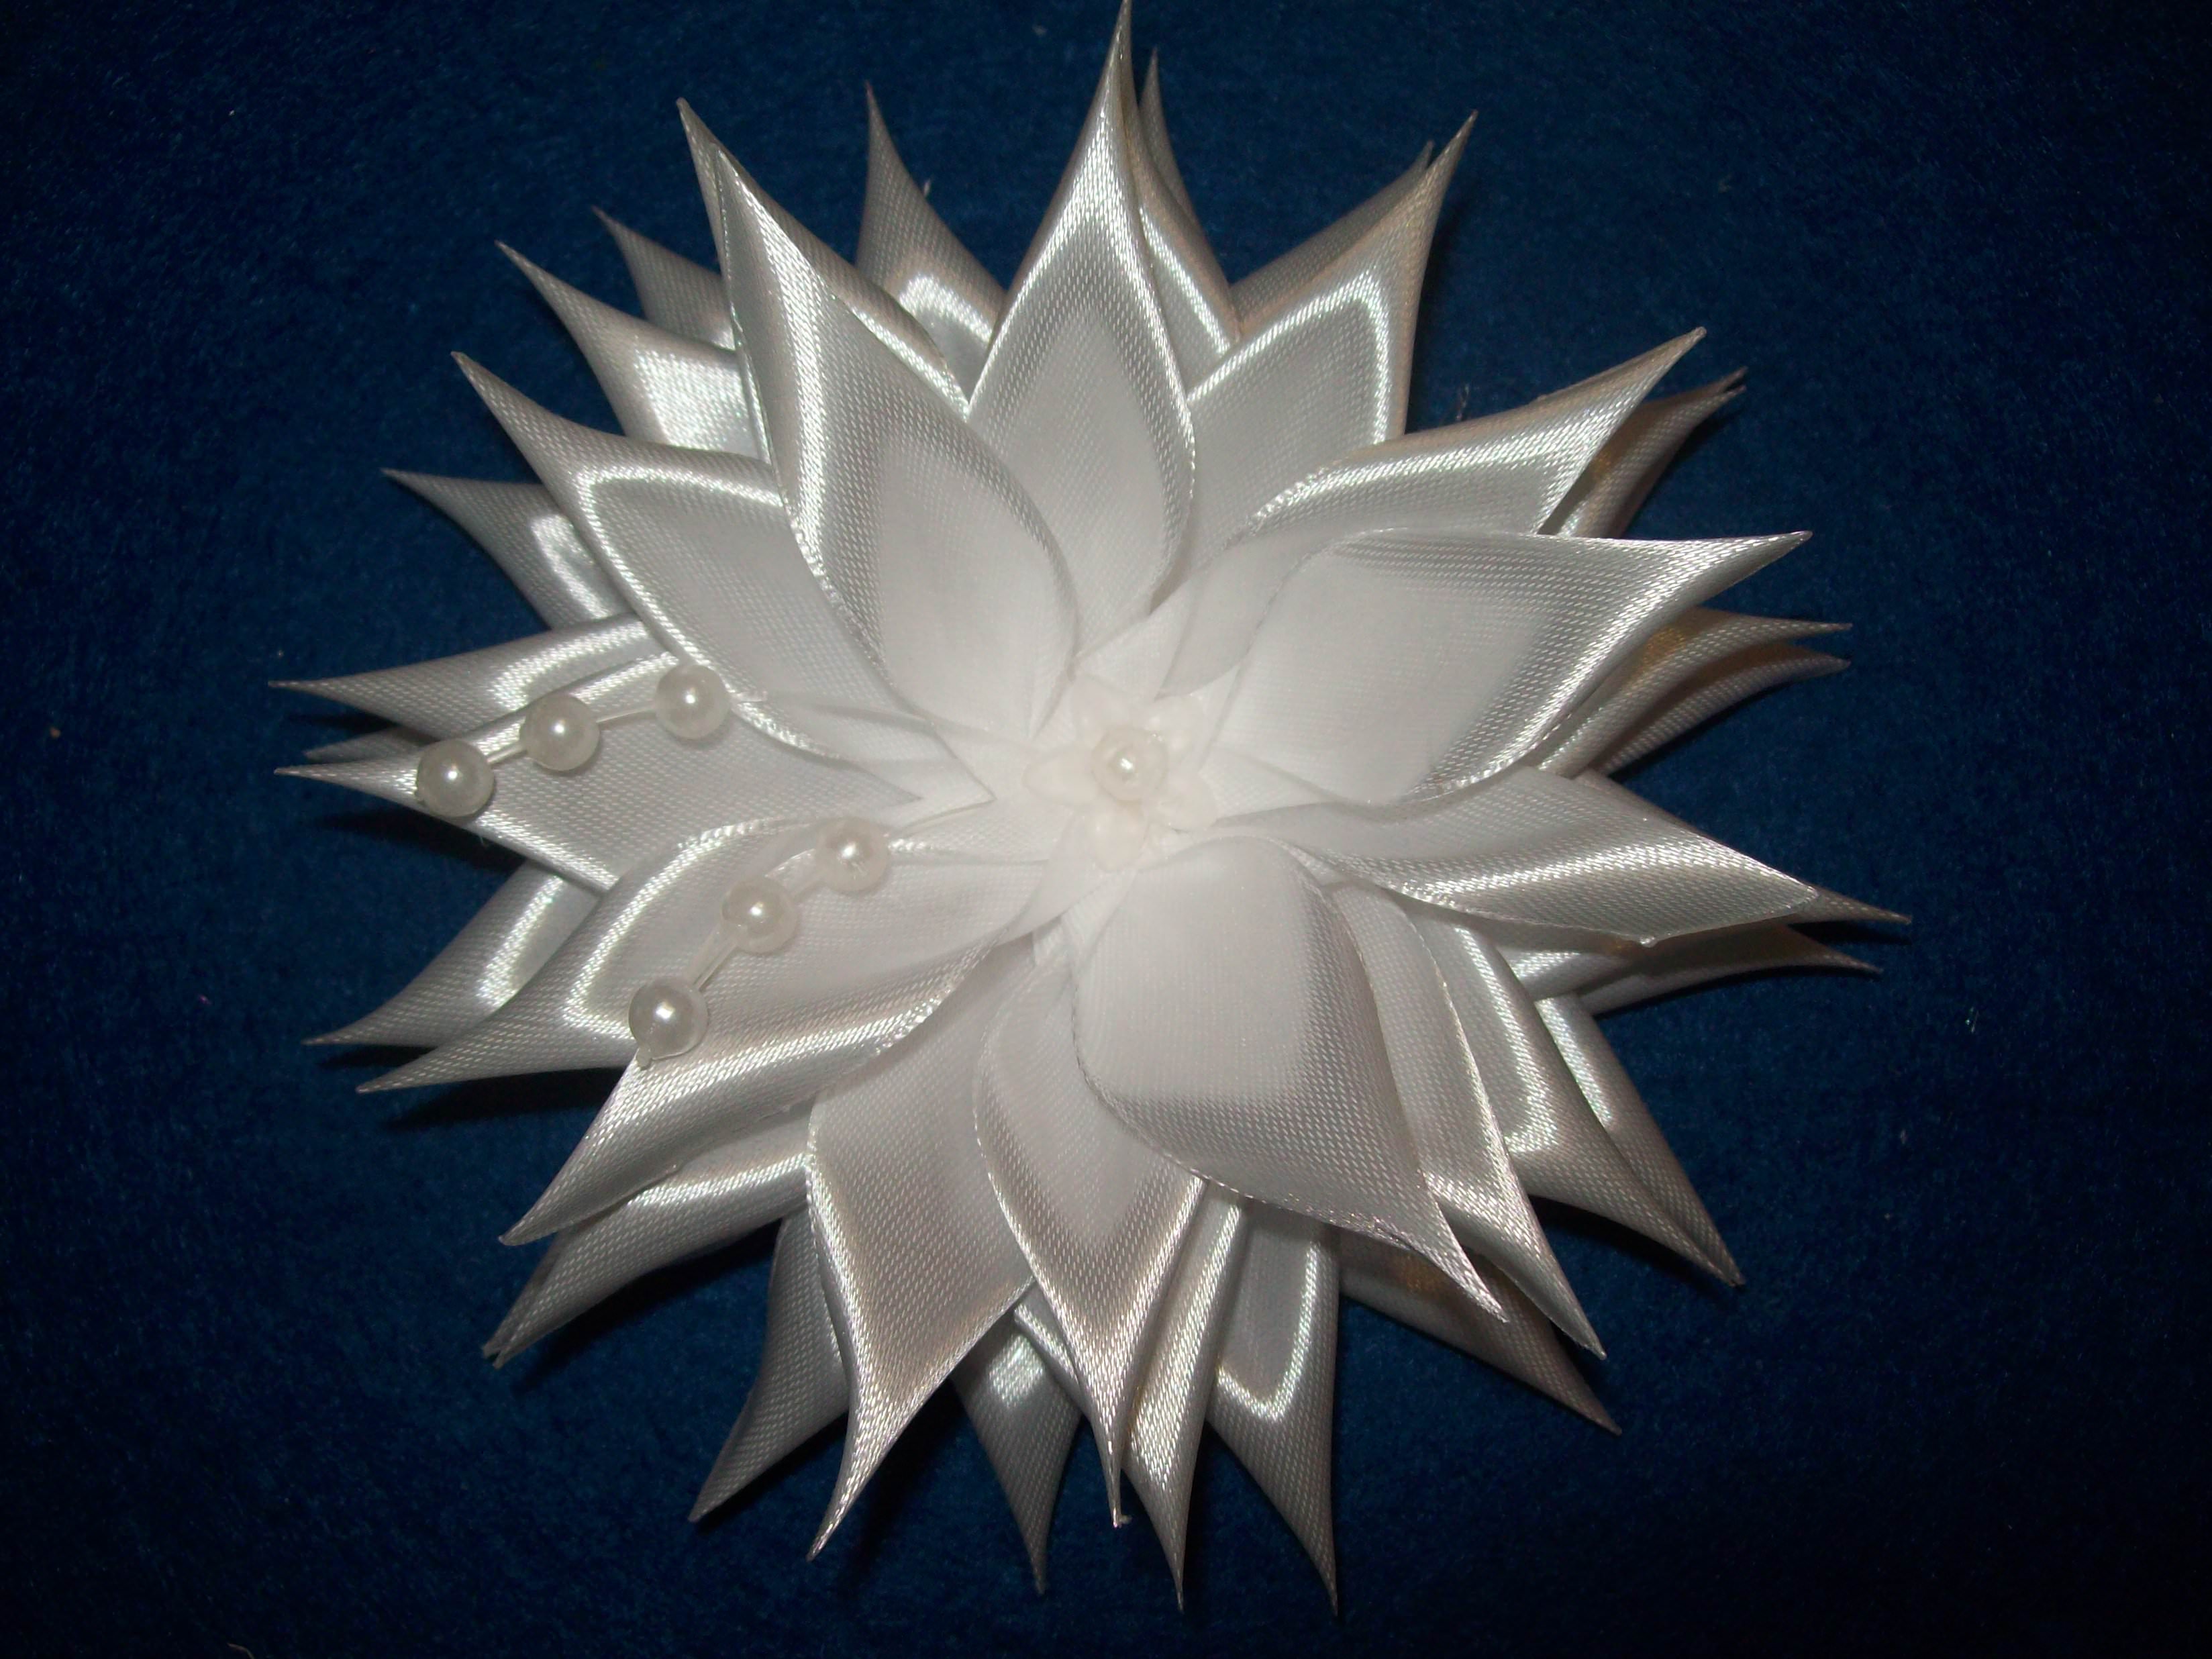
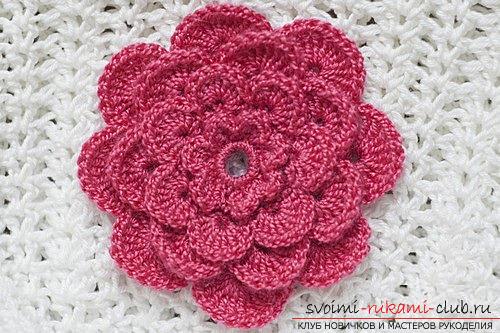 The flower is ready, it remains only to decorate his heart with a bead and you can bravely decorate pillows, bags, pins, hats, in general, whatever you want. Now that you've practiced on simpleflowers, try to create a beautiful three-dimensional iris-brooch. In nature, there are irises of completely different shades, white, blue, yellow and multicolored. But if you combine colors, it seems difficult for you, tie the flower in one color.
 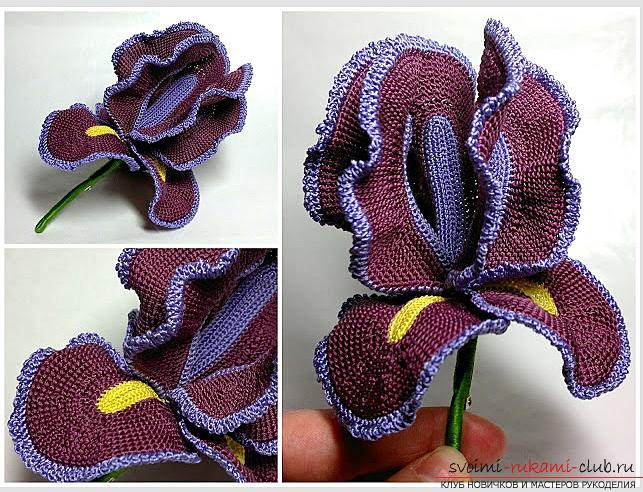 Required:
- Thin silk threads of yellow, lilac, green and burgundy color;
- Hook No. 0.5 - No. 0.7 (you can take a hook for Tunisian knitting - it's even and the same in diameter along the entire length);
- Wire;
- Round nose pliers;
- Pin for brooch.
Work to perform a thread in three additions. Outer petals. It will take 3 pcs. for one flower. 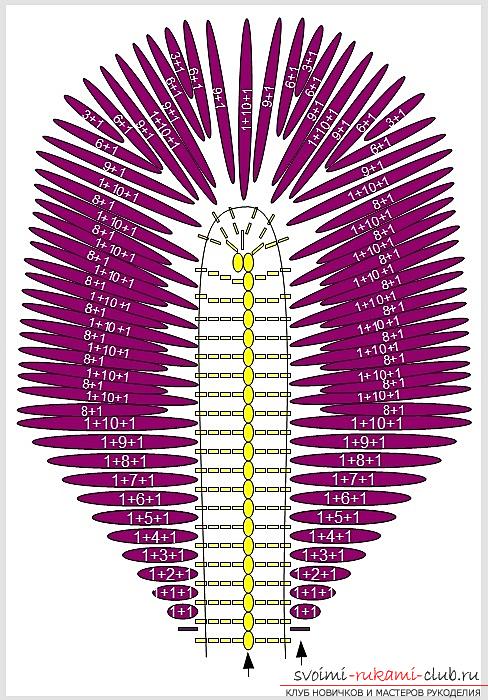 21 pp are being recruited. + 1 VPP yarn of yellow color. Is transmitted by 19 tbsp. bn, in the outer loop 2 tbsp. бн, on the second side of the chain 19 st. bn, in the arch of 2 loops (the first loop + lifting loop) to tie 3 tbsp. b. Twenty st. bb, the work is turned, 20 st. bn, then thrice for 2 tbsp. bn with one base, then 20 tbsp. Mon, the work is turning. A wire is attached along the edge and a number of st. b. It turns out 46 loops. The claret yarn is joined with 1 tbsp. bn, then tie in Tunisian technique (when all the loops of the series are on the hook) (Figure 2). The edge (last) loop of the set is pulled from st. bn yellow color. When knitting the return row, loosen all the stitches by 2. When the knitting starts, after the edge loop and the first Tunisian column, you need to make the addition by pulling the loop out of the horizontal jumper between the rows of the row below. Add until the 12 hooks on the hook (along with the edge) on the hook (Figure 4). The next row is tied with shortened rows (in the dial-up we do not stretch the eyelets from the last 2 items of the bar, in the reverse row we connect the first loop with a single loop, and all the other ones are sewed according to 2. (Figures 5 and 6) .Provyazyvat, alternating the usual and shortened rows. the loops of each row are indicated as (1 + 8 + 1, etc.).
  The upper part of the lid is tied by fourwedges. Each of them begin by tying a shortened series of 9 items, then a shortened row of 6 items, then 3 items, again 6 items. and 9 st., and again the usual full row is pegged (Figures 9 and 10). The second half is knitted symmetrically. For 12 rows to the end, starting each set of rows, to pin losses, pulling 1 loop of two Tunisian art. attach a wire and tie a row of pico (figure 15 - 18).
 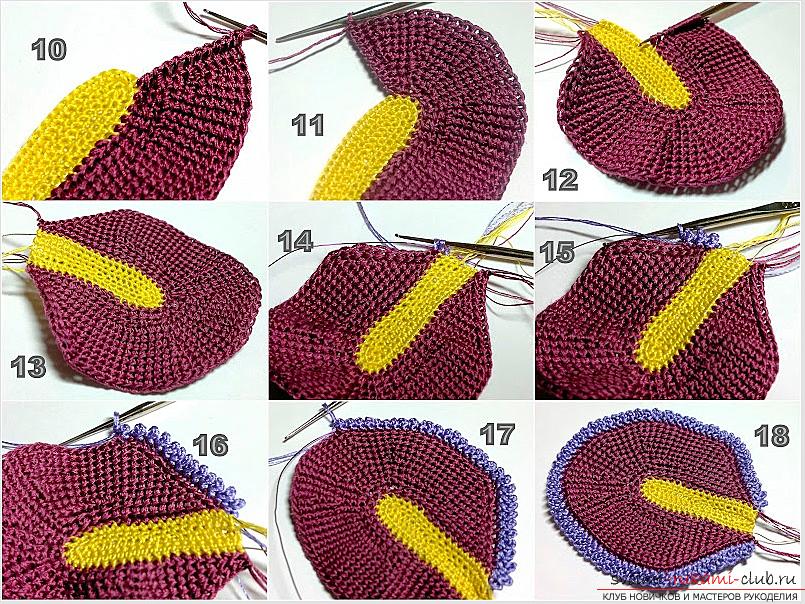 Internal petals. It will take 3 pcs. for one flower.
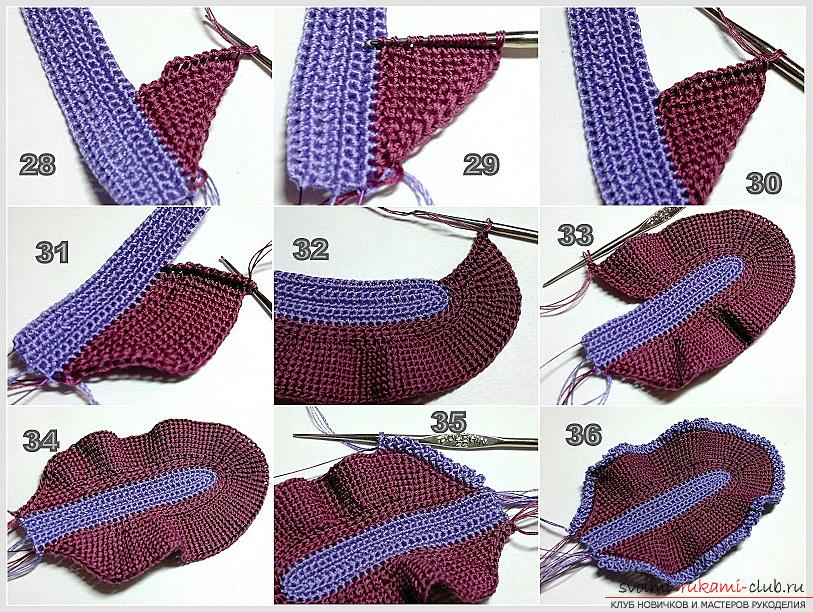
  Miter inner lobes to tielilac yarn 31 cent. + 1 VPP Further, the petals are bound similarly to the outside, except for the wedges (the sequence of the number of columns 10, 8, 4, 7). (figures 19 through 36)
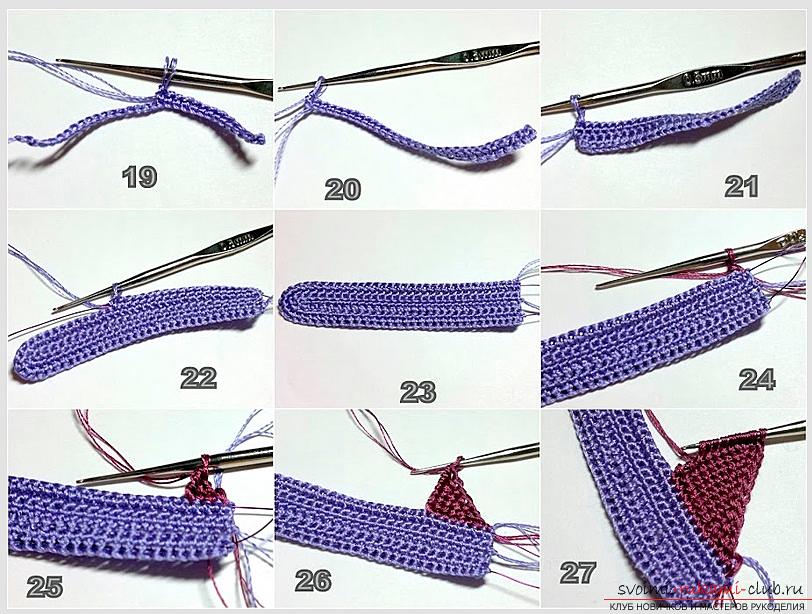
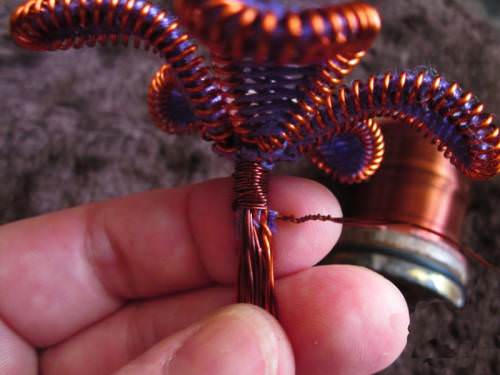
 Stem. A piece of wire with 15 cm at one end is twisted into a spiral. Its internal diameter should correspond to the diameter of the filaments of the filaments together with the wires from all the petals. (Figures 37 and 38). All threads and wires are threaded into a spiral (Figure 40). Expand the petals in the desired direction. Attach all the wires and threads with a green thread to the wire, tighten tightly (Figure 41, 42, 43) tightly fasten the brooch clip (Figures 44 and 45). After measuring 2 cm from the edge of the fastener to form a loop from the wire, wrap the thread in the opposite direction and hide the thread.
  It is not at all necessary to make a buckle and use the iris as a brooch. You can tie several such flowers, attach to stems and put in a vase.
Comments
Related posts:
 Flowers from the threads themselves: step by step master classes (photo)
 Flowers of the tapes with their own hands the video and photo workshops
 A detailed master-class with a photo will tell how to tie a set for a girl with a crochet
 This master class New Year crafts with their own hands with a photo and description will teach how to tie a Christmas tree crochet
 Schemes and a detailed description of how to crochet flowers by hand.