How to crochet a square
How to crochet a square How to crochet a squarecrochet - you are thinking now. Before you the most detailed guide and photo instructions on how to crochet a square! I do not know for what specific purpose you thought about knitting squares. Perhaps they decided to tie a tack, a rug or even a whole blanket! Then you just need to go through this and four more knitting lessons on the site and get the knowledge that will lead you to the goal! Today we look at the simplest version of how to crochet a square. You will learn how to tie a square back and forth in regular rows, how to check whether a square is a square if there is no ruler or centimeter at hand.
How to crochet a square in rows back and forth
The knitting method discussed in this lessonThe square is the most used and not only for knitting squares, but also for carrying out a huge number of knitted things. Straight rows back and forth are located above each other and gradually, with each new row form a shape. You can get a square or rectangle performing your canvas using straight rows. So, how to crochet a square using straight rows. Find out about this below! ? 1. Initial crochet loop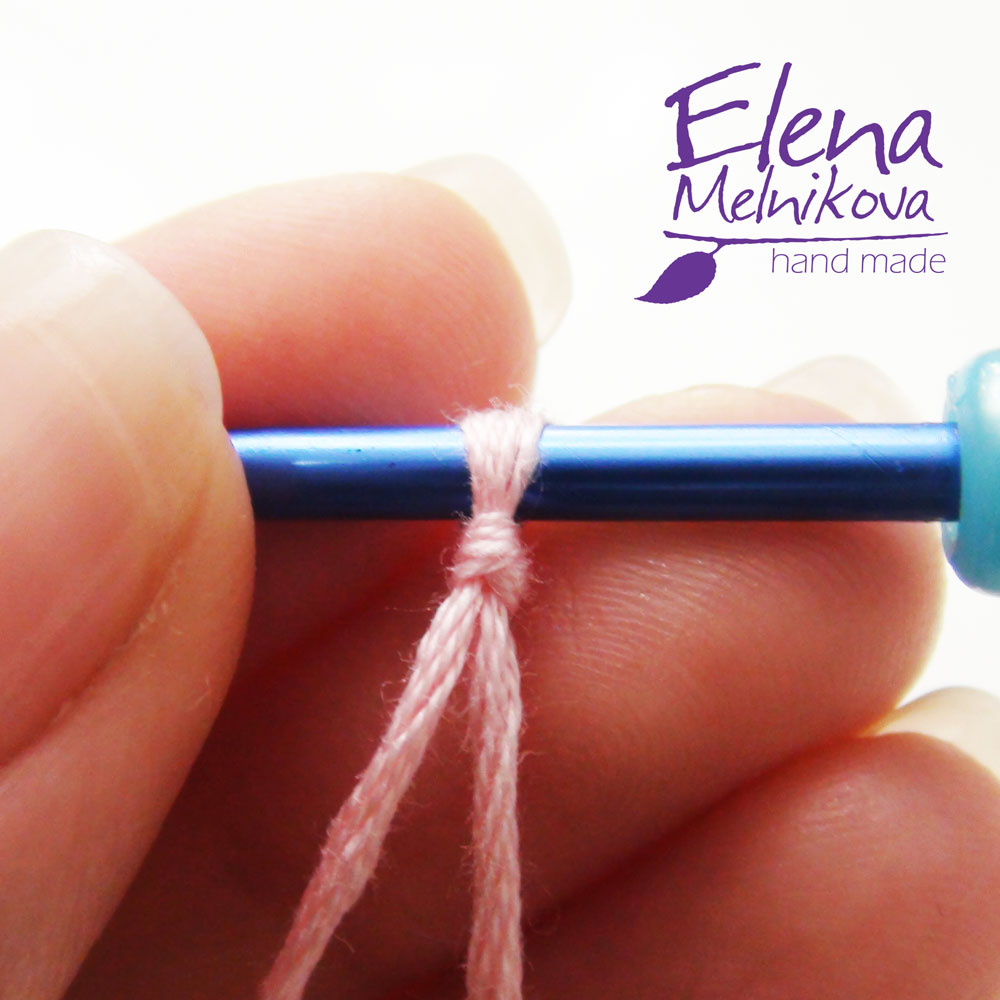 2. Chain of air loops. This chain will be equal to the number of columns in each subsequent row. A chain without stretching will be approximately equal to the width of the square. Therefore, if you need to knit a square of a given size in centimeters, you need to check by experiment by knitting the first row
 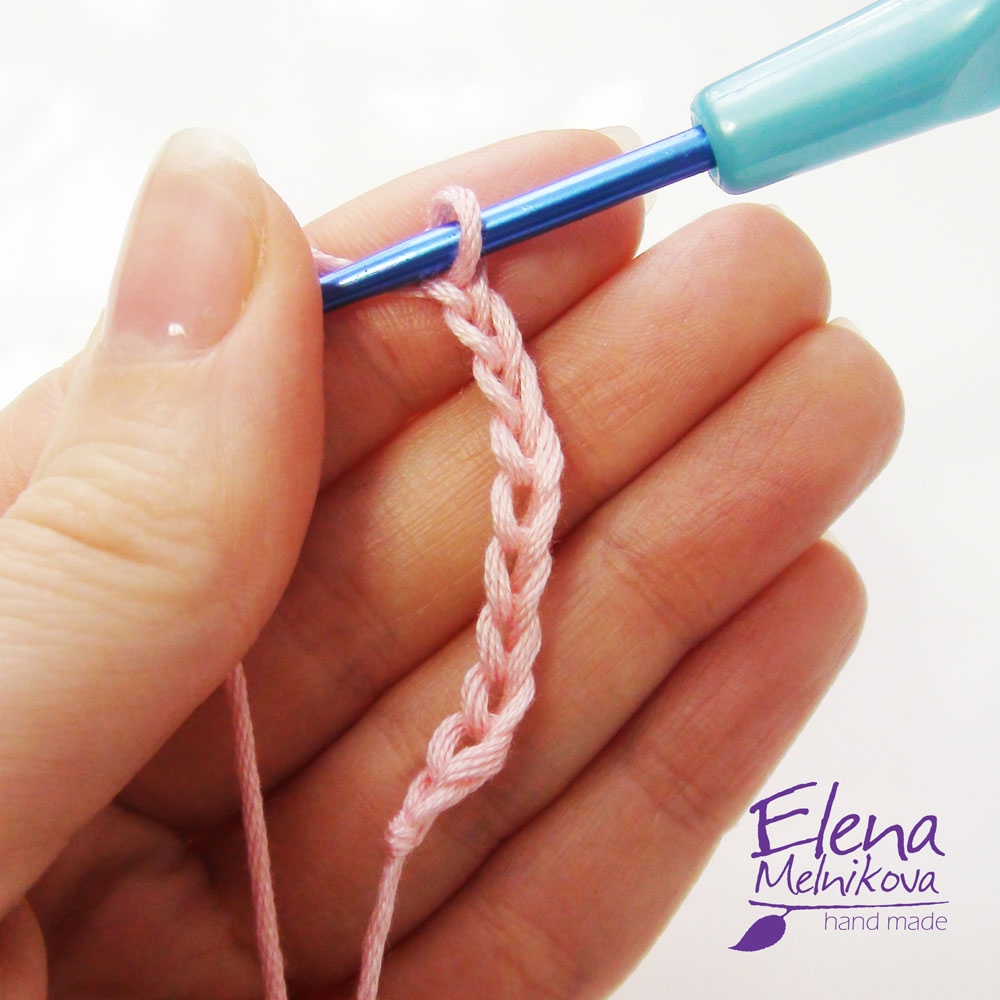 3. First row. One or two air depending on your knitting. In the future I will write one air lift loop, because this corresponds to my knitting density, and you are running the number of loops corresponding to your knitting
 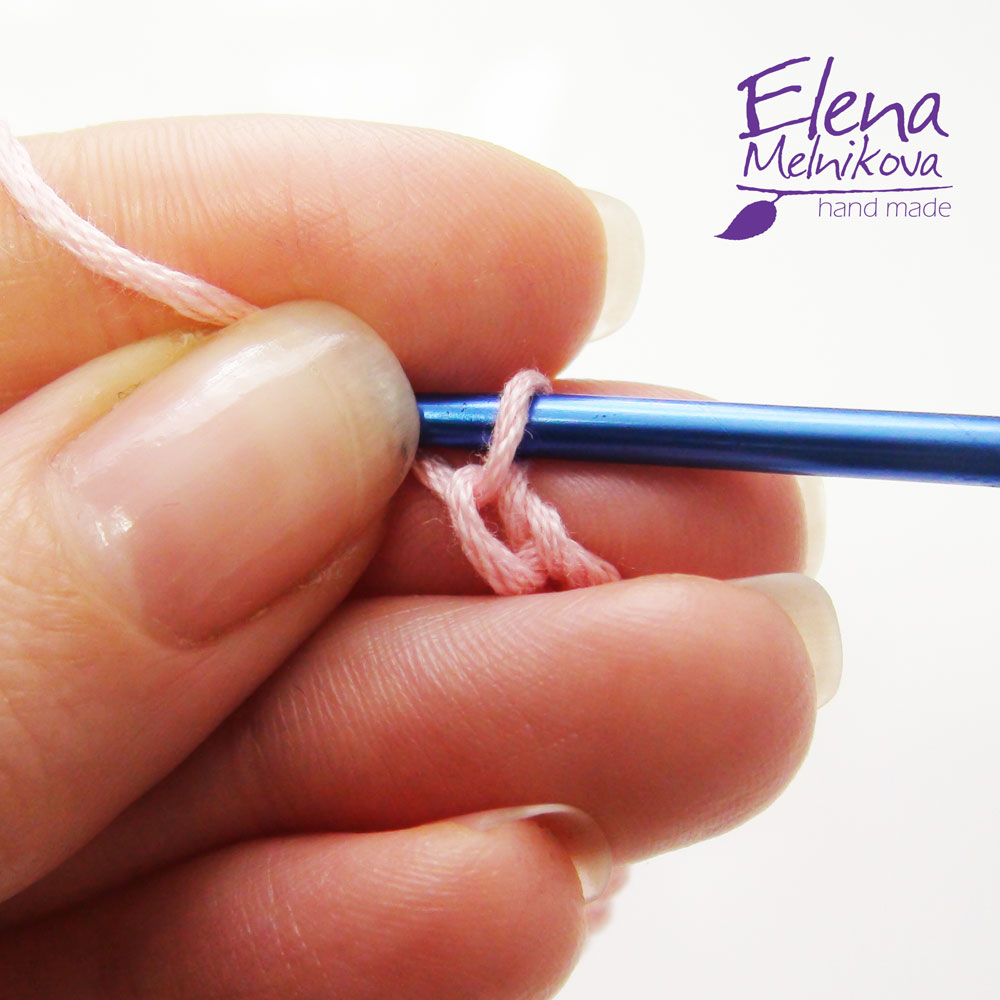 4. A single crochet column in the third (with one air lift loop) or into the fourth air loop of the chain (with two lift loops)
 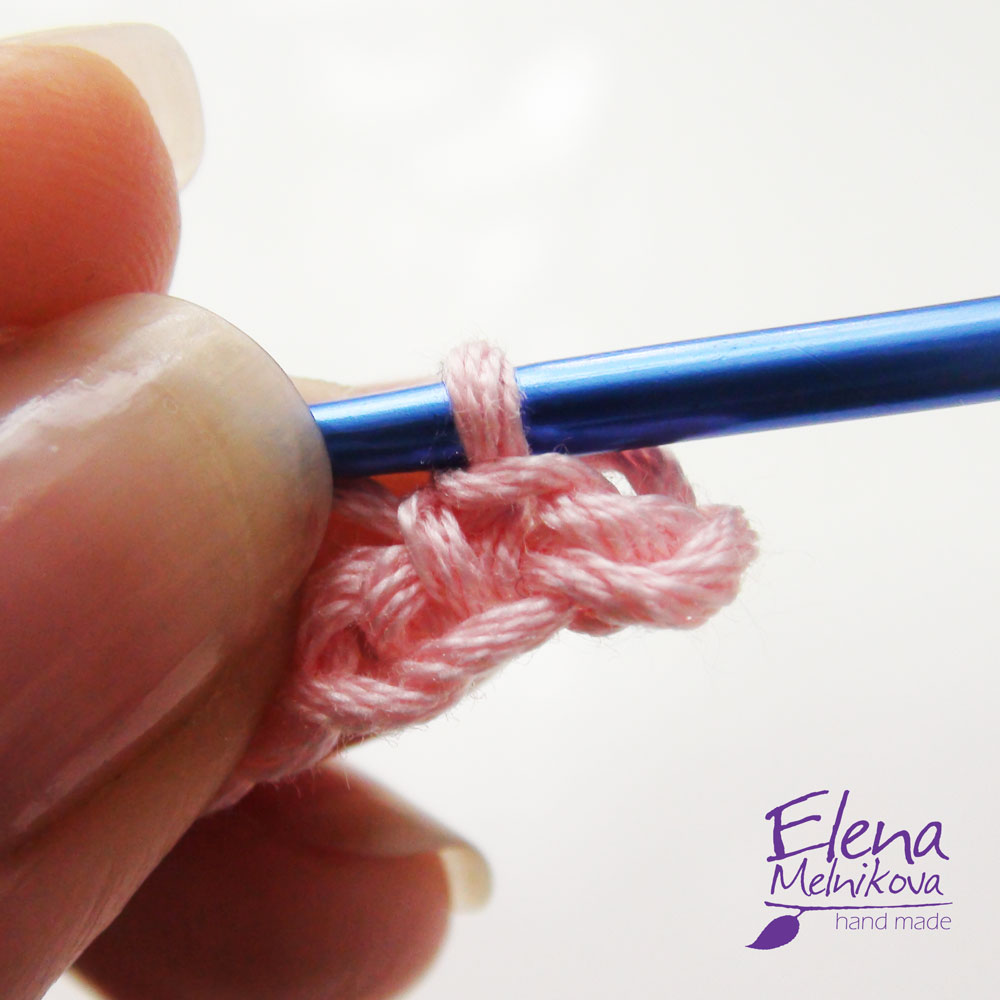 5. Knitting to the end of the chain.
  6. Second row. Air lift loop
  7. Turn knitting column without nakida in a loose loop. The loop from which the lift loops rise is skipped
 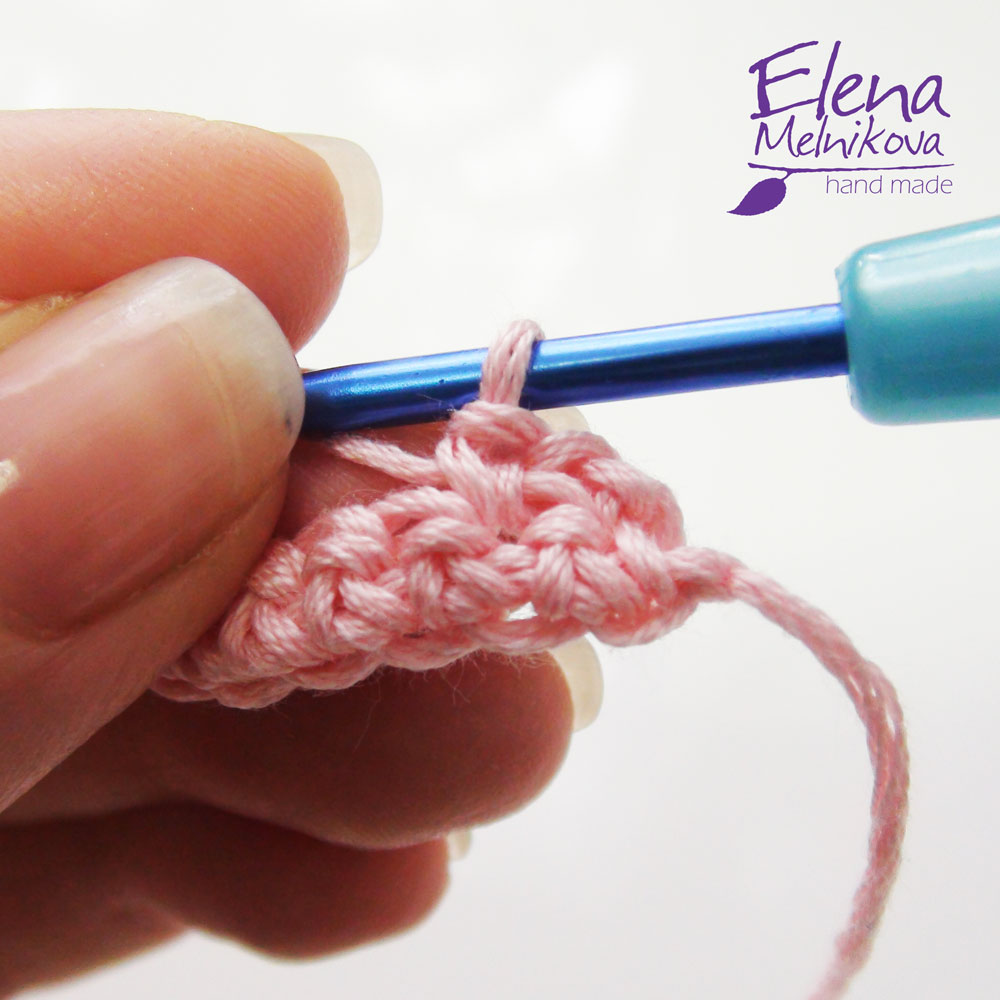 8. We knit the posts without nakida to the end of the row, the last column without nakida is performed in the air lift loop of the previous row. When counting the columns in a row, the ascent loop of the current row is counted as a stolbik
  9. Repeating paragraphs 6-8 knit the required number of rows to obtain a square. How to determine the number of rows for a square! Pulling two opposite corners to each other, fold the canvas in half. If you have an even triangle, then rows are sufficient. If the corners have developed unevenly and the edges come out - you need to add more, or you have tied a lot
 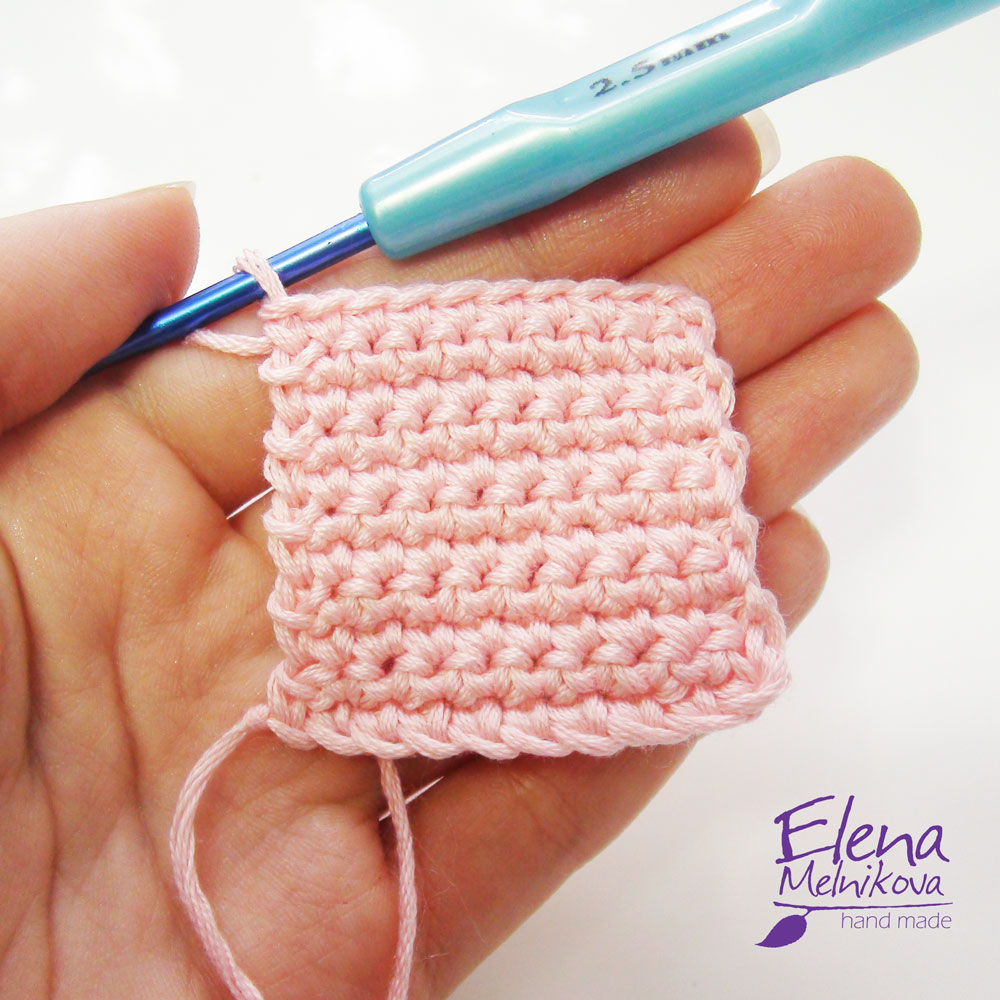 Thank you for attention! More complex, but very interesting ways to knit squares: See you in the new classes! Do not forget to add a useful bookmark using the bookmarks buttons or social networks located below!
  Your e-mail: * Your name: * Share in social. networks
  </a> Navigation by records
How to crochet a square - Method 5: 5 comments
 Sonia1209: Thank you so much for YOUR WORK!
 : You are welcome! ?
  Kretz: Elena, I dream to learn how to tie a lash squares. Thank you for your work!
: You are welcome! ? All cards in hand. Pay attention to the lesson on knitting motive - Grandma square. Additionally, there are lessons on the combination of such squares: http://crochet-story.ru/motivy
Kretz: Elena, I dream to learn how to tie a lash squares. Thank you for your work!
: You are welcome! ? All cards in hand. Pay attention to the lesson on knitting motive - Grandma square. Additionally, there are lessons on the combination of such squares: http://crochet-story.ru/motivy Add a comment Your e-mail will not be published. Required fields are marked * Comment Name * Email * Website
Comments
Related posts:
 Children's plaid, crocheted from motives grandmother's square
 Crocheted plaid of motifs grandmother's square
 How to tie an openwork square with a crochet, an image, a diagram and a description of the work.
 How to tie a square crochet, you learn from our master class with diagrams and photos