How to tie berets with knitting needles, detailed photos and job description, several models with a delicate and dense pattern, knitting on circular, stocking and regular knitting needles
Those who are not familiar with the latest fashiontendencies, with the phrase "takes, knitted with knitting needles," for sure, frowns and counts this creation as "grandmother's old". But for real women of fashion who follow the latest trends in the beauty industry, handmade berets become a real find. There is no woman who would not be approached by beret, there are those who do not know how to choose and wear them. These beautiful hand made accessories can completely transform the style, give it a light French chic, light-mindedness of this artist. Turn any woman into a charming coquette. In addition, berets, bound from warm yarn, will be perfectly preserved from winter cold, and light and delicate options will be indispensable under the bright rays of the sun in the summer. Knitting art has very long and rich history. Knitted things over 4 thousand years old were found in the tombs of Egypt. On the territory of Cairo was found a dress made of multi-colored silk, tied on spokes. It was from this country that knitting came to Europe together with the Copts - Christians. Since the XII century, knitting has become a very profitable industry in Europe. They make stockings, gloves, even sweaters. At that time, only men are engaged in this craft. They fiercely competed in this matter with women. Even special agreements were issued. For example, the stockings of Prague in 1612, under pain of money losses, refused to employ women. But over time, knitted things became more popular, the need for them increased, and, after a couple of centuries, knitting became a woman's business. The appearance of the beret is a history no less ancient. The name of this accessory comes from the French "beret", which can be translated as a "flat cap". It is believed that the first berets were worn by the Celts, who lived in the 12th and 13th centuries on the territory of present-day Holland. In those days, this hat was both female and male. Now charming women wear only their berets. In order for this product to become one of the favorite things in the wardrobe, the beret should be to the person. To achieve this easily, if you create this accessory yourself, for example, knit. In addition, that such a product will be individual, it does not require a large expenditure of yarn. For a classic beret you will need up to 100 grams of thread, if you want to associate a volumetric variant with an unusual texture, then take about 150 g. Any person who is versed in fashion trends will definitely say that the only style that will never lose popularity is classic .
Berets with knitting needles
Classic beret version, knitted 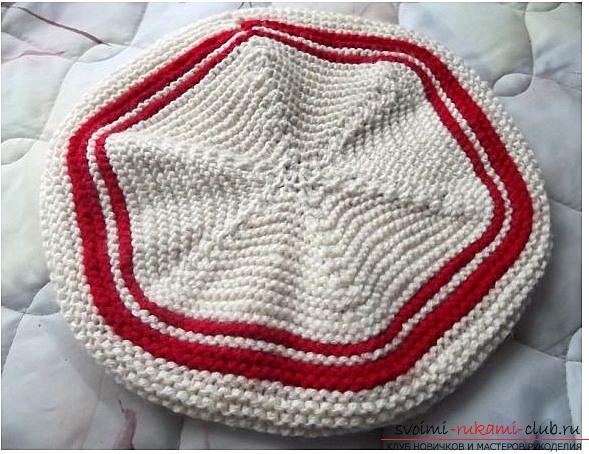 Option 1 Materials:
- Yarn of milk color 50% acrylic, 50% wool (280 m / 100 g);
- Red yarn for contrasting stripes (not mandatory);
- Spokes straight № 3;
- Hook No. 2.
We type on the spokes 110 loops. Their number will depend, of course, on your own measurements. Before starting to work, you will need to link a small sample and calculate the loops by individual measures. The first river. knit with facial loops. Starting from the second row, we knit an elastic band of 2 x 2 to a height of 5 cm. 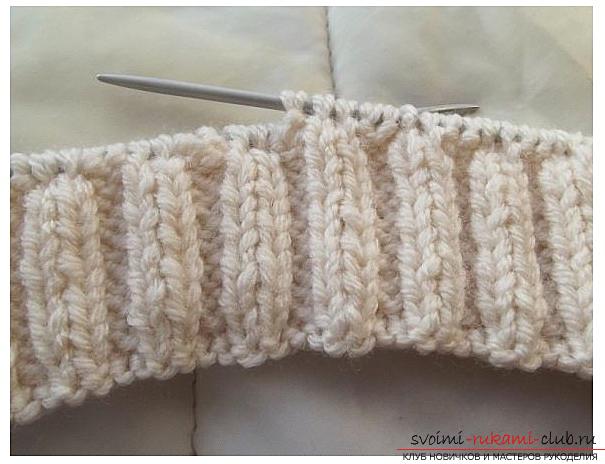 The last row in the elastic band is sewn by the wrong. We evenly add 28 loops. We do this in the following way: we make a cape. Beret will be made garter stitch. This is one of the easiest species. And for the front and for the back rows we use the facial loops. This kind of loops learn to knit the very first, so even for beginners, they turn out to be even and neat. Even if you are new to knitting, a beautiful beret is guaranteed. The cloth thus connected is sufficiently dense. Bonded in this way takes a thread with a high wool content will be an excellent option for a cold winter.
 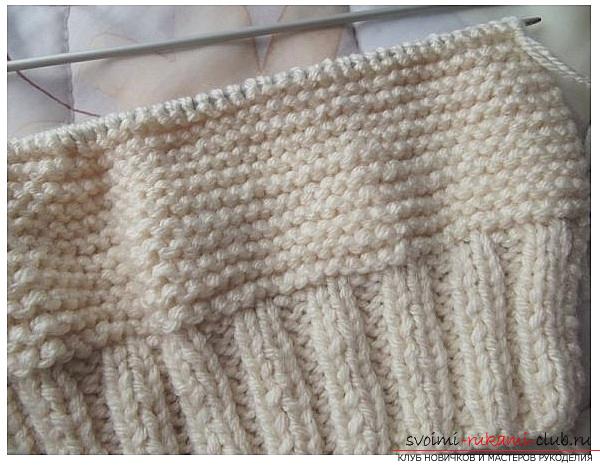 When knitting a cloth, alternate the thread in the followingorder: 22 rows of yarn of yarn, then 4 rows of red shade, again 2 rows of milk, 2 more rows of red and 8 rows of milk. The height of the canvas will be about 11 cm. Then we start knitting with discounts. With contrasting thread or pin, we divide the canvas into 6 equal parts. Each of them has 23 loops. The first river. should be facial. First and last two loops we sew with 1 face loop. Also we knit 2 loops together before and after the marks. A reduction of 12 loops is obtained. The next two rows are knitted without any penalty. Fourth р. knitting is similar to the first. We subtract 12 loops. The next two rows are performed without any penalty. Seventh r. (facial) to make adjustments similar to the 1st and 4th series. Similarly we act with all subsequent facial series. We blotted the rows without deductions.
 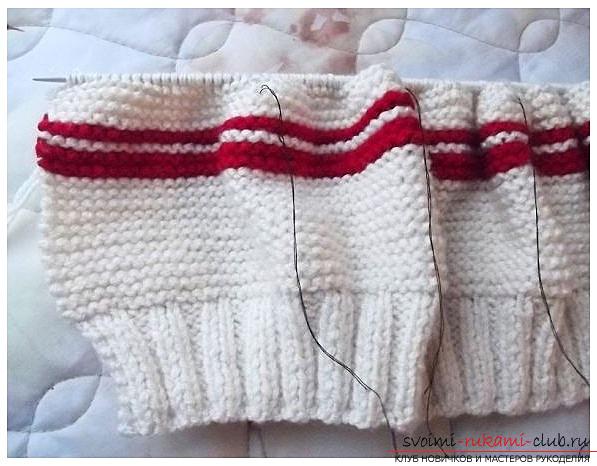 When there are 18 loops left, we reduce their number by half. Now we have 9 loops left. We thread through them and tighten.
 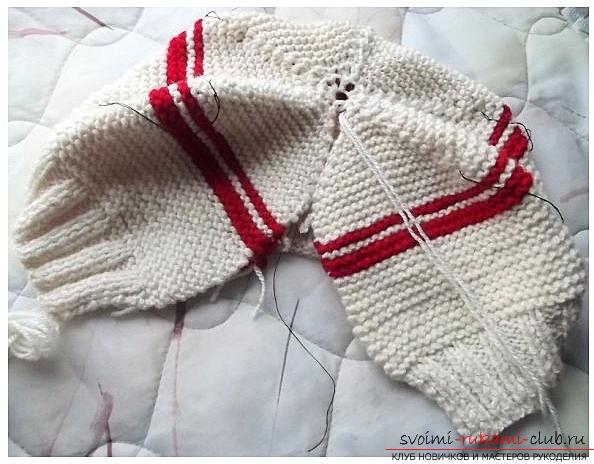 For this it is convenient to use a hook. We fix it, but we do not cut it. The same thread with the help of a hook connects the beret on the seam. Option 2
 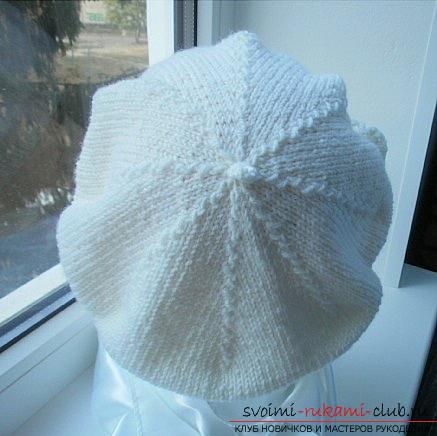 Materials and tools:
- The yarn is white (50% acrylic, 50% wool);
- Circular knitting needles No. 2.5 for rubber bands and 4.5 for the rest of the fabric;
- Hook No. 2.5.
We'll knit in a circle. We start with smaller spokes. We type on 64 loops for each knitting needle (total 128 loops). We make an elastic band 1 x 1 eight rows, about 2 cm. Now knit all facial and evenly add 12 loops on each spoke. In total, you should get 152 loops. 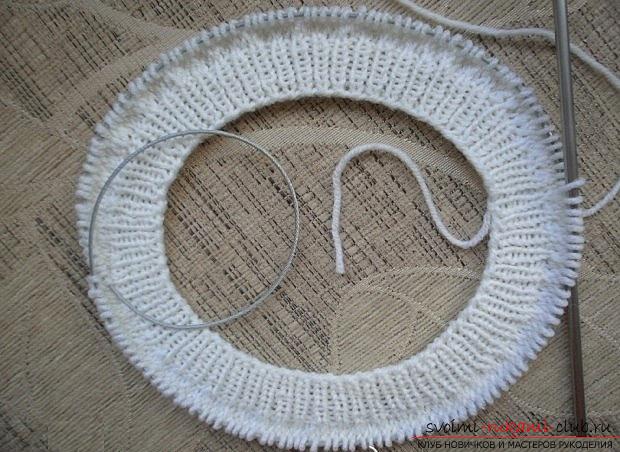 All the increases are made on the front side of the beret. We sew the original rows with the usual series. Those. The addition of loops is obtained through a series. You can make increases in the middle of the canvas in several ways. First - add 1 loop. For this, the broach between the two loops of the previous row is picked up by the left knitting needle and knit the front crossed loop. The second is to tie two of them consistently from one eyelet. When we got 152 loops, we take the knitting needles No. 4,5 and we sew the next 8 cm with the eyelets. Beret will be made with a stocking knit.
 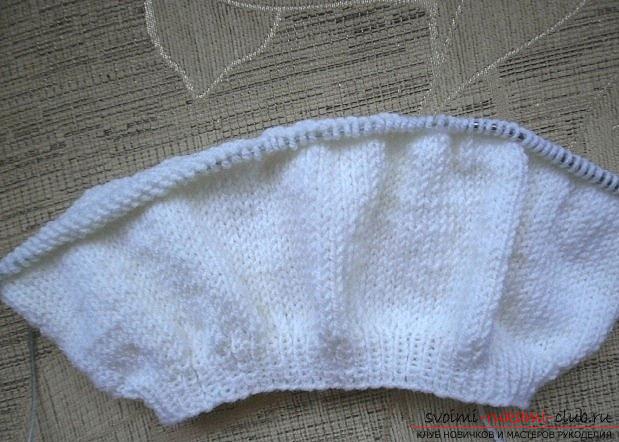 Now it is necessary to divide the work into 8 wedges19 loops each. We do this in the following way: every 19th and 20th loop we sew together behind the back wall with a face loop. It will serve as a marker that separates all eight parts. You can, for accuracy, select these loops with a plastic marker or a regular pin. In the figure, the wedges are marked with black lines.
  The next circle is knitted simply by facial loops. Next, we will knit the looseness of the loops in each of the eight wedges. They will look like a zigzag scar. Losses we do similarly to the increase in each first row. Spotting the second facial loops unchanged. Thus, we will knit all the remaining canvas before closing the loops: First p. * We knit with the eyelets up to the mark. To tie the hem, we knit together with a face loop behind the back wall (a loop formed by tying two loops together, and the one that precedes it). We continue from * to the end of the circle. The second river. we knit just facial loops. Third r. * We knit the front to the mark. Then we sew with the obverse loop behind the back wall (a loop that was formed from the knitting of two loops together and the next to it by a loop of a wedge (it is obtained first in each part)). We continue the whole circle from *. Fourth р. knit similar to the second facial loops. Due to the fact that we are tying together with the selected loops, then loop to them, then after them we get beautiful zigzag teeth. In this case, the web decreases.
 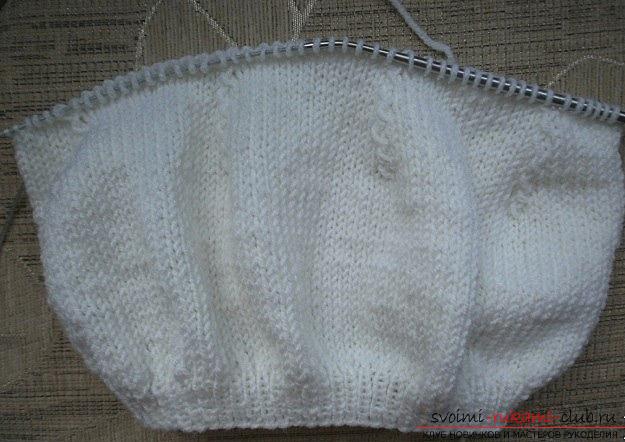 Continue to make adjustments until we get 8loops on each spoke. Now we sew the two loops together with the front ones. At us it turned out on 4 loops on a spoke. Only 8 pieces. It is necessary to stretch a thread through them and tighten without tearing it away.
 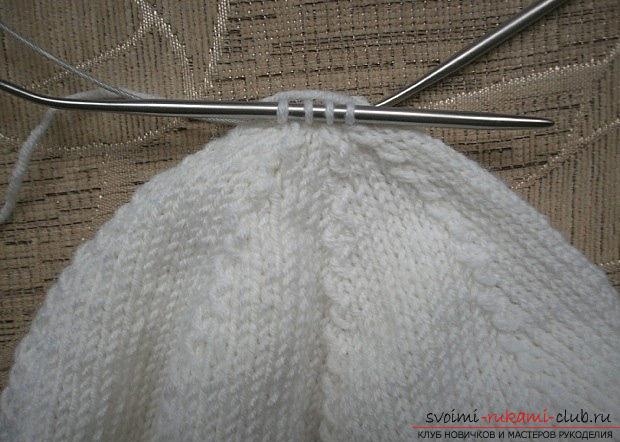 On the same working thread, we will knit a loop with a crochet. We dial 8 cp. and we sew one row of Art. b / n. we fix in the loop of the base.
 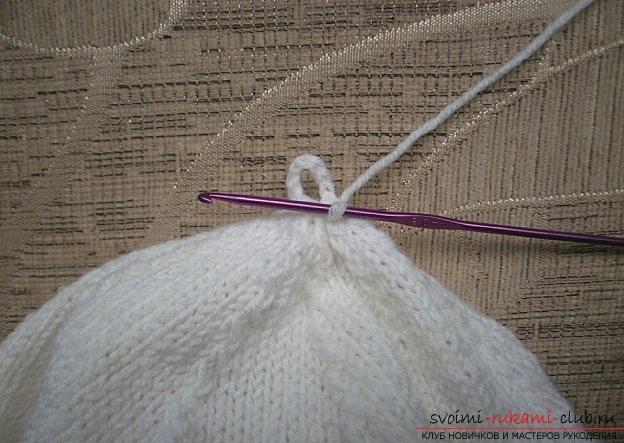 Thread, fasten, cut and hide. Takes knitting needles with a volume invoice pattern "open knobs".
 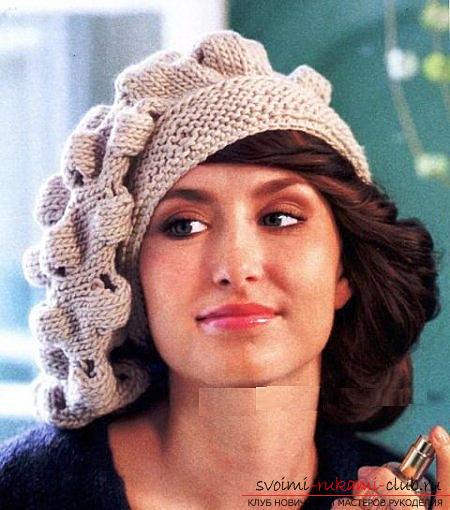 A charming beret of yarn with a touch of coffee and milk will suit both the blonde and the brunette. This is almost universal model. Materials and tools:
- Yarn color coffee with milk (45% acrylic, 55% wool merino) 70 m / 50 g;
- Stocking knitting needles No. 5;
- Stocking knitting needles No. 6;
- Hook No. 4.
For knitting we will use garter knitting(alternate 1 row with face loops and 1 row with purl). Himself takes it suits very simply. Preliminary it is necessary to make a sample of approximately 10 x 10 cm in order to calculate the required number of loops according to individual measures. We type on spokes number 5 (you can have another number) 78 loops. We knit 4 cm garter stitch. Now we turn to knitting needles with a large number (No. 6) and begin to knit a pattern with open knobs *. * The main pattern is as follows:
- From the 1st to the 4th rows we knit the usual plak (facial) smoothness.
- The Fifth River. * We begin with eight facial loops, then there is one shishechka of six loops (on these loops separately we knit the face surface of 8 rows, not touching the rest of the canvas) *, continue from * to the end of the row.
- From the 6th to the 9th rows we knit with garter stitch.
- 10-th р. * 1 facial, then 1 open shishechka on 6 loops, then 7 facial *. We knit from * to the end of the series.
- Continue knitting, repeating these 10 rows.
In the first row, knitted with needles No. 6,add 34 loops. Now there are 112. After repeating three times from the 1st to the 10th series, we start knitting. We mark 8 equal wedges with 14 loops in each. You can note their contrasting thread or pin. Now we knit together the last two loops of each wedge. The next row is knitted without any penalty. The rest with similar discounts until there are 8 loops left. We stretch the thread through them and tighten them. 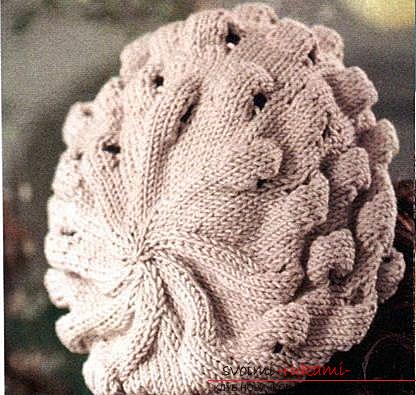 Now crochet it is necessary to tie the edge of the beret and the beginning of rows with knobs. Takes knitting needles with an openwork pattern
 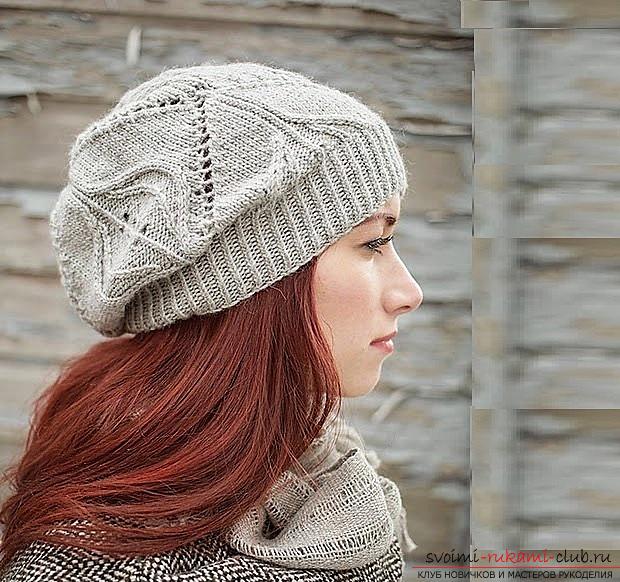 The highlight of this beret will not only be delicatea pattern, which is connected with the canvas, but also an elastic band. Usually for these purposes the most common kinds are used, for example 1 x 1 or 2 x 2. This takes we will knit using a twisted elastic band. Materials and tools:
- Yarn 50% alpaca, 50% wool (132 m / 50 g);
- Spokes № 3,25, № 3,5;
- Additional spoke.
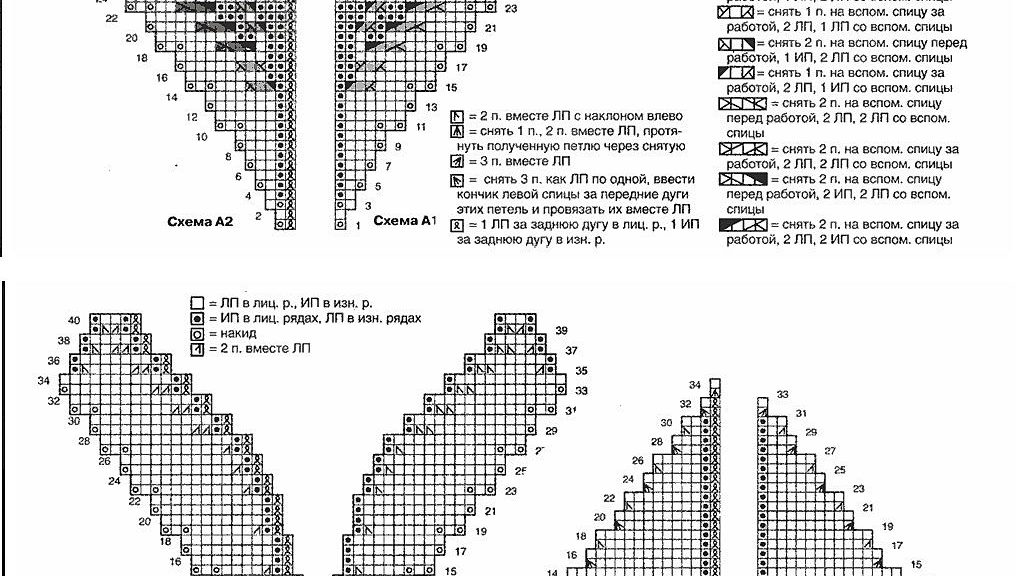
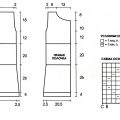
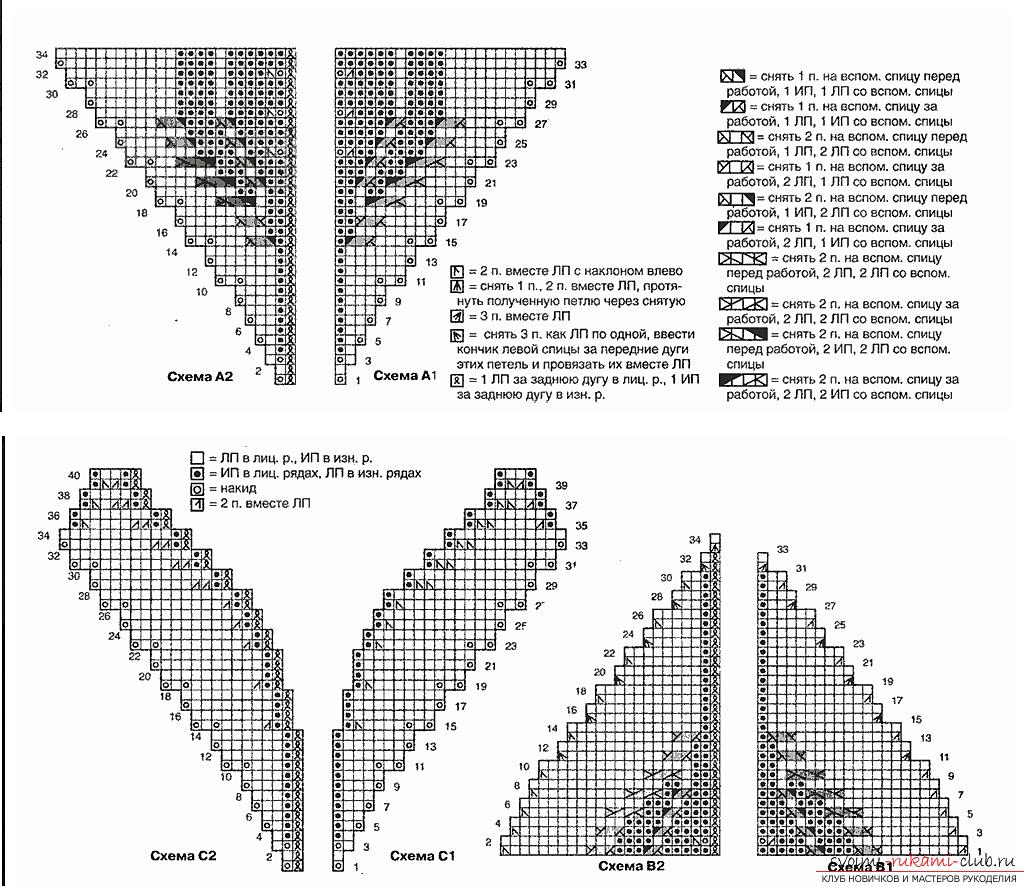 Before you start knitting a beret, it's worthperform a sample of the gum and calculate the required number of loops according to the individual measure of the head circumference. The data are given for size 51. The twisted elastic 1 x 1 knits on an even number of loops as follows: First p. (purl) * 1 purl for the rear wall. 1 facial loop *, repeat to the end of *. The second river. * 1 purl loop, 1 facial loop behind the back wall *, continue from * to the end of the row. We alternate the first and second rows. Eraser is made with knitting needles 3,25 on 104 loops 5 cm in height. To finish it is necessary purl (as the first) series. Next, we knit with the increments, beginning with the purl series. We transmit 19 times (3 facial from the pull of one loop, then 2 facial from the pull of one loop), then 4 times we knit 2 facial loops from the loop of one loop, 1 facial loop. We have 146 loops. Now go to spokes number 3.5. The first river. openwork pattern (front). 1 purl loop, now you need to knit a series of schemes in the sequence B2, A1, A2, B1. Repeat 3 times. Finish with 1 purl loop. The second river. (purl). 1 the face loop then re-knit according to the patterns in the following sequence: B1, A2, A1, B2. Repeat three times, 1 facial loop. We knit by schemes up to 34 rows, and including it. All facial rows begin with B2, and the purlins B1. We knit the 35th row as follows: 1 back strap, then the first row according to the scheme (C2, B1, B2, C1) is repeated three times, one is the backing loop. The next row we knit by analogy, first 1 face loop, then three times repeat the second row of schemes in this order (C1, I2, B1, C2), 1 face loop. We continue to knit up to 34 rows of the scheme. There should be 80 loops. The next row (front) is knitted like this: 1 purl loop, (row in C2, 1 face loop for the back half loop, continue pattern along C1) three times, finish with 1 purl loop. Now knit the purl series: 1 face loop, three times (row in C1, 1 purl for the back half loop, then C2). Finish with 1 face loop. We alternate these two rows until 40 rows are tied. In total, there are 32 loops. Next row (front). We knit 1 the wrong loop, then the two hinges together with the front hinge with the slope to the left, farther 5 times (two hinges together face, then remove the 2 hinges together, like the front hinge, 1 facial hinge and pull it through the removed hinges). We then remove the 3 loops as a front one, insert the left spoke and tie the front half-loops together, as one face, end with 1 purl loop. In total, there are 14 loops. The Wrong River. 1 facial, 12 purl, 1 facial. Facial r. 1 purl, 1 facial behind the back wall, three times knit (remove 2 loops, like front, 1 facial loop, now extend it through the two loops removed together), then knit 2 loops along the front with a tilt to the left, finish row 1 with a backing loop . In total, 7 loops are obtained. Now it remains only to stretch the thread through these 7 loops, tighten and sew the same thread with the same cloth.
Comments
Related posts:
 Knitting with knitting needles of a female pullover with an openwork pattern. Detailed diagram with photo and description for beginners
 How to tie a crocheted autumn hat with your own hands for girls, detailed diagrams, photos and job description
 Knitting with an elongated waistcoat with a zipper. Our scheme and recommendations will help you to master the knitting of a waistcoat with a pattern of a honeycomb with knitting needles
 How to tie a hat, knitting hats with knitting needles, patterns and patterns for hats, patterns for knitted hats, detailed descriptions, diagrams, photo examples, recommendations.