
How to age a tree with your own hands - 7 ways at home
How to make a tree aged at homeand give a vintage look with your own hands? This article is dedicated to such tricks! Artificially aged things - look very stylish and harmonious! 7 methods of wood aging, which we consider here, are interesting for their simplicity and excellent end result. They also do not require the purchase of any expensive special materials or tools. We will analyze in detail the following 7 painting methods: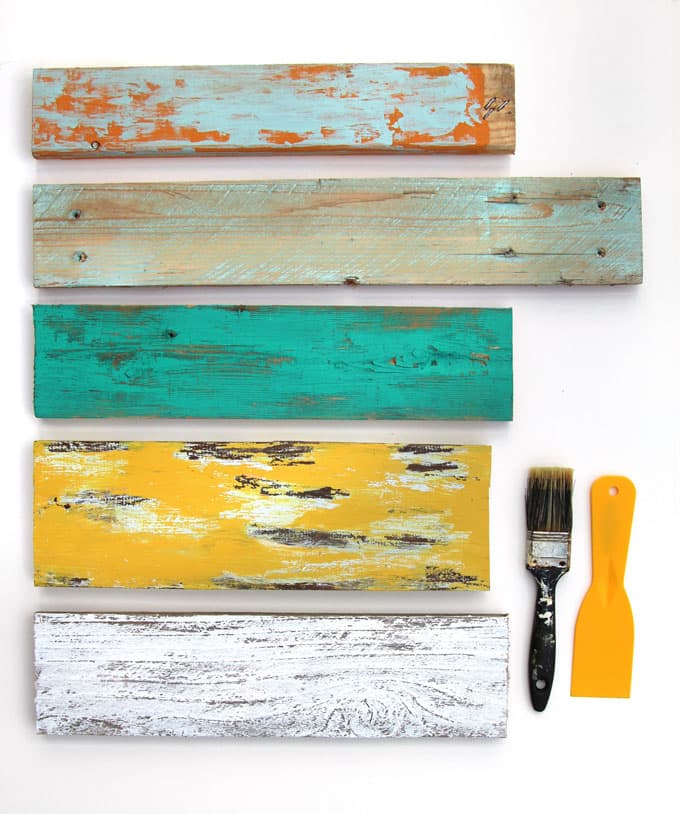 The content of the article:
1. Using a candle
This is a universal technique that helpsto give wood or wooden furniture a vintage look. It can be used both on untreated wood, and on already painted wood and furniture. Suitable for painting in one or several layers. For example, this result is obtained when painting this method in white color (for a detailed guide, read the article "")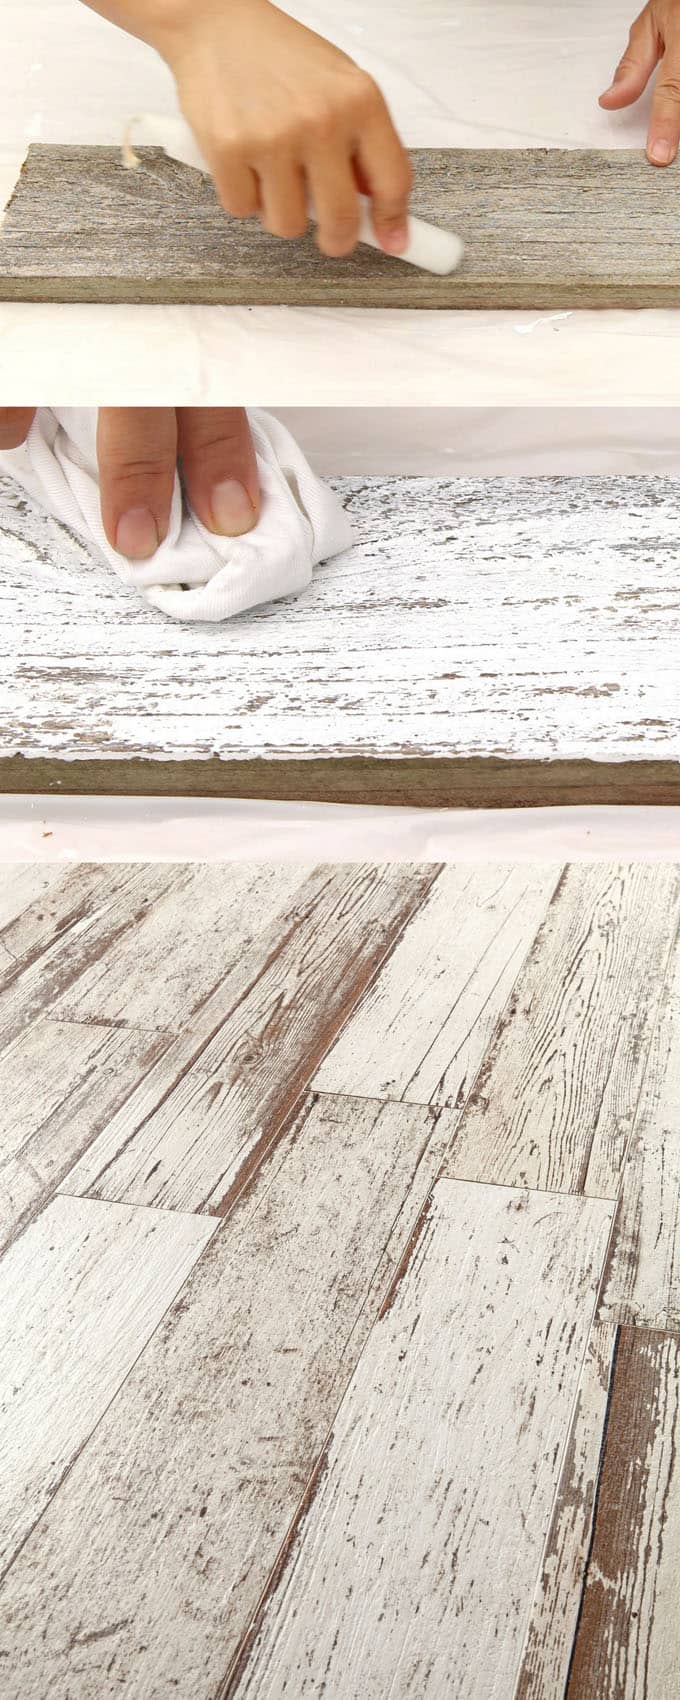 Let's take a detailed look at how to paint a tree using this method, making three layers (brown, white and yellow). Necessary materials:
- paint (brown, white and yellow)
- brush, candle, rag.
Step by Step Instruction: Step 1: First coat of paint
Step 2: We use a candle. Take a candle and rub it to the surface of the tree in several separate places (at the same time push the candle quite hard so that a clear trace of wax or paraffin remains on the tree). 
- Step 3: Second coat of paint Choose a color for the next coat and apply paint (here we use white). At this stage, the paint can be applied evenly to the entire surface, and not strokes, as with the first layer. Leave to dry completely.
- Step 4:After that, take a rag and wipe the surface, and with some pressure. In those places where wax was applied, the paint will lag behind the surface. If two layers are enough for you, then you can stop at this, and if not, we follow on.
- Step 5: The third layer of paint Repeat steps 2 and 3, but the latter is already using paint of a different color (here it will be yellow). After the paint has dried, you can apply a protective varnish. The latter is not necessary due to the fact that we intentionally gave an old look, so if the paint starts to lag behind a little, it will not be noticeable.
2. Wet paper aging
This method gives the tree an aging texturesimilar to the previous one from the candles, but now instead of wax there will be wet paper (if suddenly there were no candles at home, then everyone certainly has paper). Necessary materials:
- paint,
- brush, paper,
- a bowl of water.
Step-by-step instruction: 
You can make several layers, for example, as in the previous method. To do this, follow the step-by-step instructions described there, replacing the wax with damp paper.
3. Texture dry brush "Loft"
This technique is great for creatingold and scratched look. The key to success here is just using a very dry brush. For example, old brushes with a hard bristle perfectly will approach.  Necessary materials:
- stiff bristle brush
- water based paint.
Instruction: This is what this process looks like: 
This technique is also suitable for painting with the effect of a metal loft, for example, to create such artificial zinc letters. You can also combine this method using emery paper to remove some of the ink after applying each layer.
4. Paint scrapers in Provence style
The result will be about the same asusing emery paper. The difference is that sandpaper not only removes some of the paint, but also levels the surface of the tree if there were bumps in that place (which is not suitable if you want to preserve the structure of the tree, leaving it as natural as possible). The second difference is that sandpaper is used only after the paint has dried. 
 Materials needed: brush, paint, scraper (or any unnecessary plastic card).
  Instruction:
TIP: If you paint the furniture, then scrape the paint on the corners and edges, because it is there that it most often slashes during use. Thus, the effect of antiquity will look more natural.
5. Rinse method
This method to create the effect of old wood is suitable for elegant furniture in a rustic or Provence style. It is best used on raw wood. Necessary materials:
- paint brush
- water, rag.
Instruction: 
- Apply a coat of paint and leave to dry for a few minutes (as in the previous method, so that it is still sticky and not completely dried).
- After that, quickly wash the wood with water, gently rubbing the surface with a rag. The goal is to wash off a little paint on the surface. Leave to dry. That's all!
For example, a table painted gently in green, after applying this method looks just wonderful.
6. The method of painting wooden bars
This is a simple method that allows you to age wood or furniture with a wooden bar. Necessary materials:
- paint brush
- wooden bar.
Instruction: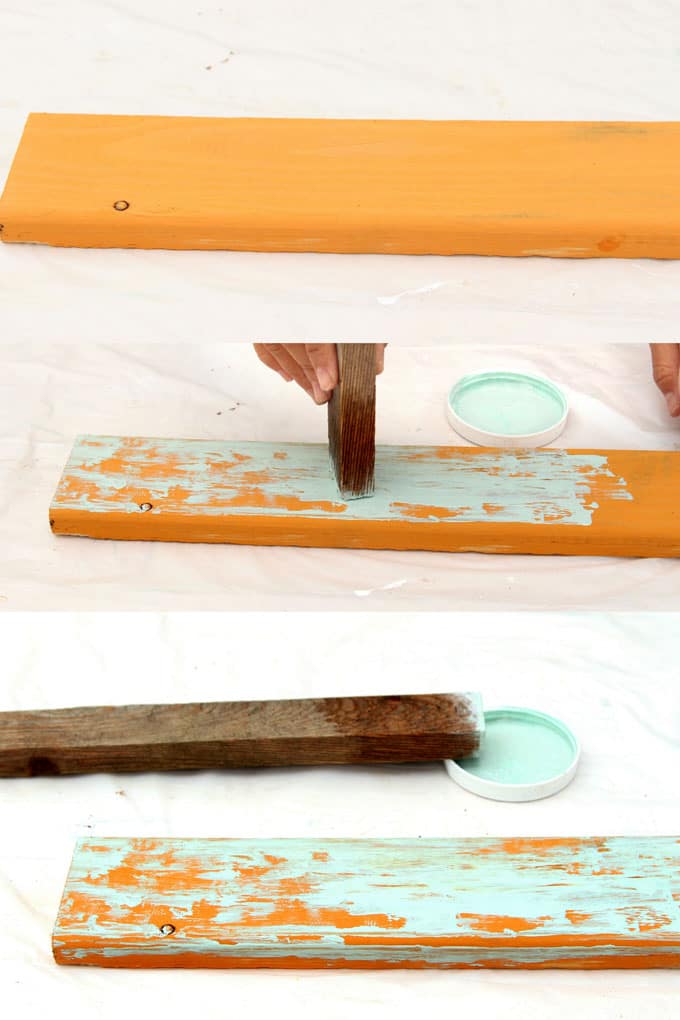
- Dip the end of the wooden block into the paint and run it along the surface to be painted.
- Apply as many colors and layers as you like.
Here, for example, they made a single layer of pale-blue paint.
7. Paint Ink Method
This is a one-step method, suitable for all types of wood with a large number of textures on the surface. Required materials: paint, scraper (or plastic card). 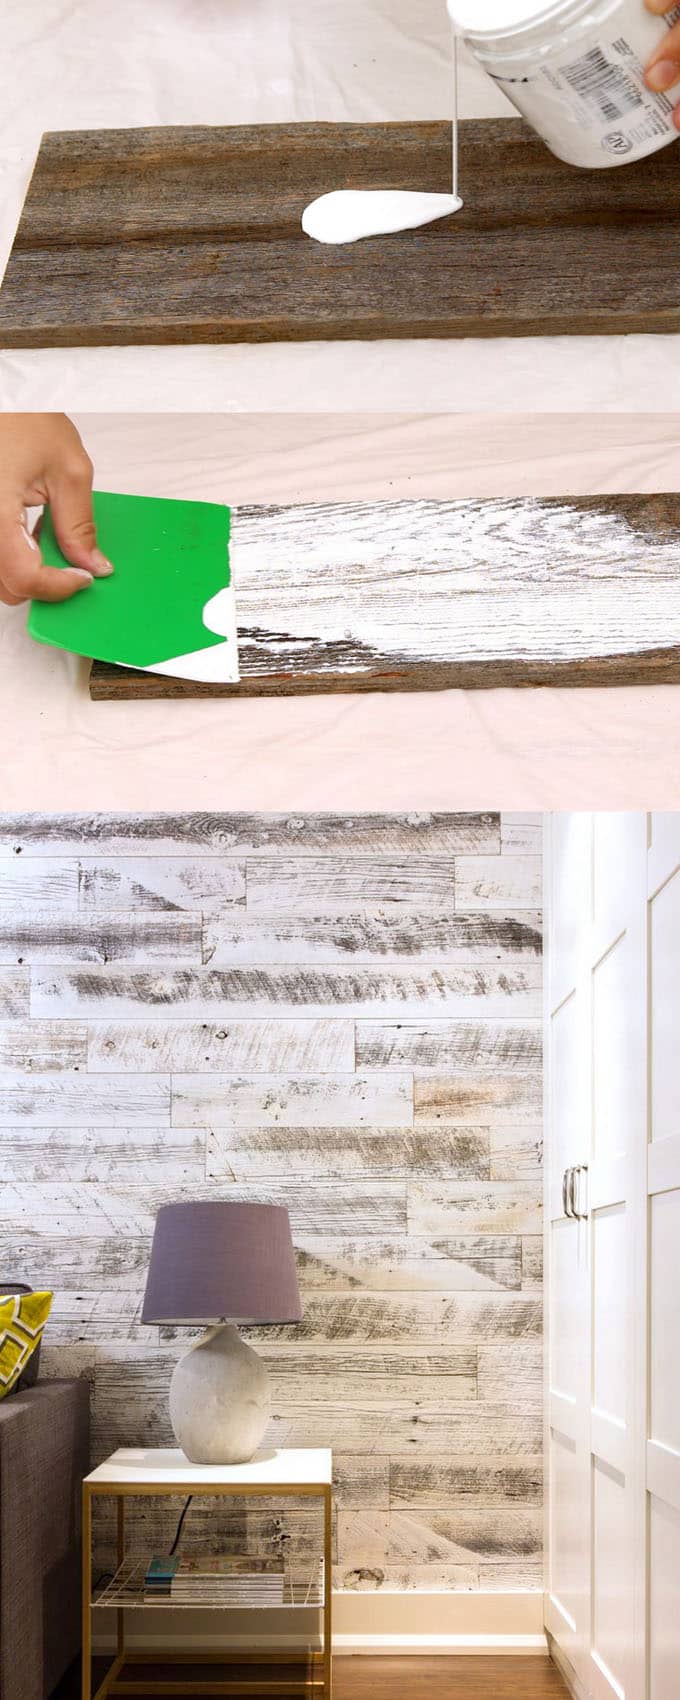 Instructions: You just need to pour a little paint on the surface of the wood and smear the scraper. Wait until dry, and you're done!
Recommendations and Tips
After we have reviewed all 7 methods of painting wood with the effect of antiquity, I would like to highlight a few basic tips that you can apply to all methods:
- If the surface you are going to paint, was treated with a sealant, wax or varnish, it would be better to polish it a little so that the new paint is better.
- Do not be afraid to experiment: you can mix these methods at your discretion, creating a personal design style.
- First practice on some piece of wood.or in less visible places of furniture (for example, on the inner surface of the door of a painted cabinet) before starting work on more prominent parts.
And remember that the main thing here is your desire! Good luck! 
Comments
Related posts:
 How to paint a cloth at home, with your own hands. Step-by-step instruction and materials for painting the fabric.
 Tips and advice on making chocolate figurines with your own hands at home.
 How to make paper garlands with your own hands at home
 We create hare ears with our own hands at home
 How to make amazing hairdos with a bang with your own hands at home