
How to build a pattern of skirt-trapezium with your own hands according to the instructions with a photo for beginners.
Skirt-trapezium by many fashion designers refers tothe type of skirts that face each of the fair sex representatives with any type of figure. The skirt received its name due to the corresponding geometric form, as it sits clearly on the waist and expands in a downward direction. The length and expansion parameters vary. 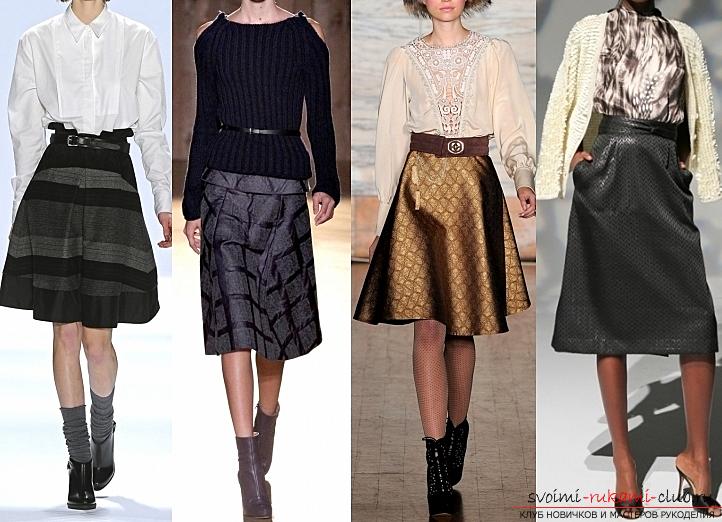 The construction of a pattern of this type of skirts should begin with the construction of the basis of a two-seam straight skirt based on which further modeling is performed.
  We take measurements. There will be only 3 of them: St is equal to the waist; Sat is equal to the half-grip of the thigh; Dizd is equal to the length of the product. In our example, the measurements were as follows: Ct = 35 centimeters; Cb = half a meter; Dezd = 95 centimeters. Additions. Now we need to decide on the additions for freedom of movement. In the waist, add from half a centimeter to one centimeter (Fri), and add one to two centimeters (Pb) on the hips. Addition will depend on the material and the required fit. When you have purchased a good stretch material and want the skirt to sit tightly, take the smallest increases. We begin to build the basis of a straight skirt. You need to take a large piece of paper (fit unnecessary wallpaper) and remember a little geometry.
 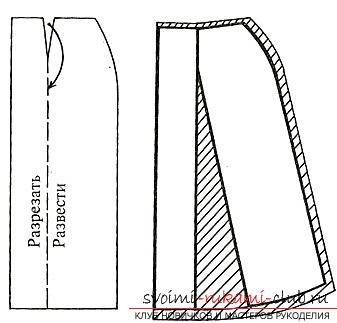 On the left side at the top there is an angle of 90degrees. Its top is the mark of T. Horizontal - is the level of the waist. The desired length is laid down from the T mark and the label N. is obtained. The width is the size of the hips, so the hip line is to be searched. For this purpose, it is laid down from the T mark about 16 to 20 centimeters. A conditionally proportional figure will fit for this parameter a value of 18 centimeters. This will be the mark B, from which the line is drawn, which is a parallel to the level of the waist. From the mark B along the line of the hips the result of the addition of the half-hip of the thighs and the increment in them is postponed. We get the label B1.
 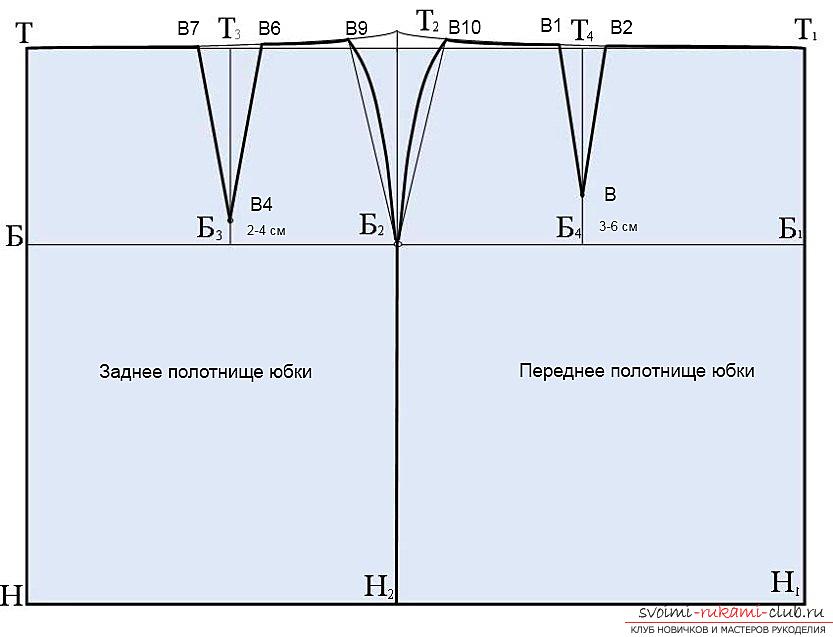 For our example, the width of the base will beis equal to 51 centimeters. From the mark D1, a segment is drawn in the direction upwards to the intersection with the waist line and to the bottom, the marks T1 and H1 are obtained. The TN segment denotes the harness of the rear panel. TH1 - the middle of the transmission.
  Now you need to determine the location of the gasketlateral seam. For this purpose, the width of the skirt is divided into two, from the received private take one centimeter. Postpone the resulting number from the label B and get the mark B2. Through the mark B2, a vertical line is made before contact with the waist line and the bottom line. For our example, the segment BB2 is 24.5 centimeters. To skirt is better sitting, you need to raise the side bevel at the waist level by one to two cm - you will get a T2 mark. Construction of a dart skirt. The total solution of the darts at the waist is found by the formula below (in it the values from our example have already been substituted): ΣB = (50 + 1) - (35 + 0.5) = 15.5 centimeters. Perform a side tuck of the skirt. Half is taken for the side seam. To this end, T2 is deposited in both directions one-fourth of the total solution. For our case comes out at 3.87 centimeters. From the resulting marks, smooth curves are made to the hip line (B9, B10). We make a dart of the back of the skirt. The solution for this dart is found by multiplying the total solution by 0.35. The position of the dart can be determined by multiplying the length of BB2 by 0.4. From mark B4 a line perpendicular to the level of the waist is drawn, which will be the torso of the dart. From the place of contact with the level of the waist, the obtained value of the tumbling solution is divided in two directions, divided in two. Dart should not reach the level of the hips by two to four centimeters. We construct a dart of the front part of the skirt. Its solution is subtracted from the total size of the lateral solution and the tuck of the rear part. Determine the location of the dart should be the same as we did for the back. In front, the dart should not reach the hip level by three to six centimeters. Connect all the marks and the pattern of the base of the straight skirt can be considered complete. Now you can start creating another type of skirt. So, the skirt is a trapezoid. In order to give it the appropriate shape, you should perform the expansion at the bottom. This is done by laying off the lateral bevel at the bottom level of three to seven centimeters, focusing on the length of the skirt and the necessary amount of expansion. To make the landing more attractive, you need to use another way. First of all, the lines of dewlap serfs continue to the bottom and cut according to them a pattern. Then the dart closes, and at the bottom you get an extension. It is a ready-made pattern. However, it should be taken into account that the dewatering solution is different, and when the two darts are completely closed, the expansion will also be different: the rear is wider, and the seam on the side will go forward. To prevent this from happening, the dart of the rear part is closed solely to the size of the front. In other words, the front panel will not have a dart, and the back will have less than the original. Pattern skirt trapezium is now consideredfinished. We turn to the cutting of this type of skirt. We begin with the basics. Before starting work, we advise you to moisten the material slightly and walk through the iron. Fold in half face inward. Lay the pattern with the front panel saddle to the fold line of the material. In conditions where the width of the material allows, the panel of the rear part should also be cut without the middle seam, however, while the buckle should be located in the seam on the side. The pattern is transferred to the material, the seams are made: on the side seams one and a half - two centimeters, on the hem of the bottom - two to four centimeters, on the finish of the upper cut - 5 - 10 millimeters. We do the cutting. We add a belt, and you can take up sewing.
Comments
Related posts:
 How to properly build a pattern of a pencil skirt, detailed photos with patterns
 How to make a pattern of a skirt-year with your own hands. Amazing innovative solutions.
 How to build a pattern of a long dress for a woman with your own hands, using step by step instructions with a photo and description.
 Sewing a pattern for a trapeze skirt on an elastic band for a woman with a description for beginners.
 Informative article on how to make a pattern of a skirt in a floor the hands?