
How to make a birthday cake-cake: a master class
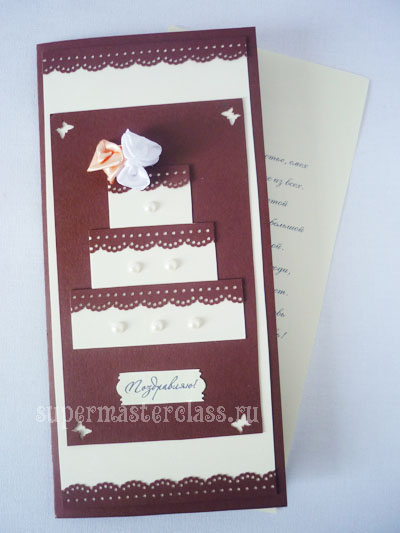 How to make a birthday card with your ownhands? This question is asked today by many, and not without purpose. Handmade postcards have become a sign of special attention that you want to show to the person presented. Today, there are many products and accessories that make the process of creating cards easy, fast and interesting. We will show you some tricks and methods using the example of creating a simple postcard with a chocolate cake - for a birthday!
To make a birthday card on our model, you will need:
cardboard of two colors - brown and cream; narrowsatin ribbons; punch curb; figured hole punch butterfly or any other; cream-colored half beads; glue gun; double sided tape; tweezers; inscription with congratulations (you can write by hand or print it out on a printer). 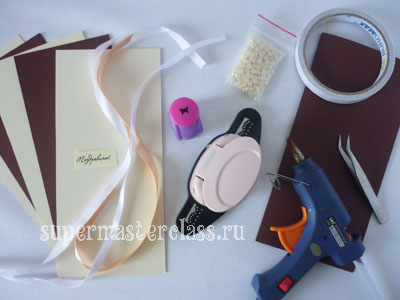
How to make a birthday card with your own hands: job description
Cut out cardboard card blanks. The base of the folded postcard has a size of 10x21 cm, and in the unfolded one - 20x21 cm. 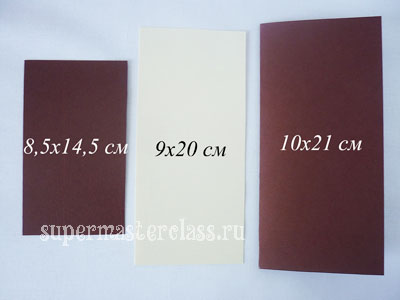 In the blank of brown cardboard we cut through the butterflies in the four corners. We place the cardboard in such a way that the butterflies are exactly centered between the sides forming the corner.
 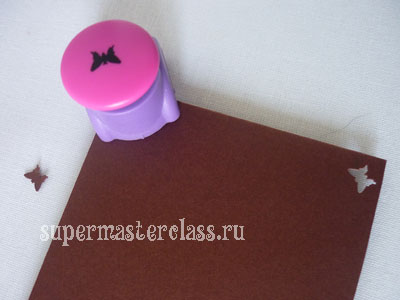 Sticking on double-sided tape billet creamshade to the base of the postcard. It is necessary to glue so that the indents from the opposite sides are the same. In the same way we glue a brown blank with butterflies.
 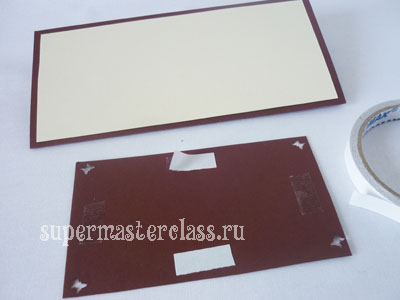 We did the main part of the postcard, the most interesting part is its decoration.
 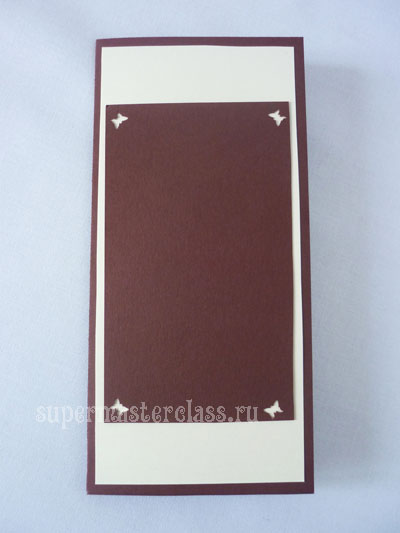 Cut out strips of this size from light cardboard. This will be the tiers of the cake.
 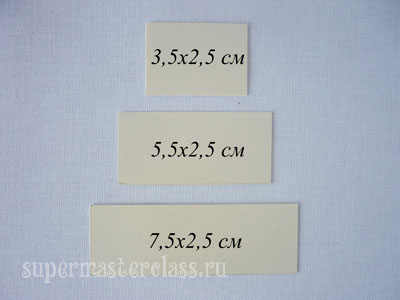 Sticking tiers in the center, forming a cake.
 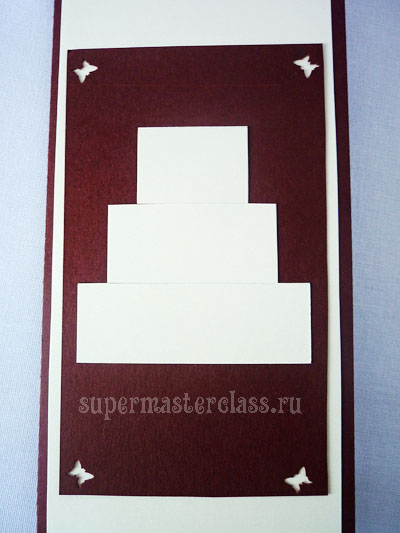 From brown cardboard, we extrude the lace stripes with a hole punching curb.
 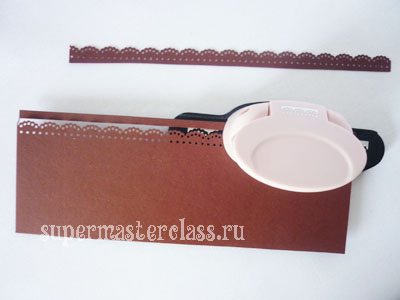 We cut off 3 strips with a length equal to the length of each rectangle-tier of the cake, and glue them on the adhesive tape to the top of each rectangle. Using a glue gun and tweezers, decorate the cake with beads.
 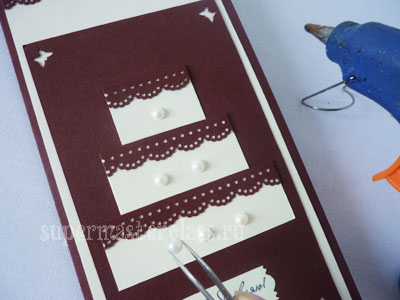 Now you need to decorate the top of the cake. For this we weave small. We will make two roses from ribbons 1 cm wide and one 0.5 cm wide. Take ribbons of a color contrasting to the main colors of the greeting card, but so that they are in harmony with each other. We take a tape 30 cm long and bend it at the center at an angle of 90 degrees. Arrange the ends of the tape as shown in the photo: the left side - over the right.
  Now turn the left tail down. The perpendicular arrangement of the tails of the tape relative to each other is maintained throughout the entire process of weaving.
 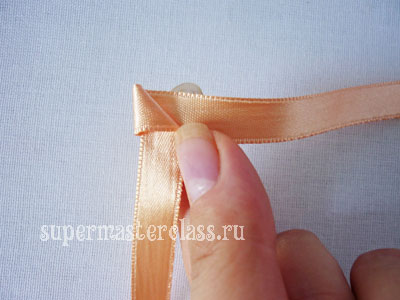 The tail that went down in the photo is bent down again.
 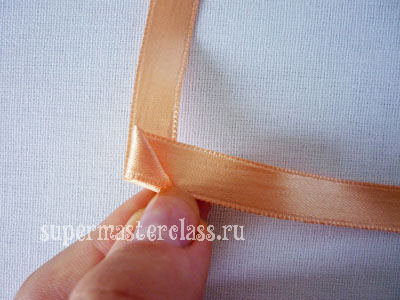 Thus we alternately turn both ends of the tape down.
 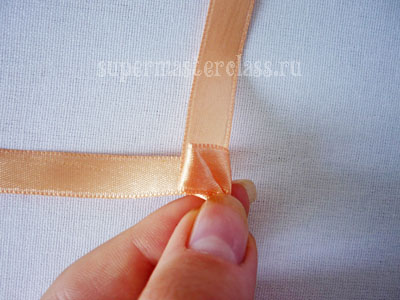 Repeat until the free ends of the tape are about 2 cm long. Now we take the free ends, holding them together with our fingers, and let go of the woven pile.
 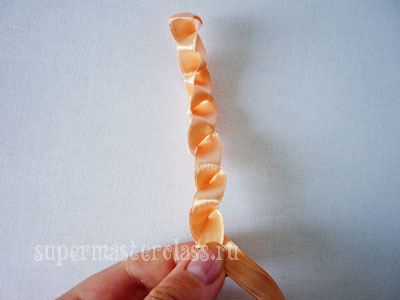 We take one of the two tails of the ribbon and pull over it, watching as if the ribbon itself folds into a rose. To secure the structure, we tie a knot at the bottom.
 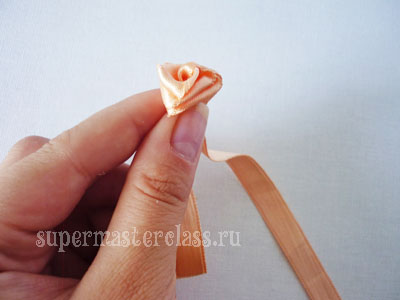 Sticking roses on the upper tier of the cake. In the free space under the cake we glue the congratulatory text.
 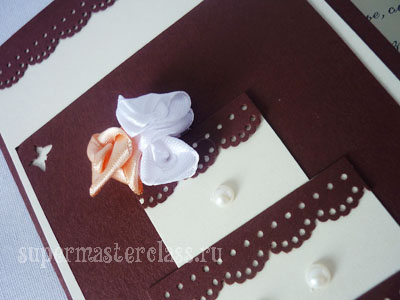 Birthday card is ready. And if you make the same card, but in pastel colors, it can complement your gift for the wedding day!
 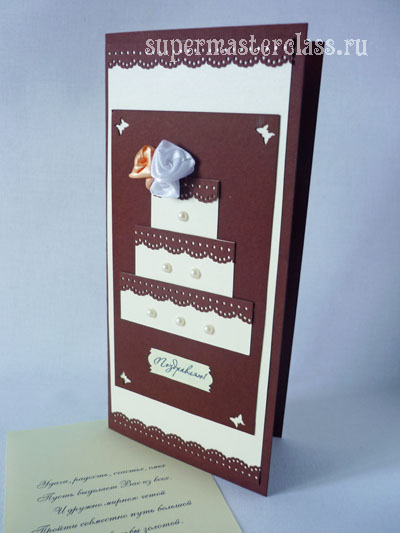 And what will be your main gift? Maybe try yourself in our master class? Antonina Mazur specifically for the site Previous article: Next article:
Comments
Related posts:
 If you want to learn how to make a card with your own hands, look into this master class.
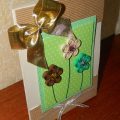
 This master class will tell you how to make a card by yourself for a celebration.
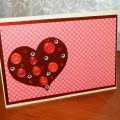 This master class with the description will teach you how to make your own heart-postcard.
 This master class will tell you how to make a birthday card with your own hands.
 Original cake from diapers to the extract. How to make a cake from diapers yourself using the master class