How to make a pattern and sew a pajamas for a newborn with your own hands with a description and a photo.
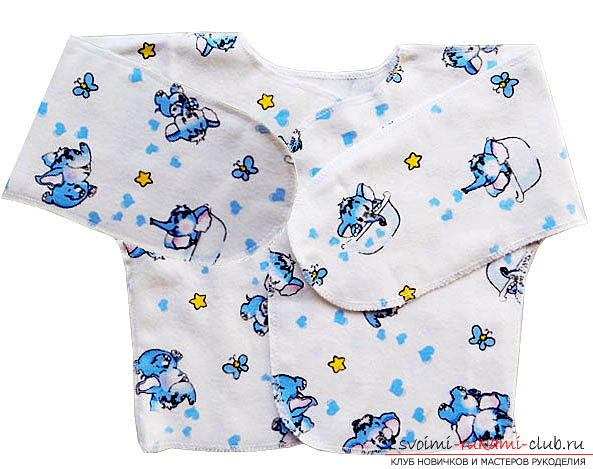
Each mother wants to wear from the first daysyour baby in bright beautiful things. However, often these stylish and, at first glance, comfortable little things, give the baby a lot of discomfort. The child will feel much more comfortable in a simple cotton loaf of cotton fabric. At the same time for babies it does not matter yet which embroidery and other elements of the decor contains his clothes. 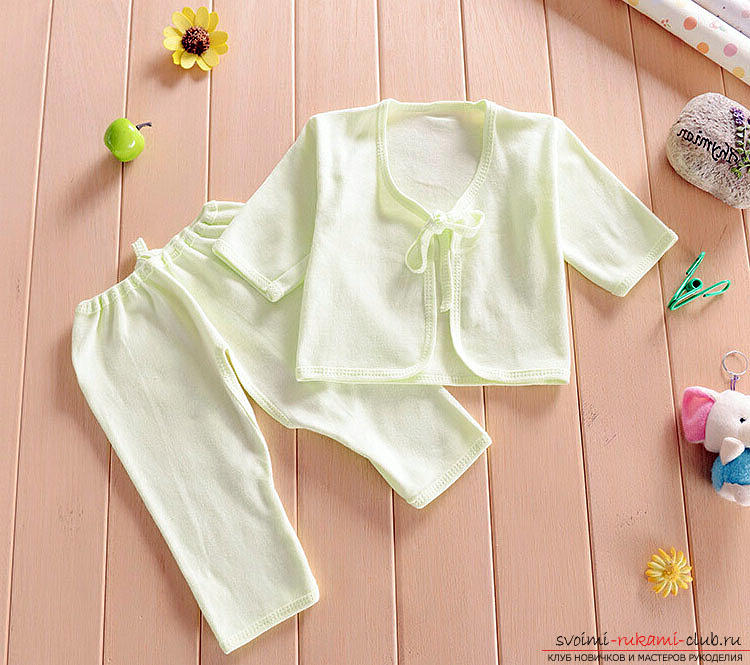 The choice of material for sewing a ringlets Therefore, whenit is very important to sew fabrics correctly. The most optimal option is still the tissue from a hundred percent cotton fiber: chintz or flannel. Of course, you can buy a good pajamas in the store, but with a sewing machine and the desire to put your child in the original thing, it's better to try to create it yourself. Often, among the grandmother's stocks you will find more than one piece of quality natural fabric for diapers, and from its remnants you just put a couple of raspashonok. Only be sure to pay attention to the quality of the fabric. You can also use cambric, madapolam, paper. The high quality of the material from which the baby will be sewn will become the guarantee of your child's safety. So-called "white-earth" cotton fabrics (a small drawing on a white background only on one side) will be most harmless to the delicate skin of your baby. On them there is no deep painting, therefore it is hypoallergenic. How to properly create a pattern for a baby's toddler. When creating a pattern for a future loaf, you need to take into account such measures of the child: the length of the product is thirty centimeters (in our case), the child's breast is half-covered with the child's breast - twenty-four centimeters, the neck of the baby is twelve centimeters. If the size of your child is slightly different from what we have proposed, then make the calculations yourself, based on the formulas below.
 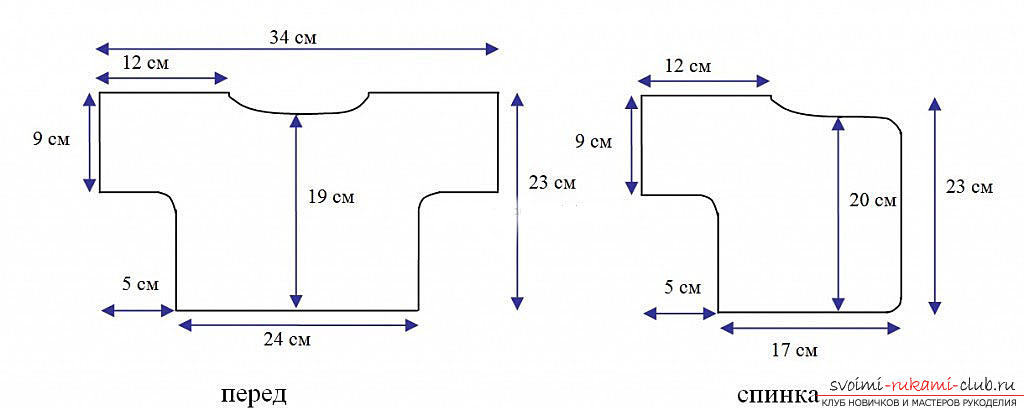 Building a Pattern 1. It is necessary to draw a rectangle ABCD, in which the vertical lines will be equal to thirty centimeters (AD and BC), that is, the length of the tutu. The horizontal line AB CD shows the width of the product and is equal to fourteen centimeters. This value includes half of the mid-breast of the baby (twelve) + add to the free fit two centimeters (for any size). The formula is this: twenty four: two + two = fourteen.
 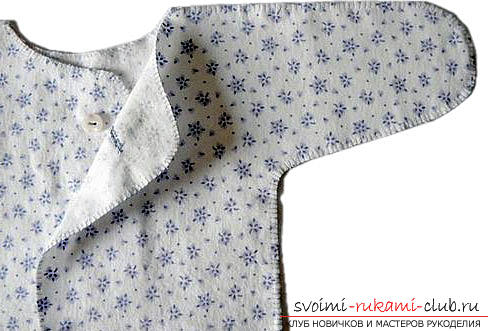 2. Make a neckline from the back. To do this, you need to move from point B to the left side, focusing on the line AB, to postpone four centimeters (that is, one-third of the neck), or twelve: three = four centimeters. And starting from point B towards the bottom, focusing on the line BC, you need to postpone one centimeter (for any size). The resulting points "four" and "one" need to be connected by a slightly concave straight line.
  3. Create a neckline in the front of the product. And starting from point B towards the bottom, focusing on the line BC, it is necessary to postpone five centimeters. The resulting value means: one-third of the semicircle of the neck + one centimeter (for any size). The formula is: twelve: three + one = five centimeters. 4. Determine the line length of the sleeve. To do this, from the point A to the left side, extend the AB line, postpone ten to fifteen centimeters and fix the point P. You need to measure your baby's pen, and then calculate this value by an experienced way. If you decide to create a closed sleeve, then you need to add to this figure another four to five centimeters. Do not fret, the sleeve will not turn out to be too long, because the kids grow fast.
  5. Determine the width of the sleeves of the ruff. And starting from the point P in the direction to the bottom, draw a line of eleven centimeters, focusing on the parallelism of the AD line. Then from the new point 11 create a line to the right side of the horizontal line until intersection with the line AD occurs, and the new intersection point will be called "P1". 6. Create a line of the bottom of the sleeve. Starting from point 11 in the upward direction, it is necessary to connect the point 11 to the point P, and then to postpone one centimeter. From the very point P1 to the left side along the line that connects P1 and point 11, it is necessary to postpone two centimeters. From the point P1 in the lower direction along the line AD, it is necessary to postpone three centimeters. As a result, the line of the bottom of the sleeve will pass through points No. 1, No. 2, No. 3. 7. Create a seam on the side of the product. Starting from point D, we need to extend the CD line to the left by two centimeters. And then connect the points number 2 and number 3. 8. We draw the line of the bottom of the product. To do this, separate the CD line into two equal parts. Then from the point number 2 (the bottom of the product) towards the top along the line of the side seam, put one centimeter. We will connect point 1 to the new point that divided the line CD.
  At this stage, the construction of a pattern of the futurethe turtleneck is almost complete. Still here it is important to decide which smell you will make, calculate its depth and the presence of the buckle. Having found out all the nuances, you can smell add on the sun line already on the tissue material itself, without introducing it into the pattern. As you can see, the pattern of the pattern contains only the fourth part of the raspashki, therefore, cutting out a pattern, you need to put another sheet. As a result, you will cut out the front part from the top sheet, and the back part from the bottom sheet. When you cut, you need to fold the fabric in half, focusing on the share line. Patterns of the back of the article we apply to the main fold of the fabric. And the front side of the loin will cut symmetrically to the back. With the help of an overlock, you need to connect the shelf and the side of the back or you can still use a simple suture seam. In this case, the main thing is to try to create a soft seam so that it does not press the child. We cut out the elements of the shirt, leaving no stock on the seams. Because we already took them into account when we were building a pattern (its drawing). Using a manual or machine stitched shovchik, we make lateral joints of the raspashki. Remember also that for babies up to five to six months you need to make all seams on the face of the product so as not to cause irritation to the baby's skin. The neck and the edge of the sleeves need to be decorated with a cut strip or with a scythe. They can also be processed using a hook. Or just handle the overlock. That's all! A loaf for your baby is ready.
Comments
Related posts:
 How to make a pattern and sew an oriental costume for a woman with her own hands with a description and a photo.
 Make a simple dress pattern for a girl with her own hands, using a step-by-step instruction with a photo and description
 Bant on the extract from the hospital of the newborn boy with his own hands with a detailed description of the steps and photos
 How to build a pattern of a long dress for a woman with your own hands, using step by step instructions with a photo and description.
 Step-by-step instruction on how to make a pattern and sew the trousers of a riding breeches