How to make a vase from a plastic bottle: 6 workshops with photos
A vase of flowers can cheer up even inthe gloomiest day. Surely, every house has one or several vases, but there are not so many of them - it is pleasant to change and alternate them from time to time, and not use the same one year after year. A vase made by hands from plastic bottles will be a wonderful solution to replenish existing stocks. 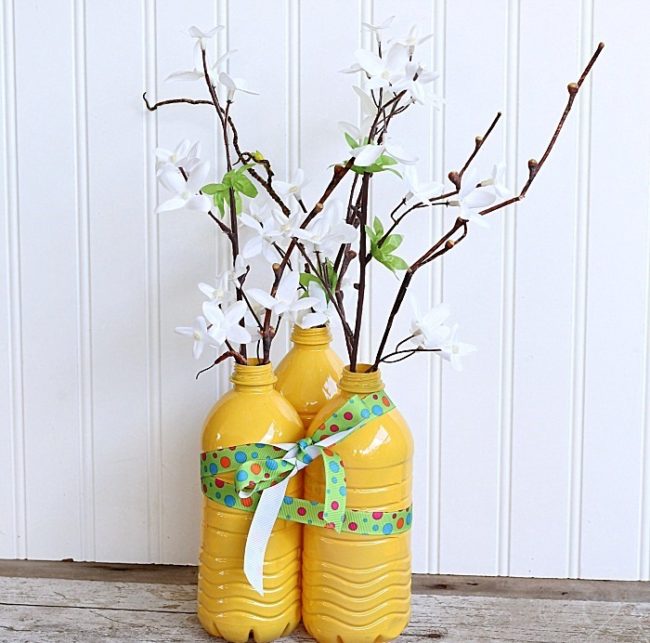 The content of the article:
5 advantages of plastic vases:
 We offer 6 workshops for making a vase at home. You can strictly follow them, or add your own elements, it should turn out beautifully.
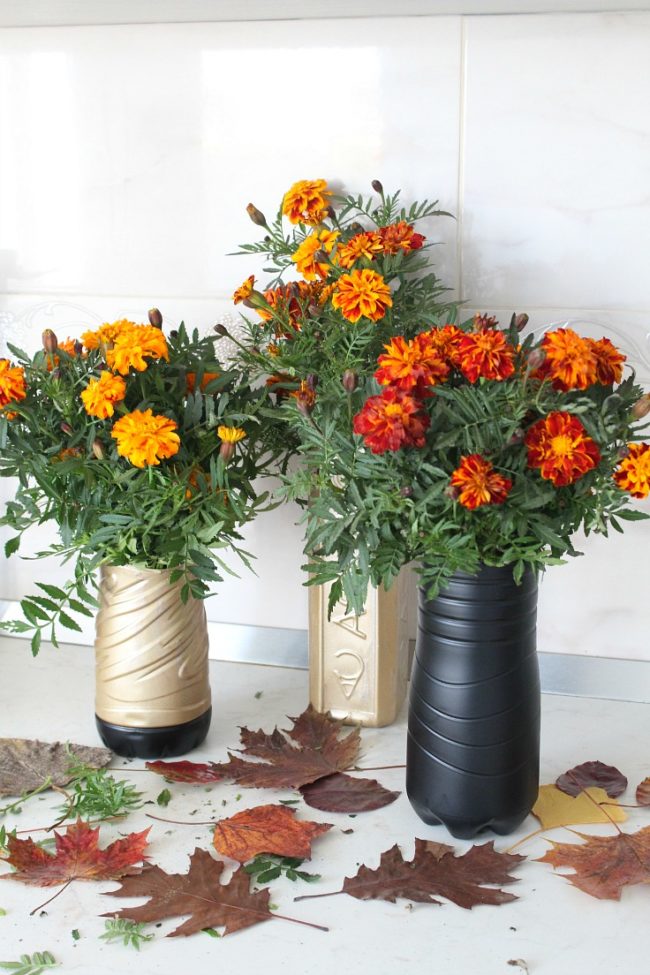
Vase painted with spray can
 Necessary materials:
- plastic bottles
- primer
- paint in a can (color of your choice, we used gold and black), ask the seller to keep it on plastic
- scissors
- insulating tape

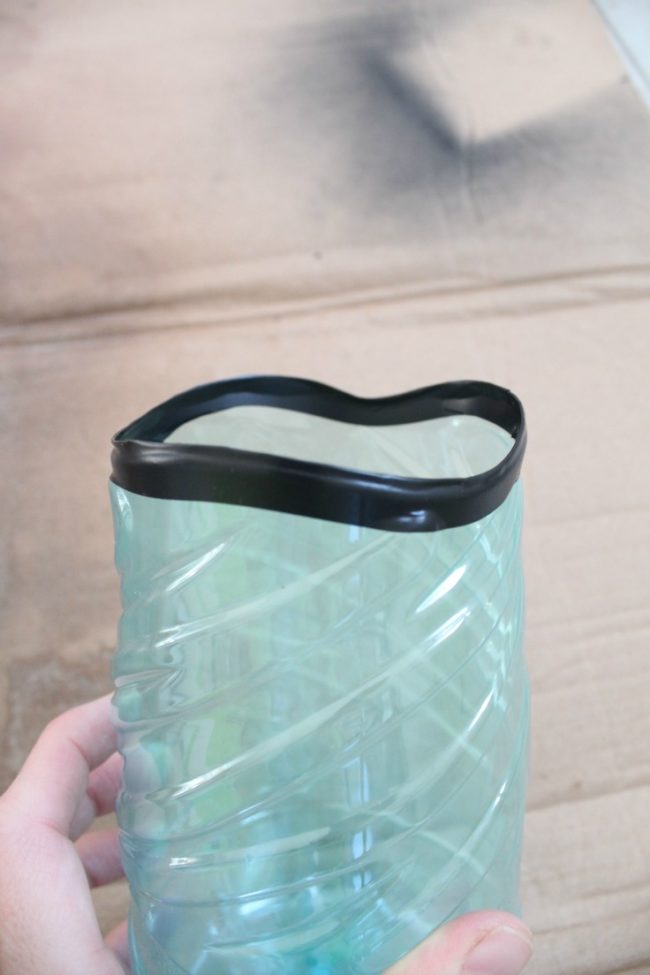
Step by Step Instruction: Step 1: Preparing Bottles
- Make sure the bottles are clean.
- Cut the top of the bottle.
- Tape the cut edge with tape so that when using a vase, the top edge does not cut flowers. Make sure it holds tightly on the bottle.
 Step 2: Primer Prepare the bottle for painting by first applying a layer of primer on it. So the paint will hold on better and will last longer. Step 3: Painting Spray paint on the bottle from the spray can and leave it to dry completely. Do this procedure on the street, or cover the floor with newspapers so as not to get dirty.
 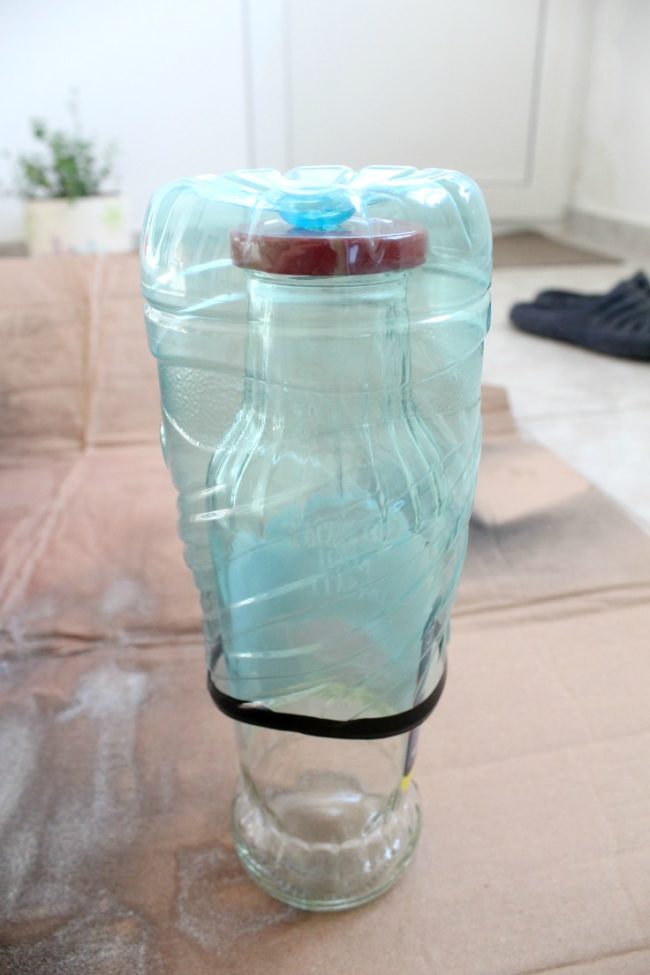 TIP: If you want to make a non-vase using several colors of paint (for example, gold and black, as in the photo), first apply one of the colors, leave to dry completely, and then apply electrical tape over the area where you want to add a second color, and spray , also leave to dry completely, remove the tape.
  Be sure to wait until the first paint dries, otherwise the sticker tape will ruin it, and then they will be removed together. These are such wonderful vases! ATTENTION: If you use a bottle of thicker plastic (from under the yogurt, for example), then the top edge can not pasted over. Trim the top carefully, and if a burr protrudes, just saw it off a little.
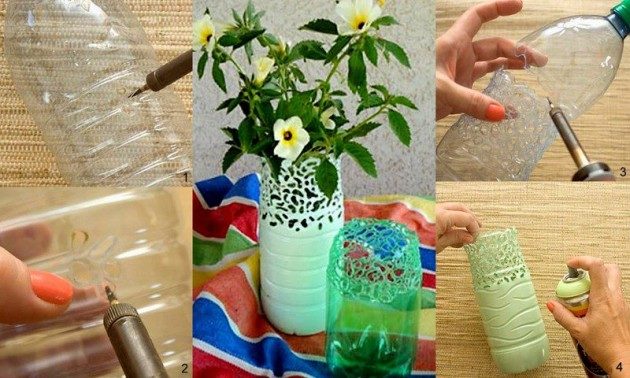
Vase in decoupage style
Another way to decorate a plastic bottle -use wipes for decoupage. They make it possible to apply a huge range of drawings. Also, as an option, we offer to make this vase hanging. Necessary materials:
- napkins for decoupage
- materials for fastening napkins (brush, glue)
- scissors
- decorative ribbon with pompons
- hole puncher
- glue gun
Step-by-step instruction:  Step 1: Trimming
- Cut and discard the top of the bottle, leaving only the bottom.
- Use decoupage materials to attach the napkin of your choice to the bottom of the bottle.
Step 2: Fasten the rope In order to hang the vase, you must attach the rope.
- First punch two holes near the top edge, they should be diametrically opposite to each other.
- Take the rope of the desired length and tie it to both holes.
Step 3: Band with pompons It remains to make the final decorative element. Using a hot glue gun, attach the ribbon with pompons to the top edge of the vase. All is ready! Hang in an apartment or garden, put flowers inside and enjoy!
Vase from bottle and thread
This method is suitable for the manufacture of vases for dried flowers, pots for pots or just baskets. It turns out quite unusual, and it is not at all clear that a plastic bottle was used here.  Necessary materials:
- wide plastic bottle
- Knitting
Step by Step Instruction: Step 1: Trimming Cut the bottle in half, leave only the bottom. Cut the sides of the bottom half into an even number of strips of the same size. On them we will spun layers of yarn. 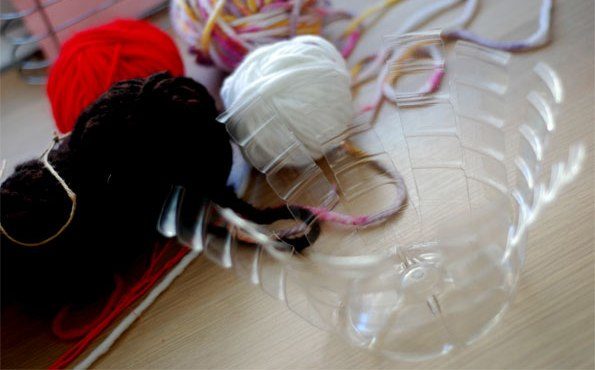 Step 2: Weaving It is better to use thick yarn, and it looks prettier and weaves faster. Twist the strips through one: the first in front, the next behind, and so on. Continue until you reach the top. You can use one color, blend yarn, or alternation of several different colors.
  Step 3: Processing the top edge From above you need to attach a strip of fabric (or tape) so that the edge does not prick and the threads do not break up. To do this, first wrap the end of the thread in the middle of the vase under a layer of woven threads, and then on the edge of the vase, wash the fabric strip with large stitches. Now the vase is ready to decorate your home interior!
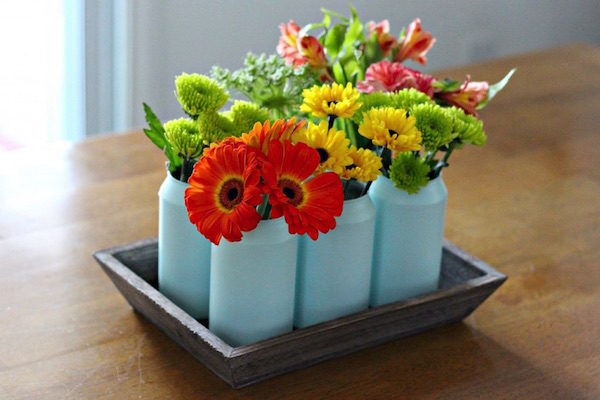
Set of vases
From small square plastic bottles you can make a whole set of vases. And here you don't even have to cut anything.  Necessary materials:
- 6 identical small square-shaped plastic bottles
- Scotch
- Multicolored ribbons
Step by Step Instruction: Step 1: Putting the bottles together Take six identical clean bottles, put them side by side in two rows of three. Now wrap them all together with tape to firmly fix between them. Step 2: Decorating
- Wrap the design of the bottles of multi-colored ribbons, in several levels above each other.
- In each bottle, insert evenly a small amount of flowers to eventually get one big bouquet.
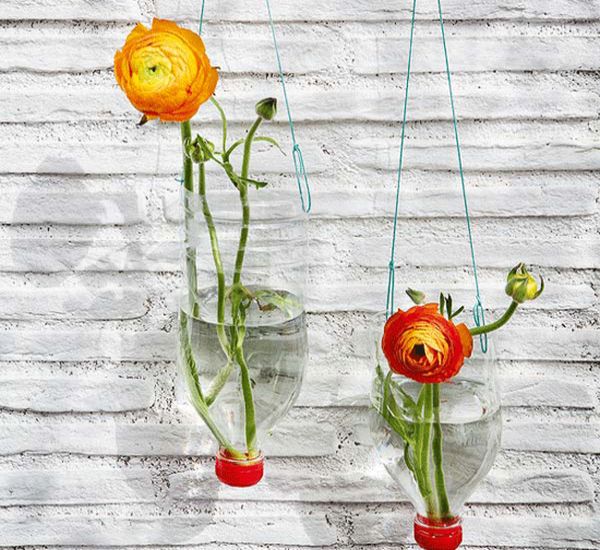
Hanging vase in the garden
Plastic bottles can not only be insertedcut flowers, and grow live plants. We suggest making a small hanging pot that can be attached to a tree in the garden, fence or veranda.  Necessary materials:
- Plastic bottle with a thick material (for example, from shampoo, detergent)
- Office knife or scissors
- Marker
- Hole punch or awl
- Soil and plant
Step by Step Instruction: Step 1: Trimming You need to trim the bottle as shown in the photo, not just horizontally. Thus, we leave a place for attachment. Step 2: Hanging Hole
Step 3: Plant the plant It remains only to plant the plant in the newly made pot and attach it to the carnation in the chosen place. Another option We also offer another option that is done similarly. 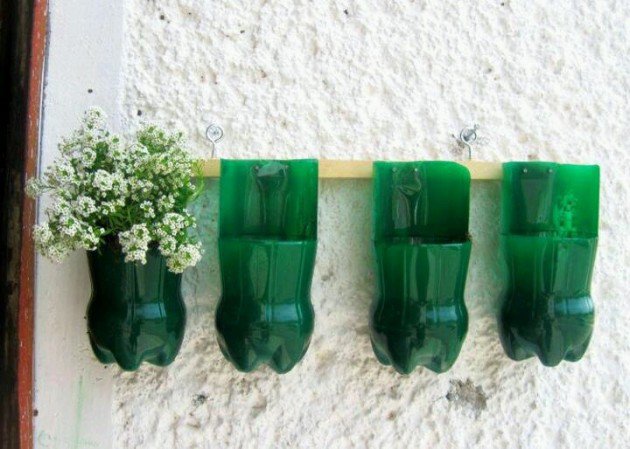 It used two-liter bottles from undersprite. Since the plastic is thinner than in a shampoo bottle, make two holes for hanging (one can simply not bear the weight of the pot with the ground). Can be used as a vase for wildflowers.
Flowerpot for flowers
Everyone loves cats (or at least most). Decorate your apartment with this cute little vase, and it will make everyone smile on your face. 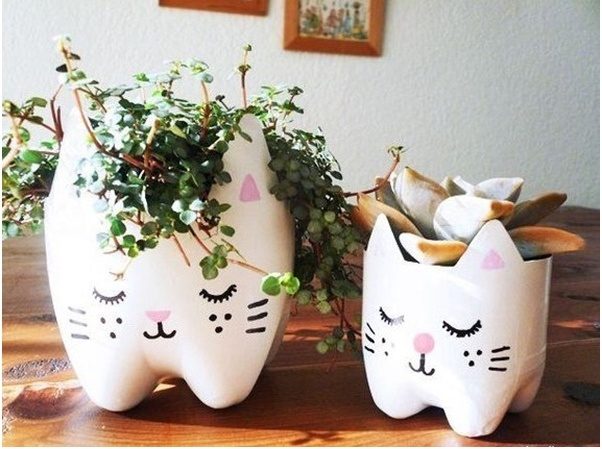 Necessary materials:
- Large plastic bottle (2 liters)
- Stationery knife
- White spray can
- Markers (black and light pink)
- Flowers
Step by Step Instruction: Step 1: Cleaning the bottle Remove the label from the plastic bottle, wash it thoroughly (so that there is no trace of sweet water in the middle, no glue from the label outside). Step 2: Mark the place of the picture. Mark how tall your vase should be and draw a horizontal line around the entire bottle. It should not be too high for the cat to be pretty. 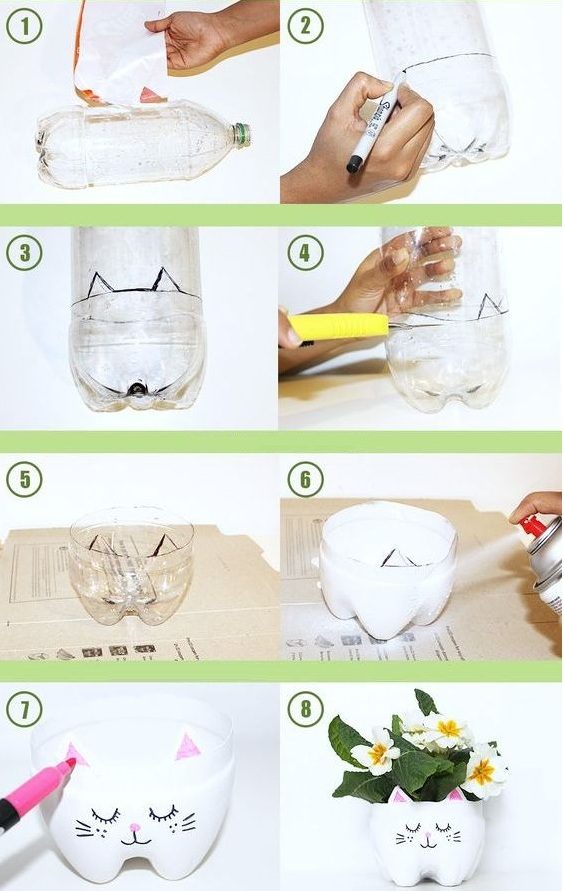 Step 3: We draw a cat. On one side of the bottle above the horizontal line just drawn, draw two ears, as shown in the photo. Step 4: Cutting Now cut the bottom of the plastic bottle along the outlined contour. Be especially careful with the ears so that they are even and equal. Step 5: Preparation for painting
- Cover the floor with newspapers or boxes to avoid staining during painting.
- Before painting, you can apply a coat of primer to keep the paint better.
Step 6: Painting Apply white paint from a can on the bottle. See that the layer is uniform and there are no transparent spots left. Step 7: Drawing the Seal Now the most enjoyable part: drawing the seal. You can copy from a photo or invent your own. It remains only to put flowers in a vase, it is short, so a small bunch of short cut flowers will suit. You can also fill in the soil and plant a home plant. See how beautiful it turns out, I am absolutely delighted with this vase!
Vase with a muzzle
A fun vase or pot with a muzzle will add cheerful notes to the home atmosphere. 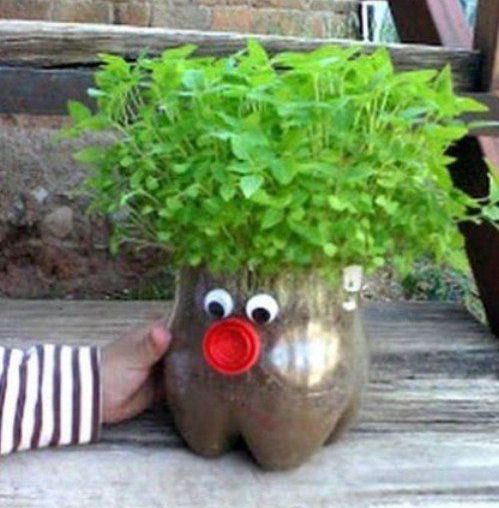 Necessary materials:
- Plastic bottle (2 l)
- Office knife or scissors
- Decorative eyes
- Flat bottle caps (they are very high in two-liter bottles, better to take from yogurt)
- Superglue (or glue gun)
- Flowers or soil with a plant
Step by Step Instruction: Step 1: Trimming
- Cut the bottle (not very high) and leave only the bottom.
- Glue decorative eyes and cork nozzle. The cork can be mounted both up and down the bottom, at your discretion.
Step 2: Put flowers or plant plants If you use as a vase - just put flowers in it, if as a pot - fill the soil and plant it. This is what should end up: 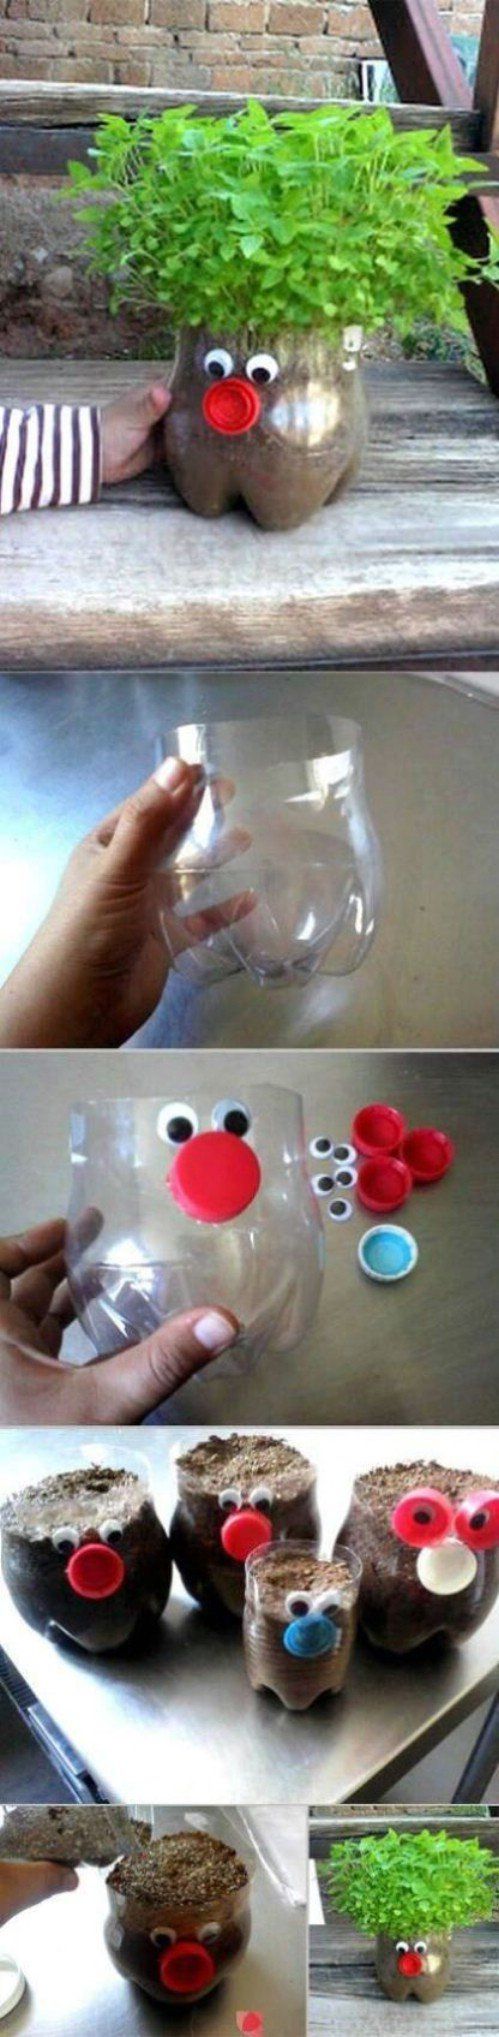 Tip: plastic vases are lightweight, therefore not very resistant. It is possible to increase stability by putting a few pebbles inside the bottom, the vase will become heavier and will not roll over and fall.

Comments
Related posts:
 Plastic bottle feeder: how to make?
 Candlestick from a plastic bottle do it yourself: photo
 How to make a pig from a plastic bottle for a garden and cottage / Toys with their own hands, patterns, video, MK
 Master class with photo and description will teach how to make a decoupage of bottles of champagne for the New Year
 Master class with a description and photo will teach how to make decoupage of a bottle of champagne with your own hands