How to tie Easter cake crochet: master class
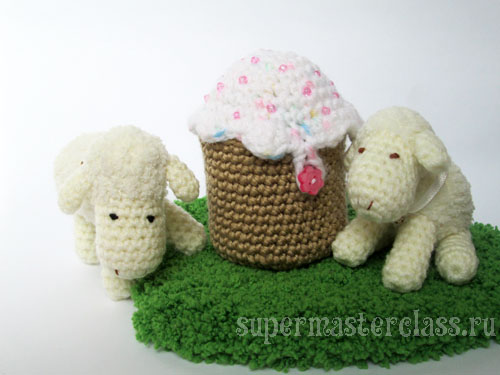
 Easter will be an appropriate souvenir for Easter.crocheted Easter cake. In our master class you will do it easily. You can link both parts of the cake ("paska" and "icing"), sew them together, fill with filler and decorate to your liking. We today offer you a slightly more time-consuming option, but, in our opinion, that will be much more interesting! Namely - a mini-box in the form of an Easter cake. Such crocheted cake will take root in any household. A needlewoman can conveniently accommodate in it, for example, all existing needles or small things like buttons, beads, eyes for toys. By the way, another convenient use of such an Easter cake is the needle bed. The top layer of the “glaze” is soft, and the needles in it are held nicely. And a girl of any age will be happy to store children's decorations or hairpins in a Easter cake.
To make an Easter cake crocheted in the form of a casket, you will need:
Acrylic yarn in two colors: white or cream for "glaze" and brown or beige for the most crocheted cake; crochet hook; the lining for the box (in our case - green cotton knitwear); a decorative element for decorating the inside of the casket lid - in our case, it is a patch on the knitwear and an ornament for a hairpin; beads and / or beads for icing "topping"; button to match the basic colors of the yarn or "dressing"; some filler - syntapon or silicone; empty reel of yarn (in our case, from YarnArt Violet, 6 cm in diameter and 6 cm in height); thick and thinner cardboard; PVA glue or any other for gluing cardboard; ruler; simple pencil; needles thin for beads and ordinary sewing; sewing thread: white or cream, brown, thread in tone lining; a self-fading marker or tailor's chalk (a remnant will do as well); scissors.
How to tie a crochet cake: a job description
Frame for crocheted cake For the cover: we cut the reel from the yarn on a very hard cardboard. 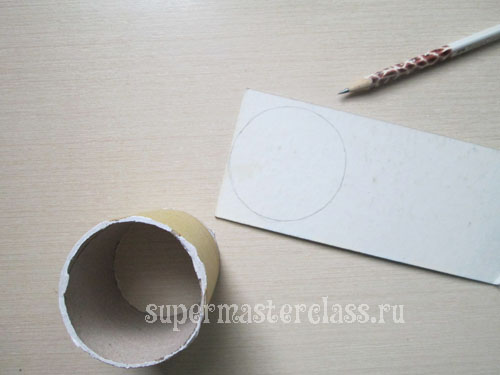 Cut circle.
 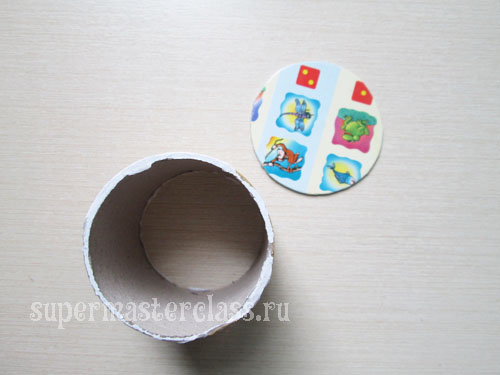 Next, we outline a reel on a piece of cardboard softer -it will be the bottom. Around the circle obtained by hand, draw another circle, the radius of which is about 1 cm larger than the inner circle. Do not worry about accuracy: this is a rough point that absolutely nothing will have any further effect.
 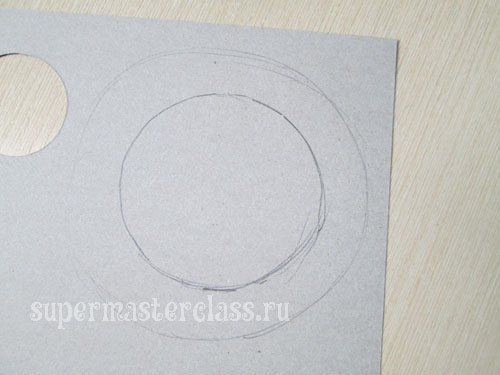 Cut a circle along the contour of the larger circle, and then in random order begin to crush the distance between the two circles with small triangles. Like this.
 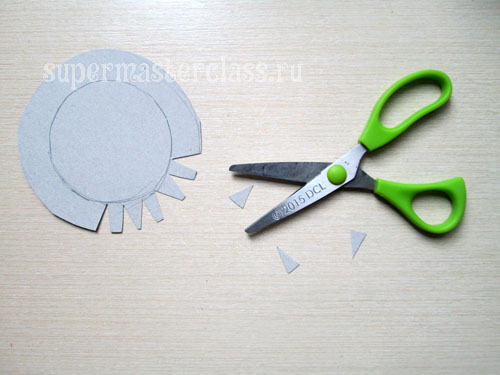 It turns out "sun."
 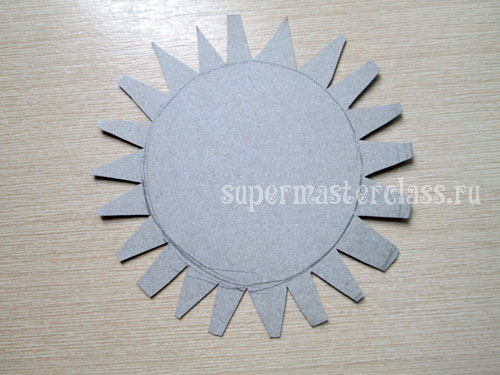 Cut the reel with glue and put it on the "sun", leave for a while to dry.
 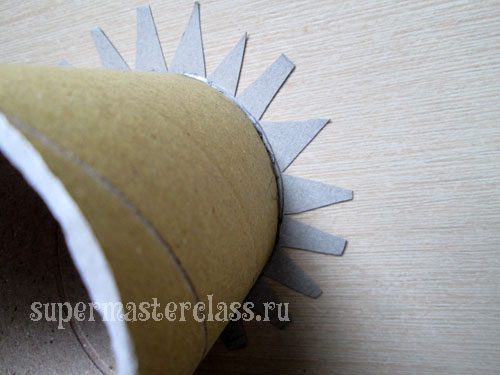 Bend the petals on the reel itself and glue them, pressing it with your fingers so that the glue has time to grab.
 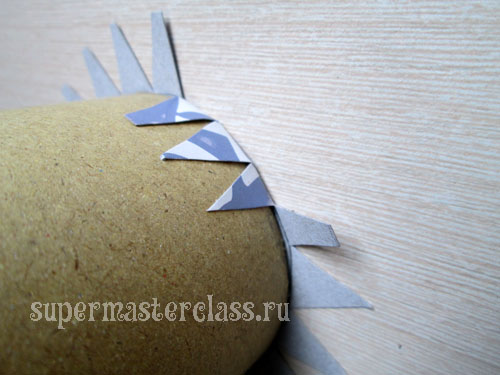 The basis for the box in the form of a crocheted Easter cake is ready.
 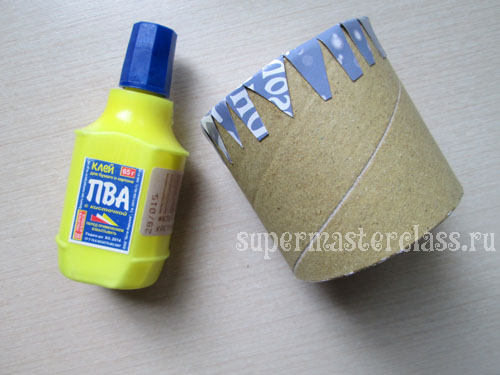 Crochet Easter cake: knitting the “baked” part To begin, I selected acrylic yarn of suitable shades: brown, white, cream.
 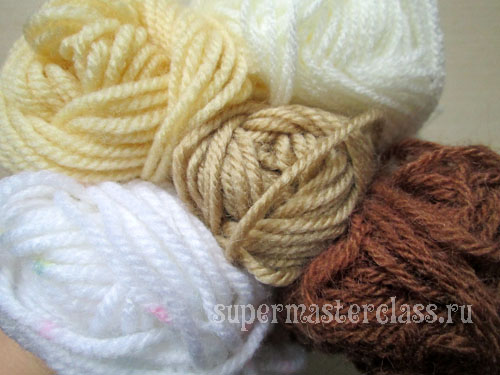 For the first cake, I chose a light brown yarn and a 4 mm hook suitable to it. The bottom of the cake is an even circle. Getting to knitting. 1 row. Around amigurumi ring - 6 tbsp. without nakida
 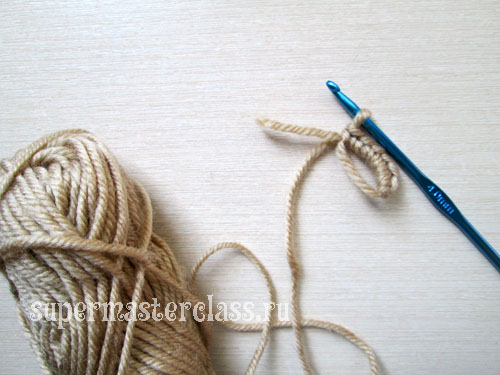 Tighten the ring.
 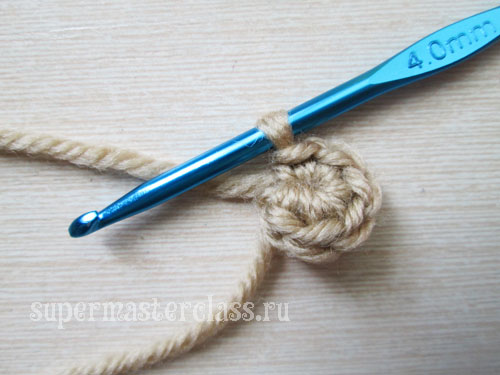 2 row. In each column of the previous row we knit 2 tbsp. without nakida - will turn out in a row of 12 loops.
  3 row. In every second column of the previous row we knit 2 tbsp. without nakida - will turn out in a row of 18 loops.
 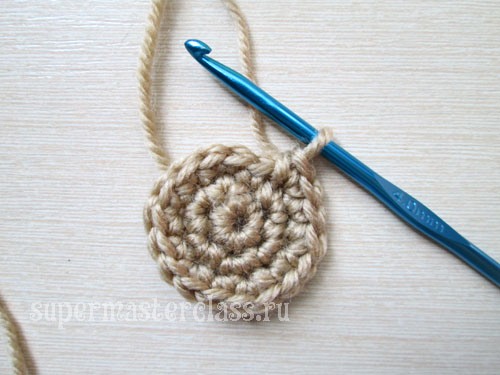 4 row. In every third column of the previous row we knit 2 tbsp. without nakida - it will turn out in a row 24 loops. 5 row. In every fourth column of the previous row we knit 2 tbsp. without nakida - 30 loops in a row.
  6 row. In every fifth column of the previous row we knit 2 tbsp. without nakida - 36 loops in a row.
 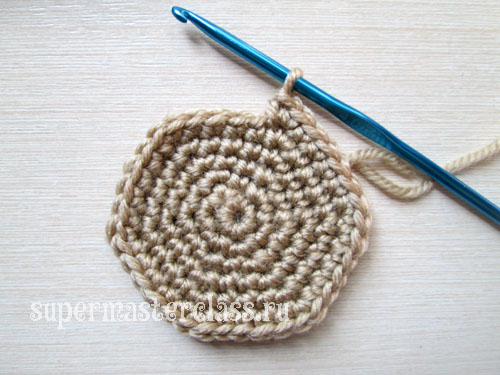 If your base is larger in diameter thanThe resulting circle - knit further, adding in each row of 6 loops. Those. in the next row you will double every sixth loop, then the seventh, and so on. In my case, the size of the knitted circle is now equal to the diameter of the base.
 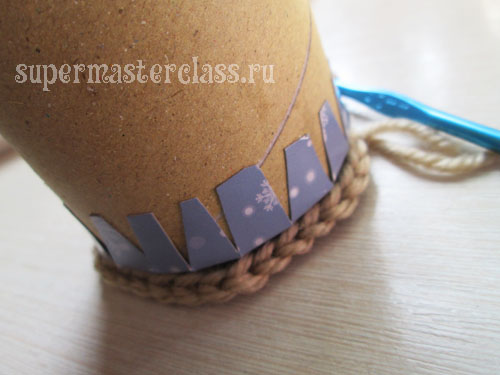 The following rows - without increments - are just single crochets. Knit up until we reach the edge of our base.
 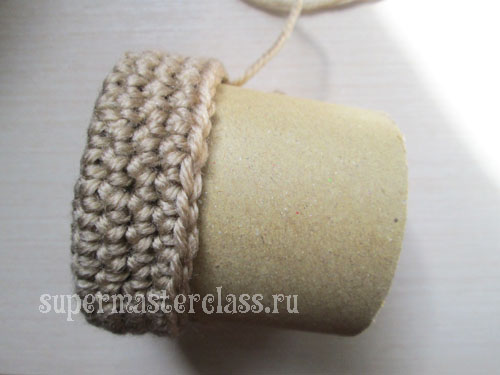 I got 12 such rows. We close the last row of a deaf loop, trim the thread, fill the tail on the wrong side, using a smaller hook. Knitted glaze The first three rows - as in the initial knitting of the cake.
 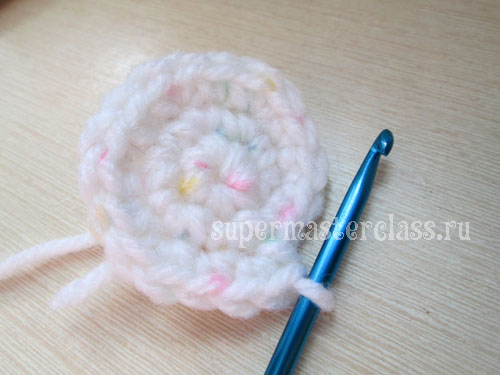 4 row - no increase, i.e. 18 columns without nakida.
 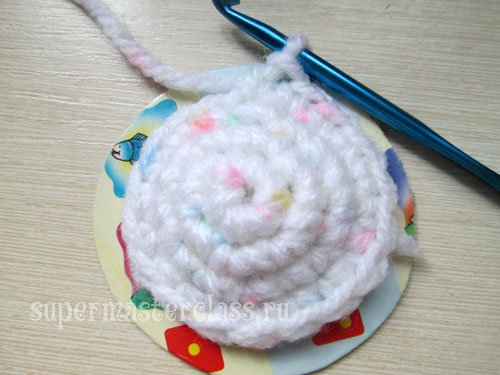 5 row - we make an increase in every third column = 24 columns.
 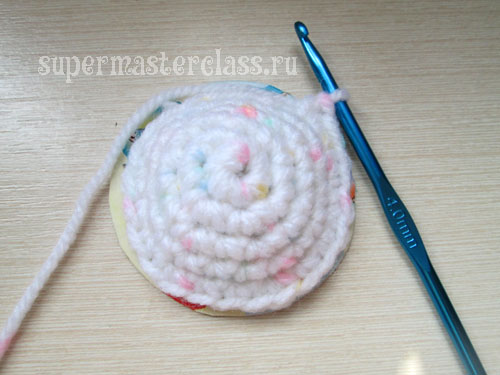 6 row. - we make an increase in every fourth column = 30 columns.
 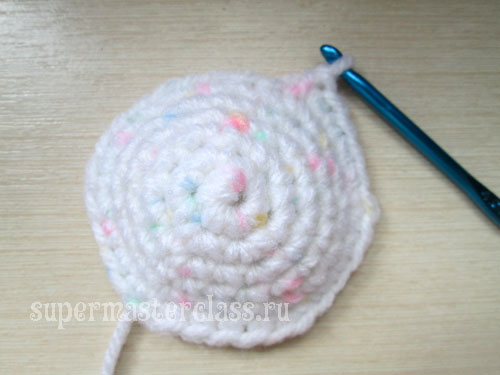 7 row - knit without increments.
 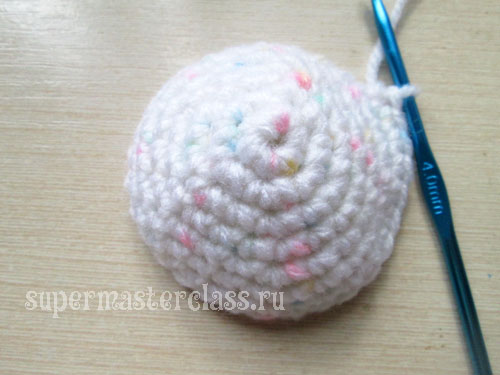 8 row - the last. Knit "flowing glaze." First, mark with a marker the place where there will be a loop for fastener. The first "drip" will attach the cover to the Kulik. We knit 3 ce, on which we then knit 2 tbsp. without nakida Next - a single crochet on the previous row. The glaze flows unevenly, so I alternated different festoons: somewhere it is 3 tbsp. with 1 double crochet, somewhere - double crochet column, 2 tbsp. with double crochet and again double crochet in the same loop, etc. Do not be afraid to improvise, let your crocheted cake be unique. In the place where there will be a fastener, tie a chain of air loops of such size that the folded button will pass through this loop when folded. And then continue to vyvyazyvat "drips". We close the end of the row with a blind loop, fix the thread, cut it, hide the tail.
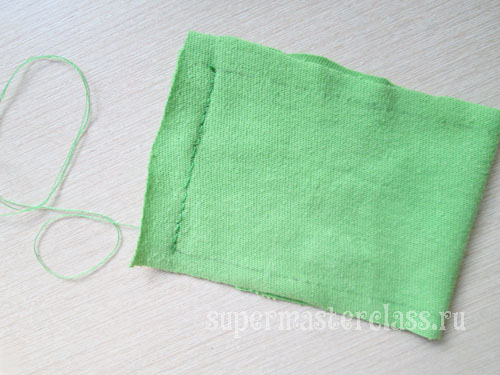
 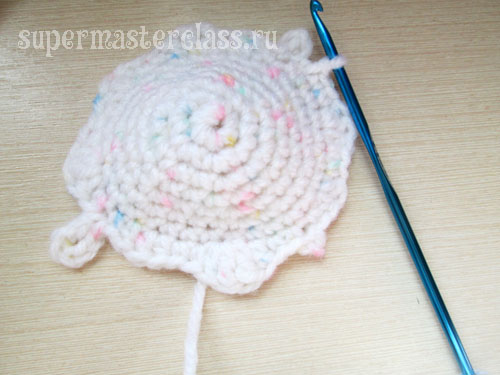 Lining Case for lining. We need a strip, on the wide side - equal to the length of the base circumference, narrow - equal to the base height plus one centimeter plus seam allowances. In our case, the size of the inner diameter of the reel is 6 cm. This means that the circumference is equal to the diameter multiplied by the number π, i.e. 6x3.14 = 18.84 cm. This is the length of our strip. The width is equal to the height of the reel plus a centimeter, in our case it is also 6 + 1 = 7 cm. We cut out a rectangle with these parameters and small seam allowances. You also need to cut out 2 circles from lining fabric; for their cutting use cut out cardboard circle. Seam allowances on one of the circles should be done more.
 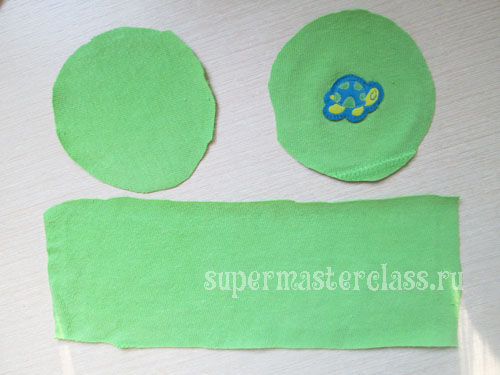 We fold the rectangle face up inside,combining together the slices of the smaller sides of the rectangle. We fasten with a pin so that there is no displacement, and stitch it with a back needle stitch or on a sewing machine.
 We wrap the bottom, try on the cup-based and sew the same stitch.
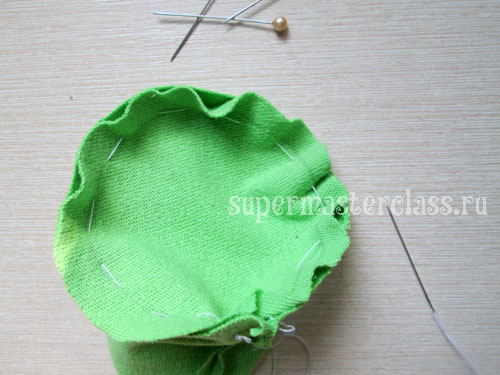
 Shorten seam allowances.
 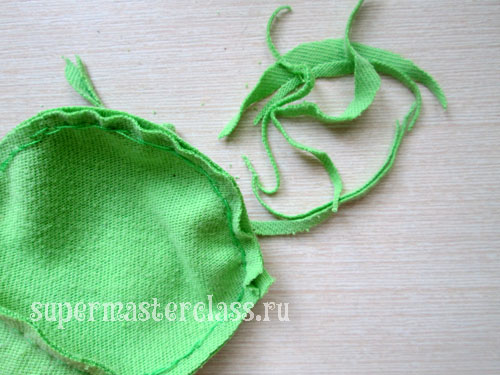 We try on the lining to the glass, turning the extra parts of the rectangle outwards.
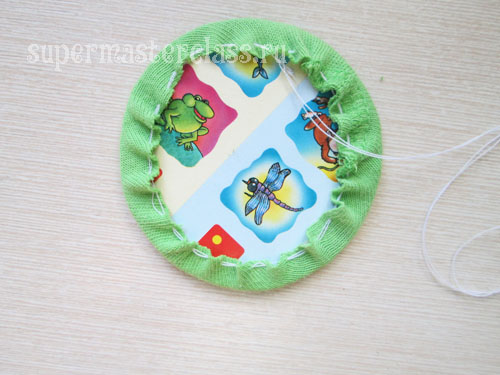
 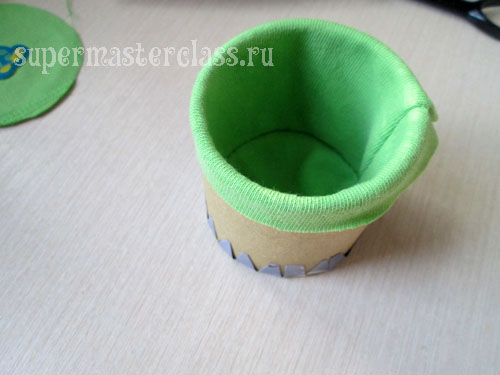 Assembling and decorating crocheted cakeSo, the lining is already comfortably placed inside the cup. We put on him knitted part of the cake. If the edge of the lining is raised - gently straighten it between the walls of the cup and the knitted part (for this it is convenient to use scissors).
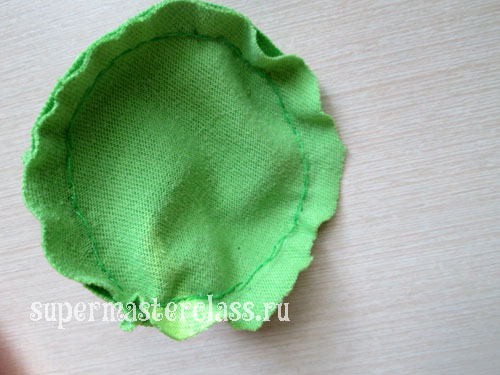
 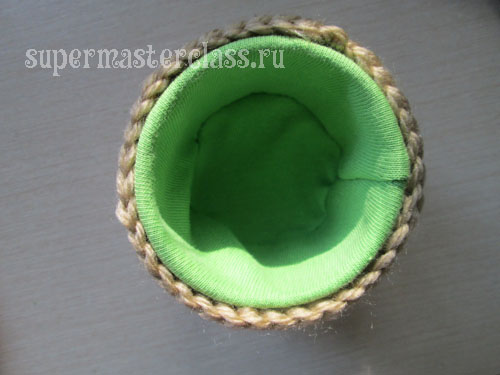 In a needle we thread a thread in the tone of the knitted part. We sew the lining with a knitted part with a back needle stitch.
 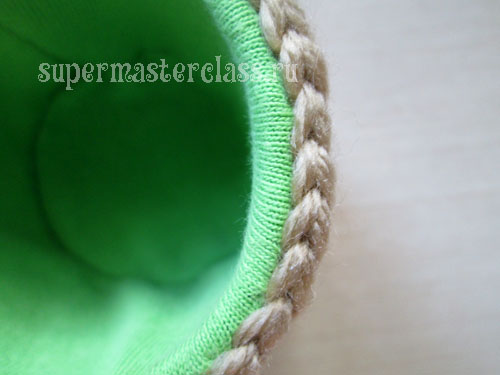 Cap. For her, we wrap a cardboard circle in a circle of fabric that we cut out with a good margin. Circle stitch around the perimeter of the seam "forward needle", we put inside the cardboard part, tighten the thread and fix.
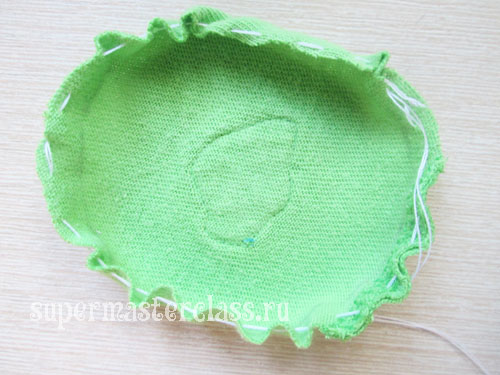
 This is what the circle from the front now looks like.
 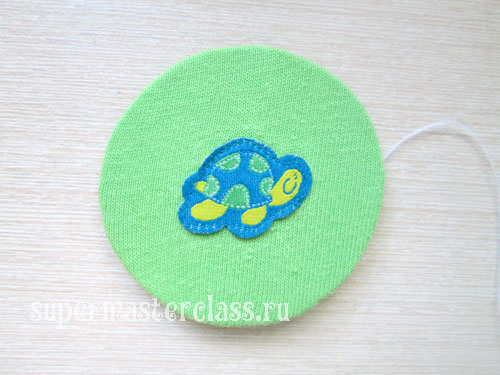 Freely put this circle inside the "glaze". We thread a needle into the glaze of the needle and sew a circle, grabbing the fabric from the wrong side. Stitch around the perimeter, leaving a small hole for packing the cover.
 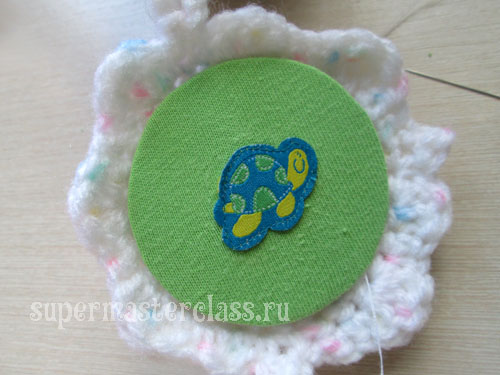 We fill and sew the remaining hole.
 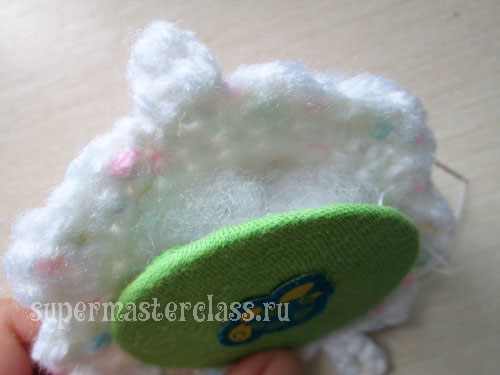 The finished cap looks like this.
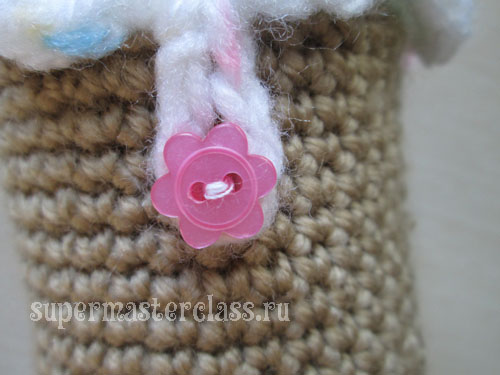
  We try on the cover to the main part of the cake and sew from the inside one of the “glaze drips” (diametrically opposite the buttonhole loop) to the brown part.
 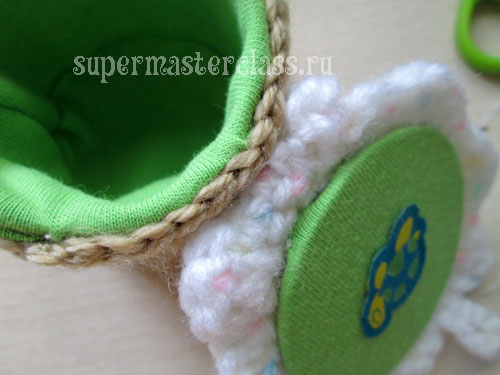 Define a place for buttons and sew it.
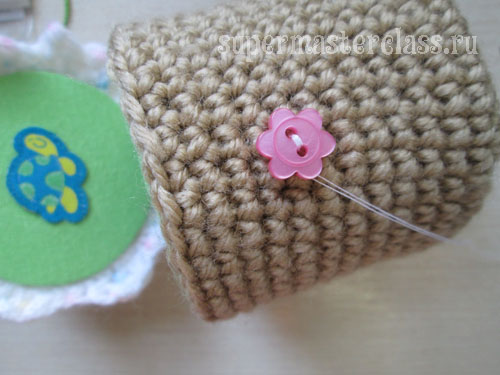
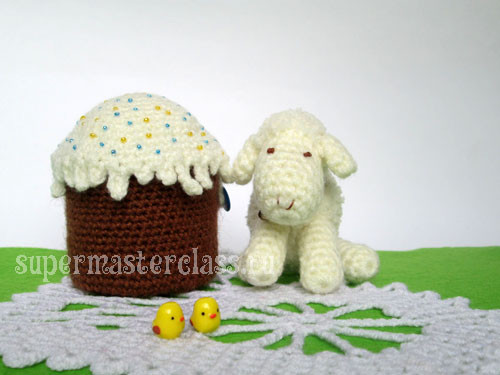
 You probably noticed an unusualyarn, which was used for tying the glaze: white with colored patches. And yet the finished result was not colorful enough, so I extended the icing with pink beads, resembling sweet powder, on top.
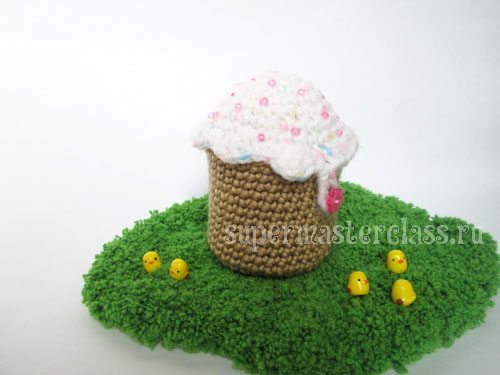
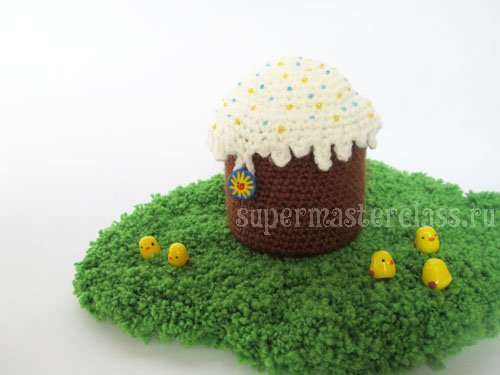
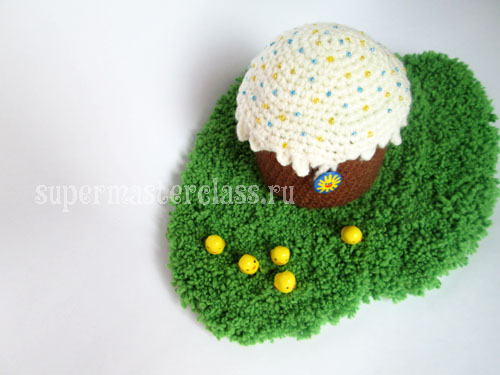
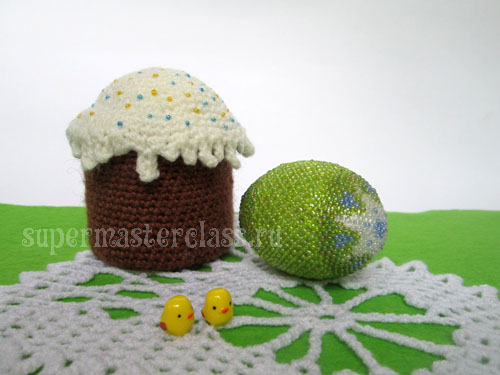
 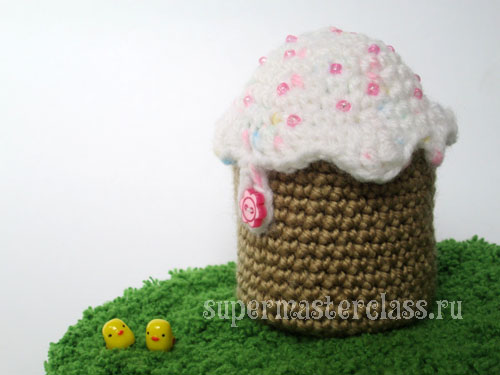 That's all. A kulich from different yarn and a slightly different decor were tied in the same way - and the finished product looks completely different. We offer you a photo of Easter cakes, which turned out in the process of creating this master class.
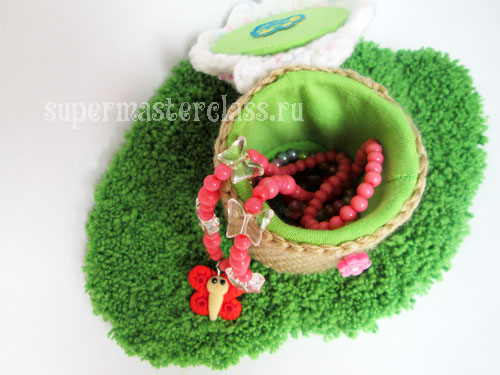
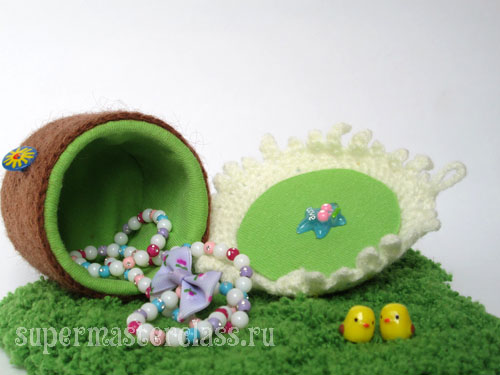

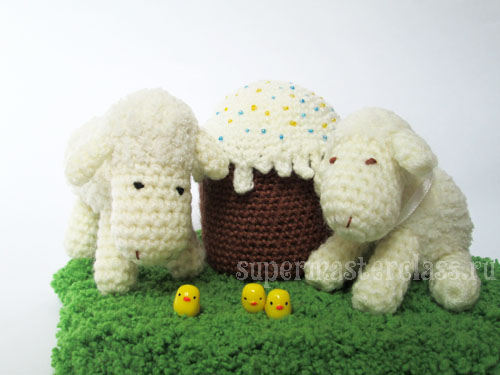
 If you are cooking a crocheted Easter cakein our master class for a gift, it remains to find out, to give a souvenir with thematic content. However, the owner of an unusual casket will probably be pleased with the new decoration, and the hare made a good addition to it. Eva Casio specifically for the site Previous article: Next article:
Comments
Related posts:
 Easter crochet crochet. Master class from Flanden Tatiana
 This detailed master class will teach you how to crochet beautiful valentines.
 Our master class with a detailed description and photos will teach how to tie a toy crochet - donkey.
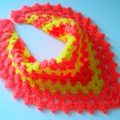 This detailed master class of crochet for beginners will teach how to crochet an openwork kerchief.
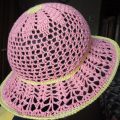 This detailed master class contains crochet lessons for beginners and will teach you how to crochet a summer hat.