
How to update and paint the old cabinet do it yourself photo
Currently in stores can be foundAn infinite number of various cabinets, dressers, racks, hanging shelves, multi-functional drawers for clothes and personal belongings. But if you decide not to dive into a long search, but to follow the thread of your imagination, then with the help of the following master classes you will learn how to update the old cabinet with your own hands beyond recognition.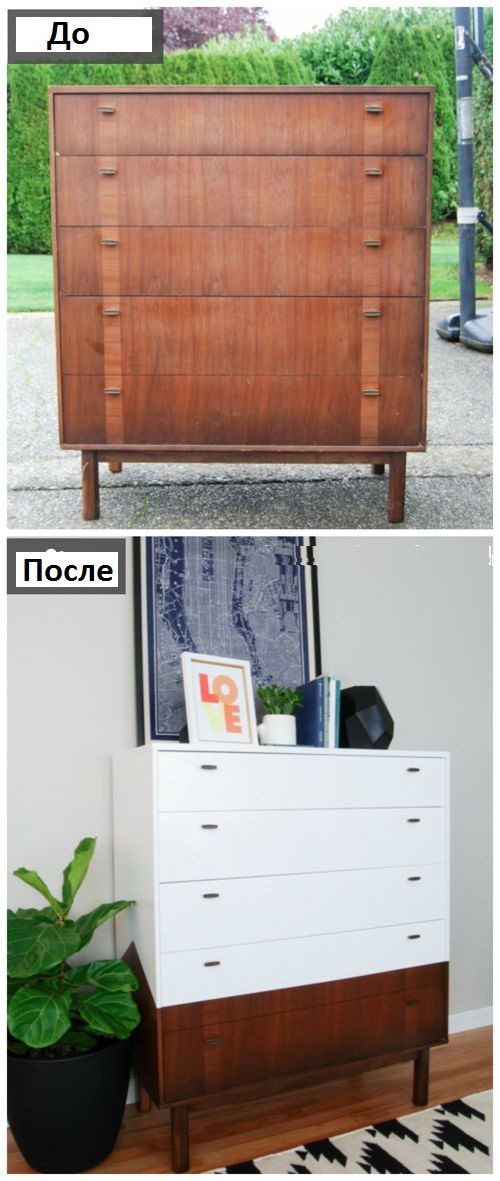 After reading the article you should not stayhow to paint lacquered, chipboard or wooden cabinet, what paint to paint and make it suitable for your own style, and you will learn some of the subtleties of this work.
 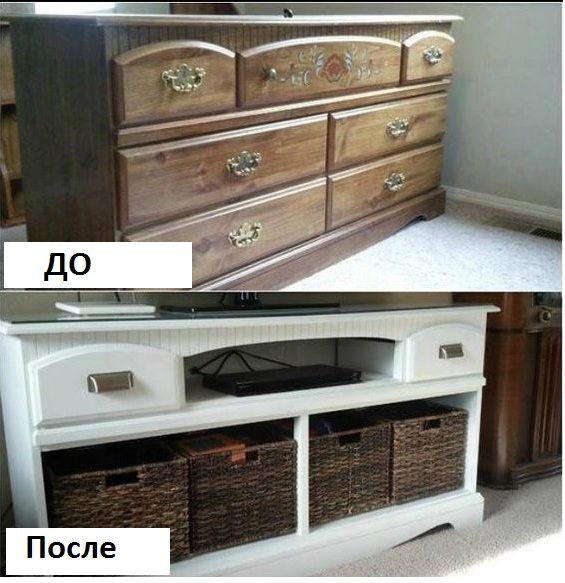 The content of the article:
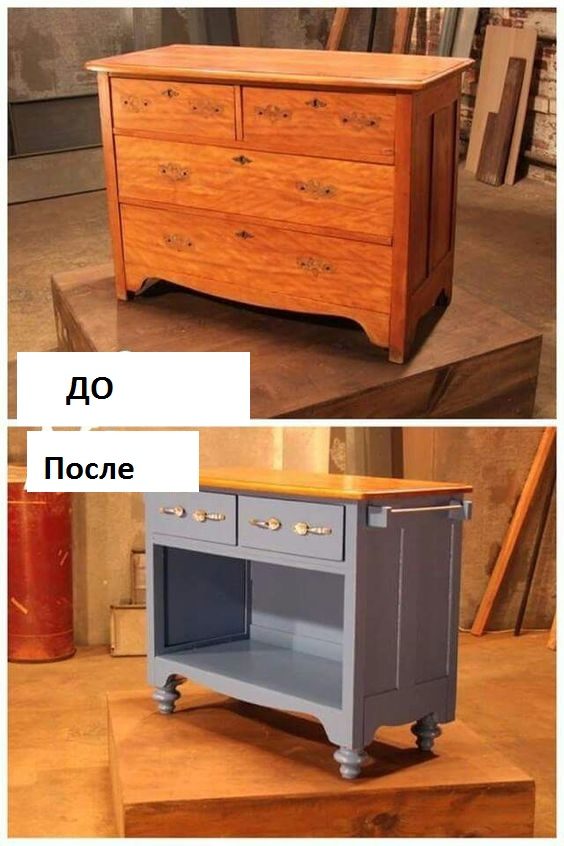
3 main methods of updating the closet compartment
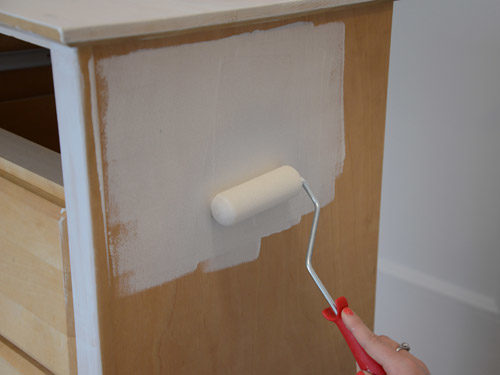
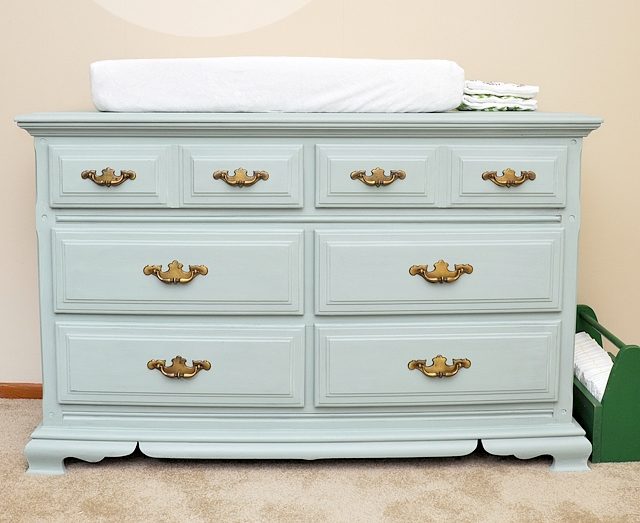
The best method to upgrade any chipboard or wooden cabinet, of course, painting is not as expensive as it seems at first glance and quite simple in execution. 

Painting wooden cabinet of chipboard
Paint selection
- For processing wood and chipboard, you can use alkyd or acrylic,
- spray paint or ordinary wood paint
- for deeper staining - varnishes, but most often preference is given to acrylic paints.
They are non-toxic, dry at room temperature.the temperature, which in our case and when painting home furniture is very convenient, is presented in stores in the widest range, they can be colored, i.e. dilute with white paint, achieving the desired color. In addition, there is a choice of acrylic paint with the effect of mother of pearl or, for example, metallic. [alert-success] Aerosol acrylic paint is better than usual on the surface, creating a smooth and evenly colored texture. It is easy to work with both professional and newbies. [/ Alert-success] 

- Lucky is used mainly to give furniture of an old, but well-groomed appearance, noble and rich. In this case, the surface is painted over several times after the complete drying of each layer.
- Varnishes are also needed to fix the color and protect the surface from scratches and minor damage.
- Varnish will be needed even if you decide to paint the chest of antiquity or in the style of Provence.
 Selection of brushes and roller After selecting the paint, special attention should be paid to brushes and rollers. Why you should not save on painting supplies, if you decide to update the chest with your own hands?
- With the correct technology of processing the old surface and good staining, the cabinet will retain its appearance for several years.
- When using bad brushes you will not save freshly painted furniture from sticking hair or lint, which is almost imperceptible to fix.
 If you are faced with the task of painting a large smooth surface, then a roller and aerosols will also work.
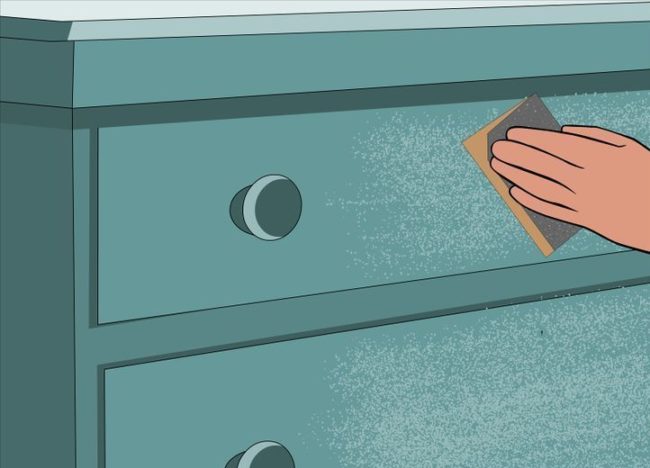
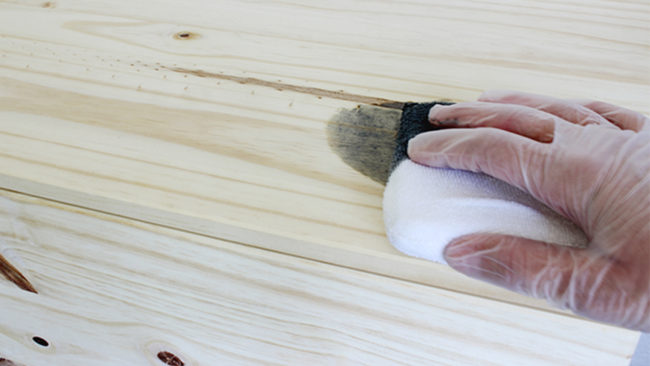
ATTENTION: During the work, do not leave the brushes dry, it is better to put them in a jar of water, otherwise they will quickly become unsuitable. Technologists and painting techniques Do not forget about other important painting tools and materials, such as sandpaper or sanding machines, primer, putty, solvent and varnish All this is necessary to comply with the technology of proper staining. 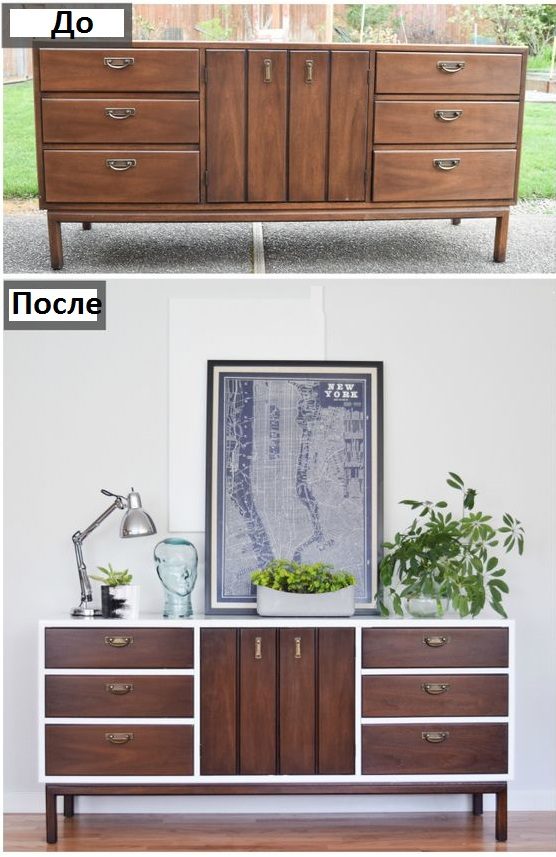 Equipment:
 In general, the preparation of the cabinet for painting consists of 5 short, but very important steps.
 When you know all the stages of preparation, it's time to move on to the main stage and figure out how to paint a wooden chest of drawers and chipboard.
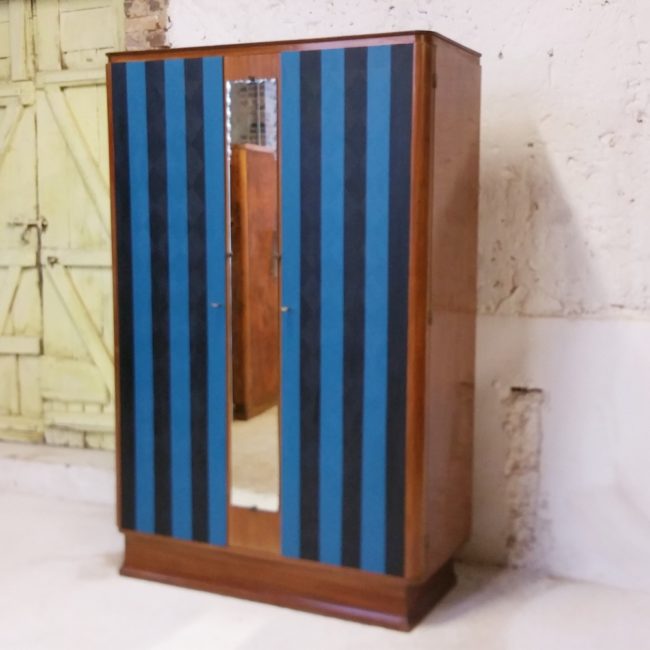
Master class number 1. Painting under the stencil
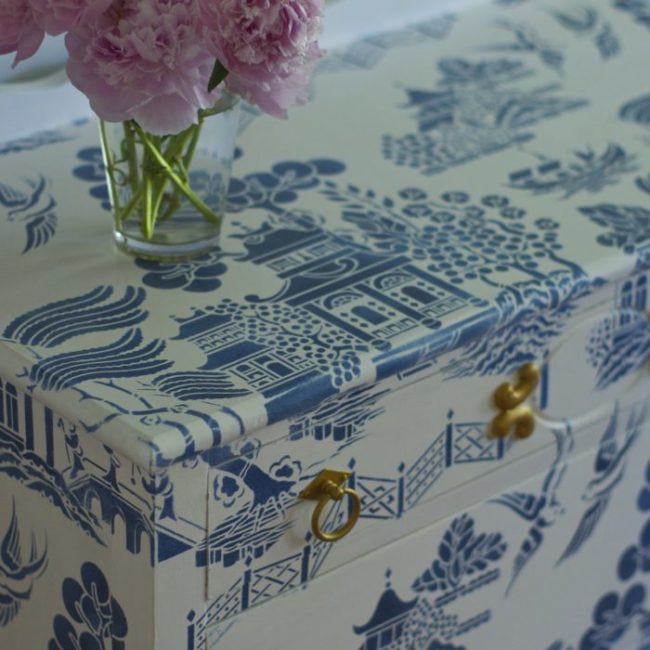
Everything is mixed up in this wardrobe - romanticism, Chinese motives, and even something from Gzhel. Everyone sees something of his own. We study the painting technique. 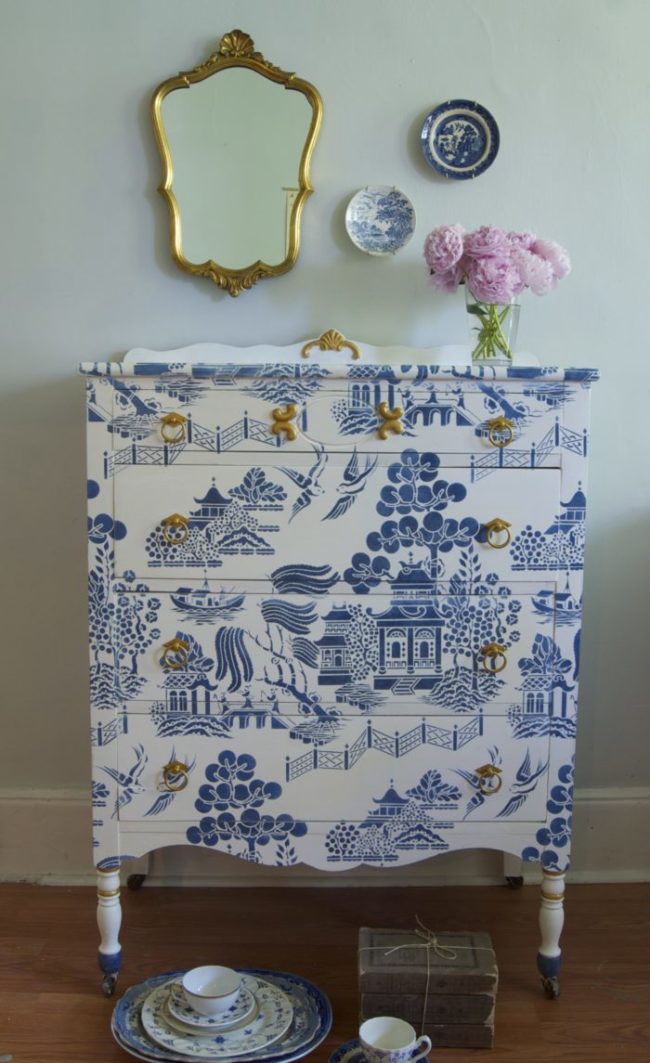 Materials and tools
- Prepared wardrobe;
- paint is white;
- solvent;
- spray paint blue;
- golden paint;
- stencil;
- brushes.
Walkthrough Step 1.
- We remove from the cabinet all fittings, locks, handles, etc. Using a familiar technology, we will prepare a wooden cabinet for painting.
- On the work surface (on the floor) we lay out newspapers or a large piece of polyethylene so as not to spoil other furniture.
 Step 2.

 Step 3.
 Step 4. While the blue paint dries, we paint the accessories, taken from the cabinet, in gold leaf. After the parts are dry, fasten them in place. We remove the stencil from the cabinet and place it in the most prominent place in the room - after all, it now deserves special attention!
 You can decorate the cabinet under the stencil, for example, with flowers.
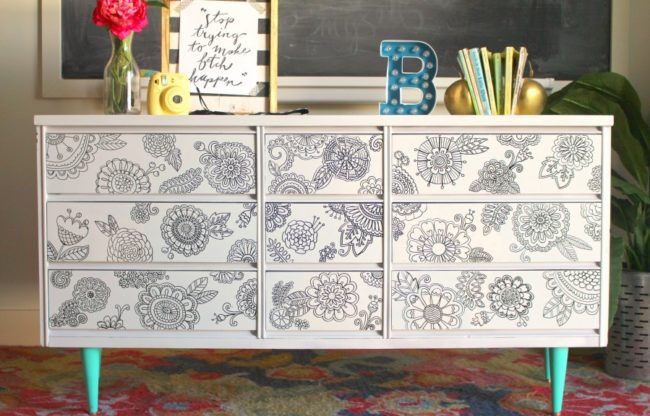

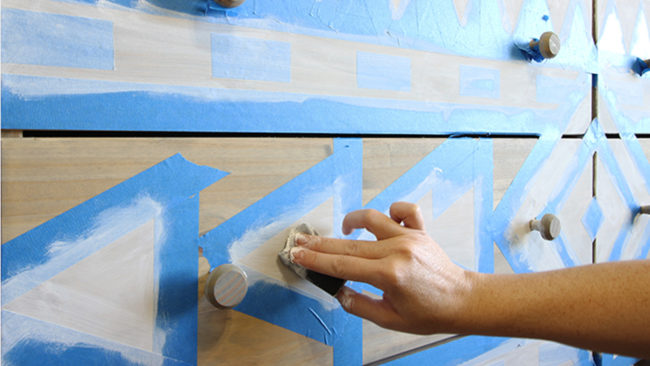
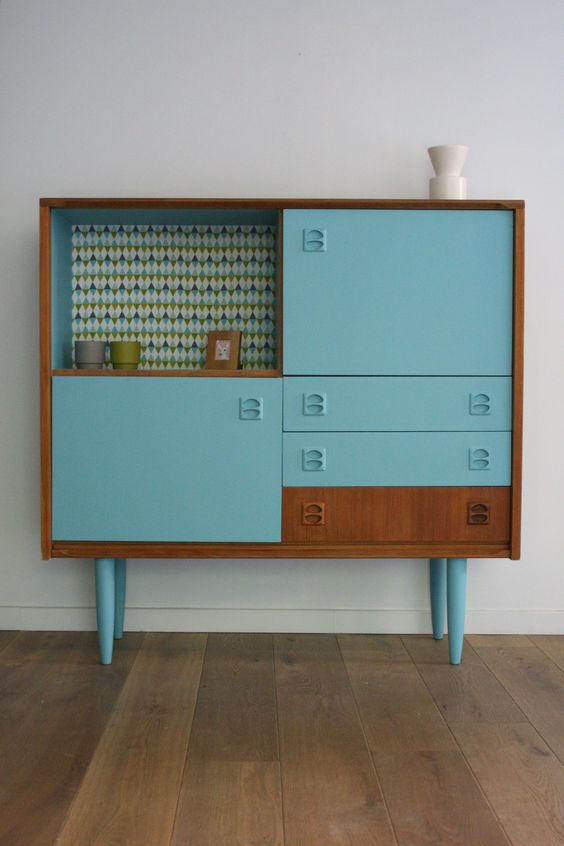
Master class number 2. Updating the cabinet of chipboard
This wardrobe looked very cheap since it was made of chipboard conceived. But we have updated it with a beautiful ornament for the children's room, now it can even fit into the interior of high-tech or modern.  Materials and tools
- Prepared wardrobe;
- paint is white;
- pencil;
- knife;
- building level;
- sponge brush;
- masking tape;
- in addition: protective paint (enamel).
Decor process Step 1.

- Rhombus is made by cutting out the same length of strips and placing them perpendicular to each other.
- To make the rectangles, first glue the ribbon evenly, parallel to the cut of the dresser, and with the help of the building level and pencil mark equal intervals. Cut through one.
TIP: Keep track of the placement relative to the fittings (handles, latches) and the gaps between the boxes - let it be better symmetrical than smooth. 
 Step 2.
Step 5. The final stage is the application of protective enamel. It will extend the life of the cabinet of chipboard and protects against small mechanical effects, such as moisture and dust. And a stylish wardrobe is ready for active use!  Coloring options may also be the same as in the photo below.

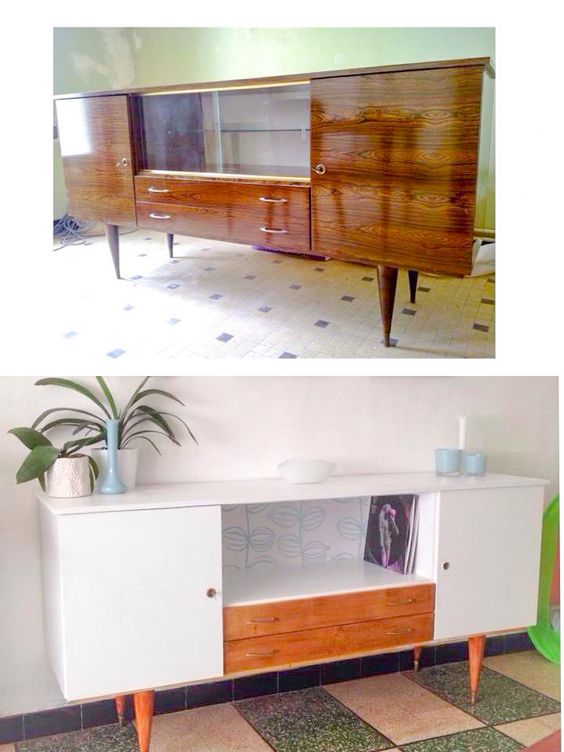
Master class number 3. Painting polished cabinet
Someone does not believe that you can make such a vintage-style candy out of an old polished cabinet without losing its functionality. And then described how to do it.  Materials and tools.
- Old polished wardrobe;
- vintage paint (plain acrylic matte);
- white spirit or acetone;
- Brushes;
- sandpaper or polishing machine;
- gold handles for boxes.
 The coloring process Step 1. Despite the fact that we create a vintage effect, the real tattered chest of the chest comes to nothing. Therefore, we carefully prepare it for painting.
TIP: Since the paint will be applied in several layers, it is very important that it is well absorbed into the wood.  Step 2.
 If you bought new pens, check if they fitDo they match your color and screw into place. Golden brass carved handles with patterns fit the white aged chest of drawers. Check the dresser to meet your requirements - it is still as comfortable, beautiful, and the paradox is modern. Vintage is now in fashion!


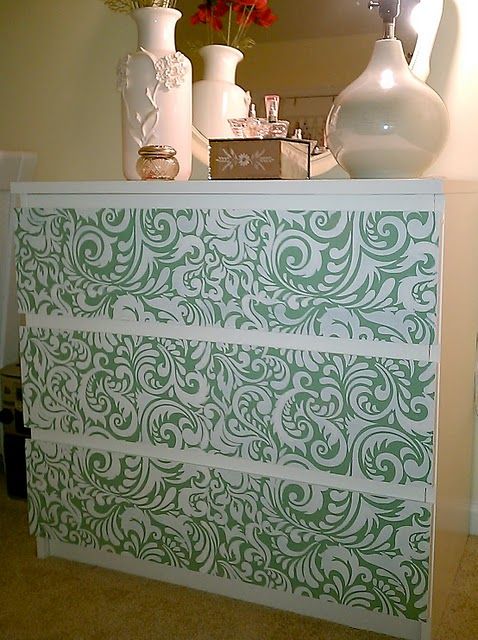
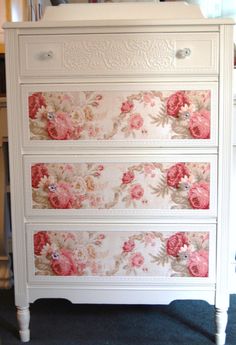
Wallpaper or film
Applying to upgrade the cabinet film or anyanother paper cover, remember that we use the wardrobe every day. And usually such a coating does not last long, but it is very simple in execution. We recommend using this method in conjunction with painting: see beautiful ideas for cabinet design with film and painting. 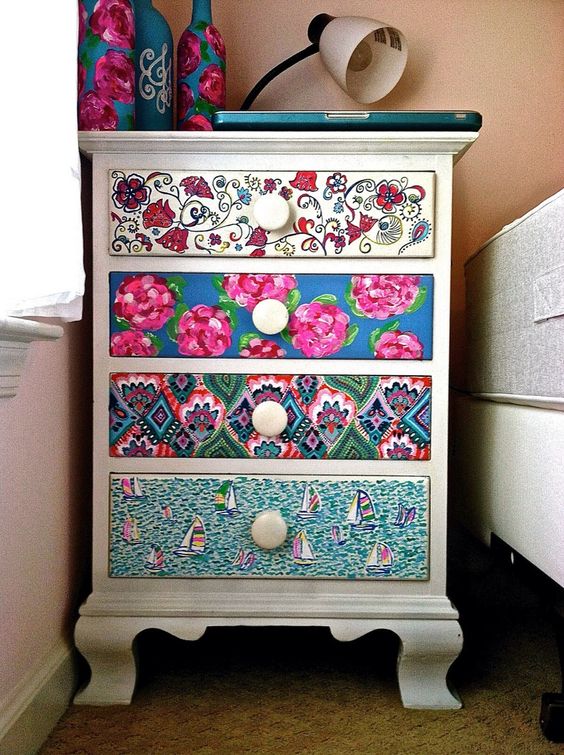


Weave cloth
This is the most laborious way to update the cabinet, when the fabric is stretched across the entire plane. The method is rather outdated. But maybe someone will like it. 

Dot painting for polished cafe
Dot painting is perfect for a polished cabinet. In this case, you do not need to remove the varnish and sand the surface. The technique is simple:
- Using a marker is applied drawing
- The marker is painted with paint using dots. Details - here.
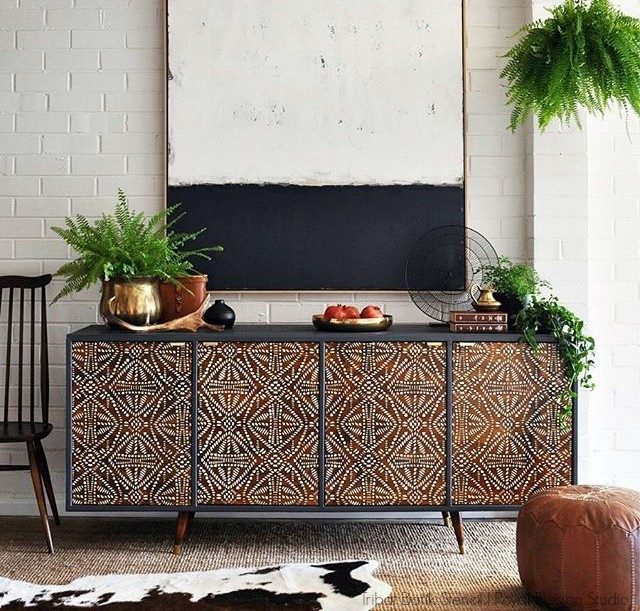

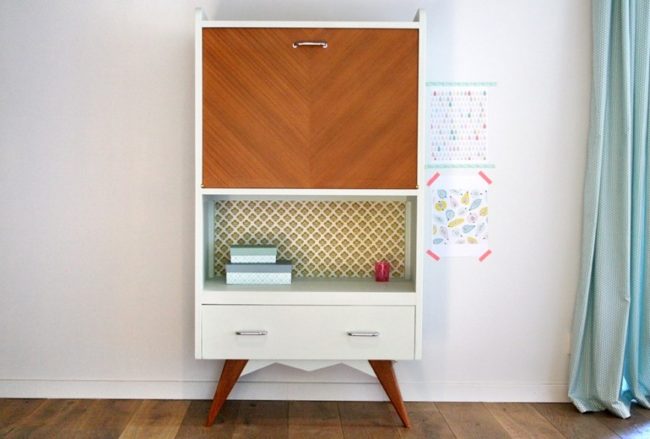
Ideas for updating the cabinet


Comments
Related posts:
 How to paint and upgrade the chair: 5 Alterations for Beginners
 Cabinet for garden tools with their own hands. We learn how to make a house for garden tools
 Decor furniture, the decor of the cabinet, how to decorate the closet with your own hands, photo, various decor options.
 We decorate with our own hands an old fence: a vertical garden
 How to make a wardrobe for dolls with their own hands, master class / Toys with their own hands, patterns, video, MK