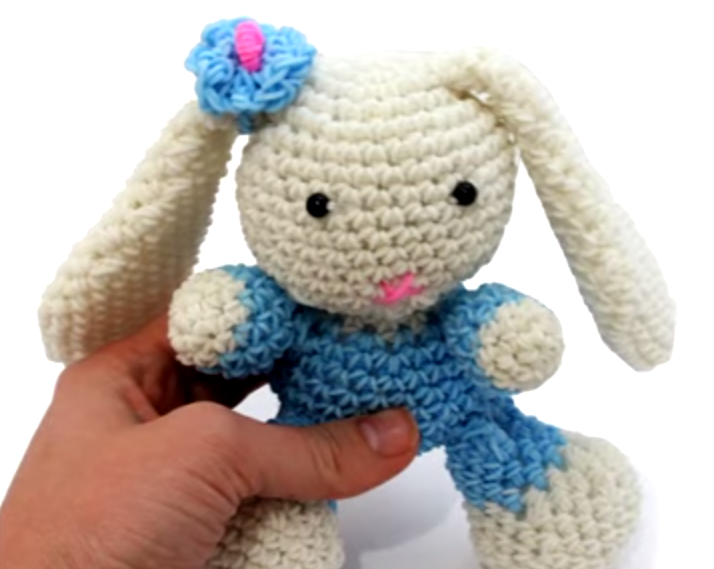
How to weave a rabbit out of rubber bands, video lessons / Toys with own hands, patterns, video, MK
Bunny from the rubber bands is made with a hook and a slingshot or fork - they are needed at the beginning. You will need 1800 gum white and 600 blue. The whole process is divided into several parts. 
First stage
We take a slingshot, wind the rubber on itthe main color is 4 turns. Hook into the formed ringlet, pick it up and stretch it through it. Return the 2 nd end to the hook and pull it all through one loop. On the hook should remain 1 loop. Creation of the head We also need to type loops, in this row there should be 6. We find the very 1 loop, through it and through the last elastic band we pass the hook. The second end is returned to the hook. On the 1 loop of each row, we dress the clip to know where it starts. We also pass the second loop - in the first, from 1 loop making 2. The next loop goes to the next one - in 2 of the first row. Further on the scheme:
- In each loop of line 1, two bands are fastened. In total in the 2nd row there should be 12 loops.
- We remove the clip and put it on one loop of the next row.
- In the 3rd row there are only 18 loops, and in 4 - 24. In 6-13 you will get 30 loops each.
- Now one elastic band is passed through each eyelet. It will be a lifting of the head.
- In the 14th row, 1 already has a loop, in 2 we sew 1 elastic band. And through 3 and 4 loops we pass 1 elastic band.
- In the next 3 loops - 1 elastic band. 4 and 5 we sew together, we leave on a hook. Further on the same principle to the end of the series.
In the 15th row there will be 18 loops, and in 16,17,18 - 12In the 19th row there will be 18 loops of blue color, in 20-25 - 24 loops each. The thong is the 26th row of 18 loops, 27 - of 12. Starting from the 28th row, we evenly close the loops. We leave a small hole, stuff the body of the bunny. We send the 29th row, we hide the tail from the eyelet inside.
Second phase
We begin to make ears and legs.We make the ears. We twirl the white rubber band 3 turns into the machine. We type 8 loops for the first row. We put on the clip to distinguish it from the 2 rows. Then we work in the following order:
- In 1-4 loops we sew one elastic band. In the 5th and 6th loop we stretch out 2 rubber bands. So the ear turns out to be more flat. Next to the end of the series one rubber band. There should be 10 loops in total.
- In 3,4,5 and 6 each time increase the number of loops by 2.
- From 7 to 10 rows we make 18 loops.
- In 11 and 12 - on 16.
- In the 13th and 14th rows - 14.
- In 15 and 16 - on 12.
- In 17, 18 and 19 - 10.
- From 20 to 23 rows - 8 loops each.
By the same principle we make the second eyelet. Be sure to measure that they were the same size. With the paw of the foot, we spin the white rubber band onto the slingshot in 4 turns. We make 6 loops. Further, the principle of increasing and decreasing the loops remains the same as in the previous cases. One part of the foot should be white, the author - a blue color. In technic, lumigurumi does not have either a facial or a reverse side, so it is not necessary to twist it. Leave a small hole and fill the paws. Lower legs are more than upper limbs.
The third stage - assembly
To leave a beautiful bunny, you need to connect all its parts correctly. This is done as follows:
- Evenly distribute the places where there are ears. Mark them with a rubber band and a hook.
- We pull out this elastic, pass through the last eyelet on the ear. We connect the eyelet eyelets with the head. We repeat.
- We try the handles so that they are at the same distance. Then the legs. The principle of connection remains the same as for the ears.
- If you want the bunny to sit, make a white tail just like weave the paws and attach it.
We add small details. Using a wire we pass the elastic band through a black bead. We repeat. We attach it to the muzzle. It will be eyes. From the pink rubber we make a spout. You can decorate the bunny on your own.
Using the figure
The toy will fit as a key fobor a flash drive. It can be attached to a backpack or purse. This is an original gift for the child or fans of gizmos in the style of hand-made. If you donate a hook and a set of rubber bands together with a bunny, you can instill interest in needlework. NOTE: In the video, there are 18 loops in the series, not 12.


