The idea of a scrapbooking organizer with your own hands. Materials, step-by-step instruction.
Organizer or the idea of scrapbooking Many of ususe purses and handbags to store various, not particularly important things. An incredible number of business cards, discount cards for special cases, storage cards and similar devices to simplify life are needed, but at what price? The handbag is always stuffed, nothing can fit into the purse. There is an exit! You can make your own organizer, using materials of scrapbooking technology and decor decoration. A convenient and high-quality organizer will greatly simplify life and help organize all these elements. Organizer or scrapbooking idea is an excellent solution for the ergonomics of your space.
The basis
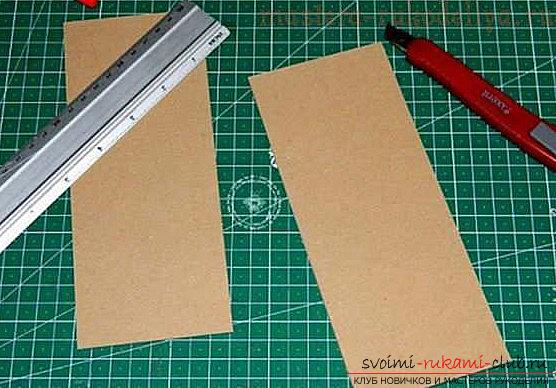 At the beginning of the work, we need to doSpecial palettes intended for the organizer. As a basis for this element, you can take a dense version of cardboard. The size of the original element is 8 centimeters by 20 centimeters. In your case, you can choose any other size. To make such palettes you need two pieces. Now we are starting to work on the cover. To do this, you need squares of 20 by 20 centimeters. Attention, the fabric needs to be ironed before working with it.
 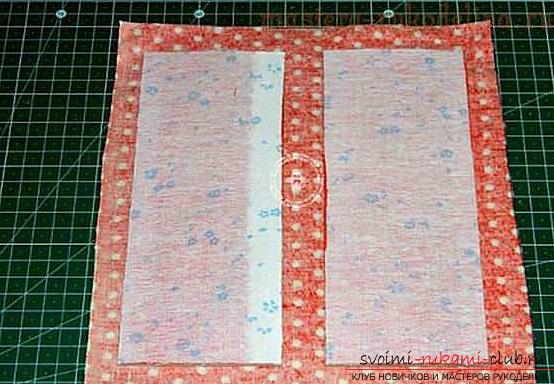 Next, to make the cover softer andpleasant to the touch, it is necessary to glue to the palettes the synthon material of the same version and size as the palette itself. If the sintepon was not at hand, you can replace the double-sided tape, on which a piece of cloth was placed on top.
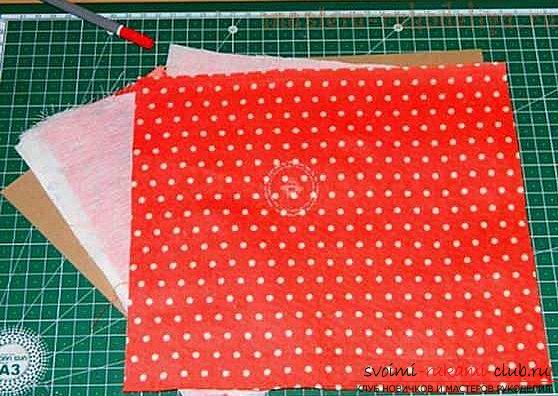
Processing and gluing
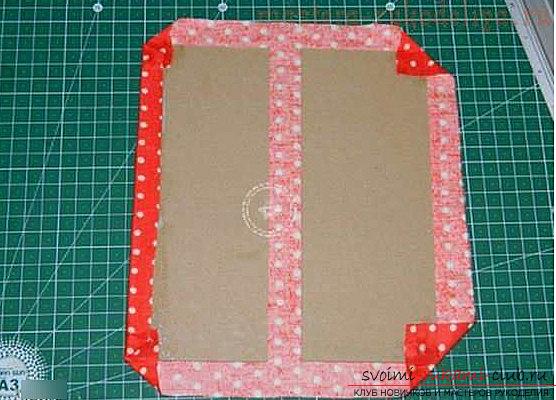 Next, level the elements and trim them tomake a foundation. We put the cloth down on it. It is worth remembering that cardboard does not need to be glued to the main fabric. It is only necessary to decompose it at a distance of 1.5 or two centimeters from each other. Then, using the PVA glue, 4 corners of the fabric for the cover are glued. After the corners dry, it is necessary to glue the edges of the fabric to the cardboard element. Then, use the organizer lock. In our case, we used the gum element. It must be glued to the substrate on the MOMENT glue.
 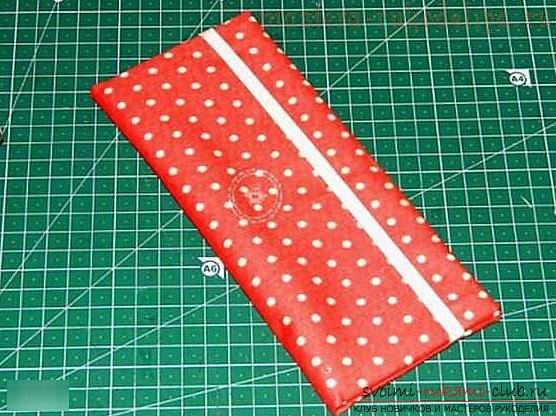 The inside of our organizer we will doin black and burgundy colors. Next, we cut out a cardboard-colored burgundy rectangle in the size of 19.5 centimeters in a ratio of 16.7 centimeters. For both sides measured at 7.5 centimeters in size. Then, using a stamping stick, we draw a special line so that the edges of our cardboard are bent beautifully.
Karmashiki
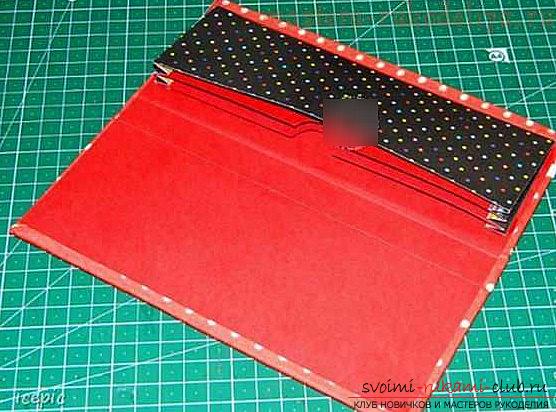
Next, we make karmashiki with three compartments. In order to connect the cardboard parts, we also use the glue "Moment". For one pocket we make two rectangular elements of size 6 by 7 centimeters from cardboard (They will be accordions, as in the usual purse). At a distance of one centimeter from each other we draw a line of bending. Next, we are working on the next rectangle measuring 6 by 19 centimeters. 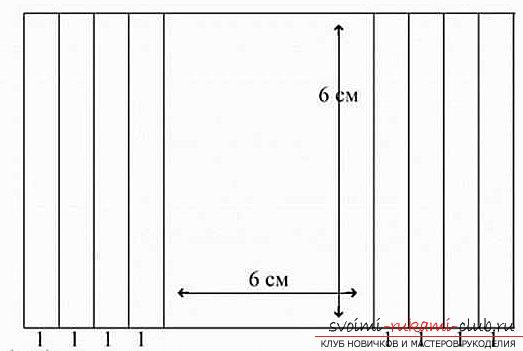 We also make two rectangles 5 by 18.8centimeters. They will become separators of offices and will designate them. Finished accordions must be glued to a rectangle measuring 6 by 19 centimeters, which will be black. Between folds in the accordion, it is necessary to insert a burgundy cardboard of rectangles of size 6 by 18.8 centimeters. All this creation is glued to one side of the burgundy. Next, on the other hand, we make two card pockets. Their sizes will be executed in the values of 14 by 6 centimeters. In the accordion you will need to insert two burgundy color separators. Then, stick the pockets on the other side of the base.
Decoration
Next, we are beautifying the organizer. You can make a refined style, minimalism or artsy. Use beads, sequins, flowers, butterflies and other decor elements at your discretion. Such an organizer is convenient to put in a bag and nothing to lose! It can be handed as a hand-made gift, or you can use it yourself to store the necessary things.