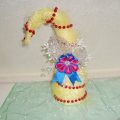
According to our master class, we get a nice piece of thread - a basket for small things.
On the bedside table sometimes easily "get along"such different subjects as a glass with water, a photo in a frame, a book, headphones, a mobile phone, tubes, bottles ... The list goes on and on. After all, each person has his own set of minimums needed before bedtime. One thing is clear - many different objects look like chaos. Hence, some of the items must be removed from the eyes, and the rest must be ordered. We propose to create with our own hands an elementary storage system - a basket woven from threads. Such a basket can be put on the bedside table and keep in it tubes with creams that you use for the night, or adapt for storing hairpins and rubber bands for hair and other small things.  To work needed:
- thick cardboard,
- colored or wrapping paper,
- toothpicks,
- yarn,
- beads are large,
- beads are small,
- needle sewing thick,
- scissors,
- PVA glue,
- pencil simple.
For the basis of the craft, I took a round box. But, having started the work, I realized that the top edge of the box only hinders me. Therefore, I advise you to take just thick cardboard, cut out 2 circles from it and glue them together. Diameter of circles, depending on the size of the basket you want to get. And I thicken the bottom of my box, pasting one more layer of thick cardboard.  Inside the bottom, too, decorate. To do this, you can use an old postcard, wrapping paper or simply colored paper. And so that the basket turned out harmonious in all, we select the color in accordance with the conceived common color scale.
  Now along the entire perimeter of the circle you need to sticktoothpicks at a distance of 1 cm from each other. To do this, we pierce the hole with a needle, dip the tip of the toothpick into the glue and screw it into the prepared hole. Try to keep the toothpicks strictly vertical, without tilting.
  I note that toothpicks should be an odd number, then further weave will move from row to row without problems. It turned out to be such a fence.
  We will interlace the toothpicks with a thread of yarn,starting from the very bottom. In the same way, the real baskets from the vine are braided. It is better to take a thread with an average thickness, since a very thick thread will be too heavy for our craft, and a thin thread will have to weave much longer. Helping yourself with a toothpick or fingers, we press the weave to the bottom of the product.
  You do not need to tighten the thread so that the toothpicks do not slope towards the center. And so, patiently passing a series behind a number, a weevil, attentively watching that not to mix up a course of weaving.
  We weave to the middle of the product.
  We will give a basket of elegance, decorating it with beads. Just put a large bead on each toothpick. I alternated white and brownish beads.
  We continue the weaving to the top of the toothpicks.
  The tip of each toothpick paste glue, plant a small bead. Thus we cover the sharp end.
  That's when I realized that I do not need a border near the box. I cut it off. I think that you have listened to my advice, and you just do not have this border.
  The bottom line requires decoration.
  We will close the bottom with a pigtail from the yarn. For the pigtail we cut 3 threads. The length of each thread should be about 1.5 times the required length of the pigtail. Fix the ends of the threads together and fix them on something to conveniently weave.
  You can fix it with a clip and throw it on a pencil in a heavy stand.
  Pintle plaits the right length in the usual way.
  We glue it on the outside of the bottom.
  The basket is ready. And if you use cardboard as the basis,cut in the shape of the heart, you get a pretty gift for Valentine's Day or on March 8. You can make a lid for the craft, using, for example, a postcard, and then you will have an original casket.
  Creative inspiration to you!
Comments
Related posts:
 A beautiful Christmas tree can be made with your own hands. New Year's hand-made article is easily created by our master class with a video lesson.
 According to our master-class crochet, we will tie the mitts and warm collar-scarf crochet.
Crochet toys by our master class will help create a knitted cat.
According to our master class you will learn how to make a scallop for hair, which decorates flowers from fameirana.
We propose to tie toys by our own hands in our master class, we will show how the hedgehog crochet.
According to our master-class crochet, we will tie the mitts and warm collar-scarf crochet.
Crochet toys by our master class will help create a knitted cat.
According to our master class you will learn how to make a scallop for hair, which decorates flowers from fameirana.
We propose to tie toys by our own hands in our master class, we will show how the hedgehog crochet.