Decor and crafts from lids from bottles
Metal caps from beer bottles,mineral water and carbonated drinks - an excellent material for crafts and decor of different surfaces. A number of features make them more convenient, beautiful and versatile raw material for creativity than plastic covers. First, the metal can be bent, bent and use a soldering iron, and secondly, the corrugated edges of the lid itself are very interesting. We offer some interesting ideas about what crafts from bottle caps can be made for an interior. Content:

Methods for decorating surfaces with lids
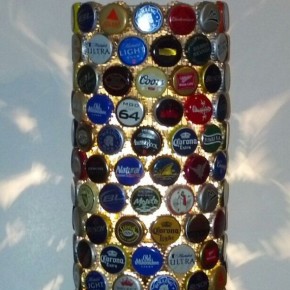
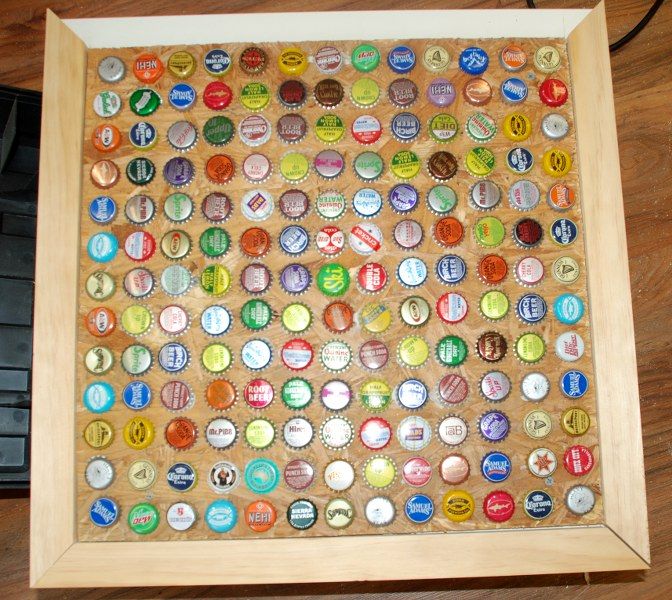
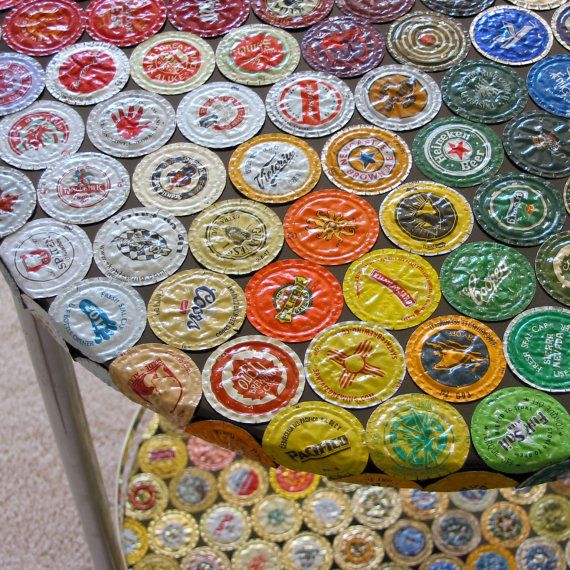
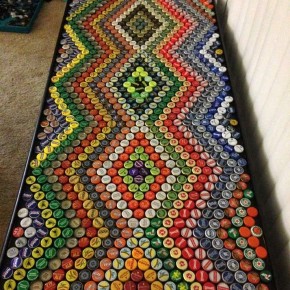
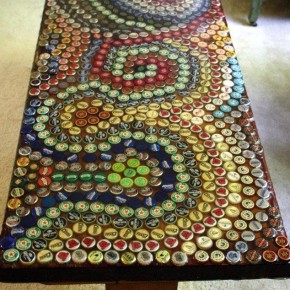
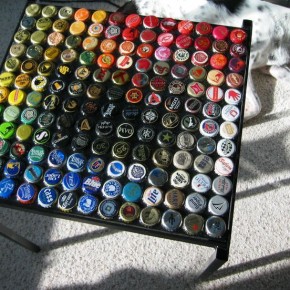
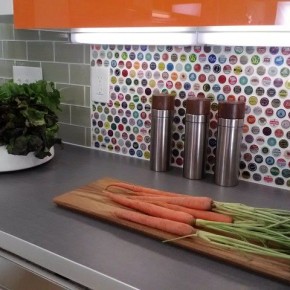
If you managed to collect dozens or even hundredsmetal covers, pay attention to this project - inlaying any surface. You can decorate with the lids an old coffee table or bedside table, a tray or a box for things, a table top for a dining table or kitchen, the surface of a chest of drawers or a closet, even put a wall or floor with a mosaic of lids! The result can exceed all expectations! The appearance of the finished inlaid surface depends on the chosen method of fastening the lids, as well as on the color solution and the laid out pattern. Let's look at the basic ways of decorating surfaces with metal caps from bottles. Put on the glue The most obvious and often used method is to put the covers on glue or liquid nails. With this method, the lids protrude above the main surface, creating a three-dimensional ribbed pattern. For gluing, use a quality thick glue, liquid nails or a mounting foam. Take care that the sticky mass does not protrude beyond the edges of the lid and at the same time securely fixes each. If desired, then the entire surface can be opened with varnish. 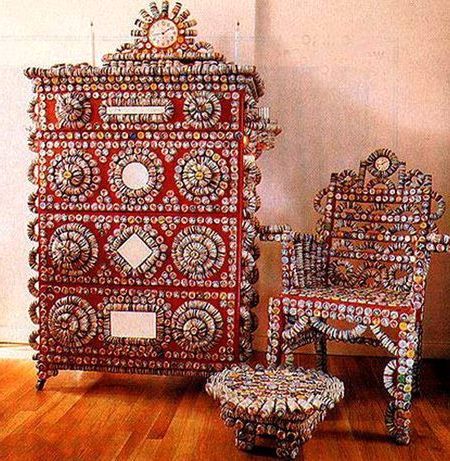 In terms of design inlaid with coversyou can completely trust your imagination. No rules and restrictions. Try using original caps with names of drinks, paint them from a can in a certain color, or manually apply the drawing with acrylic paints. You can also spread from the lid any pattern, ornament or image, like a mosaic. On a large scale, such a decor with metal covers will look very impressive!
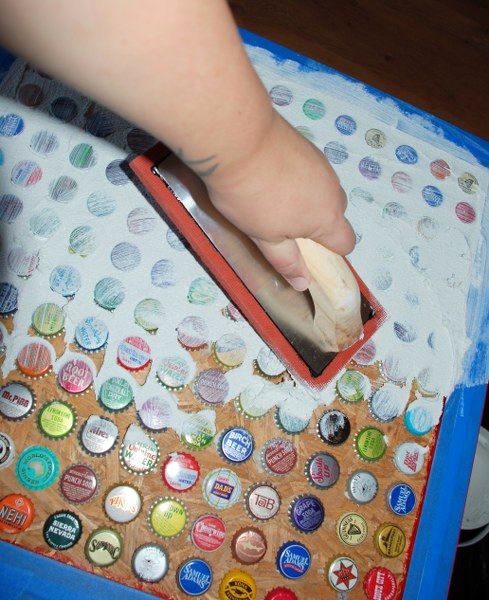
 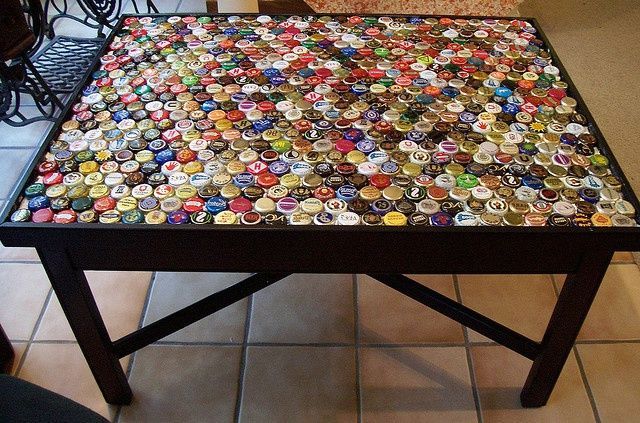 The gluing method for glue is used fordecorative tables, frames of mirrors, walls of furniture, that is, for surfaces that will not often be used as, for example, dining tables or floors. It is better for them to choose the second method, as will be discussed below. Put on the glue and wipe the seams. If you want to decorate the tops of the dining table or worktable, the floor or the "apron" over the working kitchen area, then the space between the caps is preferably filled with a grout to prevent the accumulation of dust, grease and dirt. To do this, also glue the caps in the chosen order, let the glue dry and then fill the space between the lids with a trowel or primer with a rubber spatula. It is very important at the same time to keep the clean hats of the covers, so at the same time with the trowel, clean the lids with a damp sponge.
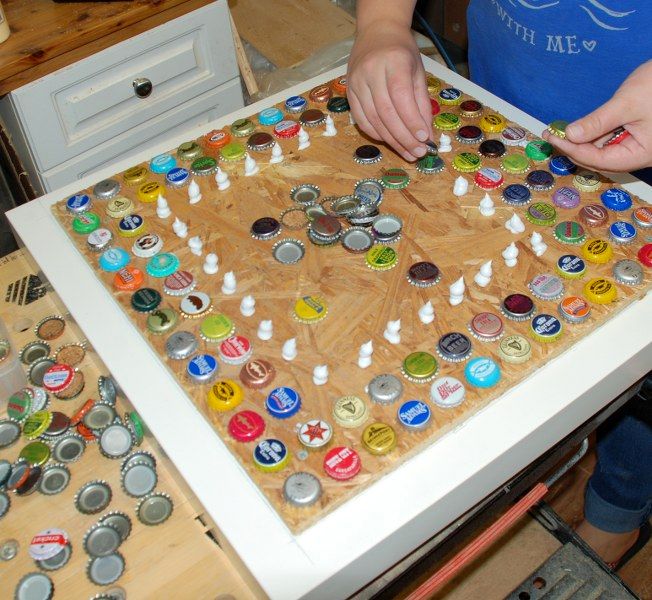
 There are options when laying the lids ona floor area use a cement slurry. While the cement is still completely dry, the lids are gently pressed into the solution. This method is quite laborious, requiring you to act quickly with a confident hand and without hesitation. After complete drying, the surface is varnished.
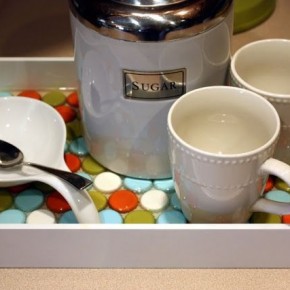
  Pour epoxy (acrylic water) ThisThe method is suitable for surfaces with bumps, for example, for a tray, drawer or countertop with a recess. As a fixer and grouting for the lids, you can use epoxy (acrylic water). Since this chemical solution is liquid, we need bumps. Lay the lids on the surface, and then pour the mosaic with epoxy mortar according to the instructions to it. Very convenient and fast, because you do not need to glue every lid, or wipe the seams between them.
  By the way, almost the same effect can be achieved if a sheet of glass is laid over the lids, especially for tops.
 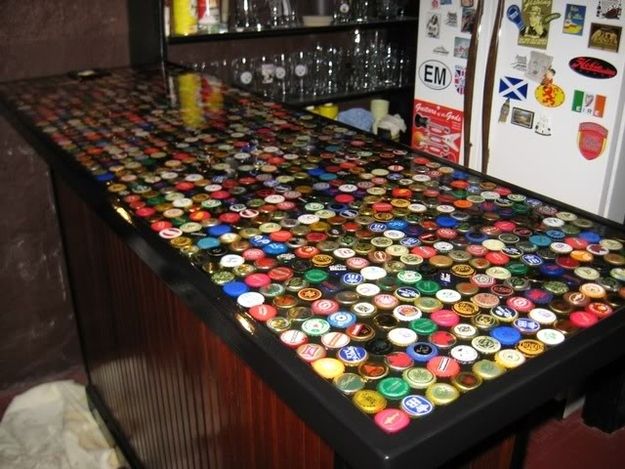 Nail Hooks Caps can simply be nailed towooden surface with small carnations. The nail cap will spoil the picture a little, but in principle it can become a highlight and a unifying element of all the caps. Alternatively, the lids can be pre-painted in a monochrome color, then the middle in the form of a nail cap will look natural and harmonious. In order to bend the nail and lid itself when hammering a nail, place a plywood and a nut of suitable height under each piece.
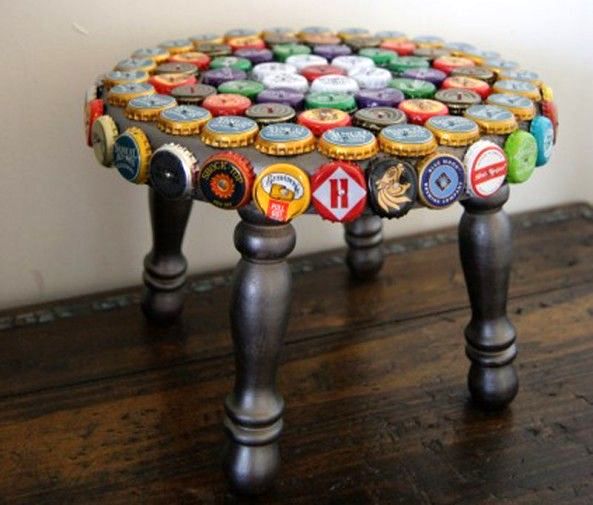
Ways to connect the lids among themselves in handicrafts
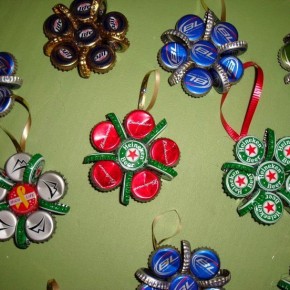
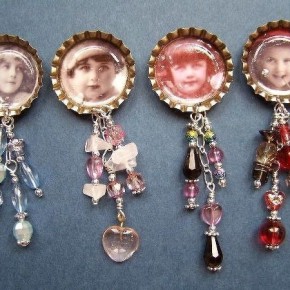
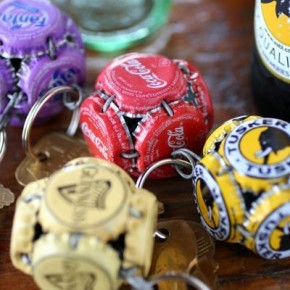
Metal lids from bottles can notonly to decorate the surface in the interior, but also to make individual crafts - decorations, magnets, coasters and toys. How to assemble the caps in a single design? Holes and wire Thin a nail or a drill in the relief sidewalls of the holes, and then connect the lids together with a wire or a fishing line. 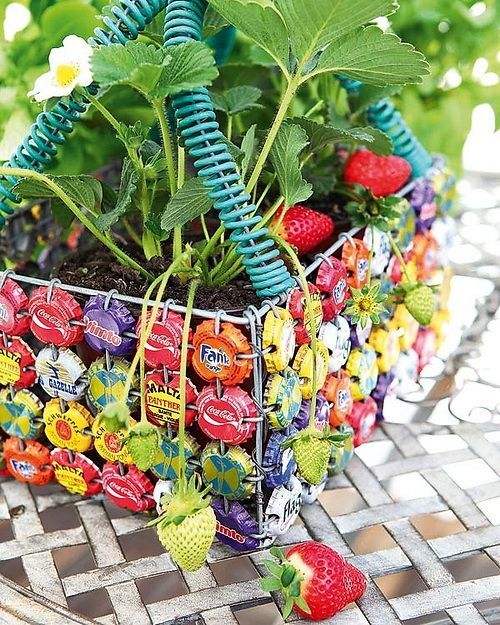 Soldering Iron You can use a soldering iron and solder to securely connect the caps.
 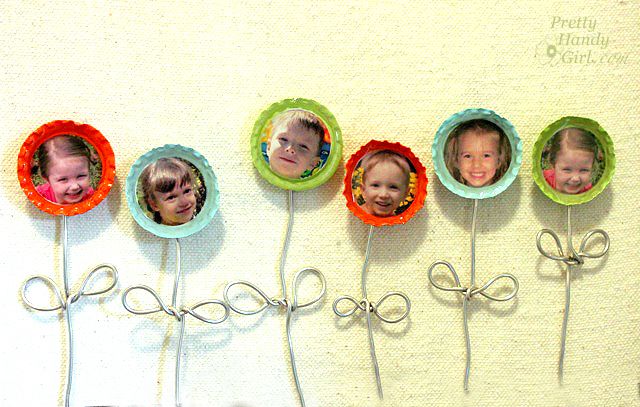 Glue and fasteners In some handicrafts,for example, for ornaments, it is necessary to use special details. They can both be soldered to the lid, and glued with a super-glue, suitable for metal surfaces.
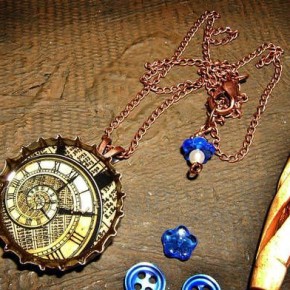
 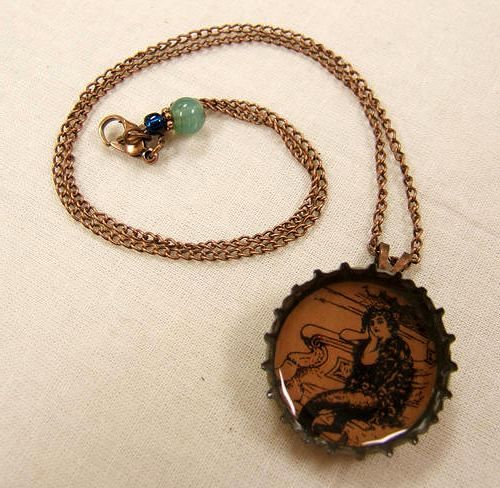 Bend, bend, straighten Unlikeplastic, metal lids can be bent in half, bend, giving a spherical shape, or completely straightened hammer blow. Their such blanks are easy to make jewelry, jewelry, Christmas toys and other decorative items.
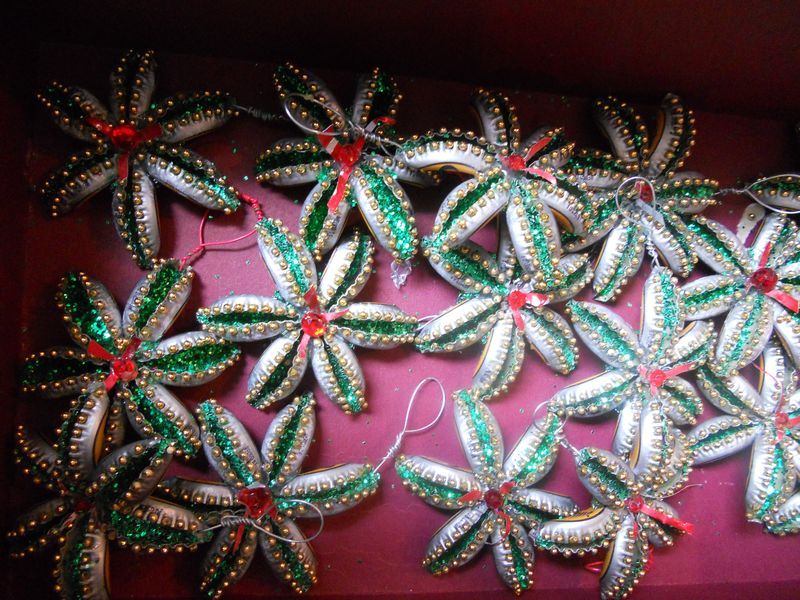
Decor and crafts from lids from bottles
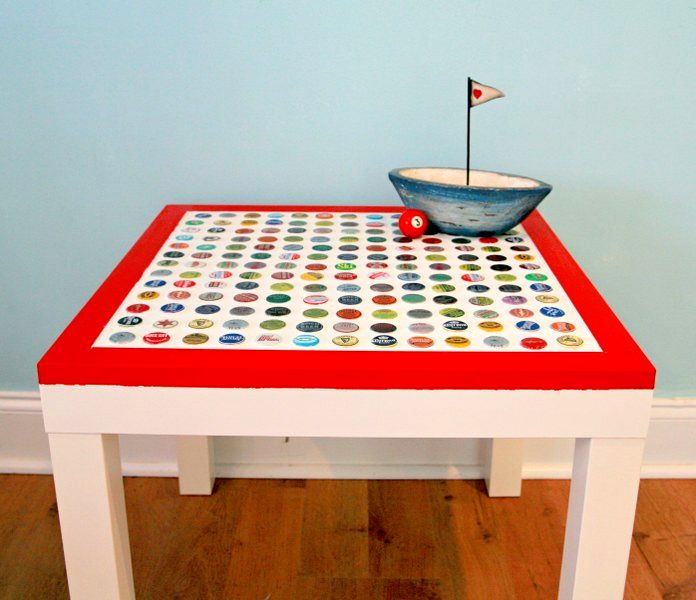
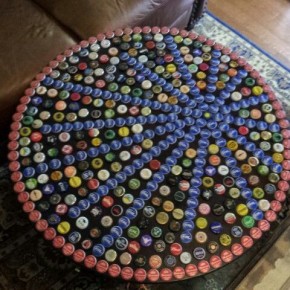
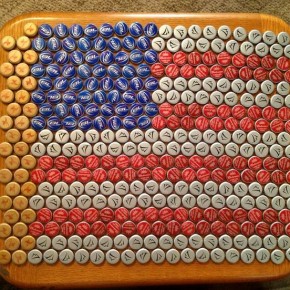
And now let's see what kind of original crafts and decor can be made from the lids. Tables 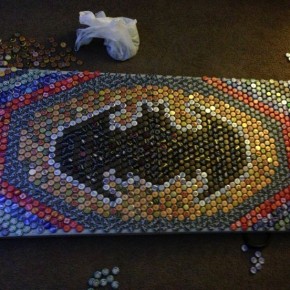


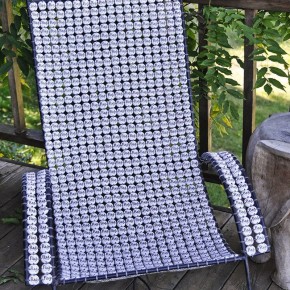
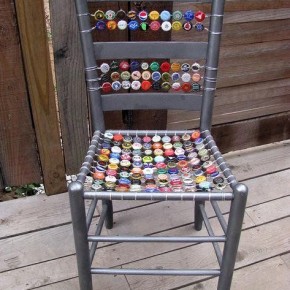
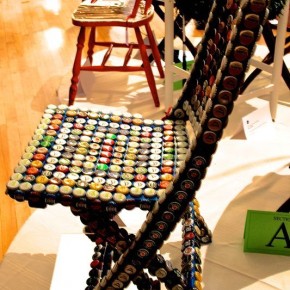
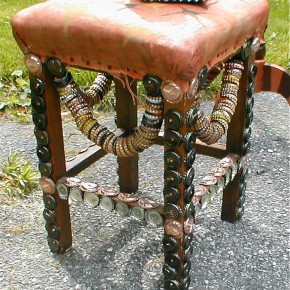
 Chairs

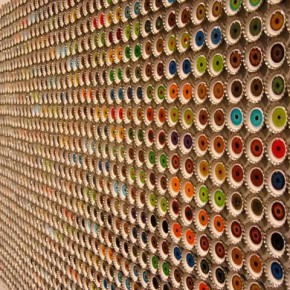
 Floor and walls
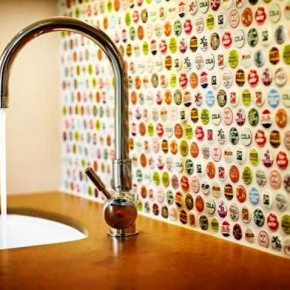


 Other articles made of lids from bottles