To connect an interesting gray shirt-front with buttons with your own hands, you can use knitting needles
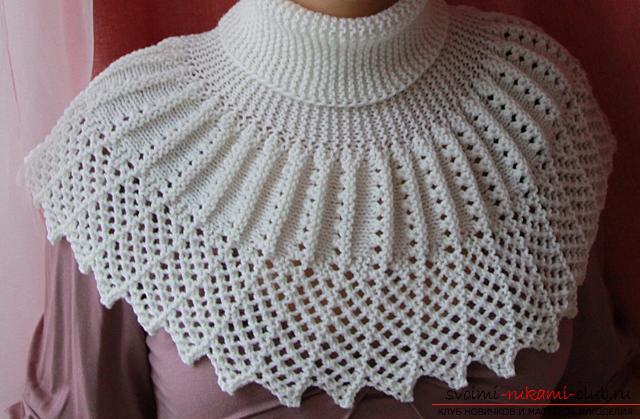
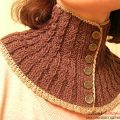
A gray shirt with buttons, knitted with knitting needles,the perfect solution in the cold season. The versatility of the product allows it to perform as a protective function (saves from wind and cold), and aesthetic. This element of clothing is quite simple to fit according to the scheme. Work does not take long even for a beginner knitter. Over the years, barnyard is a fashionable element of clothing not only for women, but for men and children. It is especially relevant for children. This version of the scarf saves the baby from the cold, tightly fitting his neck. In this case, it is more convenient than a scarf, since it does not untie and does not loosen during socks. The variety of design allows you to make it not only useful, but also just a fashion accessory to any wardrobe. In the photo we can see several variants of knitted bunnies. 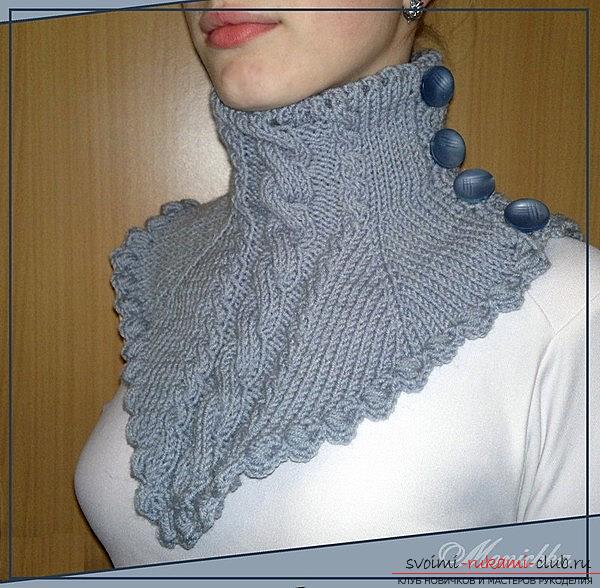
 All mannies without exception are tied according to the same rules and differ only in their design.
- For crocheting mannies it is better to take natural thread, which includes as little as possible a percentage of synthetics.
- The viscous should be dense, so that the product retains its shape, so the needles should be used to a size thinner than knitting other products with the same threads.
- Faster knit shirtless, not having fasteners.
- Calculate the number of loops in accordance with the density of binding, the volume of the neck and the addition of one or two centimeters (free fit).
- To the edges of the product do not twist, they can be tied with a hook.
- If the shirt is intended for the baby, it is better to make a buckle on the shoulders. This will make the dressing procedure more comfortable and less uncomfortable for the child.
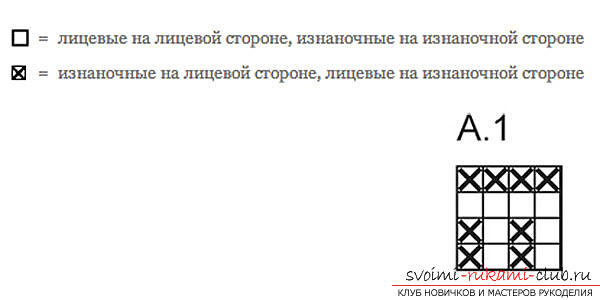
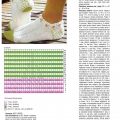
Today we offer you a scheme of a gray gray shirt with buttons connected by knitting needles. 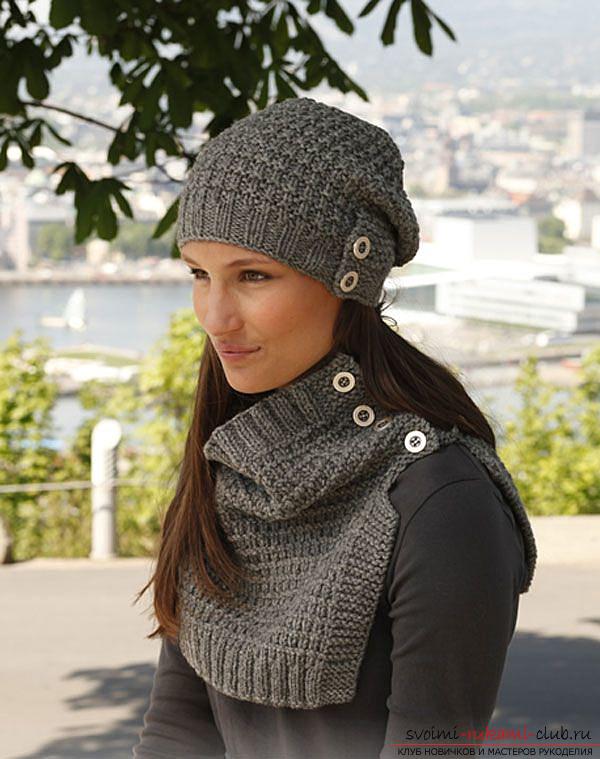 For knitting we choose the thread of gray color. We recommend threads that are 50% wool, 50% alpaca. In addition, two needles are needed - the No. 5 spokes are circular, and also one, smaller by one size, to tie the elastic band. The product has two parts. We begin knitting from the wrong side. We first connect the upper part of the product. To do this, we need to type on the knitting needles for the 62 loop loops. The first row is knitted with facial loops. In the second row we start knitting and finish it with six face loops, at the beginning of the row we knit 2 loops again. The remaining stitches in the row are knitted with an elastic band - 2 persons. X 2 rel. loops. The height of the rubber band should be four centimeters. Having knitted the top of the shirt-front, we begin to knit the second part - the main one. We take knitting needles # 5 circular. We start the series with six facial loops, then we knit 50 loops, according to the scheme (see below), we finish also with six facial loops. We knit by the scheme length of 16 centimeters. Then we close six loops on one side and six on the other. Using an auxiliary knitting needle, we throw on it 50 loops. We finish this part of the article, as we did during the knitting of the first part. Assembly of the front man
- We type six loops on the main knitting needles and in turn we knit the open loops of both parts and we also collect six extra loops.
- Next we knit six facial loops at the beginning and sixfacial at the end of the row, in the middle of the canvas we knit according to the figure of the scheme. We send this method 14 centimeters. We throw all the loops on the knitting needles for elastic bands and we knit four centimeters of gum according to the principle, as we did with the top part of the product.
- At the very end we sew buttons and the shirt is ready.
Comments
Related posts:
 Knit shirt with buttons, knitting needles, knitting with buttons for women, knitting with a knitting needle, knitting with knitting needles for beginners
 How to tie a perfectly fitting body to the scarf. A detailed description of the process of knitting a scarf-shirt with knitting needles
 Link your own hands, you can easily use the knitting needles according to the proposed schemes and descriptions
 Knitting with the knitting needles of a warm cardigan. Fashionable and stylish cardigan you can link yourself relying on the advice of professionals
 To connect a waistcoat of any complexity under the offered scheme you can without special work