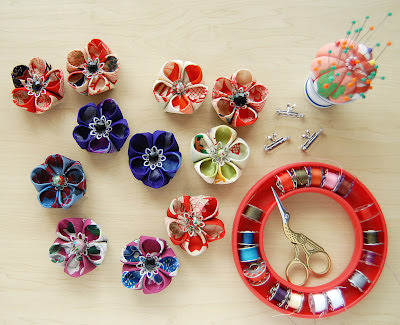
Kanzashi brooch: we make different decorations from ribbons and beads (video)
Content
- Charming brooch
- Video: Create a holiday brooch
- Exquisite neck necklace
- Smart Belt
- Video: Decoration in Kansas technique
Kanzash technique is many-sided. With its help it is allowed to produce incredible things and decorations from tapes. Starting from the Kanzash necklace and Kanzashi earring, and ending with Kanzash hair jewelry. But this is not all of what it is permissible to create with your own hands in such an interesting technique.
Detailed master-class (μ) brooches with topicalPhoto and video material for beginners, tells you about what ornaments from ribbons, you can create with your own hands from the reps and shiny ribbons. Choose an attractive and suitable master class (m) for yourself and create incredible things yourself.


Charming brooch
A brooch made of ribbons, like decorations made from ribbons, is quite easy to make, after creating several pieces, you will understand this yourself.
Before you start this master class (μ) brooches, ornaments from satin ribbons, you need to purchase the necessary accessories, namely:
- Suitable material;
- Needle with a thread and scissors;
- Small piece of felt;
- Decorative material for decoration, in the form of beads and beads;
- glue for textiles;
- The main part for the brooch.
If you have prepared everything and are ready to start yourself, then we proceed to work.
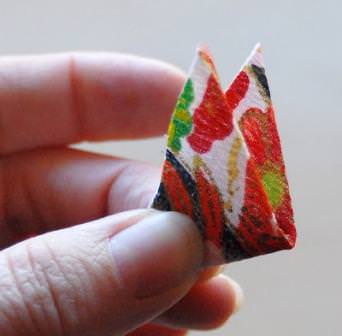
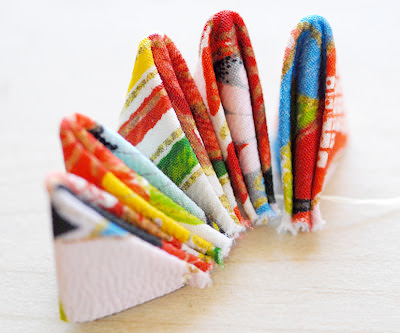
The master class begins with the creation of a roundedPetals Kanzashi for brooches. Take one of the chopped squares and fold it in half so that you have an isosceles triangle. Next, fold it in half again, and you will get a small triangle.
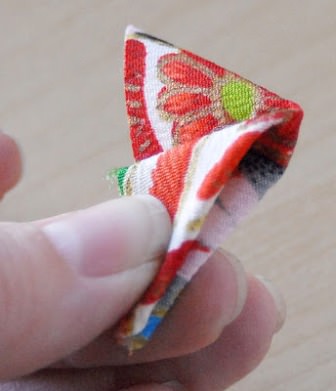
Fingers of the hands, take him for any corner andAttach to the closed corner of our figure. The second angle, also attach to all others. All angles are at the same point. You got the very first petal. Put something heavy on it, so that it does not turn around while you create the other five pieces.
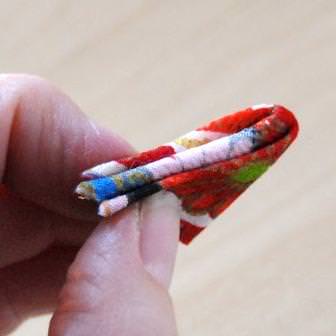
The edge, where all the corners are located, is fixed with a thread. So, your petals will be even, during the fastening of them together. Make only one seam from the wrong side, and do not touch the center part.
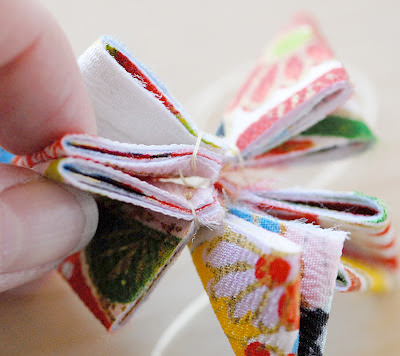
Thread not cut, and the same manipulation,Do the rest of the basic materials. When you do this, you can make sure that the brooch's petals keep together and do not fall apart. Turn the brooch to your side, grasp the primary and last petal near the corners. Sew the ends that you wrapped around your fingers.

Then, take all the same petals and stick the needle and thread in them away from the middle, fixing them.
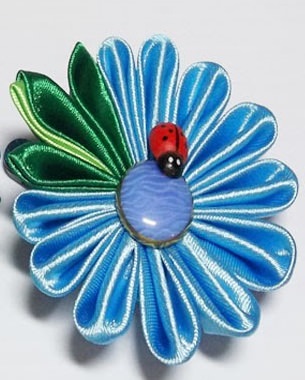
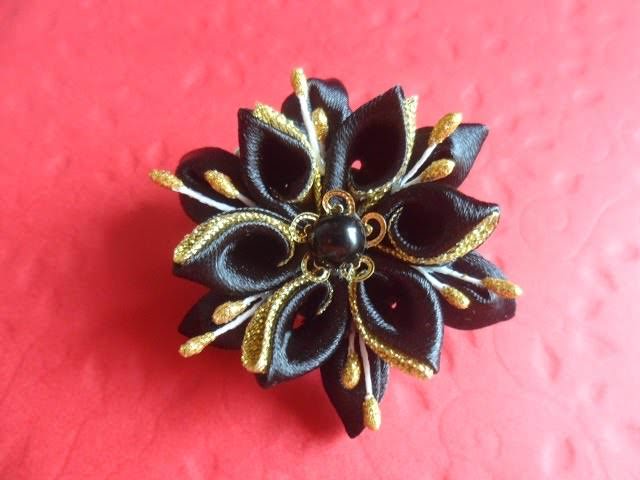
Take the adjacent petal of the brooch, and sew withNeighboring, just like the two previous blanks. After the manipulations with the materials, remove the thread. You have formed an article similar to a star, as pictured in the photo.
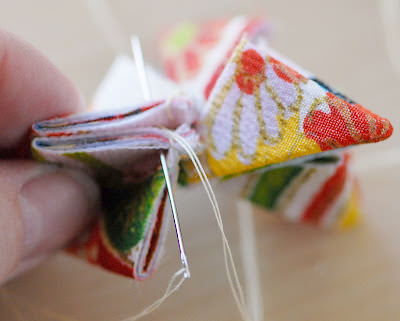

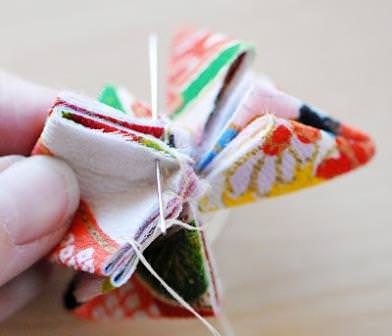
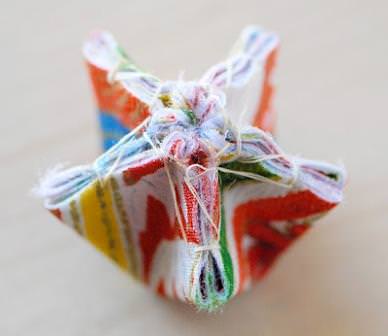
Turn the canvas over the brooch. You have sharp ends on the edges of the petals, this can be corrected, only by pressing them with your fingers, closer to the center. So that you succeed, do so several times.
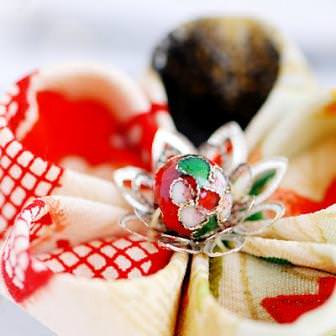
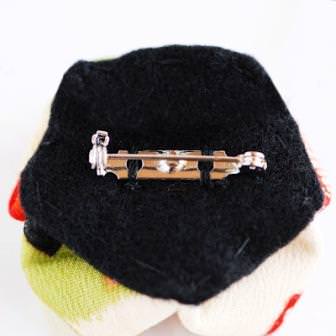
Attach to the center of the brooch, a beautifulBead. From a felt cloth, we cut out a circle, which will become the basis for a Kansasi brooch. Glue it to the flower and attach the lock. Brooch in Kansas technique, completely ready, you can try it on your dress or blouse.


For a better understanding of the material, ornaments from satin ribbons, we recommend you to view an entertaining video about the brooch.
Video: Create a holiday brooch
Exquisite neck necklace
This master class (m) Kanzashi jewelry, clearly demonstrates how, to create with their own hands a neck necklace in Kansas style, which is worn and adorns the neck.
For the sake of kanzashi necklaces, we need such accessories, and more precisely, then:
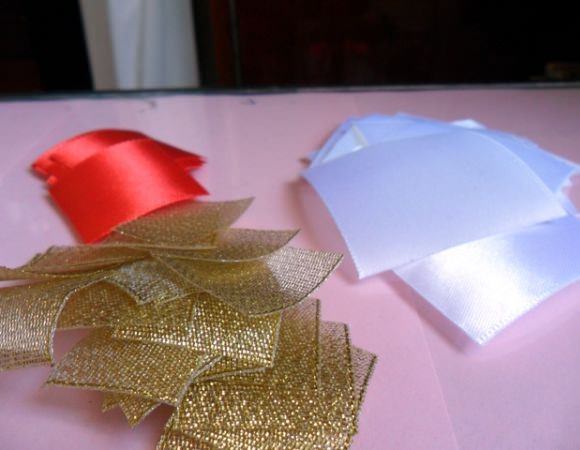
- A detachment of satin and rep ribbon, preferably a scarlet, golden and white shade;
- Thin ribbons;
- Special glue;
- Fire lighters or candles;
- soldering;
- Fasteners for jewelry.
As you know from previous studies, from the beginning,You need to cut the ribbon into squares. To do this, you will need red squares, in the number of three pieces, size 5 by 5 and eight pieces 2.5 by 2.5. White make, 18 pieces, size 5 to 5. Gold boxes should be 19, size 2.5 to 2.5.

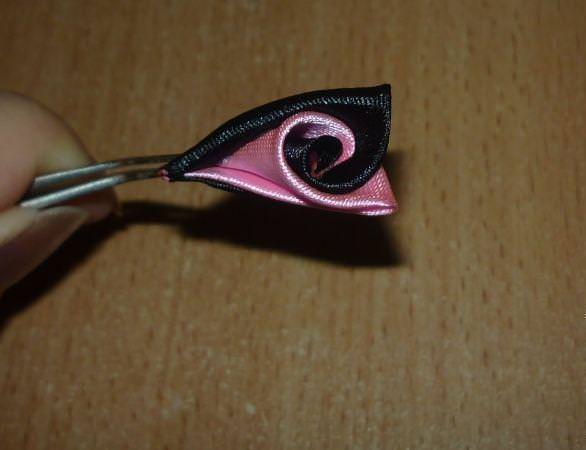
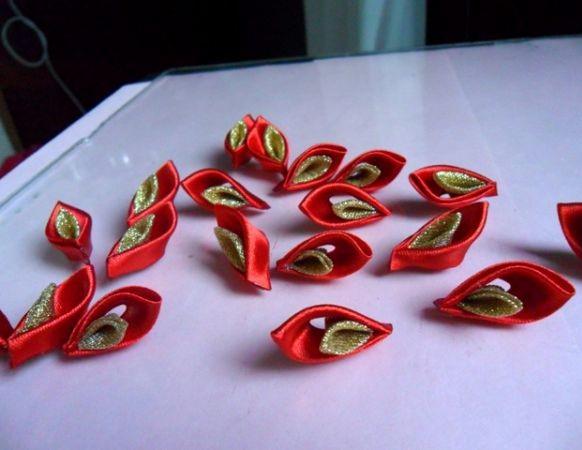
After you have made the blanks, you need toTo make peaked petals, large-sized with holes. And a few pieces without punctures. In order to master the technique of creating pointed petals, we recommend that you get acquainted with the video and photos on this topic.
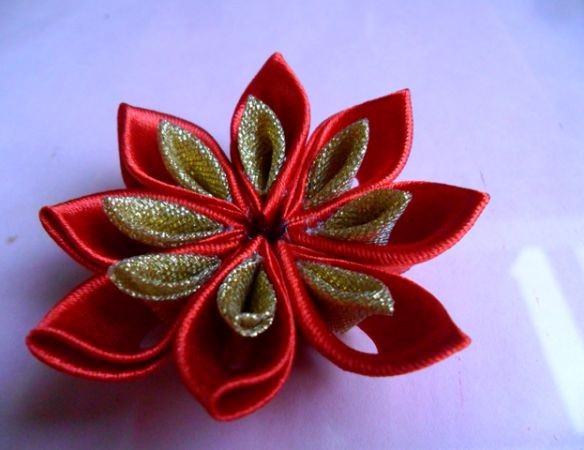
We make six circles, of which, two, scarlet, and four, must be white. We take three pieces for the base of the flower, and the rest will cover the places on which the fastening will be seen.

Take 19 pieces of gold color and paste them in the same amount of petals of a scarlet shade, large size. The same manipulations, do with the red petals.
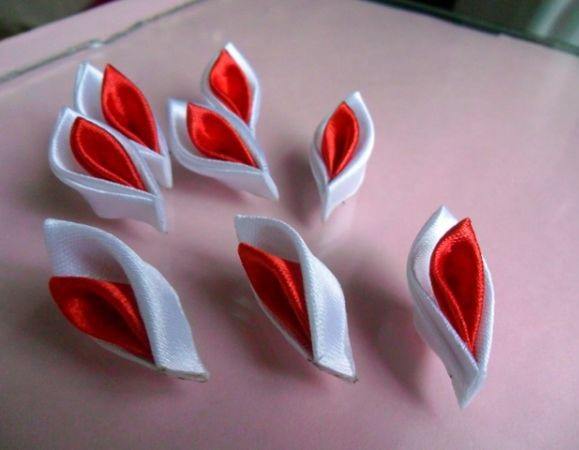
One craft is made of eight red pieces, while others will consist of scarlet and white.

The following actions for beginners areTo make a rope, which will serve as a fastener to the neck. Use the satin or cloth of the ribbon ribbons and bind them. One strip will be slightly longer than the other. Light it with a lighter, and with quick action make a pointed edge. Such an end, it will be easier to enter the end, which is attached to the necklace. Attach the fasteners, and the rope for the necklace around the neck, is completely ready.


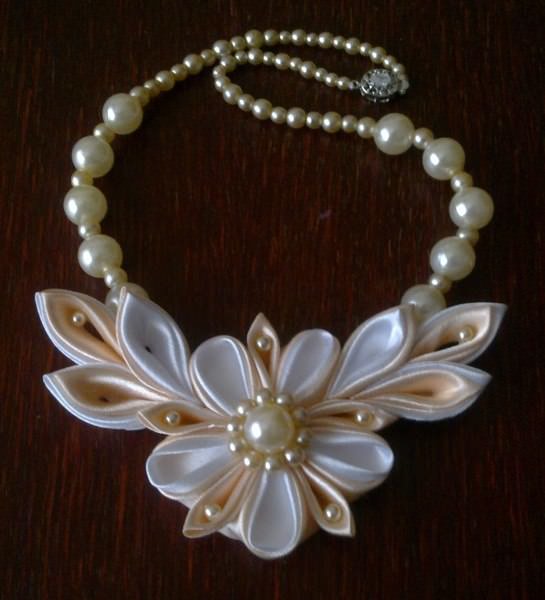
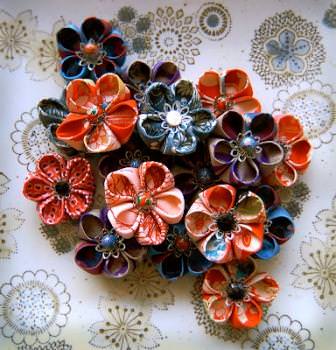
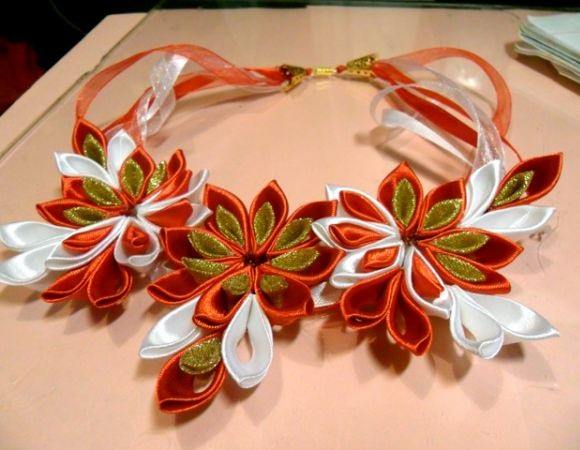
Take our Kanzash flowers, namely, attach the red color in the middle, and the remaining blanks on the sides. The place to which the flowers were glued are closed with round cuttings.
What remains is attached to the middle flower andWe decorate with beads. Look at the photo, and you will see how the decoration on the neck should be. In order to consolidate our material, study the video instruction for beginners.

Smart Belt
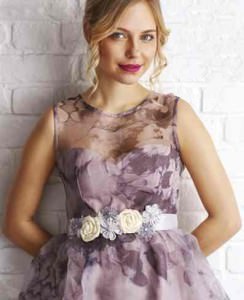
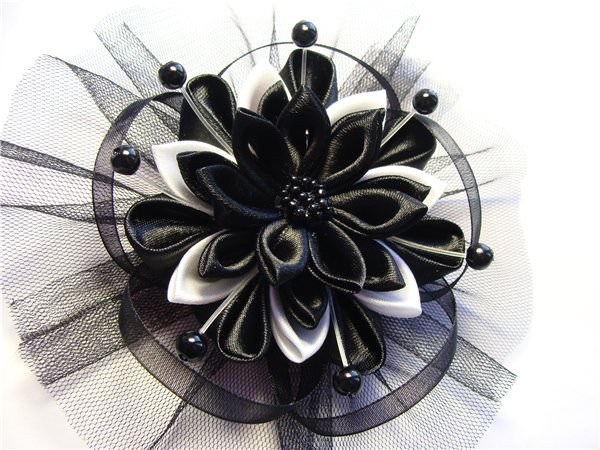
This master class (μ), more complex, we willTo create with your own hands a belt of Kanzash, which is decorated with festive clothes. In this technique, the belt will look even more pomposing than a conventional accessory. Blanks from reps and satin ribbons, as well as organza, will be able to make a belt, which for beginners skilful, will be a pleasant discovery in needlework. The rose, which will decorate your belt, will be made in Kansas style. In order to create it, we need some hardware:
- Basma gray in satin;
- Still such accessories, only the diameter;
- Gray organza;
- Double beige basma;
- Ribbon of tulle fabric, also beige;
- Thread with a needle;
- sharp scissors;
- Beige felt;
- Decorative material, in the form of pearls and beads;
- Cord from guipure.
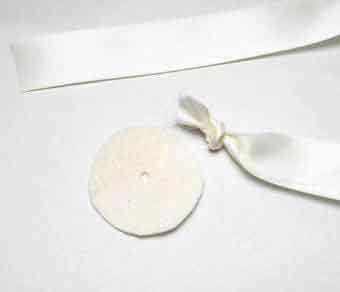
The central dyeing of our crafts, will beThe queen of plants is a rose. To create it, we need 3 tapes, the length of 50 cm each. Tie their edges together with a knot and sew them with a thread. Then, we cut out two felt circles from a felt, with a diameter of 4.5 cm and make holes in the middle. The tail of our knot is pushed into this hole. Cut the ribbons, twist together, doing this in a circle, to give the desired shape of the rose. Low flax, need to sew through felt. Nodes are fixed on the inside of the piece of felt. The second rose, is done in exactly the same way, based on the same schemes.

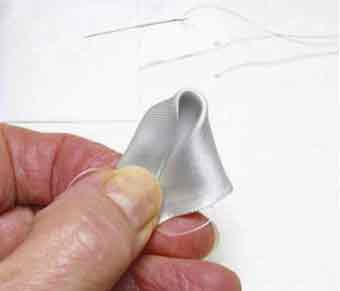
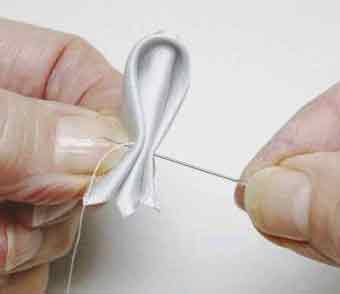
We begin to make a flower, which is necessary, so thatBeautify the girdle. You need to cut fourteen squares, size 5 to 5. fold with your own hands, a small square obliquely, to get an isosceles triangle. Wrap its edge. Again, fold it in half, so that the core is inside the triangles, as shown in the photo. Pull the thread into the needle and make a knot, and then stitch it through the petals, just above the end. Make one seam and fix it on the front side. In order to create a beautiful belt with your own hands, you need the rest of the workpiece to do the same. We need 7 of these products.


It is necessary to cut off excess fabric, below the created seam. Sew it all and pull it together. Similarly, we create the rest of the flowers.
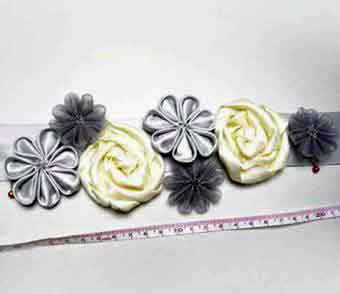
The belt is not finished yet, we continue the master class onThe creation of their own hands such crafts. Slice another 27 squares, 4 by 4 from organza for three flowers. Each such workpiece will be created from nine squares. We begin to sew flowers to the gray ribbon, starting from the central part. Then, go to the side places. Make the decor with pearls and beads so that the belt looks festive. The rose will be decorated with a pearl.
Look at the photo, and you will see which belt should go out, made by yourself.
Video materials that are designed for beginner needlewomen, will help you to understand the details and read the schematics of the material blanks to make manually decorations in Kansas technique.