
We knit a beautiful beret with his own hands according to the scheme. Description of the process of knitting the original beret and recommendations of professional knitters
It's no secret that the Internetand the corresponding literature, anyone who wants a beginner can master the system of knitting a beret. First, you need to "fill your hand" on the main set of loops. Previously, such a dress was attributed to accessories that were worn in autumn or winter, as they were fabricated according to the technique of tight knitting from wool yarn. But recently all women of fashion prefer a delicate, delicate berets. As a rule, in the process of knitting a maid beret must know at least the basics of this technique, as well as acquire knitting needles and high-quality yarn. Before you start knitting, you need to decide on the model you want. 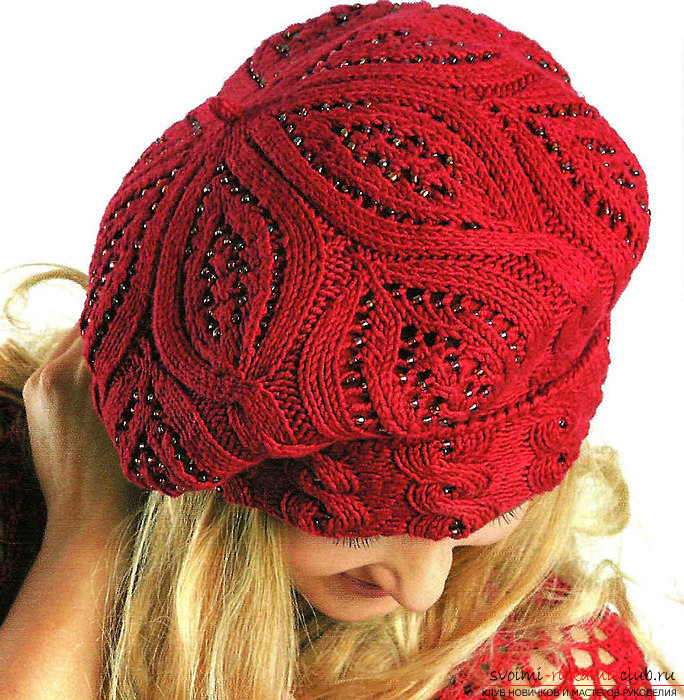 The knitting system of the stylish beret knitting So,to start knitting a beret, we take a choice of woolen or half-woolen threads, with a calculation of 100 meters 125 grams, with a wool volume of about 200 grams. Need to be the spokes of two digits 5.5 and 6. Spokes 5.5 make about 45 loops, which we knit with an elastic band in 2 facial and 2 purl in eight rows, letting two loops through two. Then you can take the big needles, with which help to achieve the chess pattern according to the following principle: for every 5 loops there are 5 purlins, on the reverse side we knit the same 5-6 rows, and after that we change the knitting system. As a result, about 75 loops should be loosened, increasing in the process of the 1-rd river. After that, it is worth to reduce the number of loops, for example, in the 37 rows there will be 42 loops, and at 45 already 20. When the process of binding eventually reaches such rows as 49 and 51, we draw a thick thread through the typed loops. Then pull off the beret, creating a fold on it, then tie a string in a bundle.
  Other knitting options for stylish beret knittingFor those to whom the previous method of knitting Beret seems quite difficult, you can practice an easier option - a dressing that assumes an equal combination of several color scales, of the type 100 g per 100 g.
  Another technique is binding, which can be safelypractice to amateurs, is similar to the previous one. Such a binding involves a complicated pattern. It will be enough to take yarn weighing 200 grams, knitting needles at number 6, which will need to be strung from 60-62 stitches and then knit by the side-stitched rows of 8 centimeters, with 11 loops of 3,5,7 and 5 rows of cones left. When there are already 14 rows connected, carefully begin to shoot 9 for 6 loops in each second row. Skipping 32 rows, immediately loops will be visible, which are tightened by a thread and fixed. At the end of the entire mating, it is necessary to decorate those bumps that have remained, with various stones, rhinestones.
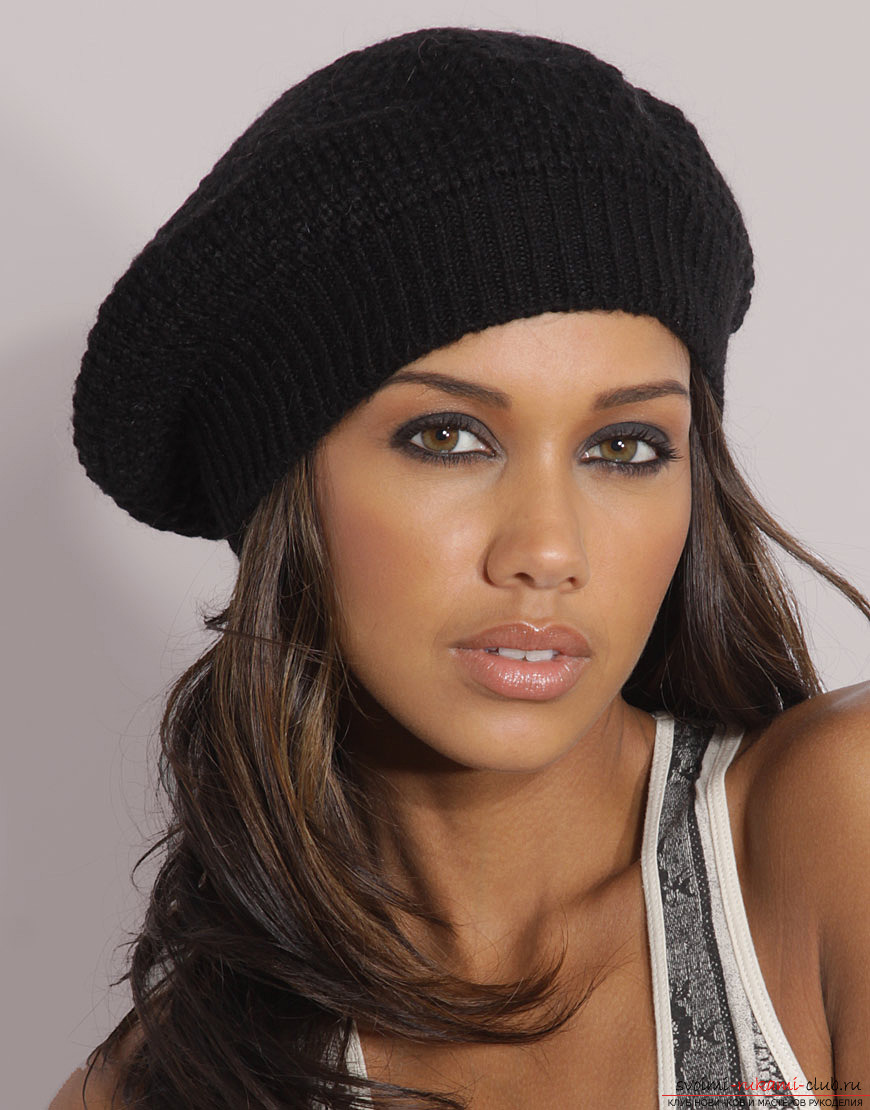
Comments
Related posts:
 Knit with knitting needles a beautiful women's sweater with interesting patterns. Description of knitting by the scheme of a stylish sweater for a woman
 We knit the dress for girls with their own hands. Scheme and description of the work. Photos and recommendations of experts on the sequence of knitting dresses
 We knit a stylish jacket for a woman. A detailed description of the knitting of the original and stylish female jacket
 We knit a women's vest with our own hands. The scheme for knitting with detailed descriptions and pictures on our website
 We knit an exclusive children's cap with knitting needles. Description of knitting cap for kids according to a certain pattern