Crochet the original flower, using step-by-step instructions with photos and diagrams
Crochet flower on a hat Options forcrochet an ordinary flower for a cap pretty much. However, among such a variety it is sometimes difficult to pick up a flower that is not too bulky, but not very flat. We offer one of the crochet patterns of a simple and elegant flower for the headdress (see the picture below).  Description of the scheme for the extraction of a volumetric flower.
 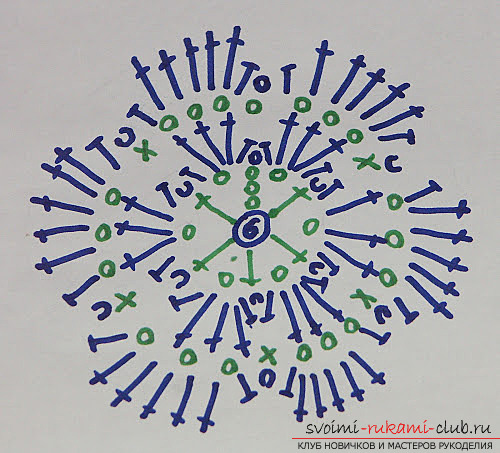 We begin with knitting 6 air loops (in) inringlet. First row. We do three steps in lifting, one in, and then in the ring we knit five times a column with one crochet (c1n) and a crochet. Second row. We form one way of lifting, and afterwards, in each hole of the preceding row we knit several columns: one half-column with a crochet, three cn, one half-cube with a crochet. Between these columns we knit the connecting column by hooking the string under the column with the cloak from the preceding row (see illustration).
 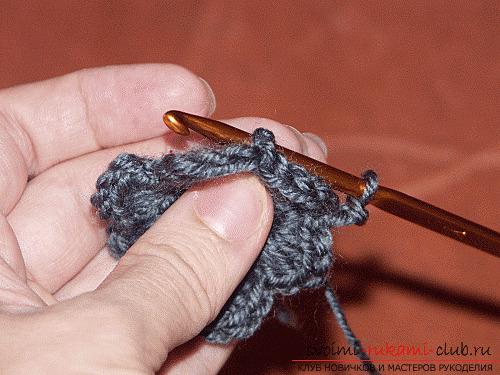 Third row. We knit one inch of lifting, then six times three inches, a column without a cape (sb). (see illustration of the wrong side of the flower) Fourth row. Again, we start with lifting. Next, in each hole of the previous row we knit several columns: one half-column with a cloak, 5 dots, one half-column with a cloak. Between these series of columns, the connecting column knits through a column without the cloak of the preceding row.
 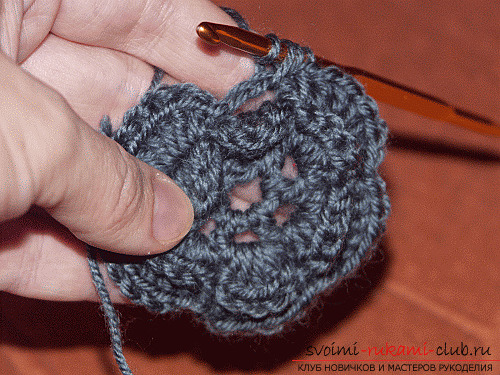 In the end, you should get something like this:
  In the following, it is done by analogy, observing the following rules:
- The number Bn for odd series is equal to the number of columns with a cloak from the preceding row;
- the number of columns with a cape (in a series of columns) for even rows is equal to the number Bn of the preceding row plus two.
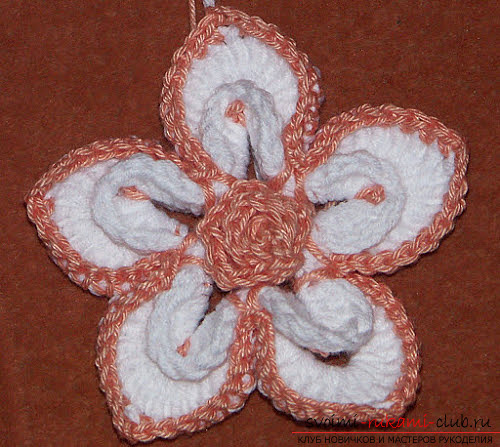
After you tie a flower, they shoulddecorate the headpiece. Sew it as follows. Cutting the thread, leave a small piece for sewing. Then, using the hook, we thread the thread from the front side to the back and vice versa, fixing the flower in a circle to the cap for the columns from the end to the middle (see the illustration). It is not necessary to tighten, since the flower will continue to hold. 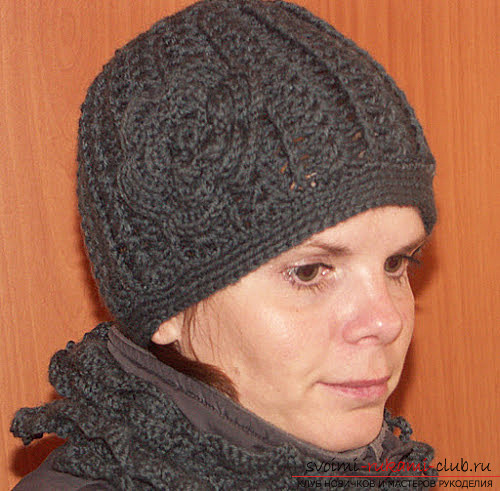 We offer you one more option, at leastan elegant flower, crocheted. We take the pink yarn and form the 12th line. 1st row (pink yarn). Starting with the 3rd loop from the hook, we sew each three cn. We wrap the rose and make a series of broaches on its basis in order to keep it in shape and not disintegrate. 2nd row (pink yarn). We untie the base of the five petals of the first level: 4 in, the pico of 3 in, 4 in, and in the base of the flower. 3rd row (add white yarn). We make the first level petals. To the right of the pico, under the chain from the vp, we sew one sb, one half-shell with a cloak, 3 ct. Then we knit to the left of the picot 3 с1н, one полустолбик with накидом and one сбн. Similarly, all five petals are tied. Further, each pico is introduced into its space between the built-in c1n, located to the left and right of the pico. 4th row (white yarn). We proceed to the second level petals (5 pieces), for which we first knit the base, making sure that it is located behind the petal from the first level. Ten vp, convex sbn in the base of the rose knit five times. 5th row (white yarn). Continue to knit the 2nd level petals. Under all the chains of ten in the breeze we sew a series of one sbn, one half-shell with a cloak, eleven cn, one half-tattoo with a cloak and one sb. 6th row (pink yarn). We make the strapping of the second-level petals with the help of the sbn, but at the same time, above the middle column of each lobe, we knit 3 bp and continue tying on further. In the area between the petals, the thread is caught through the opening of the right petal and it extends through the loop on the hook. We fasten the next petals with a cap without a cape. That's all! Our elegant and volumetric flower is ready!
Comments
Related posts:
 We sew leggings for children with our own hands, using detailed instructions with photos and diagrams
 How to tie a scarf crochet: step by step instructions using photos and charts
 We knit a dress for the girl on a photo and video lessons with schemes
 We knit jurabs with knitting needles: photo master-class with diagrams and description
 The original design of the pattern of a stylish dress-transformer. A beautiful outfit for a beautiful woman. Photos and instructions