
Knitting a smart tunic with knitting needles. Detailed diagram with photo and description for beginners
A tunic connected by hands, looks likeA small dress or an elongated sweater. Almost all the tunic styles are expanded downwards. The length is different, but usually it covers the thigh line. Tunic is perfect for women who hide their shortcomings of the figure (full sides, wide hips, stomach). 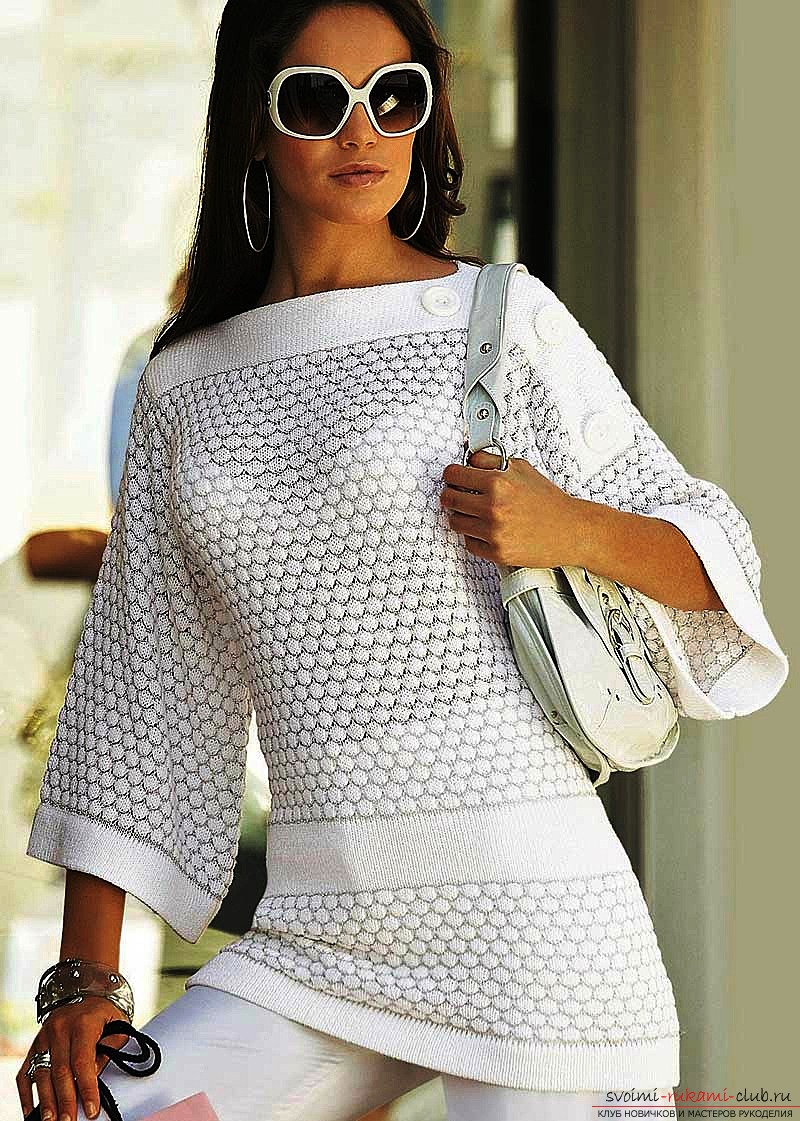 The original task is right and tastefulpick up the tunic style, which will be a highlight in your wardrobe. Tunics are beautiful and individual, only in a tunic created by own hands, you will feel feminine and confident. Tunics knitted on knitting needles can be as warm (for winter), and openwork (for a hot summer). The tunic created by you for your taste will last for you not a single season, the main thing is to choose the right yarn.
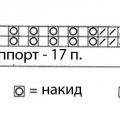
  To link a tunic model with an elastic band andpearl pattern we will need: 300 grams of mohair, preferably thin, with the addition of a string of lurex. Needles will be needed number 3,5; 4; 4.5. "Pearl pattern" will be created as follows: one face loop, one loop is a back one, the pattern is shifted to one loop through one row. Eraser two by two is done this way: two loops knit with facial loops and two loops are purl.
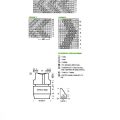
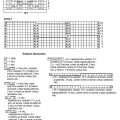
  The density of knitting is ten by ten cm. you get 24 loops for 28 rows. Proceed to the back: we type a hundred loops on the spokes number 4 and we sew them with an elastic band two by two thirty centimeters. We continue to knit on knitting needles No. 4,5 according to the pearl pattern. At an altitude of forty centimeters, from the beginning of knitting, we will mark armholes on both sides. We close forty-eight loops twice for the shoulders and thirty-eight loops for the neck at a distance of seventy centimeters.
 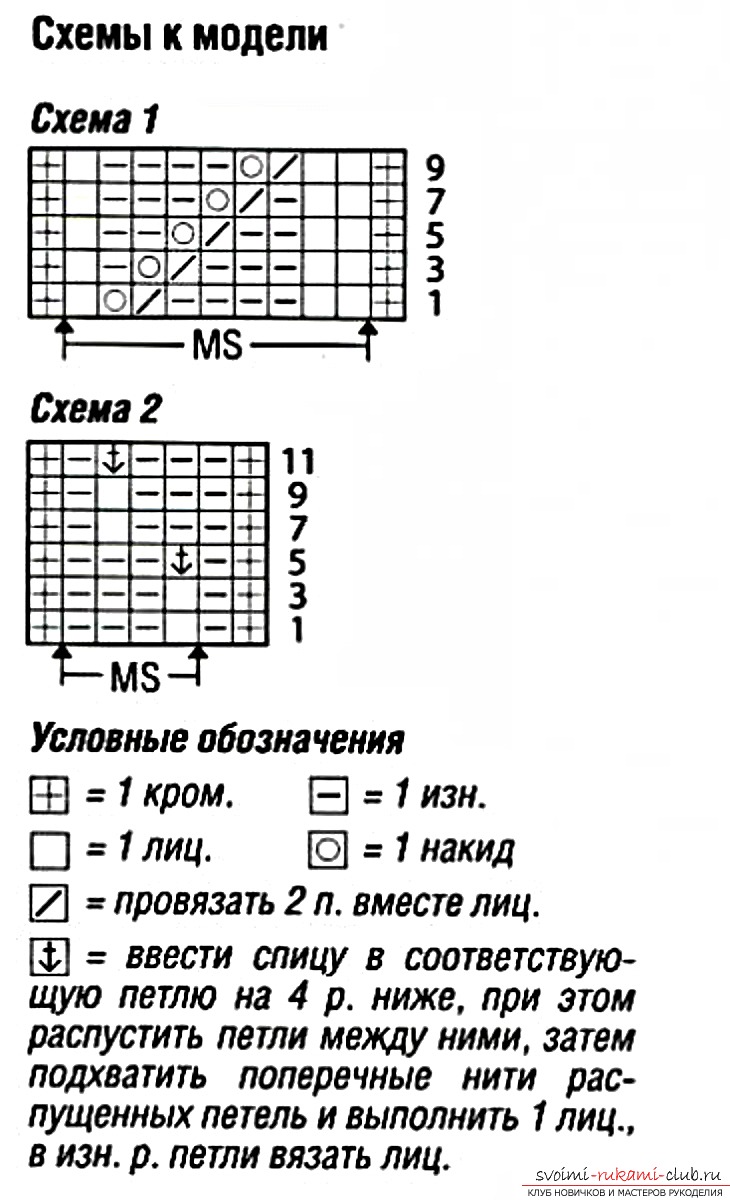 For the front part of the product on the spokes number 4, typeone hundred loops and we sew them with an elastic band two by two thirty centimeters. We make a pearl pattern, not forgetting to add from each side, in all the second rows ten times along the loop on spokes number 4,5. Somewhere at a distance of forty centimeters from the beginning of knitting, on both sides, we mark the armholes. At a distance of fifty centimeters, close the average fourteen loops.
 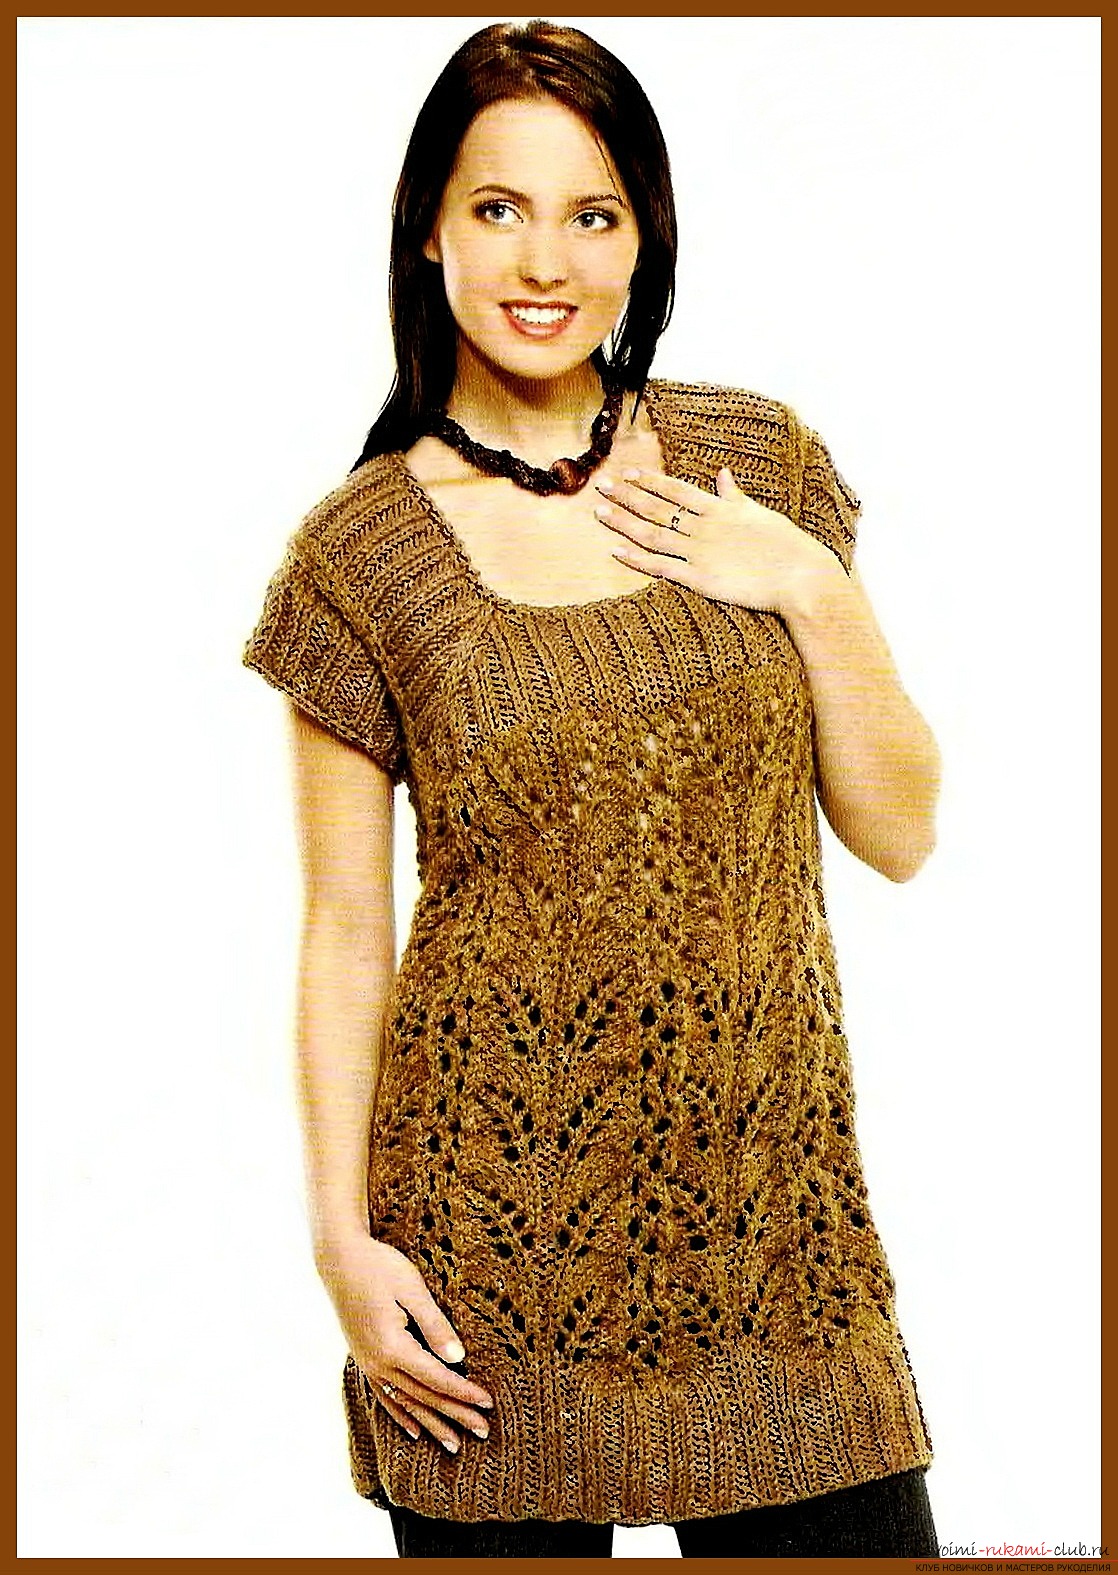 When, the total height, reaches 70 cm, close witheach side for forty-eight loops, for two shoulders. At the edge of the neckline, we dial all the loops on the spokes number 3,5 and knit them with an elastic band two by two. Every five centimeters, we change numbers of spokes, from smaller on the larger size (for creation of a collar, the necessary form). At the height of twenty centimeters we close all the loops. We carry out, the left shoulder seam and the seam on the collar (considering that the collar turns away). That's all the action. Your smart knitted knitting tunic is ready!
Comments
Related posts:
 Knitting a smart blouse with knitting needles for the holiday. Detailed diagram with photo and description for beginners
 Knitting with knitting needles with a belt for women. Detailed diagram with photo and description for beginners
 Knitting with knitting needles of a melange female tunic for autumn. Detailed diagram with photo and description for beginners
 Knitting with knitting needles of an original dress with a pattern. Detailed diagram with photo and description for beginners
 Knitting a fitted tunic on circular knitting needles. Detailed diagram with photo and description for beginners