Knitting the throat with knitting needles in several variants
Content
- Lesson # 1: three variants of the binding of the V-neck
- Lesson # 2: V-neck in the children's vest
- Lesson # 3: Video instructions for tying the necks
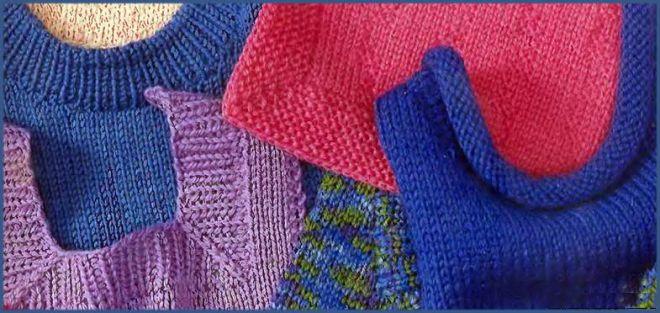
We all know that the classics will never go out of fashion. It will always be relevant and in demand. And this applies not only to footwear and clothing, but also to the ways of tying the neckline.
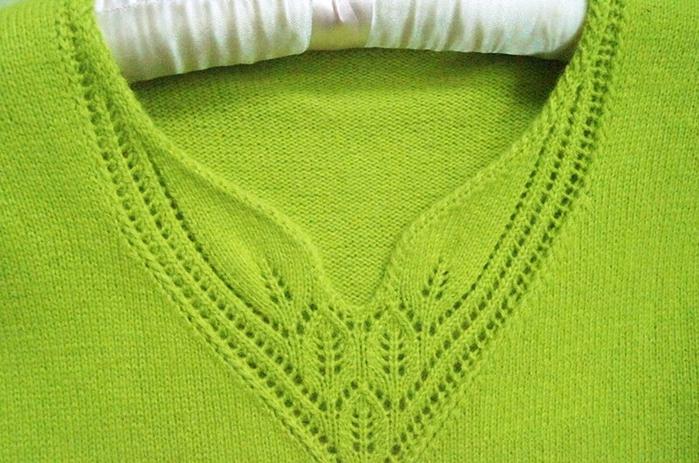
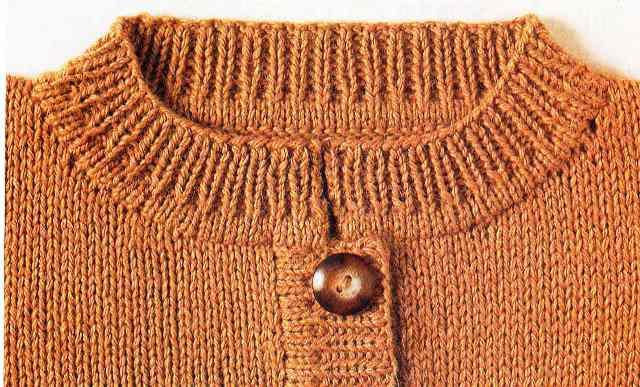
For many knitted products, the V-neckIs considered a classic of the "genre". Such a neckline is often decorated with vests, blouses, sweaters, jackets and cardigans. Today's master-class will be entirely devoted to knotting the neck in a V-shaped way. We offer you a few lessons, during which you will get acquainted with the various options for tying the necks.


Lesson # 1: three variants of the binding of the V-neck
During the lessons, the following abbreviations will be used:
- Loop - the p .;
- number - p .;
- Purl;
- Facial - of persons.
The basic variants of knitting of V-shaped necks:

Beika + 2 angular faces. P. To complement the sweater with this original neckline, you need to do the following. When typing n. For knitting, remember to remember that their total number should be a multiple of 2 or 4. Having started the formation of the cutout in the sweater, two central points of the front part of the product should be transferred to the pin. First you need to complete the left side. To make the bevel, the n. - 2 pieces, placed in front of the central stitches are tied together with the back and the next stitches are made the same. Decrease is performed in each subsequent 4 p. In the faces. R. The last two points are made by the purl. The right part of the sweater is identical. After processing the knitted product and performing all the seams, you can proceed with the formation of the bake. For bejki n. Collect, beginning from a humeral cicatrix. Their number should be divided by 4. The first circular river. - persons. Etc. Then knitting alternates: 2 faces., Two str. Pay special attention to the fact that 2 central points must necessarily be individuals. At the beginning of the rubber, the first 2 sts are tied together by persons. The second central, and also located behind it, is tied simultaneously, while making a slope to the left. These deductions are carried out in each river. As a result, the same V-shaped cutout is obtained as demonstrated in the photo;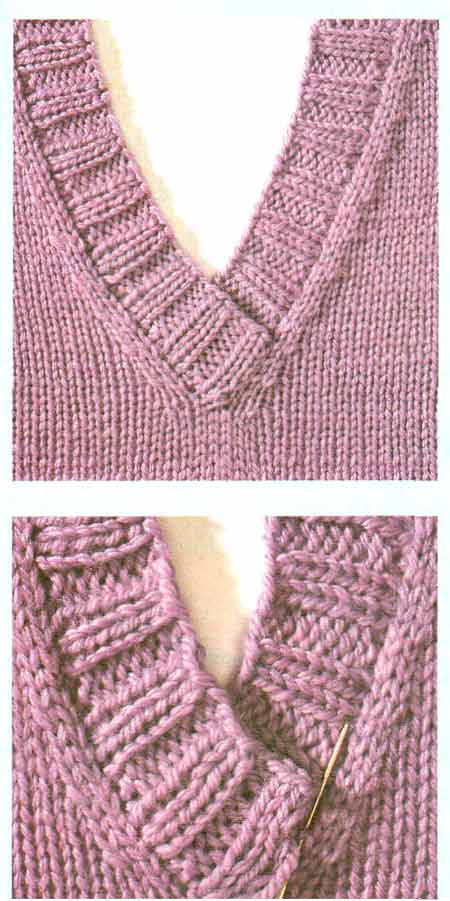
The ends of which are crossed. The total number of p. For this type of binding should be even. As well as during the tying of the previous variant, the points are divided in the center. To make the bevel along the inner side of the neck, people are tied simultaneously. Four and three n. In the future, this decrease is repeated in each subsequent 4 p. The right side of the cutout is symmetrical. But, with the formation of the right-side part, the points for reducing are carried out with a slope to the left. To form a cut, you need to get circular knitting needles from the top of the corner, type n, the total number of which is a multiple of 4. Next, knitting is performed in rows. It is necessary to move in the forward and backward direction. The first row consists of purl. Then, alternately, two different n. Alternate. When the web grows to the desired size, n is closed. To make the cut look neat, one end of the bake is applied to the other and sewed;
Knitted base with front. The canvas is knitted with a pearl pattern. In each subsequent 2 r. The pattern is shifted by 1 p. In the front part, there must necessarily be an even number of n. This variant of knitting differs from the previous ones in that it marks the central 8 n. The work, as well as in the previous version, is divided. 2 n. On the left, going to the highlighted points are tied simultaneously, making a slope to the left. Then, the need to dial 8 more pins. The initial 7 pcs. Are made with a pearl pattern, and the latter is formed in the form of a border pattern. In each subsequent 4 r. The adjustment is performed. The right side of the cutout in the sweater is symmetrical to the left side. The first selection is performed with chrome, the rest is knitted with a pearl pattern. The next 2 sts knit the faces at the same time. On the inside, the end of the bake is sewn.
All the options learned in the lesson are very simple. Even a beginner skilled, choosing one of them, will be able to decorate a knitted sweater with a beautiful V-neck.
Lesson # 2: V-neck in the children's vest
Most beginner needlewomenIt is difficult to cope with such a complex process as tying the cutout of a knitted product. Sometimes it's easier to tie a sweater, vest or pullover than to make a beautiful harness on the neck. Therefore, to help novice masters, we picked up small lessons, which we hope helped the needlewomen to master all three ways of tying the cutouts.
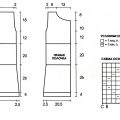
Now we suggest that you consolidate allThe information obtained in these lessons and study the process of tying the notch on a specific example. We will not tell you how to tie a children's vest, since this lesson is entirely devoted to the topic of the neckline. A lesson for beginner needlewomen on the strapping of a children's vest neckline.
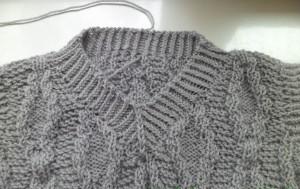
Type on the needles n. From the sides, as well as from the back of the knitted fabric. On the back, find the middle of the cutout and enter a new thread at this point. Form a loop, reduce faces. Continue with the 1X1 rubber band.

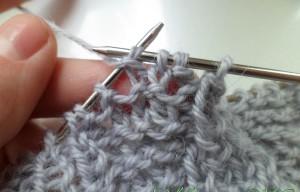
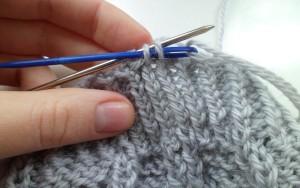
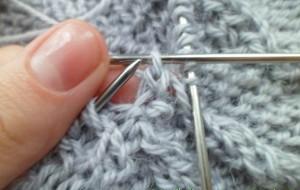
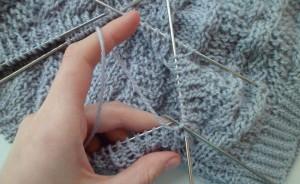
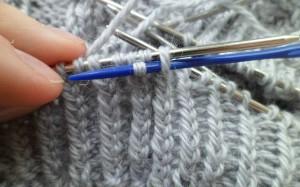
Rezinochkoy need to tie the site to the toe of the cutout. As a result, the instrument should be 1 p. Next, you must take an additional tool in hand and poke it with a constriction, located under the notch of the cutout. Having twisted the given broach, put it on the spoke, which is in the left hand. The stretch will become the central loop of the toe.


Then the right spoke needs to pass the followingEtc. Then transfer this buttonhole to the second spoke. Then carefully watch to ensure that the broach does not dissolve. Again, put a loose hanging buttonhole on the spoke.

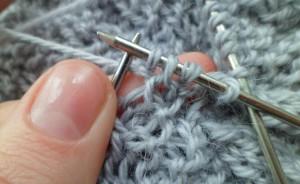
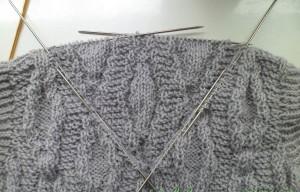
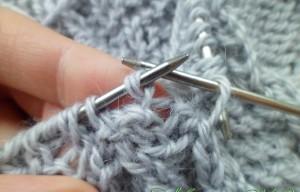
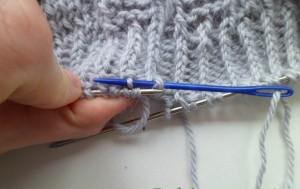
Transfer the first item from the right knitting needle to the left knitting needle. And then do the same with the next eyelet. Spray the front stenochki 3 p. Together. The result should be exactly as shown in the photo.
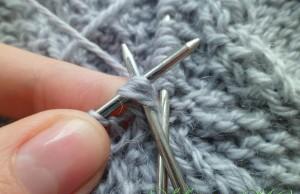
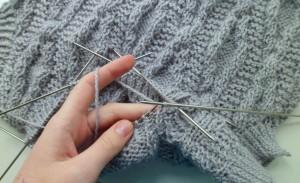
Next, the work continues with the elastic band 1X1 in a circle. According to this scheme, the row is tied up to the point where only one loop remains of the 3 stitches bound together. We exchange the loops. On the left needle, put on the one that is located in front of the central n.
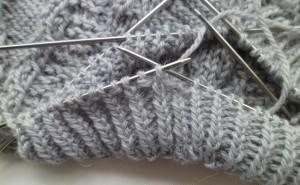
Repeat the action of point number 14. Under this scheme we knit 3 rubles, and 4 we perform up to the shoulder. Perform individuals. Etc., as well as purl, going behind it, together.

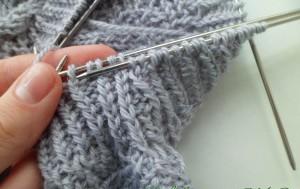
By the same scheme, make a decrease on the secondShoulder. When forming 6 r. From two sides on the shoulders we subtract 1 of the two consecutive losses. We send it along with the persons. Etc. In the 8 r. We make allowances for the remained izn. After completing 9 r. Close n.

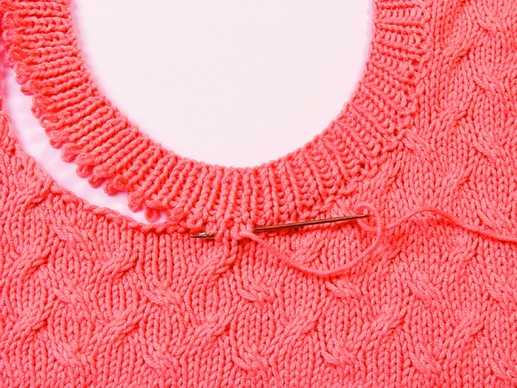
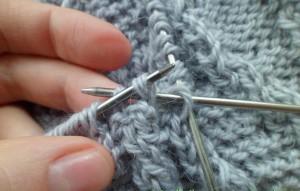
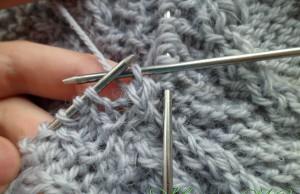
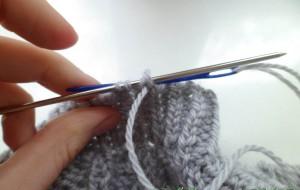
At this stage of the lesson,Pay special attention, because in the course of it they will be able to learn to close the loops with a needle. Thanks to the use of such a closure option, the cutout will be more elastic. Insert the needle into 1 person. Etc., so that it is poddeta behind the front wall and in 2 persons. Etc., but poke it behind the back wall. Drag the needle and remove from the spoke 1 faces. At the back insert the needle in the first 2 out. Etc. Drag the needle and remove from the spoke an extreme. P.
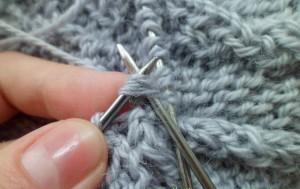
Hold the needle in the first person. P., But now poddene it for the front stenochku. The next faces. Pick up the back. Drag the thread, remove the edge loop. Without changing the scheme of actions, continue tying the V-shaped cutout. When you reach the place on the shoulder where there are 2 persons. Stand side by side, grab them all together and at knitting count as 1 st.
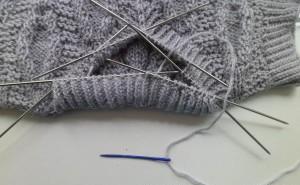
The further work is to close the loopsround. When the strapping is complete, the needle must be pulled out and the thread cut. At this stage, the lesson can be considered complete. Beautiful neatly machined cutout is ready! It remains only to hide all the sticking threads.

We hope that these little lessons helped youTo master several variants of tying the notches. Each of these options looks incredibly beautiful and elegant. But, the most important advantage of all these three options is that to bind the harness on such simple and understandable schemes can even a beginner skilled worker who recently started mastering the technique of knitting with knitting needles.
Lesson # 3: Video instructions for tying the necks
Some beginner needlewomen are easier to learnNew knitting techniques with the help of small video tutorials. Therefore, now we suggest that you watch a video detailing the process of knitting a V-shaped cutout.
In this video lesson, the tinker does not waste timeListeners on the story of how to form the canvas itself, that is, a sweater, pullover or waistcoat. In the video clip, the needlewoman immediately starts to trim the cutout, so we recommend that beginner craftsmen start watching this video immediately after they have tied the product itself.
Comments
Related posts:
 Simple patterns of knitting patterns in several forms - crocheting and master-class
 To tie a man's gray shirt-shirt with knitting needles, knitting a man's manicure with knitting needles, knitting for men, knitting men's skirts for beginners
 Men's Knitting Knitting Patterns, Knitting Pullovers for Men Schemes, Knitting Patterns for Men's Pullover Schemes, Men's Knitting Patterns for Beginners
 English elastic band knitting pattern, knitting with English elastic band, knitting with knitting needles for beginners, knitting lessons
 Knitting with an elongated waistcoat with a zipper. Our scheme and recommendations will help you to master the knitting of a waistcoat with a pattern of a honeycomb with knitting needles