Knitting pattern of a knob in accordance with the scheme with a detailed photo description
Content
- Kinds of bumps and the area of their application
- Ordinary round knob of five loops
- Oval cone
- Shishechka purl loops
- Little knob "Uzelok"
- Shishechka obviv
- Video master class on knitting knobs with knitting needles
Beginning to master such needlework as knitting onKnitting needles, each master at the beginning of training must understand the simplest process of fabrication with the help of the main loops (P). By gaining some experience, we strive to complicate the needlework, and we try to learn how to perform a variety of patterns and reliefs. In doing so, we introduce diversity into the creative process, and we can associate any model or pattern. To do this, we need charts, as well as descriptions of the technique of knitting. In the lesson, we will consider such a pattern as knobs with knitting needles. A variety of hillocks from loops, which are called nodules, peas or nuts, are often performed by similar techniques, that is, untying several loops from a single П. This is a very beautiful convex relief. The best design of the knob looks like when it is tied on a smooth canvas. This can be both the front and the back. Moreover, it perfectly combines with different convex reliefs, such as plaits, braids and rhombuses.


Kinds of bumps and the area of their application
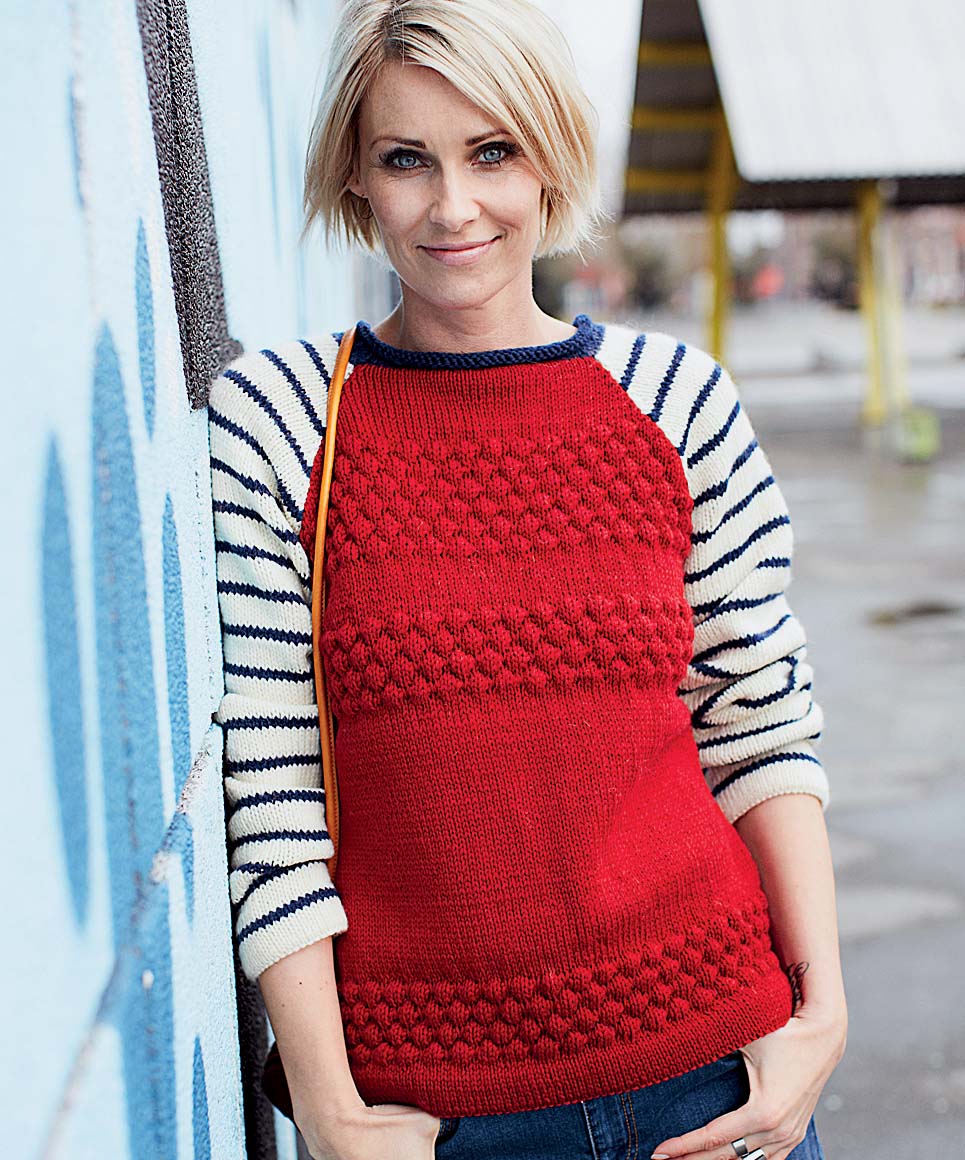
Sishechki, knitted needles, there are all kinds ofSizes and shapes. The thing is that they consist of a group of loops made by different techniques. In each of these groups, the loops are combined in a special way, and their number may vary greatly. It is these combined groups that form convex surfaces, that is, the relief with volume. Applied pattern in the Irish knitting, as well as women's and children's things. At the same time, knitwear turns out to be special, that is, it acquires volume. In accordance with the technique, you can form both small and large knobs. With an increase in the number of П and series (P), the size of the relief increases. The optimal yarn for the pattern is woolen or mixed yarn. Visually increase the volume can be by forming shishechek threads of a different shade. Linking this pattern is quite simple.
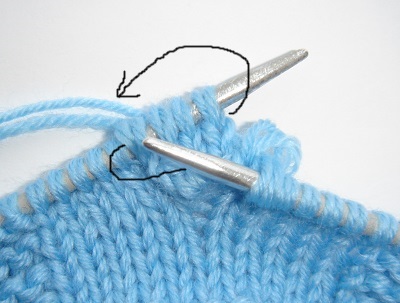
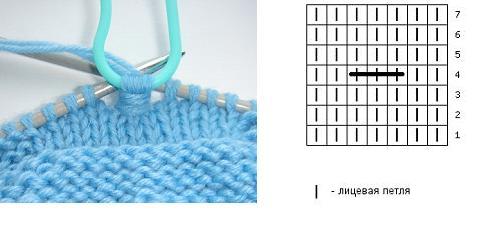
To do this, you will need to perform the front loops(LP), reverse loops (IP), and edge. The most popular technique involves knitting three loops out of 1. Increasing the number of units, turn the canvas, and knit the following three R. In the fourth P all three units must be joined in one loop, resulting in a cone. There is a method of performing a shishka technique with five П from one. It is identical to the first, and differs only in the number of units. Quite small knobs are performed in two rows. In the first P we knit from one loop five, and in the second P we connect them again into a single whole. And one more technique, when the hinge loops stretch out through a row located two P below the last one. In the figure, you see just such a technique:
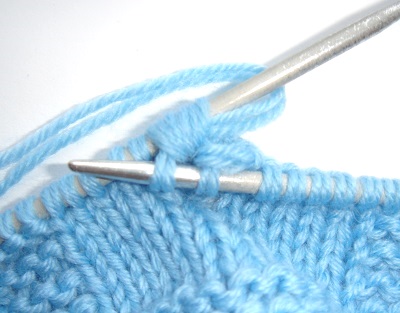
To obtain the volume, we draw a string of two PBelow, and pull out the loop. Then we execute the cue, and repeat again. Having typed new loops through the bottom P, we knit the next line, and then we will connect the new loops together.
Ordinary round knob of five loops
In the master class there are schemes of knitting shishechek different types, which we now consider. Let's start with the relief, which is executed from five P:
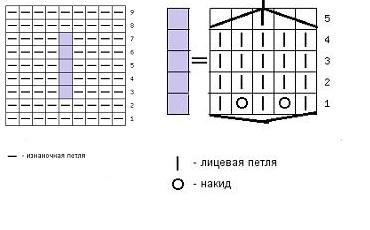
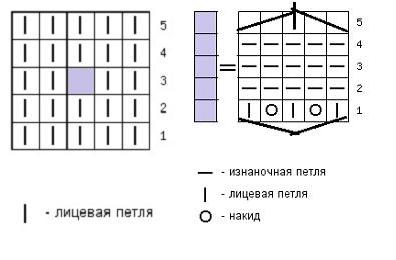
He looks great on a smooth and even canvas. Below in the drawing there is a diagram of this pattern:
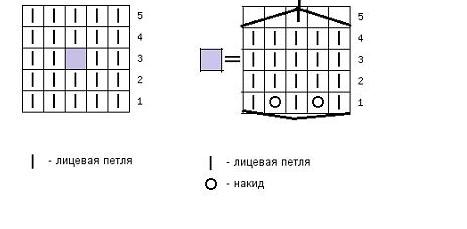
First, we knit five units from one loop. The sequence of knitting is as follows: Facial P, nakid, LP, nakid, LP:
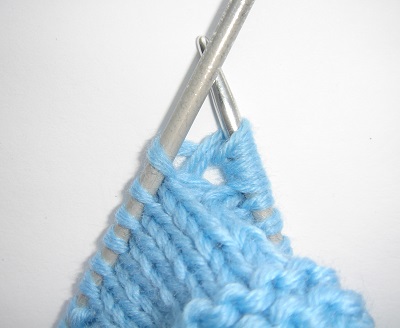
Turning the canvas, we knit three P together with the newly dialed five units. In the fourth P we finish the formation of the pattern:
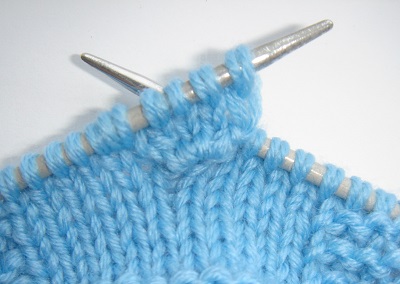
For this, you can simply link the five P together, inOne. But the shape of the pattern may not be perfect. It is better to remove the first П on the working knitting needle, to connect the remaining four units into one, with the slope to the right:
Then removed earlier П should be thrown through that which left at connection. And now the little bump is quite ready.


Oval cone
Visually, this oval pattern with spokes looks exactly like that.
Below in the text, there is a scheme for carrying out similar oval three-dimensional patterns with knitting needles.
The knitting technique in this case is very similar to the previous one. It is necessary to tie five units out of 1, and then execute five R.
As you can see, the pattern turns out to be slightly more elongated, that's why it's called oval. At the end of the work, all the П gather together, forming this voluminous oval.
Shishechka purl loops
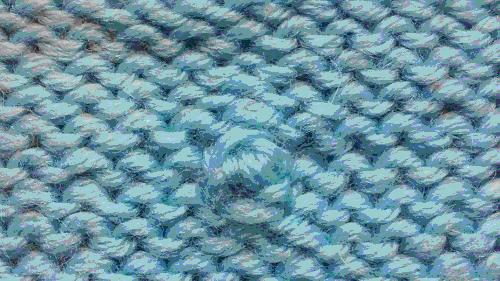
Such a bulky convex relief looks great on the face:

The technique of its formation is almost identical to that,Which we have already considered. The difference mainly lies in the fact that on the wrong side of the canvas, the PL is tied up on the underside, and on the front side of the FE. The scheme of work is depicted in the photo.
Little knob "Uzelok"
Such a small bundle of knitting needles is nothing but a small knob:
The technique of its formation with spokes reminds one,Which we already considered earlier. The only difference is that it consists not of five, but of three P in a single row. If you need a more voluminous knot, tie it in three rows. The end of the nodule is performed by removing one unit along the edges of the nodule.

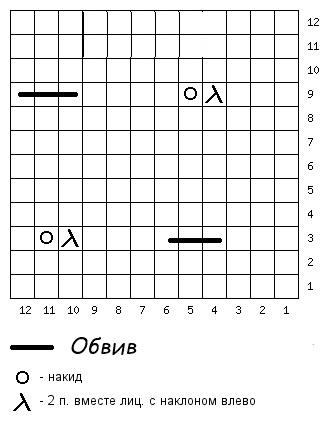
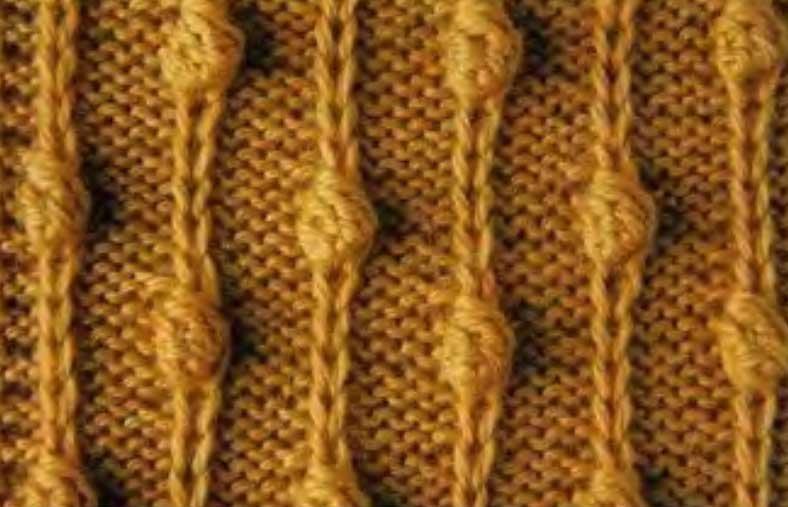
Shishechka obviv
But this volume wrap is made with spokes in a completely different way than the previous reliefs:

Here you will need an additional pin, on which you need to remove the number of units from the left knitting needle. In this case we are talking about three units:
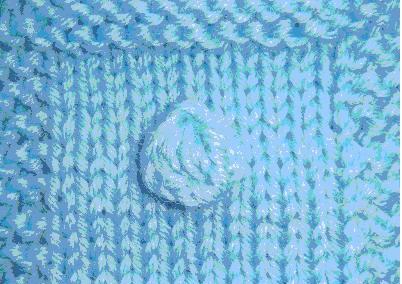
Having removed P from an additional spoke or pin,Then wrap them counter-clockwise with a thread as many times as the diagram shows. For our case, this means performing three turns of yarn. Now it remains only to place the received form on the former left spoke. But what does this pattern look like with knitting needles on an openwork cloth:
Video master class on knitting knobs with knitting needles
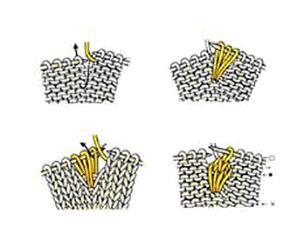
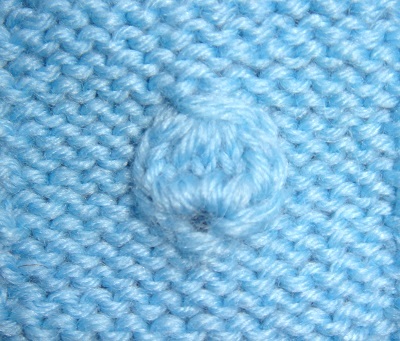
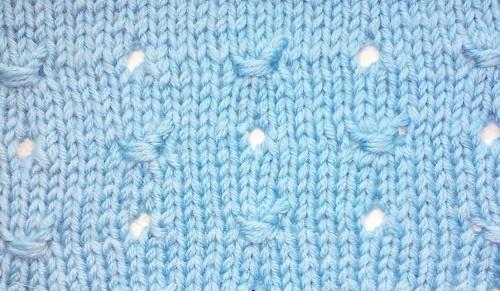
The video below shows you theKnitting of the knobs from the elongated loops of the lower row. Such a decorative element is suitable for both women's and children's clothing. To knit, you must enter the working needle in P on a row below, grab the working thread, extend it up to the height of all P. Then you need to make a cake, This procedure must be repeated five times. All the received P is transferred to the left spoke. End the knitting with the help of a hook, as shown in the video.
Comments
Related posts:
 Knitting French gum according to the scheme with a detailed description
 Cardigan knitting - a knitting scheme with a detailed description
We knit the ponchos according to the scheme with a detailed description
Cardigan knitting - a knitting scheme with a detailed description
We knit the ponchos according to the scheme with a detailed description
 Shawl with knitting needles: knitting an openwork pattern and a video lesson
 Rhombuses with knitting needles according to the scheme with detailed video description of knitting