Learn how to make beautiful, colorful, original bookmarks for your own hands
Colorful bookmarks for books with your own hands can beto do with the child. As a rule, such a craft does not require a lot of money. Used tools, which are almost in every home. A little bit of free time, and a useful product will please your baby. Bookmarks are an easy invention, but very useful, especially for children of primary school age. It promotes learning to use with a book. With the presence of a bookmark, it's easy to find the right page and it's very convenient to read the text without losing a line. Today the market offers a wide range of similar products, but they can not compare with bookmarks made by oneself, especially if the child himself participated in the manufacturing process. There are many interesting ways to create a small masterpiece. Everything is suitable for production:
- thick cardboard;
- colored paper;
- remnants of cloth or tape, braid;
- polyethylene covers;
- Rubber bands;
- old gift bags or paper for gift wrapping;
- postcards, cut from old picture magazines.
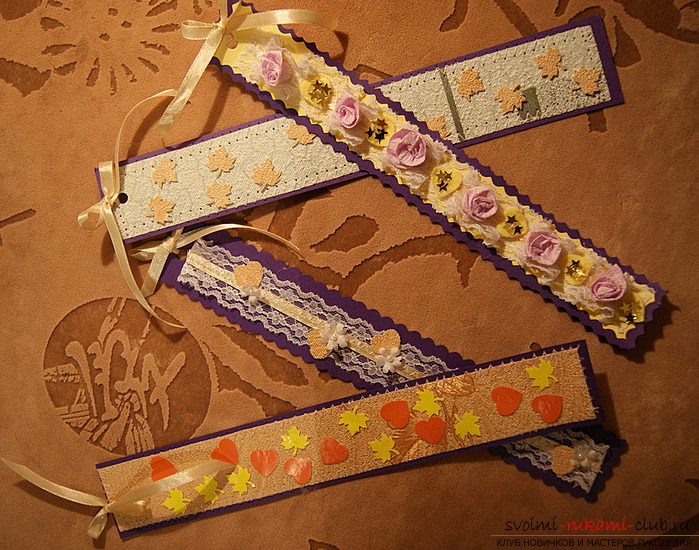
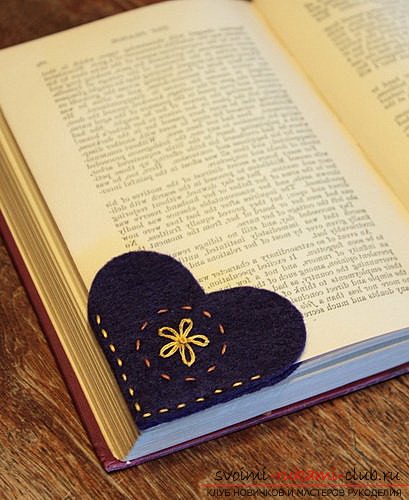
It all depends on your imagination and desire, as well as on the child's imagination. Here are some simple manufacturing optionshand-made articles. We put the following materials for the products: PVA glue, ruler and simple pencil, thick cardboard, polyethylene cover, colorful pictures, cards, gift paper . To do this, on a sheet of cardboard you need to draw a rectangle. Height - 18 cm, width - 5,5 cm. The upper part is marked in the form of an acute angle. Cut out the resulting shape. We apply it on the reverse side of the postcard or other material selected in advance and circled in two copies. Cut out the details on both sides of our carton blank and leave until completely dry. In order to make it easier to work with the product, it is desirable to use a sewing machine. Along the edges we are laying out our future bookmark, but without a thread, so that holes are formed. The next stage we will work with polyethylene. The finished product must be wrapped in a transparent cover, traced and cut. The final chord will be the joining of the part from the cardboard to the polyethylene. To do this, we both the details of the resulting holes are swept with threads, floss or kapron. At the end of the work we make a knot. As a decoration we can leave a small piece of thread and swirl it with a needle. You will get a colored brush. The article is ready for application. No less simple way of angular artwork-bookmarking. This will require a tight cardboard or dense fabric of any color shade, scissors and thread. From cardboard we cut out two identical hearts of the necessary sizes. On one of them you can make an applique or embroider a pattern (at the discretion of the master). Angles are stitched with a colored thread, so that a small pocket appears. The bookmark is ready.
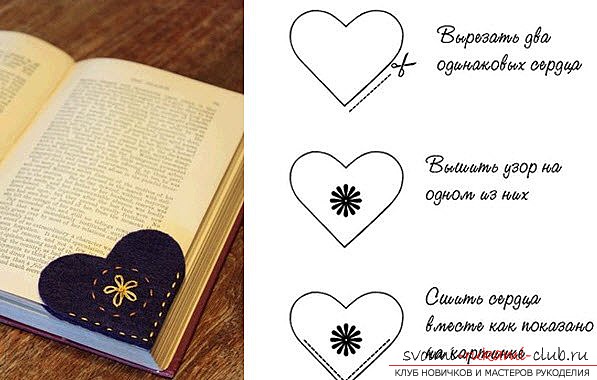
 There are lots of ideas for creating handmade bookmarks with your own hands. Some of them you can see in the photo.Using fantasy, you can make your ownoriginal bookmark and please the product of your child. Joint creativity will bring good results. The kid will not only participate with interest in the process of work, but in the future will be more careful about the product and books.
Comments
Related posts:
 Learn how to make original decor elements - garlands of paper with your own hands.
 Learn to make beautiful and useful products for the garden and the garden with their own hands.
 Learn to make your own hands with original and unique decor elements from cones
 Learn how to make beautiful gifts for loved ones with your own hands, using only improvised materials.
 Learn to make interesting crafts from paper napkins with your own hands.