
Learn how to make beautiful gifts for loved ones with your own hands, using only improvised materials.
As it is pleasant - to make a close nativeman a hand-made gift, putting in his own warmth, fantasy and love. And if you draw to an interesting creative activity of the child, the benefits and enjoyment will be much greater. The greeting card itself is relevant to any holiday. This article will teach you how to make simple greeting cards, which can be easily done together with your daughter or son. 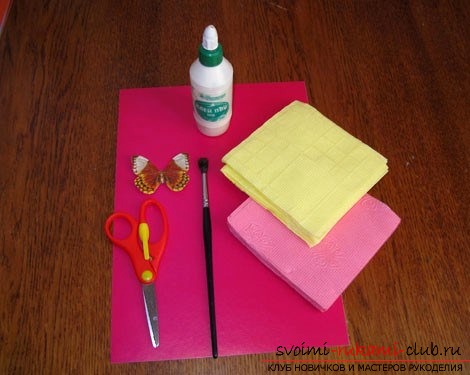 In addition to the finished beautiful postcard, the baby will receivea lesson of diligence, patience and creativity. The child will feel a surge of creative energy, and this will cause him many new creative ideas. Bonding, cutting, selection of postcard details will be an excellent training for the still inept handles of the child. It is necessary for the child to develop motor skills on a daily basis.
  The time for making postcards is not more than half an hour. Materials for postcards are available, and, probably, already have houses:
- colored cardboard;
- scissors, better - with a serrated edge;
- paper napkins of two colors (4 pcs.);
- colored bright paper;
- PVA glue;
- pencil;
- ruler or triangle.

Preparation of the basis of a postcard
For the basis of the postcard you will need a color cardboard for the album sheet (A 4). The cardboard is cut in half on the wide side.
Not from the colored side of the cardboard, 1 cm from the edge, totriangle to draw lines along the perimeter of the future postcard. On the line cut the edge of the figured scissors. This operation can be entrusted to the child. Of course, he will do it crookedly, but how nice it will be for him to cut himself! Right in the hands of children, the miracle of the birth of a new masterpiece takes place! 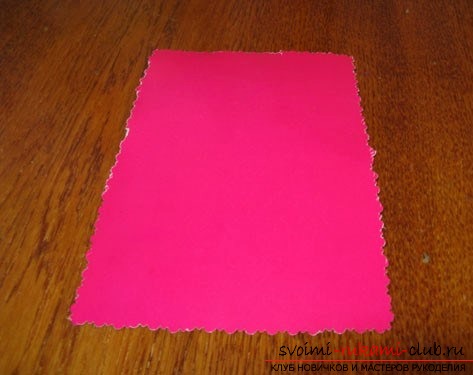 If there are no curly scissors in the house - it does not matter! The edge can be left smooth, pasting not on the color side of the bottom a rectangle of a different color than the base, the size, so that the edge creates the impression of a frame. Making petals Opening a napkin, cut four squares in a bend with ordinary scissors or gently tear it open. It turns out 4 identical squares.
  Ragged edges will not spoil the products, rather, they will give liveliness and piquancy. Each of the squares once again bends and is cut or torn into 4 squares.
  From one napkin comes 16 squares for the petals. When the squares are ready, they are transformed into petals. The kid substitutes his fist, in the middle of the cam remains a place - "well".
  On top of the "well" is placed a square. The finger of the square is pressed into the center of the "well". Do it very carefully, so as not to pierce the square of the napkin with your finger. It is necessary to show the baby how to properly make petals. Soon he will learn how to do it right.
Flower on the card
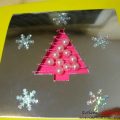
Draw on a future postcard a smallcircle. In its center is applied a little glue, or glue is poured for the baby on a small saucer. The child can be suggested to dip in the glue edges of the petals. The petals are glued to the center of the circle.  The angle of the petal is fixed on the cardboard, andthe fluffed part rises above the cardboard. To make the flower fluffy, the petals should be glued close to each other. You can make one chic flower, combining in it napkins of two colors or three small flowers of different shades. Do not glued sides of the petals should be carefully spread out. Decoration of the postcard It is left to the flower to make a stalk and leaves in the technique of paper application. Now you can decorate the card to your taste. For example, glue a pretty butterfly-urticaria next to the flower. After fantasizing, you can add other details - a vase, an inscription, a bow ... On a separate sheet you will write a congratulation.
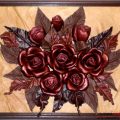
Using this simple technique, you can make a picture with a chic bouquet of flowers. It is necessary to develop an interesting framework for it. And it will be a big greeting card with your own hands.
Comments
Related posts:
 Do you want to learn how to create an original piece of jewelry from your skin with your own hands, using only improvised materials?
 Instructions on how to create original cards with your own hands, using improvised materials.
 We make original cards with our own hands, using traditional materials.
 We make an unusual flower as a gift with our own hands using improvised materials.
 Instructions on how to make a flower from a ribbon with your own hands, using improvised materials.