Learn to draw you will help basic methods of drawing in an unconventional style
Basic methods of drawing in unconventional stylepopular, both among children of different ages, and among adults. They are simple and accessible and allow you to create interesting drawings using various improvised materials. The creative process of unconventional drawing is always fascinating and entertaining, giving the opportunity to show imagination and your inner perception of the world around you. The creation of a drawing by any of the methods described below does not take much time, and even a novice artist can cope with the task. Drawing is one of the important art forms, which is not only a way to convey this or that image, but also inner feelings, perception of the outside world, emotions, fantasies and much more. Everyone from childhood knows how to draw a picture, it does not matter what - with pencils or paints on paper or with a stick on the sand in the yard. Unfortunately, not everyone continues to draw at an older age, because they believe that they have no abilities and very vain. Drawing can be learned. There is a huge number of methods of drawing, both traditional and non-traditional. It is the latter that are an excellent option for teaching children from an early age. In today's article, we'll talk about the basic methods of drawing in an unconventional style. There are a lot of them and all of them, without exception, cause inimitable delight in children, and in the adult category of people. Method "Monotype" 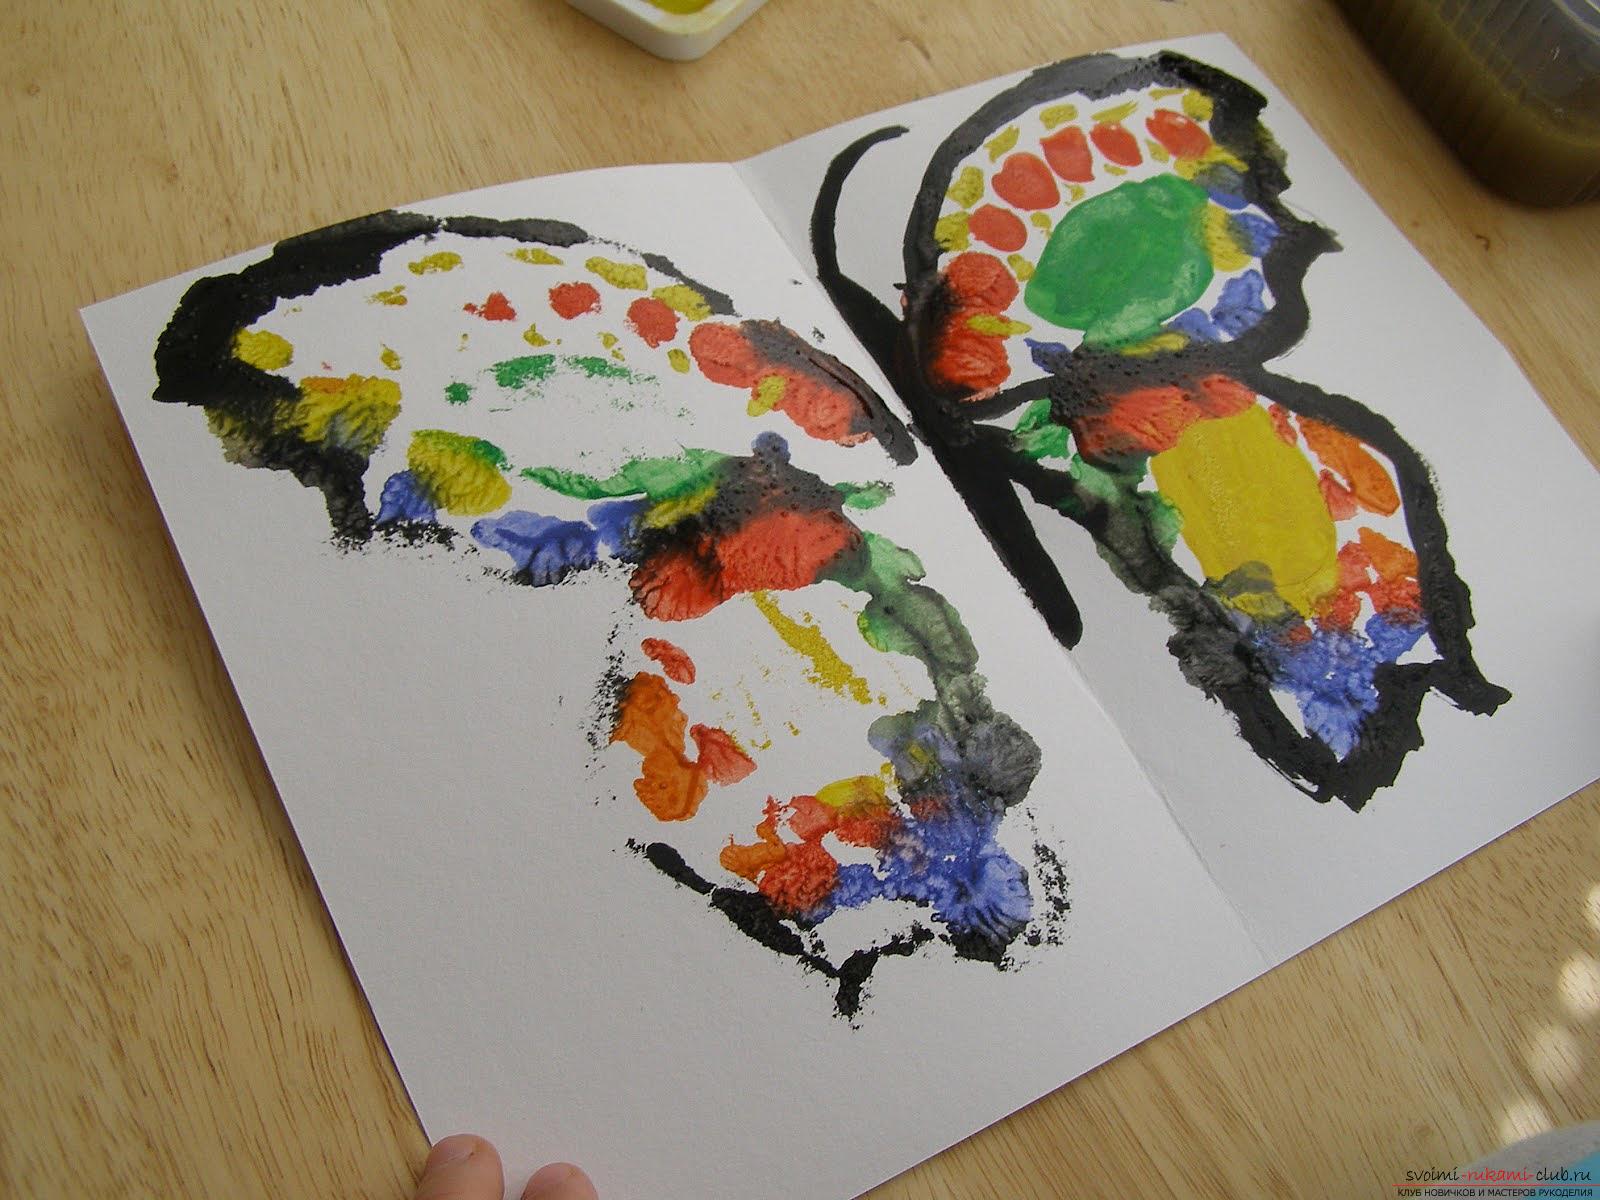 The essence of this method is very simple. Take a paper sheet, you can use any - white or other color, and folds up twice. Then it unfolds. On one side with the help of paints, gouache or watercolors, half of the drawing is drawn. It can be half moon, apple, butterfly, flower, house, anything. As long as the image does not dry up again, fold it again in half along the existing fold, squeeze and unfold it well. On the second side there remains a symmetrical imprint of the figure. The whole image of the subject was obtained. When the paint dries, you can add parts to it, if necessary. Method "Printing with leaves"
 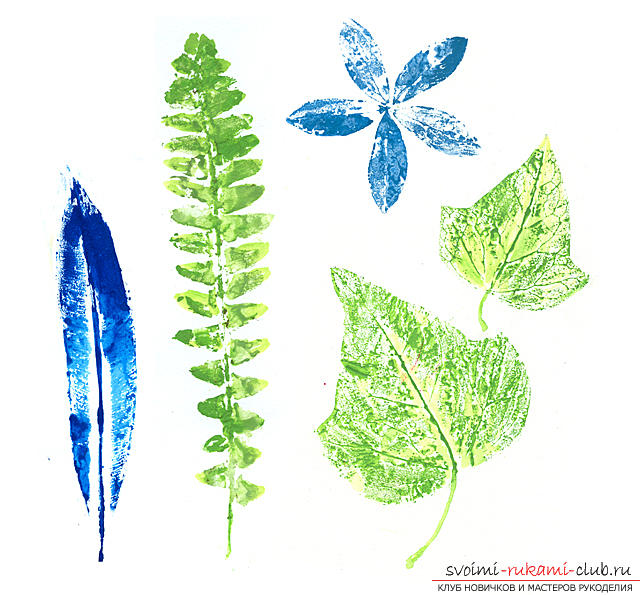 A very simple drawing method for whichit is necessary to have leaves of trees and plants of different species, while it is better to use fallen leaves. Take one sheet and cover with the chosen shade of paint. Then it should be pressed side with the paint to the paper, and cover it from above with a clean sheet and press it down. After the paper along with the leaf is removed, there will be an imprint. So you can create an entire composition, repeating the action several times with the rest of the leaves. The method of "Drawing with Threads" or "Nitcography"
 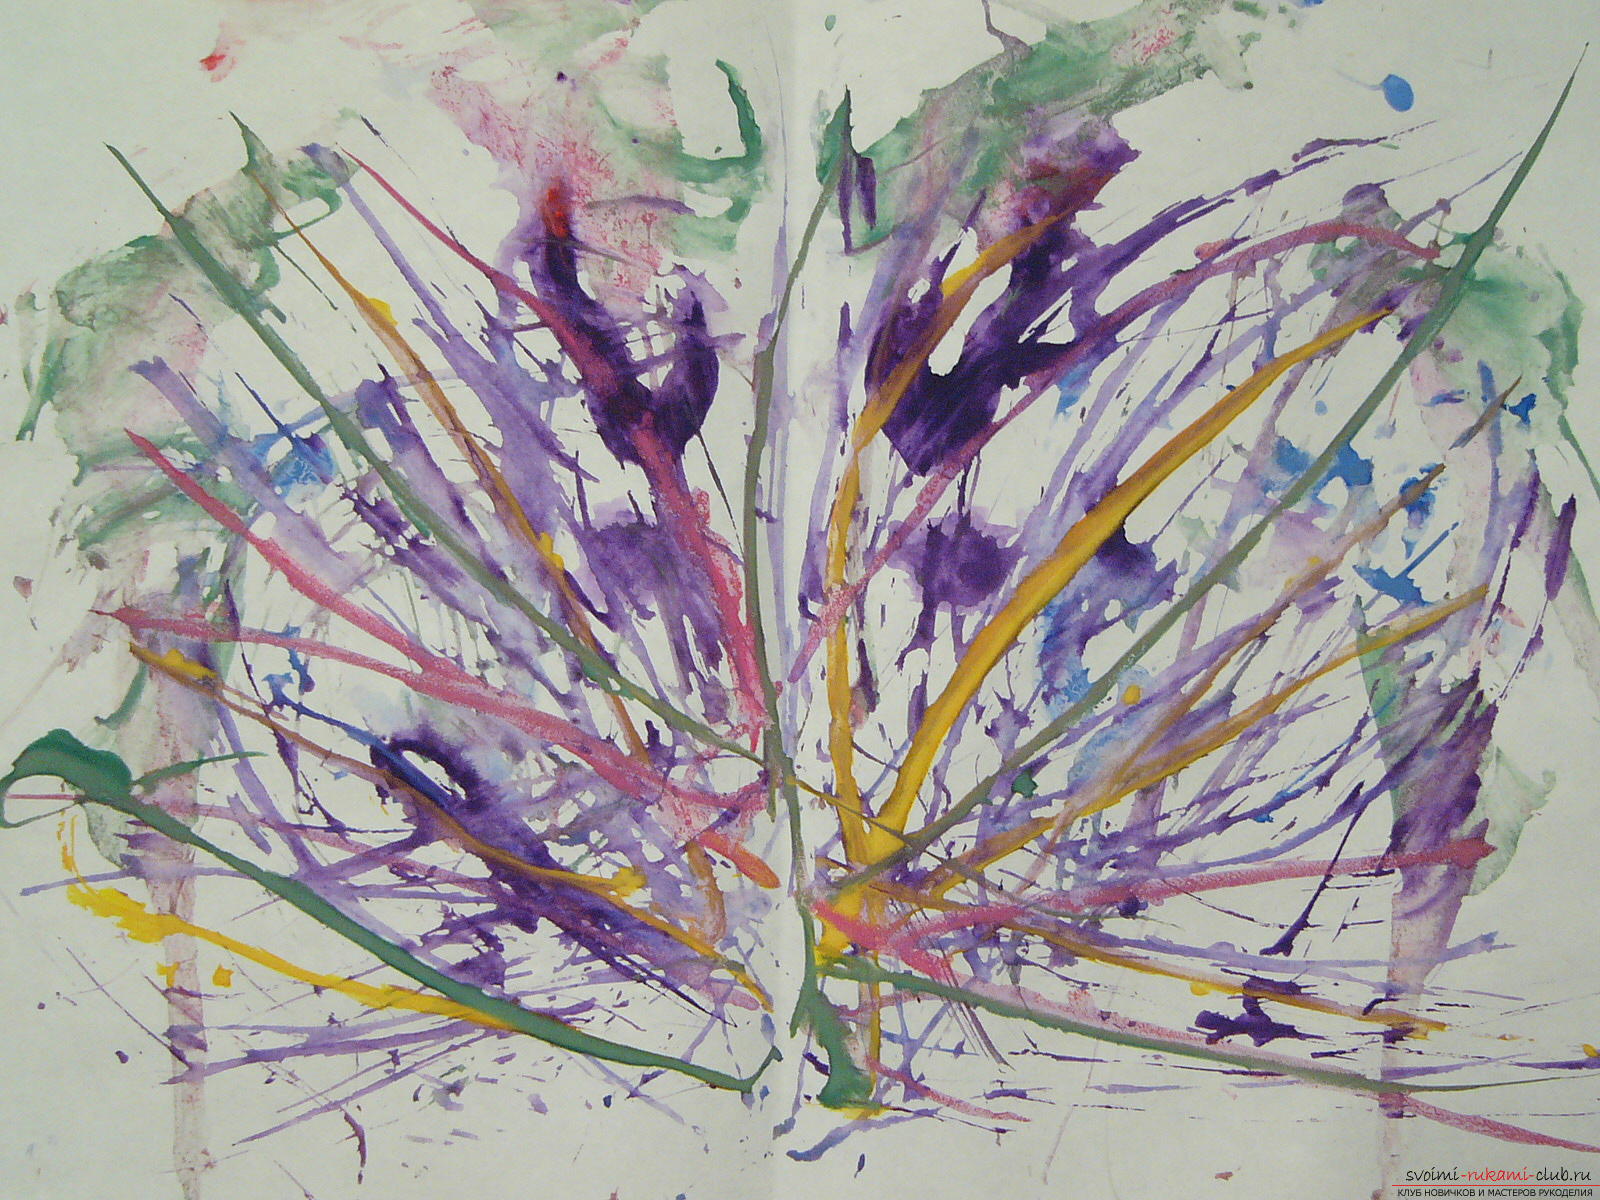 This method of drawing is ambiguous. There are several ways to create drawings. 1st method. Threads should be cut into separate pieces, the length of which, approximately, will be from 7 to 10 centimeters. Take one thread, dipped in the paint and held in different directions on the sheet. It turns out interesting lines. Then take the next thread and repeat the action, just use another paint. So you can draw to infinity. 2nd method. The paper sheet folds in half and unfolds. On one side are laid out yarns, painted with paint. The sheet again folds up as in the previous case, is pressed. A quick movement pulls the thread. After unfolding the paper, it remains an intricate pattern. 3rd method. On the paper prepared for drawing, the outlines of any object, animal and so on are drawn, only it is not decorated with pencils or paints, but with threads that are glued. On each site you need to glue a thread of the appropriate color. It is important not to leave any gaps when pasting, then the drawing will turn out to be colorful and interesting. Method "Printing with paper"
 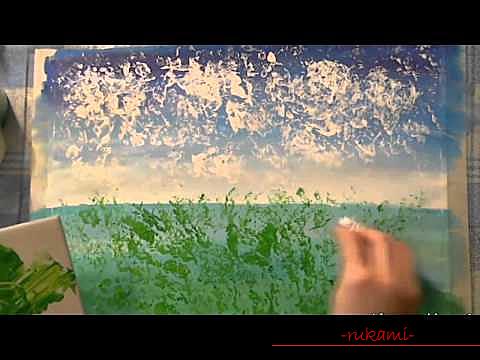 A very simple method of obtaining drawingsin an unconventional way. For the creative process you need a medium-density paper sheet, a paper for drawing a picture on it and a gouache, diluted so that it has the consistency of a liquid homogeneous gruel. Paper dense texture should be crumpled in a coma, get wet in gouache and press it against the sheet, leaving on it prints in the order that is needed. Method "Drawing with soap foam"
  First you need to make a soap foam. For this purpose, a shaving cream, liquid soap, shower gel, shampoo or detergent is suitable. Foam is beaten, spelled with a normal sponge and pressed into a container with paint, which then needs to be mixed. On the paper, the outline of the image is drawn. They need to be made large enough. The painted foam should be put on the image with a brush and wait until it dries. After complete drying, excess foam is simply blown off. Nakat method This method requires a roller and a container with paint. The roller must be soaked in the prepared paint and wait for the excess to flow off a little. Then roll the roller over the work surface so that a trace from the rope remains. Method "Drawing with cardboard (rib)" The edge of the cardboard sheet is painted in the required color, the paint can be used absolutely any. Then it leans against the surface of the paper and is carried along it. On the paper there will be a painted trail. The print can be made straight, arched and so on. It all depends on the drawing you want to draw. Method "Drawing with salt"
  Drawing an image with the power of watercolorcolors. From the top, salt is poured onto wet paint, it must be large. Cover the entire surface of the paper. After the watercolor has dried on the picture, the salt needs to be shaken off. Method "Nabryzg"
 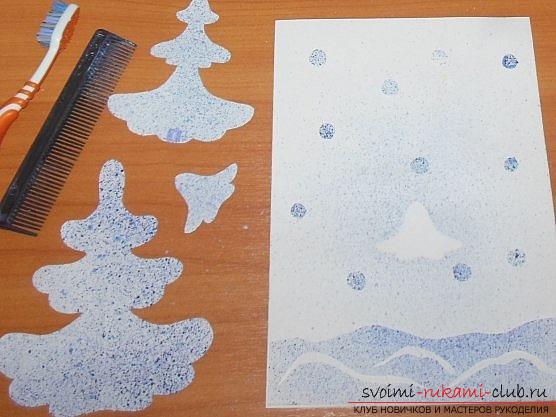 For this method, it is necessary first of all from cardboardmake templates - cut out different shapes. Then they are applied to the paper. Take a conventional toothbrush, which is applied to the paint and any object (you can use a ruler) is carried on the nap to yourself. The paint will be sprayed onto the paper. After drying the pattern is ready. You can do it in another way. cut out the cut pieces, and fasten the sheet from which they were cut to the working paper. Further actions will be the same as in the previous case. Only the picture remains painted. Method "Klyaksografiya"
 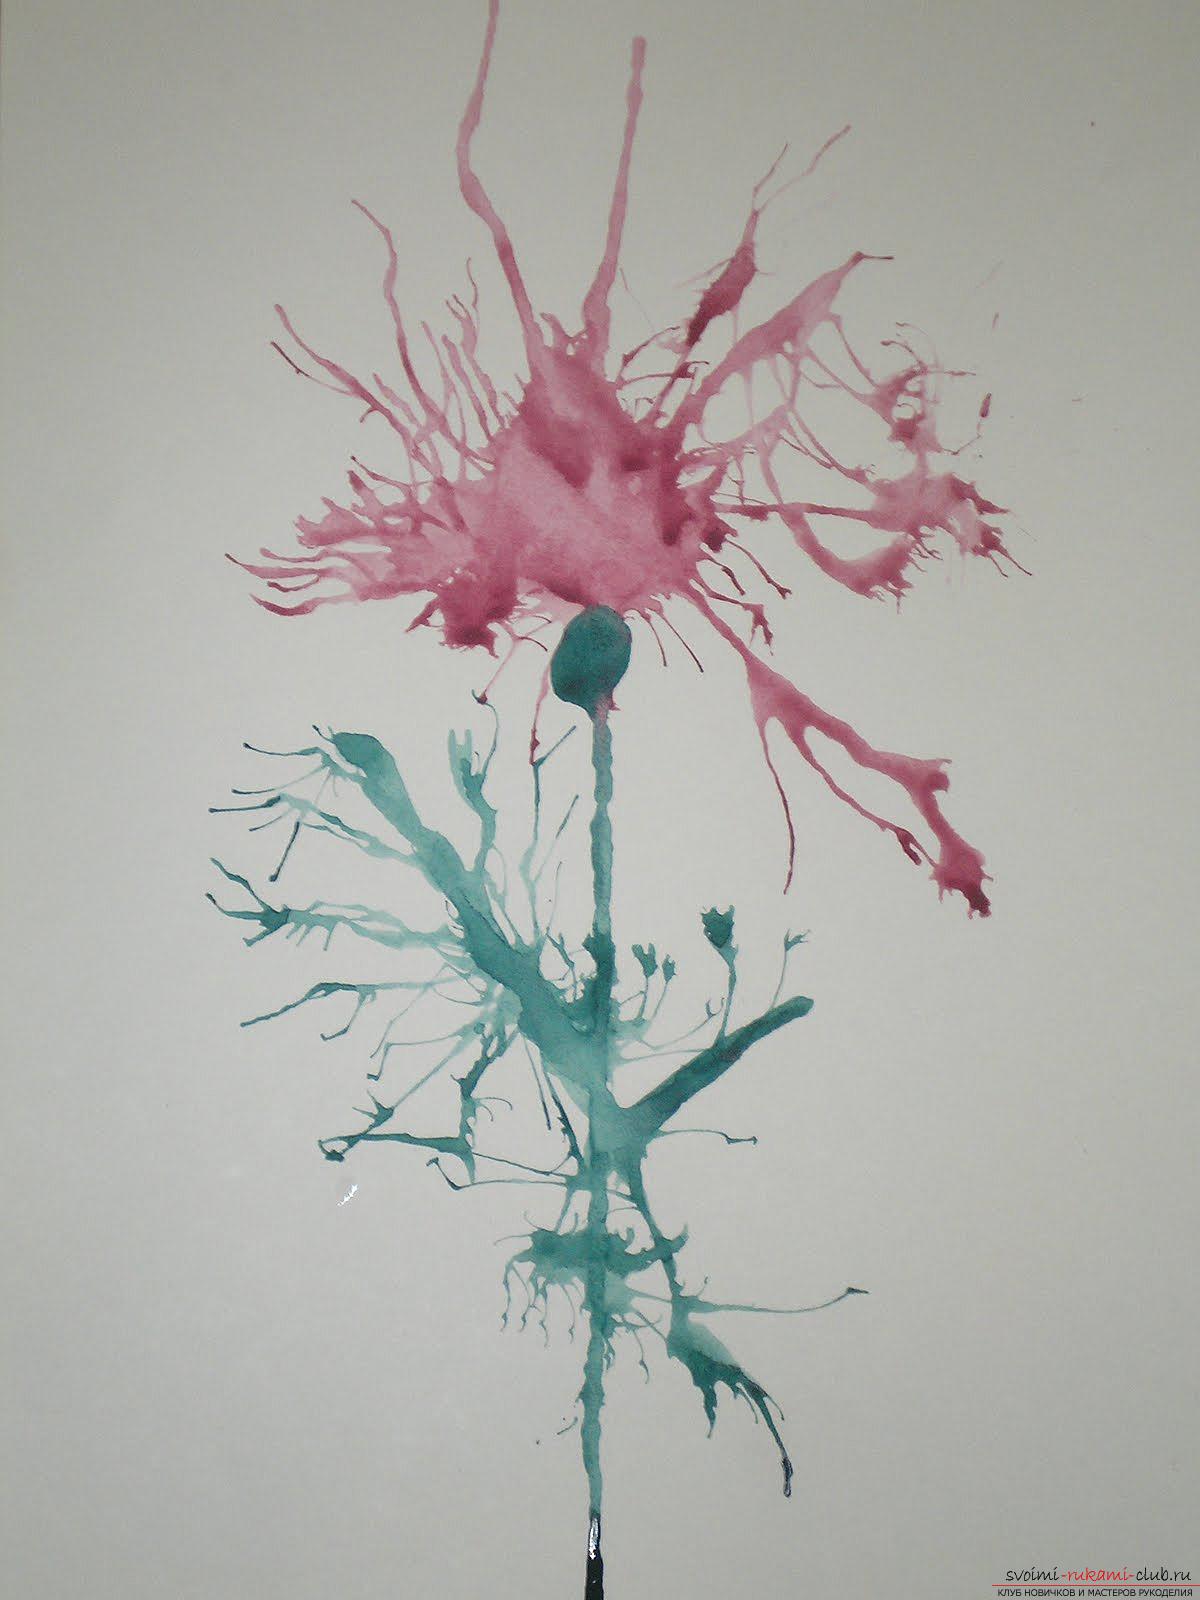 On paper put a paint blot or a few blots. With the help of a tube for drinks, it swells. As a result, you can get very interesting drawings. The method "Stained-glass windows (glue technology)"
 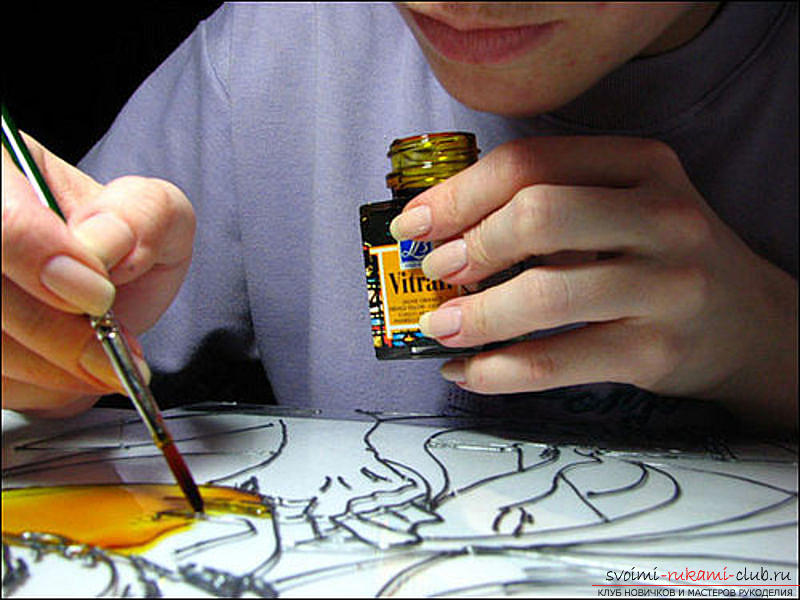 For drawing this method you will need paint,pencil, paper and clerical glue or PVA. On paper, you need to draw some kind of image. Tube with glue on the lid pierce, to form a small hole. It is necessary for the glue to flow out in a very thin stream. All the contours of the picture are outlined with glue. Draw a picture and wait until it is completely dry. Then the picture is painted with colors. Method "Drawing with your fist, palm, fingers, an edge of the palm, feet"
 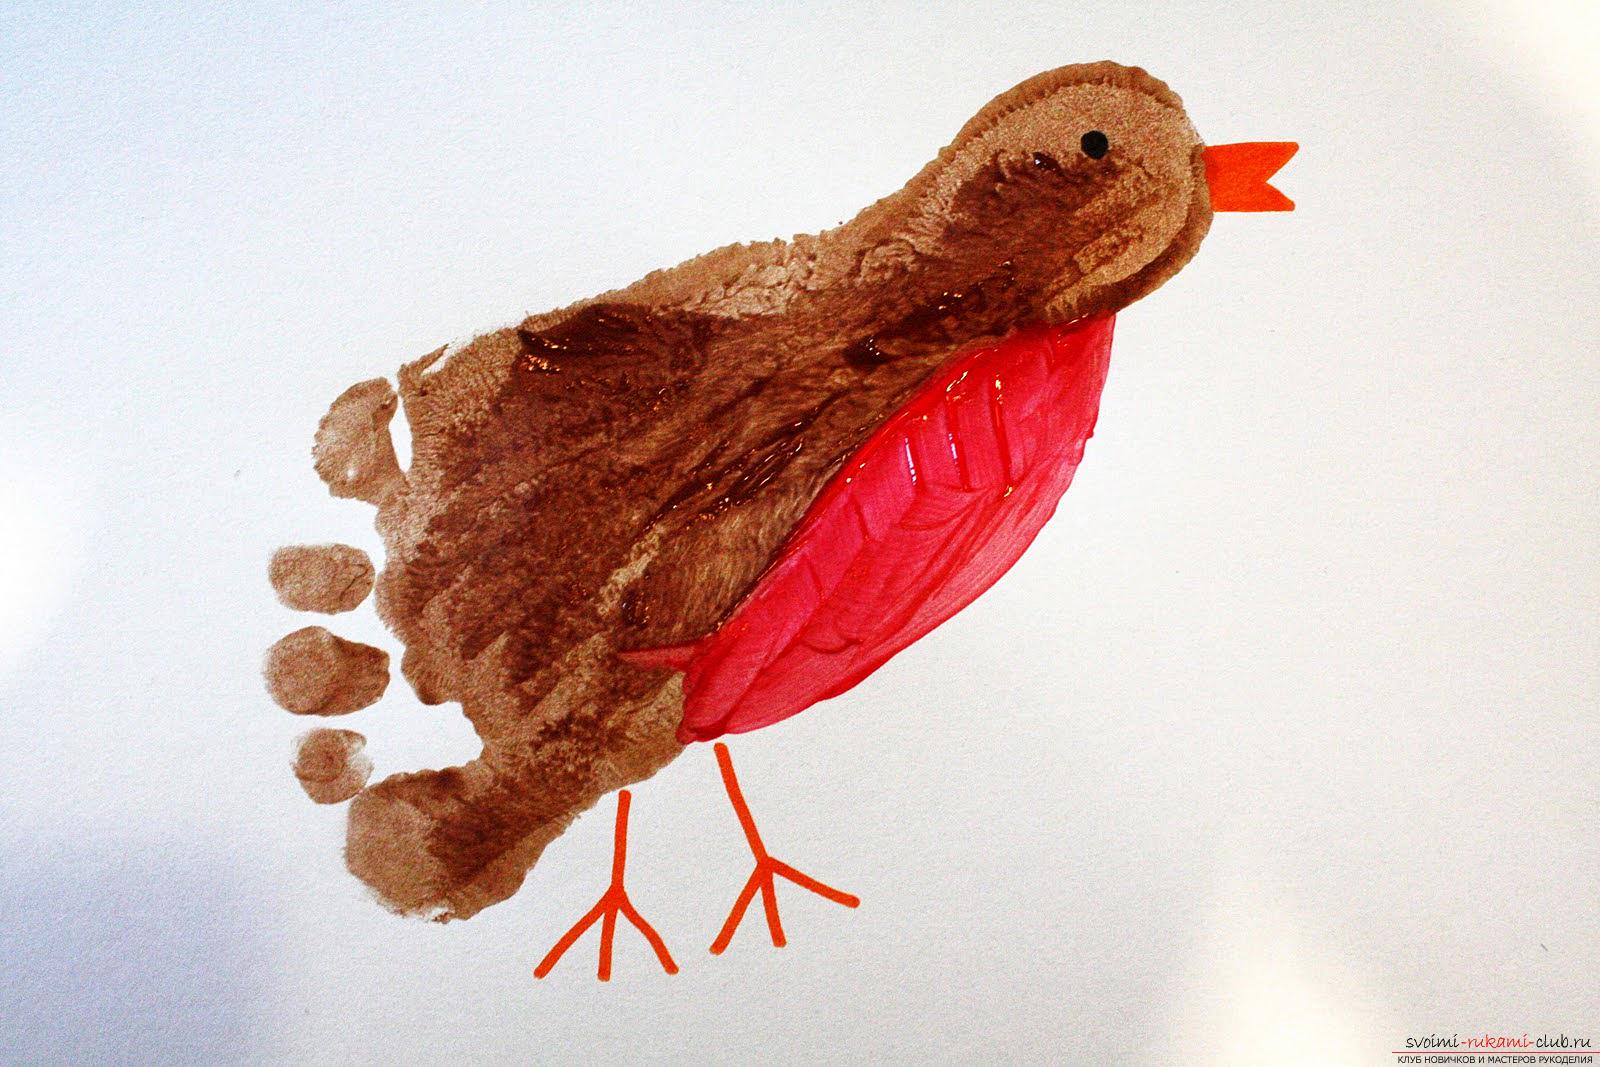 In the prepared container you need to dilute the gouache. The necessary part of the arm or leg is dipped into the container and left with its prints on the paper sheet. So you can draw anything you like. If desired, the picture can be painted after it has dried, adding details. Method "Drawing in a circle" This is not just drawing, but also an interesting game for children. It involves several guys. For a small period of time, each child must start to depict something on his sheet, then he passes his picture to a neighbor and everyone continues to create on someone else's paper, continuing the idea of a friend. So the children draw until the moment when each of them has his drawing. As a result, very interesting pictures are obtained. Method "Drawing together" This method is not only a way to learn how to draw, but also a way to learn how to work in a team. For him, take a large-sized paper, for example, Whatman, select the object that you need to draw and start to work. At the same time one participant of the process draws his part of the image, and the other one's own. The result should be a holistic picture. Method "Mixed drawing"
  By means of colored crayons an object is drawn, the backgroundpictures are painted over with the help of wax crayons. Do not leave any gaps on the surface of the paper. The picture is wrinkled and straightened. The whole surface of the paper (both the wax background and the picture) is covered with gouache. Immediately after application with a sponge, rinse the paint off the sheet (under a stream of running water). Gouache will remain in the cracks formed as a result of the crushing. Method "Drawing with paste" For work it is necessary to make a paste and mix it with paint. Then apply it evenly on the paper sheet with a sufficient volume layer. The wand is scratched and left to dry completely. Method "Drawing on glass" On paper, a pencil is drawn with an image. Take glue PVA, which is mixed with gouache in proportion one to two. On the painted picture put the glass and paint with glue around it contours of the picture, which then paint over. Method "Drawing with a poke" A piece of foam is fixed on a brush or pencil. Dip foam into the paint and by typing in a sheet of paper leave a trace on it. The result is an interesting point with uneven edges ("fluffy"). The device must be held in the hand vertically relative to the sheet. Method "Printing with a matchbox" One of the edges of the box is dipped into the paint, and then leave an impression on the paper. After drying, you can finish various details. Method "Pencil print" A contour of the object is cut from a piece of foam rubber. Then they are dipped in a paint diluted to the consistency of a liquid-like slurry, and the prints are left on paper. Method "Pointillism" This method requires cotton buds or you can use a thin part of the brush. On the paper, the outline of the image is drawn. The stick is dipped in the paint and the dots are placed on the picture. First, dots of bright color are put, then darker and so on. The picture is not filled with dots all at once. We need to do this gradually, leaving room for future colors. Method "Graft" The cardboard sheet is completely covered with wax or paraffin, the main thing is that there are no gaps. For this purpose, an ordinary candle is used. Then it is applied to it with a thick layer of mascara and left for a day to dry. After drying, a sharp object is taken and this or that pattern is scratched on the basis.
 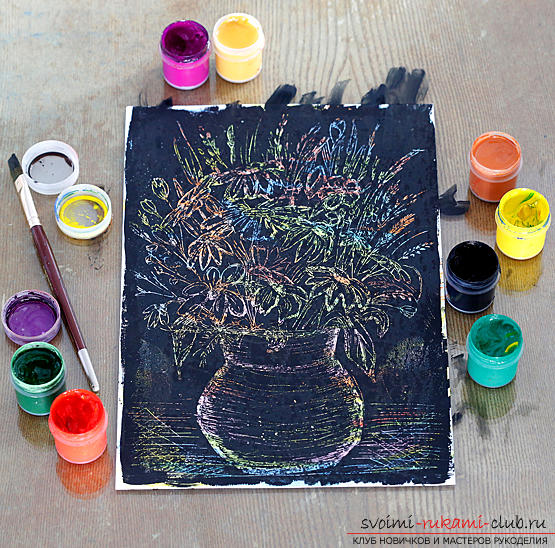 Method "Wax Pencils + Watercolor" With the help ofwax pencils need to draw a picture, and then paint it with watercolors. Method "Drawing a candle" On ordinary paper, a candle needs to draw an image. Then paint all the colors (or gouache, or watercolor). A drawing made with a candle will remain unpainted. Method "Tough with a hard brush" A hard brush is dipped in the paint. By poking at the paper, an impression is put on the drawing. The brush should be held vertically to the working surface. Due to this coloring, the effect of a prickly or furry texture is obtained. The "Drawing on a Raw Surface" method A wet paper sponge a wet sponge. Then paint on it drawing. The result is a blurred image. Method "Combing paint" On paper, you need to make stains with paint of any color. After this, a small comb is taken and the teeth are drawn along the spot. Remain interesting strokes. Method "Drawing with coal" Depending on what you want to draw the entire surface of the coal or only its thin part is used. When drawing, do not press too hard on coal, otherwise it will crumble and crumble. Method "Imprint of a cork or other seals" This method requires a thin foam, which is applied to the paint, the seal. The gloves can be made with reels, plugs, vegetables and so on. The seal should be pressed against the foam with paint, and then to the paper, on which the imprint remains. Method "Drawing crayons (colored and white)" Crayons on a paper sheet you need to draw any drawing and decorate it. Then take a regular hair spray and sprinkle the image. In this case, the crayons will not crumble. There are other ways of non-traditional drawing. All of them are very interesting and fascinating and are an excellent teaching game for children of all age categories. Do not be afraid to experiment. The result is always excellent
Comments
Related posts:
 To learn the child to draw the basic nonconventional drawing techniques in a kindergarten will help
 Various techniques of non-traditional drawing used in the older group will help teach children to draw
Teaching children to draw in the older group of kindergartens will help you to use non-traditional painting techniques
Various techniques of non-traditional drawing used in the older group will help teach children to draw
Teaching children to draw in the older group of kindergartens will help you to use non-traditional painting techniques
 Learn to sew will help the basic rules of cutting and sewing for beginners, set out in the article
 To teach the child to draw will help non-traditional drawing techniques for children 2 - 3 years