
Learning to knit balleros with knitting needles in detailed master classes
Content
- Video lesson knitting bolero knitting
- Master class knitting simple bolero "Shrag"
- Photo lessons on knitting bolero
Many fashionistas like this model very muchClothes, as bolero spokes. These are extremely stylish products, which are short jackets. In some cases, this product for women is knit with sleeves. You can also do bolero with your own hands without sleeves. This kind of clothing comes from Spain. So dressed still famous Spanish torero. It should be noted that in our time, the style and design of the knitted bolero have been greatly transformed. With its help, you can polish your style and image, make it effective or romantic. Bolero with knits is knitted with a variety of techniques, using completely different threads. Applied for handicraft schemes of all possible patterns, without making any restrictions. To associate the product with the spokes for each day, you need to acquire a thread of soft colors, and choose patterns of dense and even patterns.
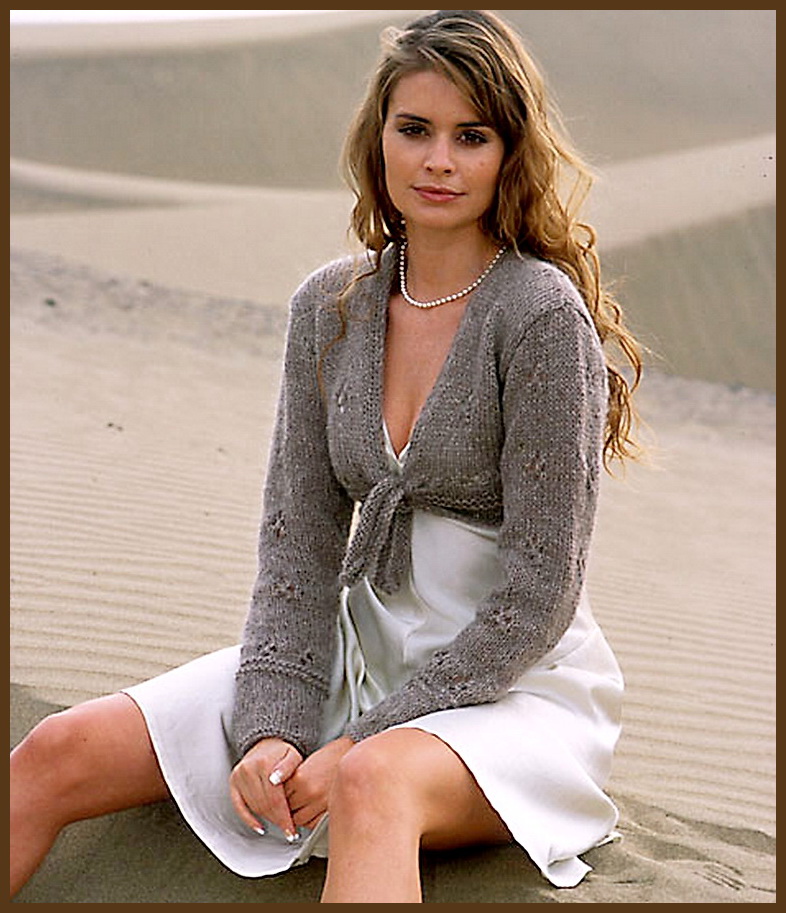


Unlike such a model, you can create an openworkAnd the evening bolero with knitting needles. Depending on the shape, color and pattern, it is worn both with trousers and with a skirt. Most often, a short jacket boler knit without fastening. In summer, always wear laced jackets, putting them on a top or dress. In addition, bolero perfectly fits to thin knit sweaters turtlenecks, as well as the same light blouses. For a cool time of the year, you need to tie a dense bolero with knitting needles from warm yarn, complementing a set of clothes. But for an evening gown, prepare a short jacket with a delicate openwork pattern. You can also add lace here.
Video lesson knitting bolero knitting
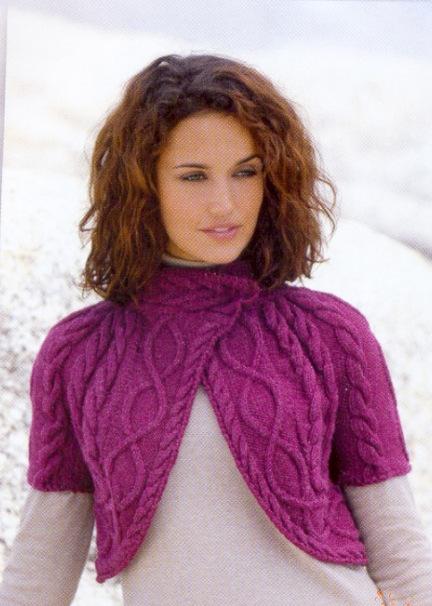
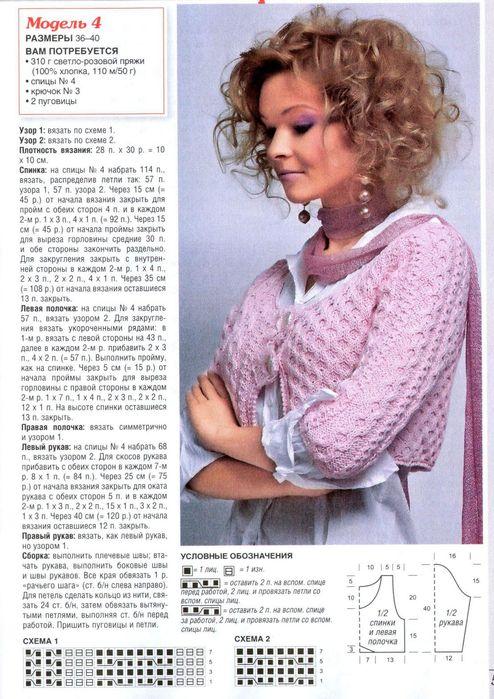
This video master class contains a step-by-step description of how to link the bolero. This is no longer a shrag, but a slightly different model that does not fit a rectangular shape, but has a short
, As well as a decorative clasp in front. The pattern of the model will be much more complicated. The pattern scheme for the particular model is described in detail in the video tutorial. Let's start knitting with a jacket for women with a set of fifty-eight loops (P). Knitting begins with the back and shoulder area. In the first row (P), the cape (H) is performed, then the two face loops (LP), one more nacelle, and fourteen units for the first arm. After them it is necessary to perform a combination of the two LPs with the hoods on the sides again. Then follow the PL for the back in the amount of twenty pieces. Then it is necessary to repeat in reverse order all the loops for the second arm. The second and all the remaining even P must be knitted exclusively with the inferior loops (PIs). In the third count of P, the number of P increases by eight units, as in the first.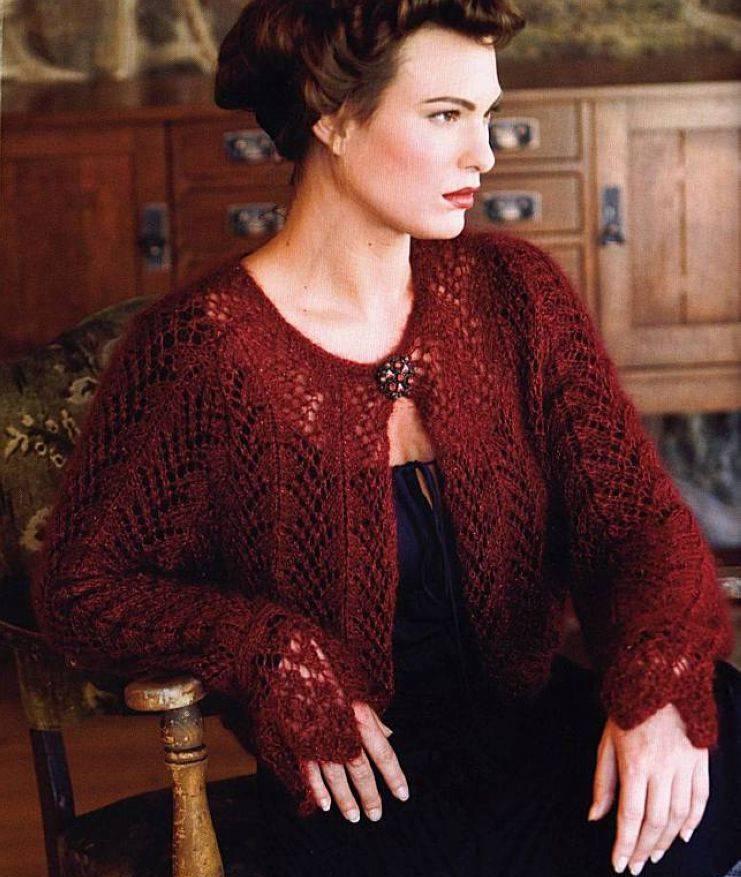
Do these additions exactly the same as in the firstRow. In addition, the third P is marked by the fact that along the pattern here two and two P along with the wrong one are executed. From the fifth row begins the formation of the front bolero. Note that the separation of the front and shoulder parts occurs just in the zone where the nakids are present. Facial loops between nakidami form a line of raglan for a bolero, knitted with spokes. We continue knitting bolero, performing an increase in the number of P on both sides of the line of raglan, before and after the capes. Do this increase as shown in the video until the number of units needed for the front is reached. We repeat the pattern from the ninth to the fifteenth series until we link forty-two rows. At this stage, each front section has thirty-one loops already. And now it is necessary to remove the two shoulder parts on additional pins, and to continue knitting with only the back and front parts, connecting them without a seam. In the fifty-fifth row, we begin to reduce the number of units at the ends of the canvas. In the eighty-first row, we close all the hinges, and we will make the crocheting of the edges crocheted. It remains to remove from the pin the loops of the shoulder, and tie the sleeves with the main pattern of the nakid and two loops together purl-in-the-circle. Having twelve rows of sleeves, we close all the loops.
Master class knitting simple bolero "Shrag"
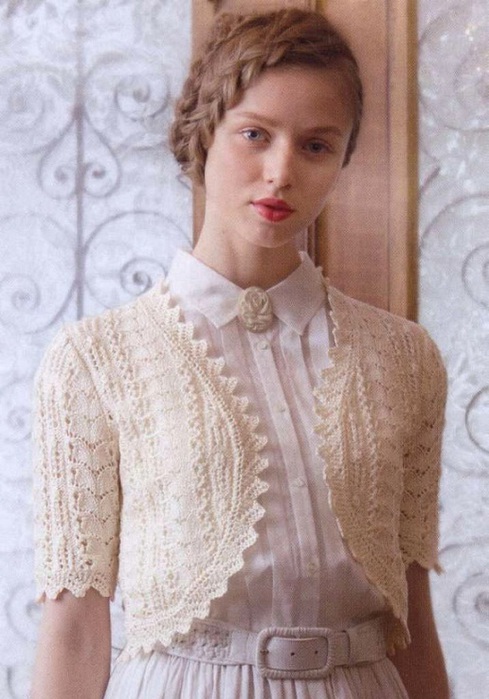
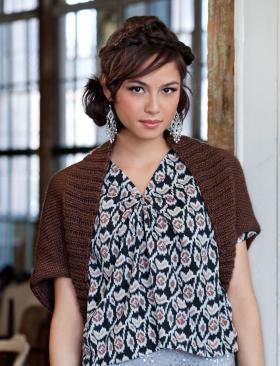
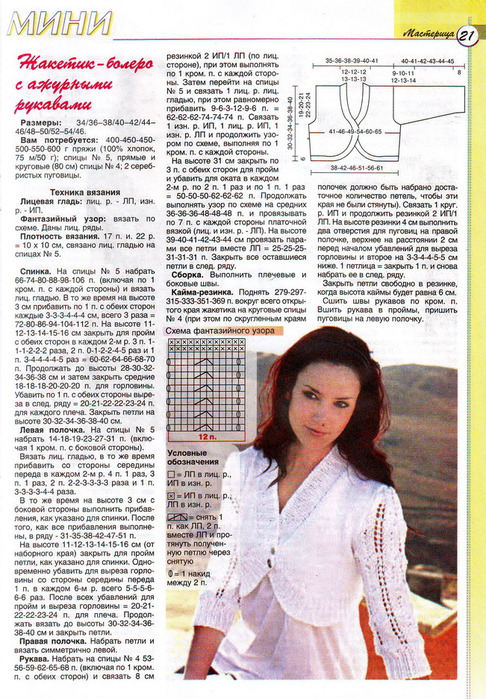
This delicate openwork bolero will decorate any day off or evening outfit. It should be worn with a summer sarafan or even with jeans.
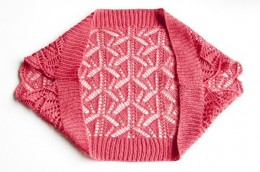
If you connect such bolero with knitting with addedShiny yarn, then it is quite possible to use it to complement the solemn festive attire. The model is so simple that even the most inexperienced needlewoman can cope with its knitting. This jacket will not need a pattern, because in its unfolded form it has the shape of an ordinary rectangle. The edge of the knitted rectangle must be folded, resulting in the formation of short sleeves.

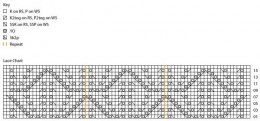
For knitting, choose any one you likeA pattern that will help you create a gentle and light product. As an example, we offer you such a pattern of openwork pattern, which is also very suitable. On the attached photo you see a knitted bolero for women. This scheme is used here. The model, which is knitted by the shape of a rectangle, and then partially joined by spokes on the sides, is called "Shrag". This example, considered in the master class, is just a knitted shag with knitting needles.
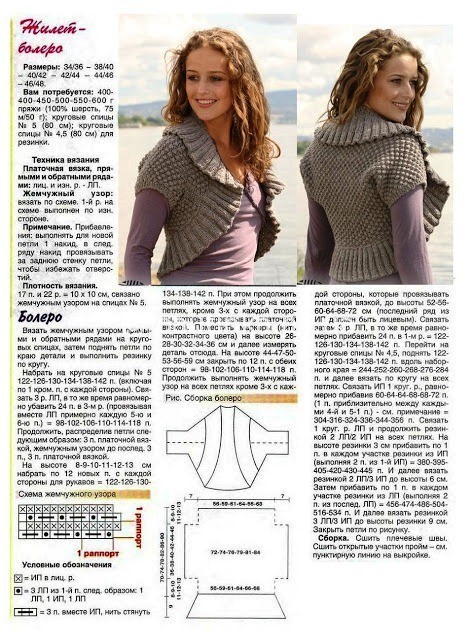
This is an example of a simple shraga for beginners. Like any classical shrag, it is knitted by the shape of a rectangle, then folded in half, and sewed together. When sewing, leave holes for the sleeves. The upper and lower edges are knitted with an elastic band, as seen in the photo.
For an average size, the length of a rectangleIs seventy-one centimeter, and width is seventy-six centimeters. We will assemble one hundred and thirty-four loops, and tie the elastic band two by two ten centimeters. After the elastic we perform the basic pattern, which for this model should be dense and smooth, at your option. Having drilled fifteen centimeters from the beginning, we will outline the plot with a contrasting thread. This point will be the beginning of the armhole armhole. Next, we knit to a distance of thirty-five centimeters, and again draw a line of the bolero line. At a distance of 55 cm, the last thread from both sides is fixed, meaning the depth of the armhole. Having tied the canvas to 60 cm, we will perform the second elastic band, and close the hinges. For assembling the shraga, fold the bound fabric back out, and sew it to the contrasting thread.
Video: How to tie the Bolero "Shrag"
Photo lessons on knitting bolero
Comments
Related posts:
 Learn to knit two-color scheme, and choose the patterns
 Knitting spokes hats with earflaps photo and video master class
 Knit booties spoke to the boy - detailed master classes
 We learn how to weave a butterfly from rubber bands on photos and videos to a master class