Learning to knit for beginners by step-by-step instructions with photos and diagrams
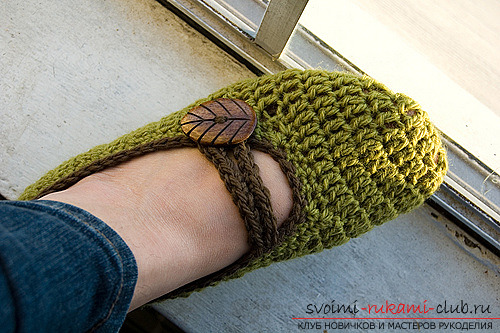
We crochet crochet: lessons for beginners Not everyone now knows what are the signs. In the traditional sense - it's a kind of mixture of socks and slippers. Only the fingers, the heel and the foot are covered solely. Due to the convenience they are quite popular and many replace them with familiar slippers for all. This kind of footwear is very suitable for everyday wearing, since it does not impede movements and does not create any discomfort. In markets and in trade networks, it is very difficult to find high-quality footprints made of natural material, and that would ideally fit in size. For those who are familiar with the initial skills of crocheting, the perfect way will be the self-tied tracks.  Due to their softness, knitted trails likethose who wish to warm their bare feet in the mornings with a warm shoe, especially in the cold season. With this type of home shoes you can also cure colds. To do this, you can put a little mustard powder in the tracks and put them on before going to bed. The next morning, all signs of a receding disease will appear: the rhinitis and cough will significantly decrease. The choice of thread for the tracks remains for you, but more useful healing properties will be products based on yarn containing natural wool or goat fluff. The tracks are suitable not only for home wear, but also for additional warming of the foot in the boot. Before you start knitting, you need to decide for what purposes you need them. If for the house, then the color and texture is better to match the everyday things of everyday wear. To learn how to knit comfortable tracks does not necessarily have to be an experienced knitter. It is enough to understand and penetrate into one of the crochet patterns of the element of home shoes. We present an example of traces that almost do not have seams, creating discomfort when walking in tight-fitting boots.
 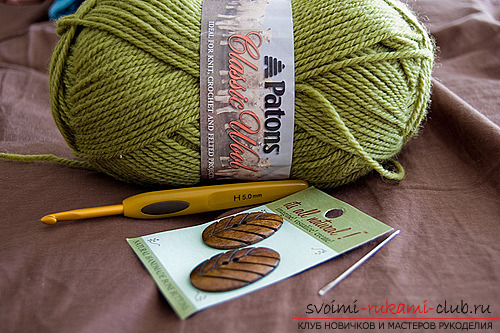 Link the tracks, ideally suited to the size,it is quite simple if the product is intended for itself and there is a possibility to periodically try on them. If you knit them, for example, for a friend, then you should make a pattern of foot. Remember that not closely adjacent to the foot of the footsteps will begin to crawl during walking. Step # 1. We knit the toe of our product. The toe of the toe is round. Then it is doubled for the other part of the trail. There are many ways to crochet a circle. Below is a simplified version with the same output result. So:
- We begin with a sliding loop into which a number of columns without a cape (sb) are tied;
- we pull together the threads of the ring in order to avoid unnecessary holes;
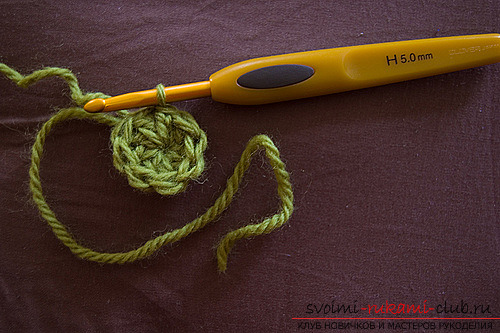
- in all the loops we sew 2 sbn;
- In subsequent series, randomly addedsbn, but at the same time, make sure that the added columns do not occur over the same action in the previous row. Otherwise, you will not have a circle, but a polyhedron. Also, make sure that the circle does not turn inside;
- knit circle until the length of the semicircle is equal to the width of the foot.
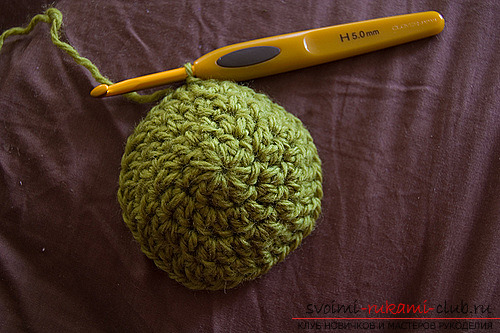 Step number 2. We fix the foot. The whole process takes place with the help of the sb. To continue knitting you should determine for yourself the position of the thread and the depth of the toe.
 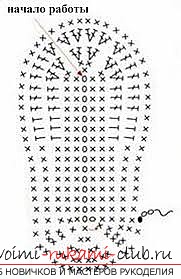 The sequence of work will be as follows: fold the previously bound circle in half; not adding sbn, keep knitting a trace; when you reach the necessary depth of toe, then do not knit some of the columns, but simply go in rows in two directions; after you tie the part of the foot to the thread, start adding one sb at the very beginning of all subsequent rows. To do this, make a loop and climb 2 knits in the first loop of the row. So we increase the height of the footprint with the goal that they do not slip while walking from the foot. In a similar way we are bred almost to the end of the foot. The heel does not have to turn out with an acute angle, so you need to make a slight rounding. Without tying 2-3 rows at the end, note the sowing of our canvas and make in the center of 6 to 8 columns through one, without tying. Step # 3. The final one. Turning the wrong side of the mark, connect the back halves. To do this, we insert the crochet hook into the back of the loop of the near halve and into the front part of the distal half. Since the loop is already on the hook, we simply link them all together and continue to do so until the end of the series.
  Then we turn the face off and performstrapping of the top of our product with the help of sb. If an error was found during knitting and the trace turned small or not close to the foot, it is worthwhile to string the extra row without tying a certain part of the columns. Now wear the tracks connected with your own hands, and carry it with pleasure!
Comments
Related posts:
 Learning to knit an original crochet hook according to the instructions with photos and diagrams
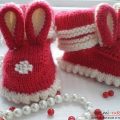 We learn to knit baby booties-slippers in the form of bunnies for children with step-by-step instruction, with photos and diagrams for free
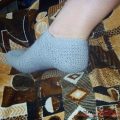 Learning to crochet warm socks, using proty and available schemes, photos and instructions for beginners
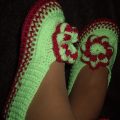 Learn to crochet home slippers for beginners, using the simplest schemes and step by step instructions
 We learn how to make a house for a cat with our own hands by step-by-step instructions with a photo