Learning to knit a rug crocheted rug, using a step-by-step instruction with photos and diagrams
Crochet the mat: a few examples for beginners Mats or kitchen napkins, associated with their own hands, are not only the pride of their creators, but also give the interior of any home a certain highlight. To make them to the force of anyone who has at least a drop of patience - in all the rest our master class will help you. If you follow the instructions clearly, you will get such a wonderful floor mat:  Before starting work, you should have: - a thick thread (yarn); - hook knitting (size - №10); - scissors. If you decide not to start with a rug, but with a napkin, then replace the hook with No. 3, and take the threads thinner. Course of work. Take the thread and tie it in a knot, without tightening too tightly - it will be a noose for the carpet of our rug. Above the ring, dial 3 in (air loops) crochet. Step 1. Tie the ring with a cn (column with a crochet). To do this, we hook into the center of the ring and weave c1n until they are 14.
 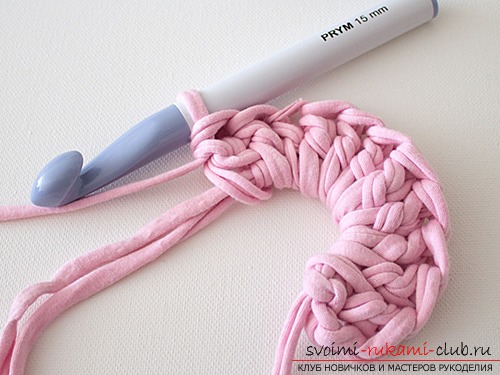 Step 2. The following illustration shows the distance between the loops and in what interval it is necessary to hook while knitting the next row. Step 3. In the second row, make three lifting loops, then we hook into the gap pointed to by the left arrow and knit through it 4 c1n. Then we make one more step and move on to the next interval. Thus we are tying it to the edge of the row: 4 c1n through the gap - one in - again 4 cn through the hole.
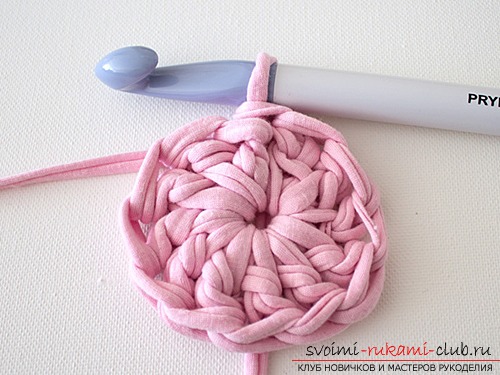
 Step 4. At the expense of between the sections a circle is formed with patterns from the knitted parts. To go to the next row, three lifting loops are again made. Next, continue knitting in a circle around the same pattern: 3 c1n through the hole, one in, 3 cn through the hole. Step 5. For the next row, you need to dial three lifting loops. Then, follow the illustration below. The lower arrow indicates where you want to hook, and the top arrow shows 2 loops of the previous row, which we do not touch. Step 6. Now we knit three loops of lifting, then we crochet into the hole and knit three cn. After this, we do one vp and again three bars. Similarly, we sew before the end of the series.
 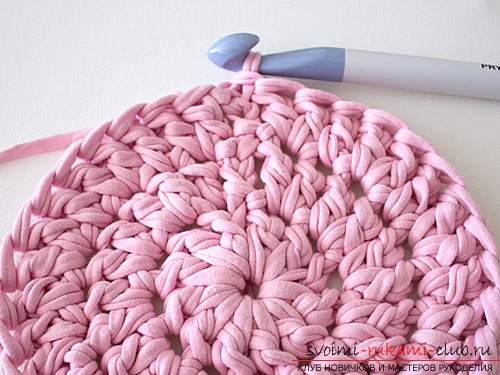 Step 7. Now we will make a particularly attractive series. We knit three loops of lifting, hook lead into the hole and knit 6 cn. Then we do one bp and again 6 dn. Due to the abundant number of columns, the end of this series appears wavy.
 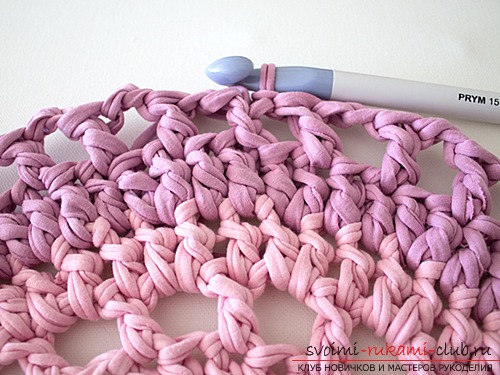 Step 8. Now you have the opportunity to enlarge your rug to the required size. Corrugate three columns in the hole, and if you notice that it is worth making the product bigger, knit six bars.
 Step 9. With the help of polustolbikov edge of our product binds a thread of another shade.
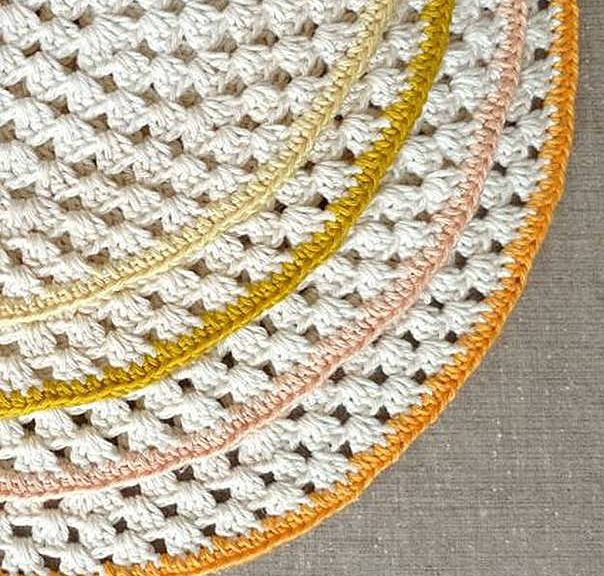
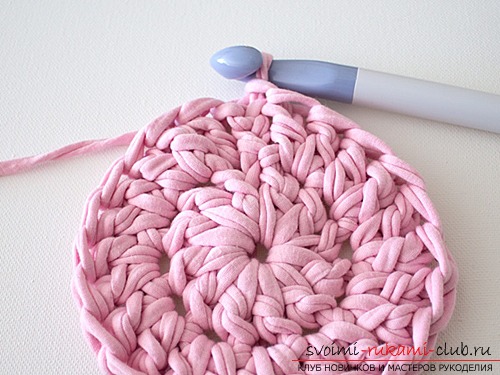
 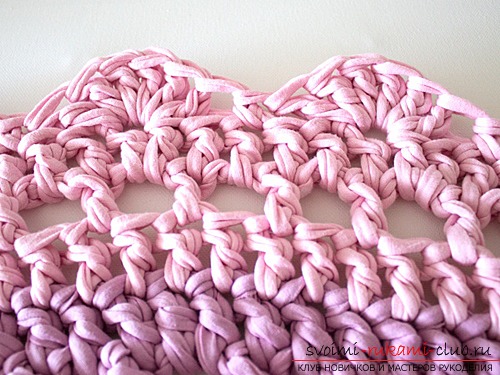 All! Your first crocheted mat is completely ready. By experimenting with the colors of the threads, you can create an ideal mat that perfectly matches the interior of any room. If the above variant of making a rug seems to you for some reason unsuitable for you, then we offer another master class on crocheting an original mat. In this master class, a set of materials and tools will look like this: - scissors; - a yarn made of cotton, called "spaghetti" (two different color shades that blend well with each other); - needle "gipsy" (with a large eye); - Crochet hook, suitable for yarn size. The yarn label usually indicates the size of the hook for which it is suitable. In this example, a 15 mm hook was used. To connect such a mat quickly does not work (on average it takes about 8 hours), so either be patient, or break the process of knitting for two days. This method does not require special preparation, and is suitable for beginners and for more experienced needlewomen. We begin to knit the product according to the following scheme. 1st row. Take the thread that shade, which will be the main thing in the rug, make a ring, as in the photo and fix the thread. Next we knit 3 cents. We tie the ring 11 with a double-cloak. We fix the ringlet. To do this, we knit a loop in the 3rd link of the chain.
 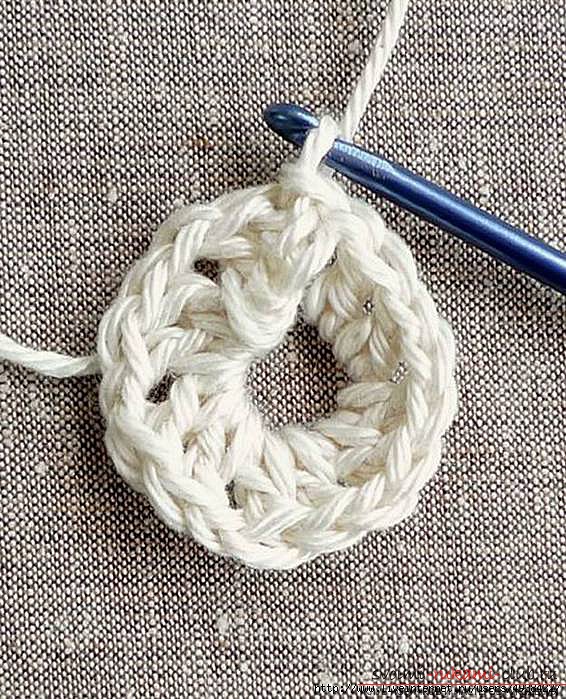 2nd row. Again, we tie a chain of 3 in. In all the loops of the previous row we knit two loops with a double cape. Close the circle in the same way as in the 1st row.
 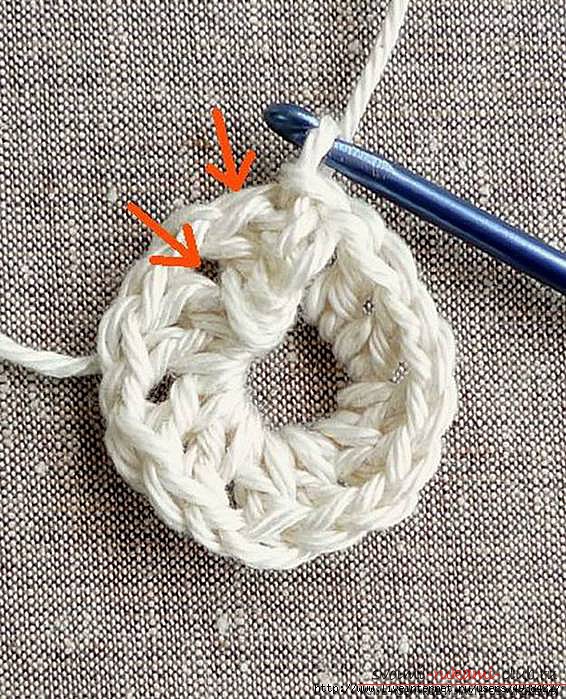 3rd row. Again, start with a chain of 3 vp. First, we knit 2 loops with a double cloak in the 1st loop in the bottom row. Next we knit one loop with a double cape in the 2nd loop in the bottom row. After that, again we knit 2 loops, but already in the 3rd loop in the bottom row, and then before the end of the series in the same way we alternate the loops. The circle closes in the same way as the first row. 4th row. Here we already knit a chain of 5-vol. In the lower row, skipping the first loop, we knit immediately in the 2nd with a double cape. Next, we sew 2 in, pass the loop in the bottom row, and into the next knit loop with a double cape. We close this series as well as all the preceding ones.
 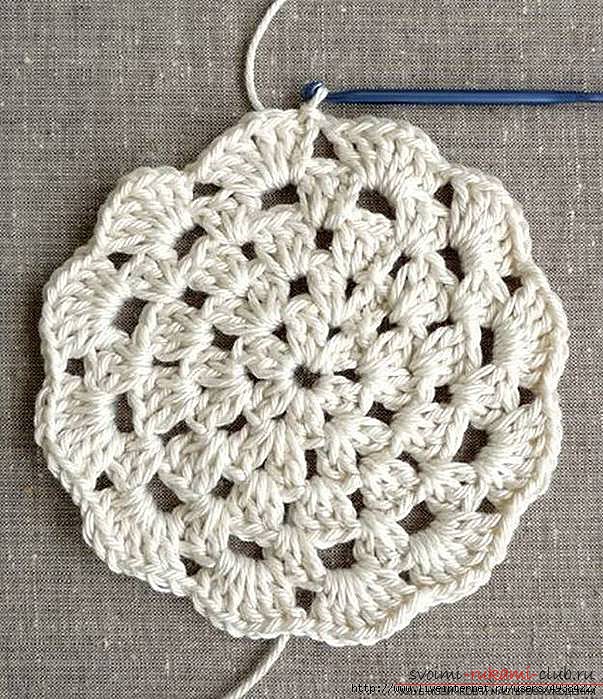 5th row. Again, start with a chain of 3 vp. Then we fasten the 4th row with eyelets with a single cap and close. 6th row. We change the threads to a different shade. We make a chain of three in, into the next loop of dn, and then into the next loop of 2 loops with a double cloak. So alternate until we finish and then close the circle. We sew the 7th row in the same way as the fourth. 8th row. We form a chain of 3 vp, we tie the previous row around the loop with one cape and close it. 9th row. Again, change the thread to a different color. The previous row is tied with loops around the circle and the row is closed. We line the 10th row in the same way as the 7th row. The 11th row is knitted according to the scheme of the third row. 12th row. Again change the color of the thread and tie a chain of 3 in. Ties with a cape tie a rug around and close.
 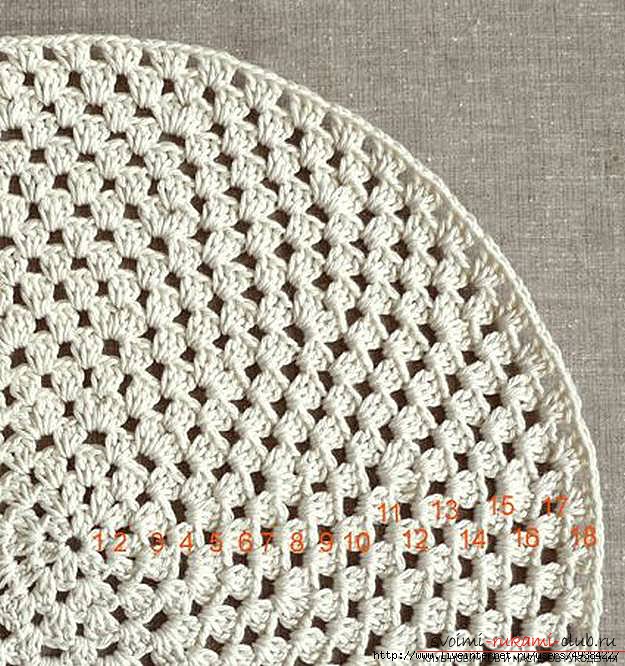 The 13th row is knitted similarly to the 10th row. 14th row. We change the thread and we sew according to the scheme of the 12th. We knit the 15th row with the same thread as in the previous row. The 16th row is tied according to the scheme of the tenth. We sew the 17th row in the same way with the eleventh. 18th row. We form one vn, into which we knit a loop without a crochet. Then skip 2 rows and knit in a loop with a cuff in the same loop in the bottom row.
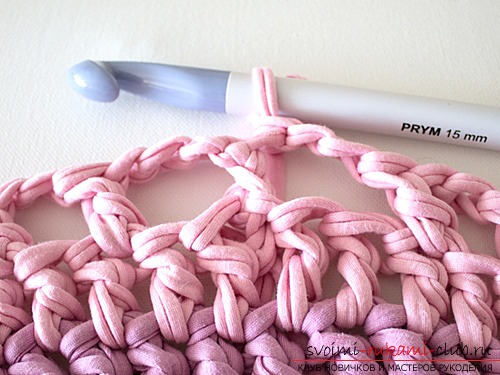
 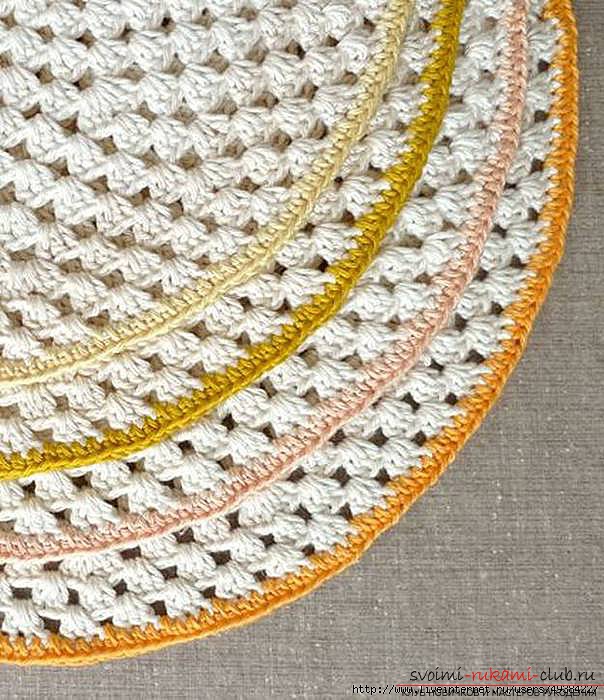 Then we do 2 in, again we skip 2 rows andwe knit 6 loops with one cloak in a loop in the bottom row. Also do until the end of the series, after which it is closed. Now you can enjoy the new crocheted rug!
Comments
Related posts:
 Learning to knit an original crochet hook according to the instructions with photos and diagrams
 Learning to crochet warm socks, using proty and available schemes, photos and instructions for beginners
 Learning to knit for beginners by step-by-step instructions with photos and diagrams
 Learn to crochet home slippers for beginners, using the simplest schemes and step by step instructions
 How to mesh a red cat with your own hands quickly and easily, using photos and step by step instructions.