We learn to knit crochet small simple toys with amiguras, which even beginners can create according to the instructions from the photo.
We give joy to children: Tips for Beginners on Crochet Crochet Toys Toys that are crocheted have become quite popular today. Already, perhaps, soon there will be no person who does not know what "Amigurs" are. For those who do not know the meaning of this word, we recall that the "Amigurs" are the production of small toys crocheted. I want to note that the creation of such toys does not require deep knowledge and great experience in crocheting. The main advice for beginners in this business is the production of small simple toys in the first stages. First, try to connect a small original hippopotamus. For this we will need such materials:
- dense yarn of blue color;
- hook of necessary thickness;
- thread;
- large beads, beads;
- foam rubber (or cotton wool as filler).
So, let's begin. 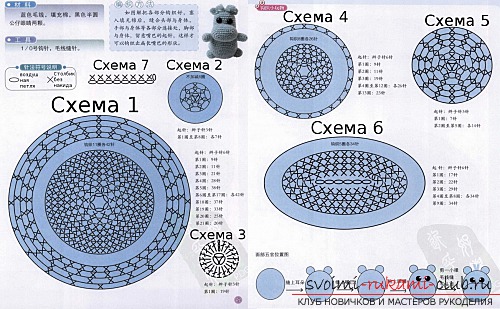 Before starting the process directlyknitting, you should determine the toy of what size you want to make. For this you need to know that the thicker the yarn and the higher the size of the hook, the more the toy itself will be. The process of knitting begins with the creation of the trunk of our toys, using the scheme. We create six EPs, combining them into a ring, then we circle nine CHs around the circle. Further actions should be clearly determined by our scheme. So, from the sixth to the seventeenth series we unfasten forty-two columns. From the proposed scheme it is seen how to make the front legs of a hippo. To do this, we make three EPs, unite them, and then we circle seven RLSs around the circle. Thus, we create eight rows. After that, let's start knitting the ears of our toy. Initially, we make three EPs, merge, then three VP lifts and nineteen with CH. Then we untie the head of the hippopotamus. First we knit six EPs, then we tie nine RNSs around the ring in a circle. The fourth - the twelfth series we create by analogy - twenty six columns. We begin to knit the hind legs of the hippo, create three EPs. In the interval of the second or fifth series we make fourteen columns. Before knitting our toys we knit this way: six VP, which we must tie, however, that is important, do not combine them with it. A total of seventeen RLS. Starting from the fourth and up to the final row, we knit in each of them thirty-four bars. A small tail is created in this way, as shown in our diagram. Having finished making all parts of our future toy, we must put them together. Ears are attached to the head with a needle. Similarly, attach the front of the muzzle, pre-stuffing it with foam rubber. Also, we compact the inside of the other parts of the hippopotamus and fasten them together with threads and needles. To create a tuft of our toy, you need to cut the threads equal in length, and attach them to the crown using a hook. In the end, attach eyes from beads or beads to the front of the head.
 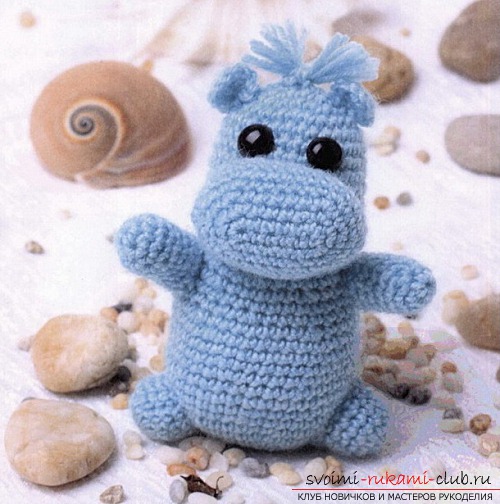 All! Our toy crocheted, ready. For more variety and additional experience, we offer you a master class on making a white kitten by crocheting. We need:
- yarn of white color;
- the required thickness of the hook;
- light ribbon;
- felt of several colors (red, white, black);
- wadding or foam rubber;
- threads of black color;
- needle;
- glue.
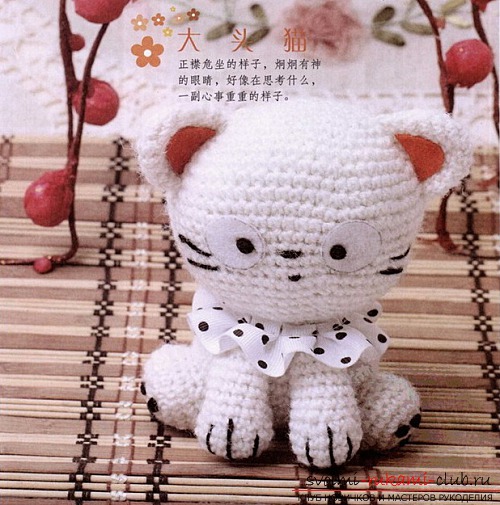
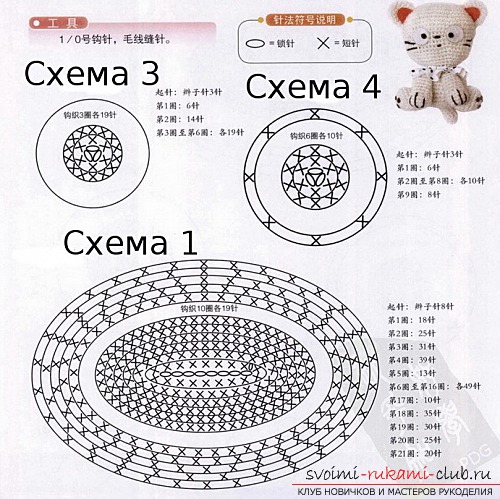 The process of creating our toys will begin with the creationhead of the cat (scheme number 1). Everywhere we will use white yarn. We make eight EPs and additionally one lifting loop to the next row. Then we tie this series around the circle with eighteen RLSs. Then we do everything clearly according to the scheme. By the same method, rows from the sixth to the sixteenth will be created: each with forty-nine posts. At the end of the twenty-first row we have twenty bars, which will become the basis of the head, which we will sew to the trunk of the toy. Next, we begin knitting the trunk itself (Scheme # 2). First, we make eight VIs, around which we then create eighteen columns. We make the fifth-eleventh rows in forty-three columns. The total number of rows is fourteen. Then start knitting small parts. Under the scheme number 3 we make the ears of the kitten - two elements. First, we tie three EPs, which we unite into a circle, and then we tie them from the third to the sixth rows to make nineteen bars. From Scheme 4, you can see how to make the tail of a toy. The beginning coincides with the first stage of knitting the ears.
 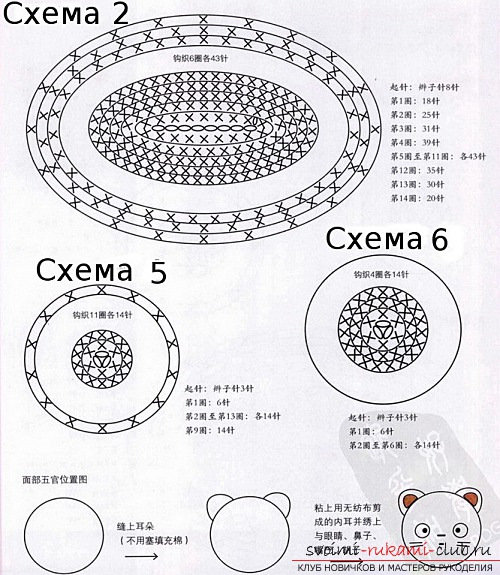 And from the second to the eighth series you need to do tencolumns, in the ninth row - eight. Let's go to the knitting of the paws. The front paws are made according to the scheme №5, the hind legs - according to the scheme №6. The beginning is the same as in the previous elements. Front paws: from the second to the ninth row we make fourteen columns. Hind legs: the second-sixth also has fourteen columns. By combining all the elements of our toy, we stuff them, not filling only the ears. The last, folded in half, attach to the head. We decorate the middle of the ears with pieces of red felt. From white felt we make eyes and attach black dots-pupils. After that, glue the eyes to the front of the head. We create the nose and mouth with embroidered stripes, on the sides - we make the antennae. Front paws are decorated with a black strip embroidered with threads, and to the back we attach black tissue circles-pads. We make a frill from the tape and attach it to the upper part of the trunk of the toy - to its neck. We sew all the created parts of our toy. The kitten is ready!
Comments
Related posts:
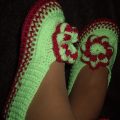 Learn to crochet home slippers for beginners, using the simplest schemes and step by step instructions
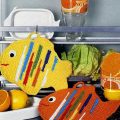 Learning to knit an original crochet hook according to the instructions with photos and diagrams
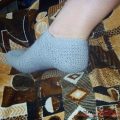 Learning to crochet warm socks, using proty and available schemes, photos and instructions for beginners
 Learning to crochet squares, from which you can then make a beautiful plaid, according to the instructions with photos and diagrams
 Learning to knit the pompoms with knitting needles for beginners by step-by-step instructions with photos and diagrams