
Lesson on creating an original small bench for a child with a secret box, a detailed description of the stages of working with photos
A small bench is a very useful thing in an apartment. In the hallway - for dressing and taking off shoes, for playing with the child, finally - a small bench for a small child. To make it simple. 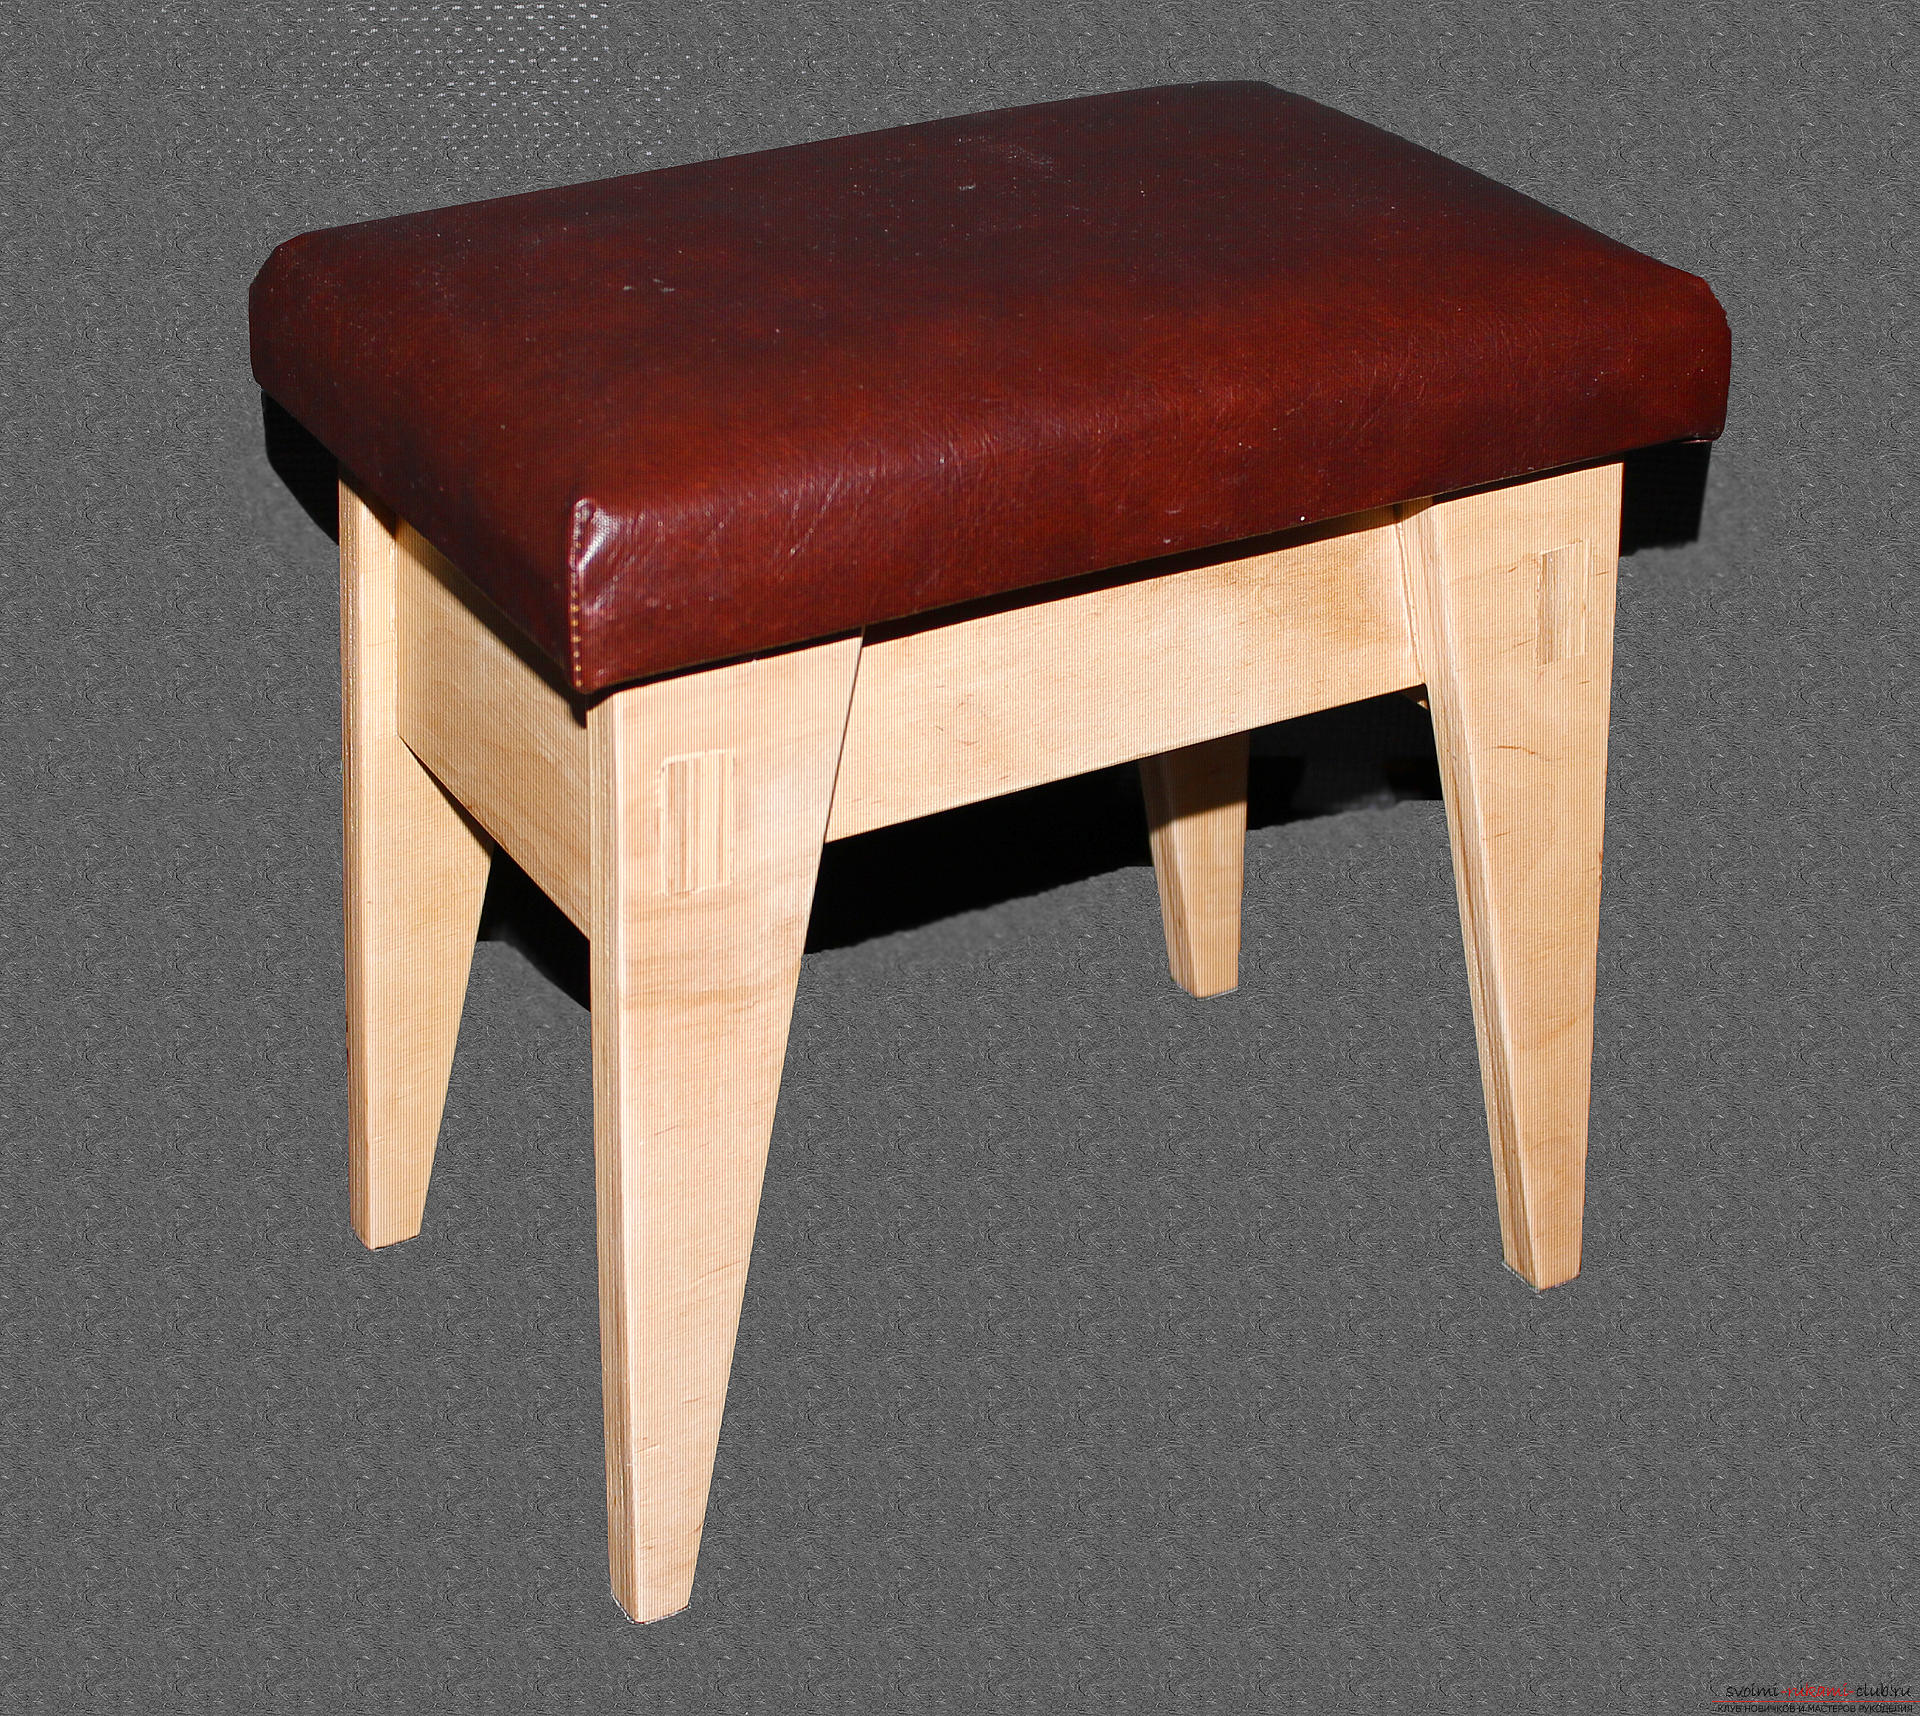
Materials and tools
Consider the manufacture of a bench of multilayer plywood 16 mm thick. (It is possible to use waste from making a beautiful stool). You need:
- plywood with a thickness of 16 mm;
- pencil, ruler;
- electric jigsaw;
- chisel 10 mm wide, hammer;
- sandpaper of different granularity;
- PVA glue;
- furniture dowels;
- colorless varnish, brush;
- piece of particle board;
- dermatitis, foam rubber.
Manufacturing process
The height of the finished bench is about 27 cm. On the sheet of plywood we mark the legs.  There are four of them and they are all the same.
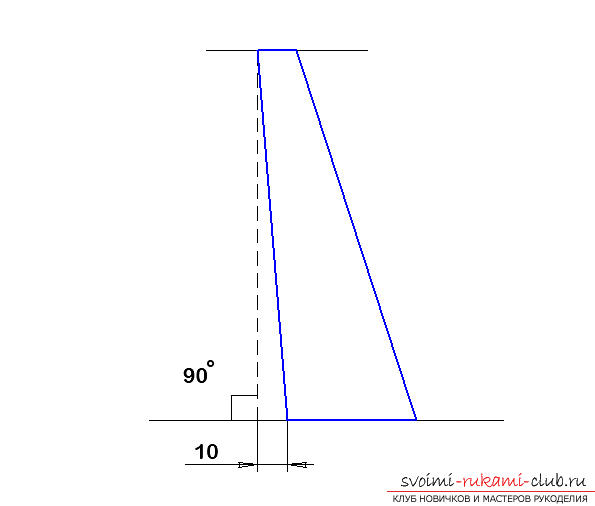

 We drill out the eyes and select the chisel. You can place all the legs economically on one sheet.
  Next, we mark two long crossbars and two short ones.
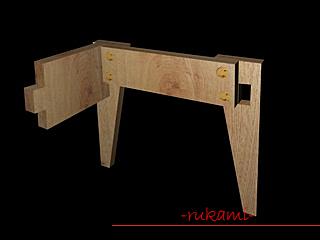
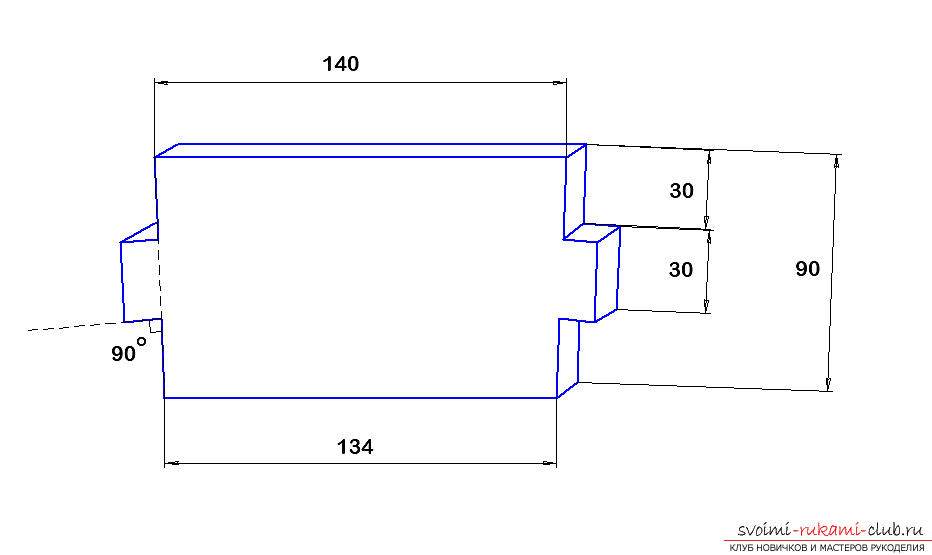 We cut out. The legs and long cross-members are glued together, making sure that the cross-arms do not block the eyes.
 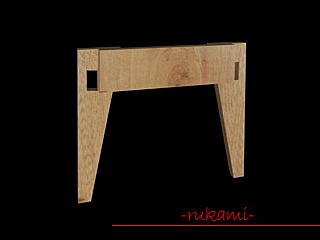 After drying the adhesive, strengthen the legs. To do this, we drill blind holes through the legs in the cross-pieces and set the dowels on the glue.
  The cutting parts are cut and cleaned with sandpaper. We try short cross-pieces. If necessary, we correct the file. If the connection is tight, collect on the glue.
 We prepare the seat. This piece of chipboard size of 190 x 290 mm. On it we place the places for screws (screws) with which the seat will be fixed to the base.
 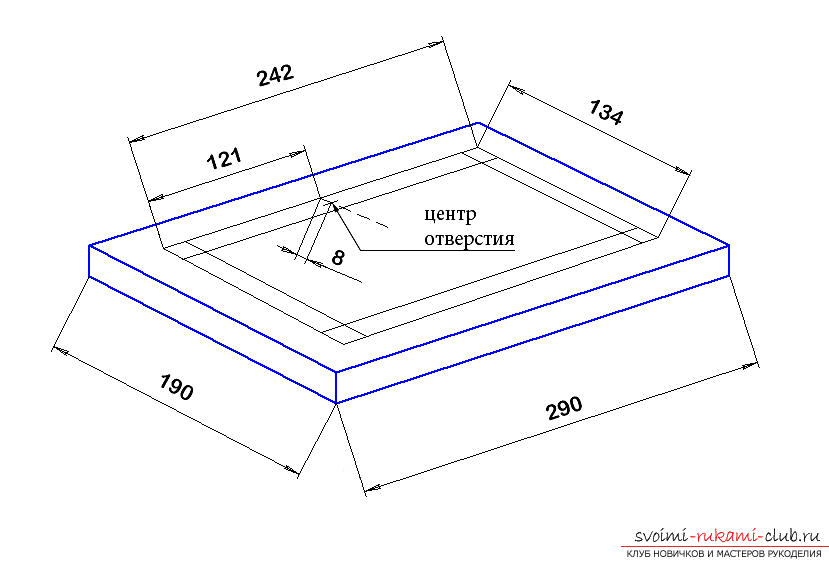 Screw holes are made on all fourparties. We use screws (screws) with a secret hat (head). If necessary, level the base and feet with a surface grinder or manually. Mark the place for the screws. It is in the middle along the length and in the middle along the thickness of all sides of the base. We fix the seat.
  We clean all surfaces with sandpaper, withthe need to shpaklyuem, cleaned, after achieving the desired result - varnish. It is possible to assemble a bench with fewer parts, but with larger waste. Legs and large cross-pieces are cut out together.
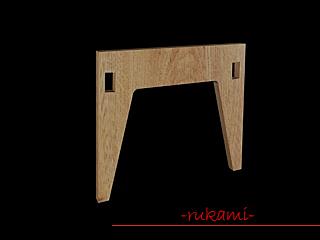


 Dimensions for this option are not indicated, but theirit is easy to calculate yourself. We prepare soft upholstery. To do this, you need foam 2 cm thick, 190 x 290 mm in size and dermatine (or imitation leather or dense fabric) measuring 310 x 410 mm. We put the foam on the seat, cover with dermatine, turn everything over and nail the dermatina to the seat from below or fix it with a stapler. Dermatitis can be simply wrapped, but it is better to sew.
 In principle, the bench is ready. But it can be supplemented with a small secret. The secret drawer will be very pleasant for your children. The whole secret is a sliding door. To make it, you will need a piece of the same 16 mm thick plywood size 215 x 140 mm. The general view and dimensions of the base of the concealed door are shown in the figure.
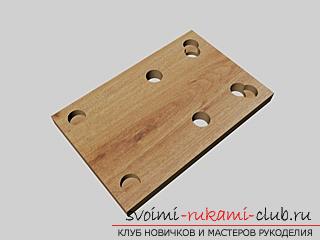
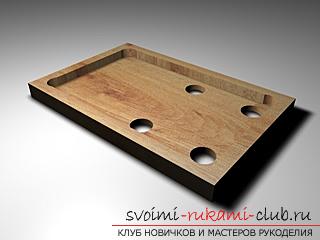
 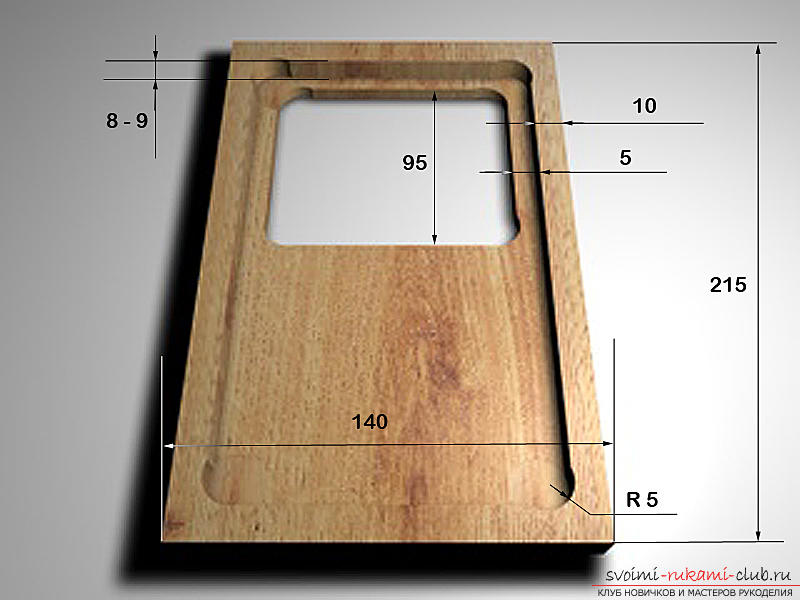 In the right places, drill a 10 diameter drillmm and choose a chisel. Drilling must not be through and preferably a feather drill, it drills not a cone, but a plane. Through the doorway we saw with an electric jigsaw.
 Actually, the door is made of plywood with a thickness of 3 - 5 mm.
 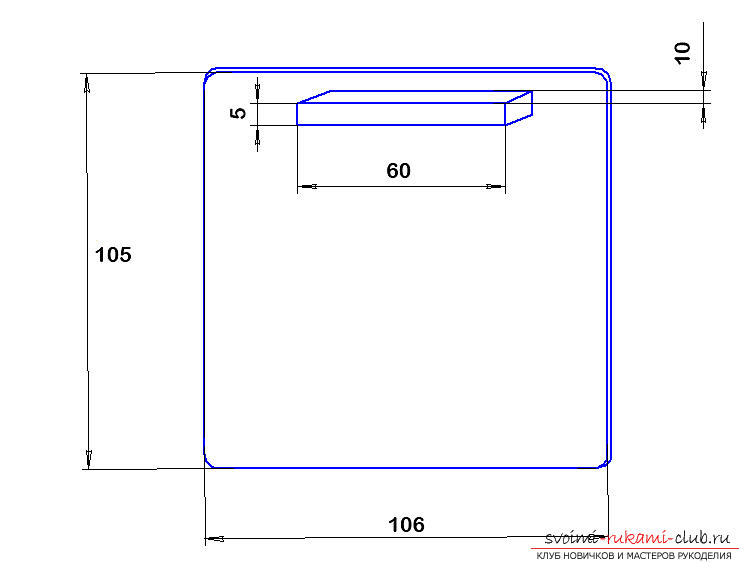 The corners are rounded. Capture is made from a wooden rod, glued, can be strengthened with toothpicks. Drill a small suitable drill and insert the toothpicks on the glue.
 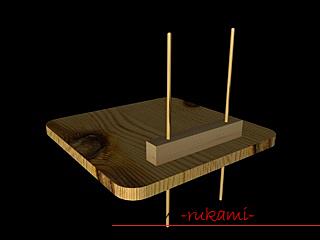 If there is no drill, you can sharpen it "under the pen"carnations. The protruding toothpicks are cut and peeled. We put the door back in place. The grip should protrude a little. We cover the top with a 3 mm thick veneer of the same size as the base. In it we make an opening for access inward.
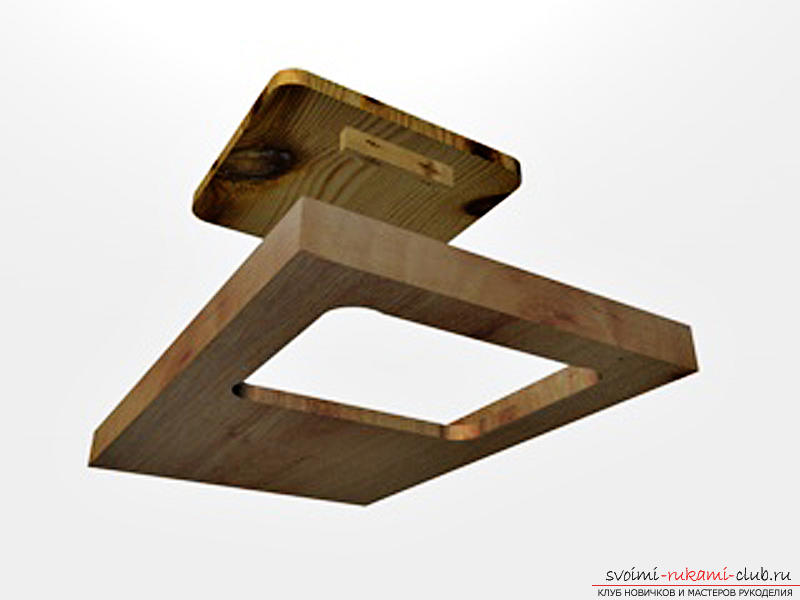
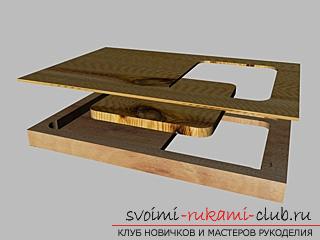
 If the door moves freely, the plywood coverpaste. If the door somewhere jams, clean the place, grease the door with soap or a candle, in the extreme case between the door and the base, you can build a thin getinax or other thin plastic with a cutout. We glue the plywood cover, it can be strengthened with toothpicks, like a grip on the door. When the whole design is ready and working, mow down the corners with a sandpaper so that it fits tightly from the bottom between the crossbeams.
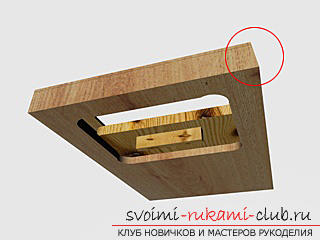
 We install the secret door on the glue. In the resulting box you can hide small toys that your children and grandchildren like. To the legs do not scratch the parquet, glue felt or leather pads.
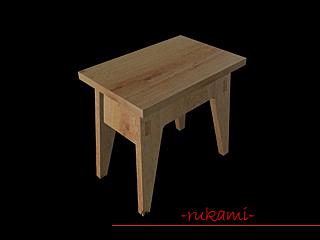
 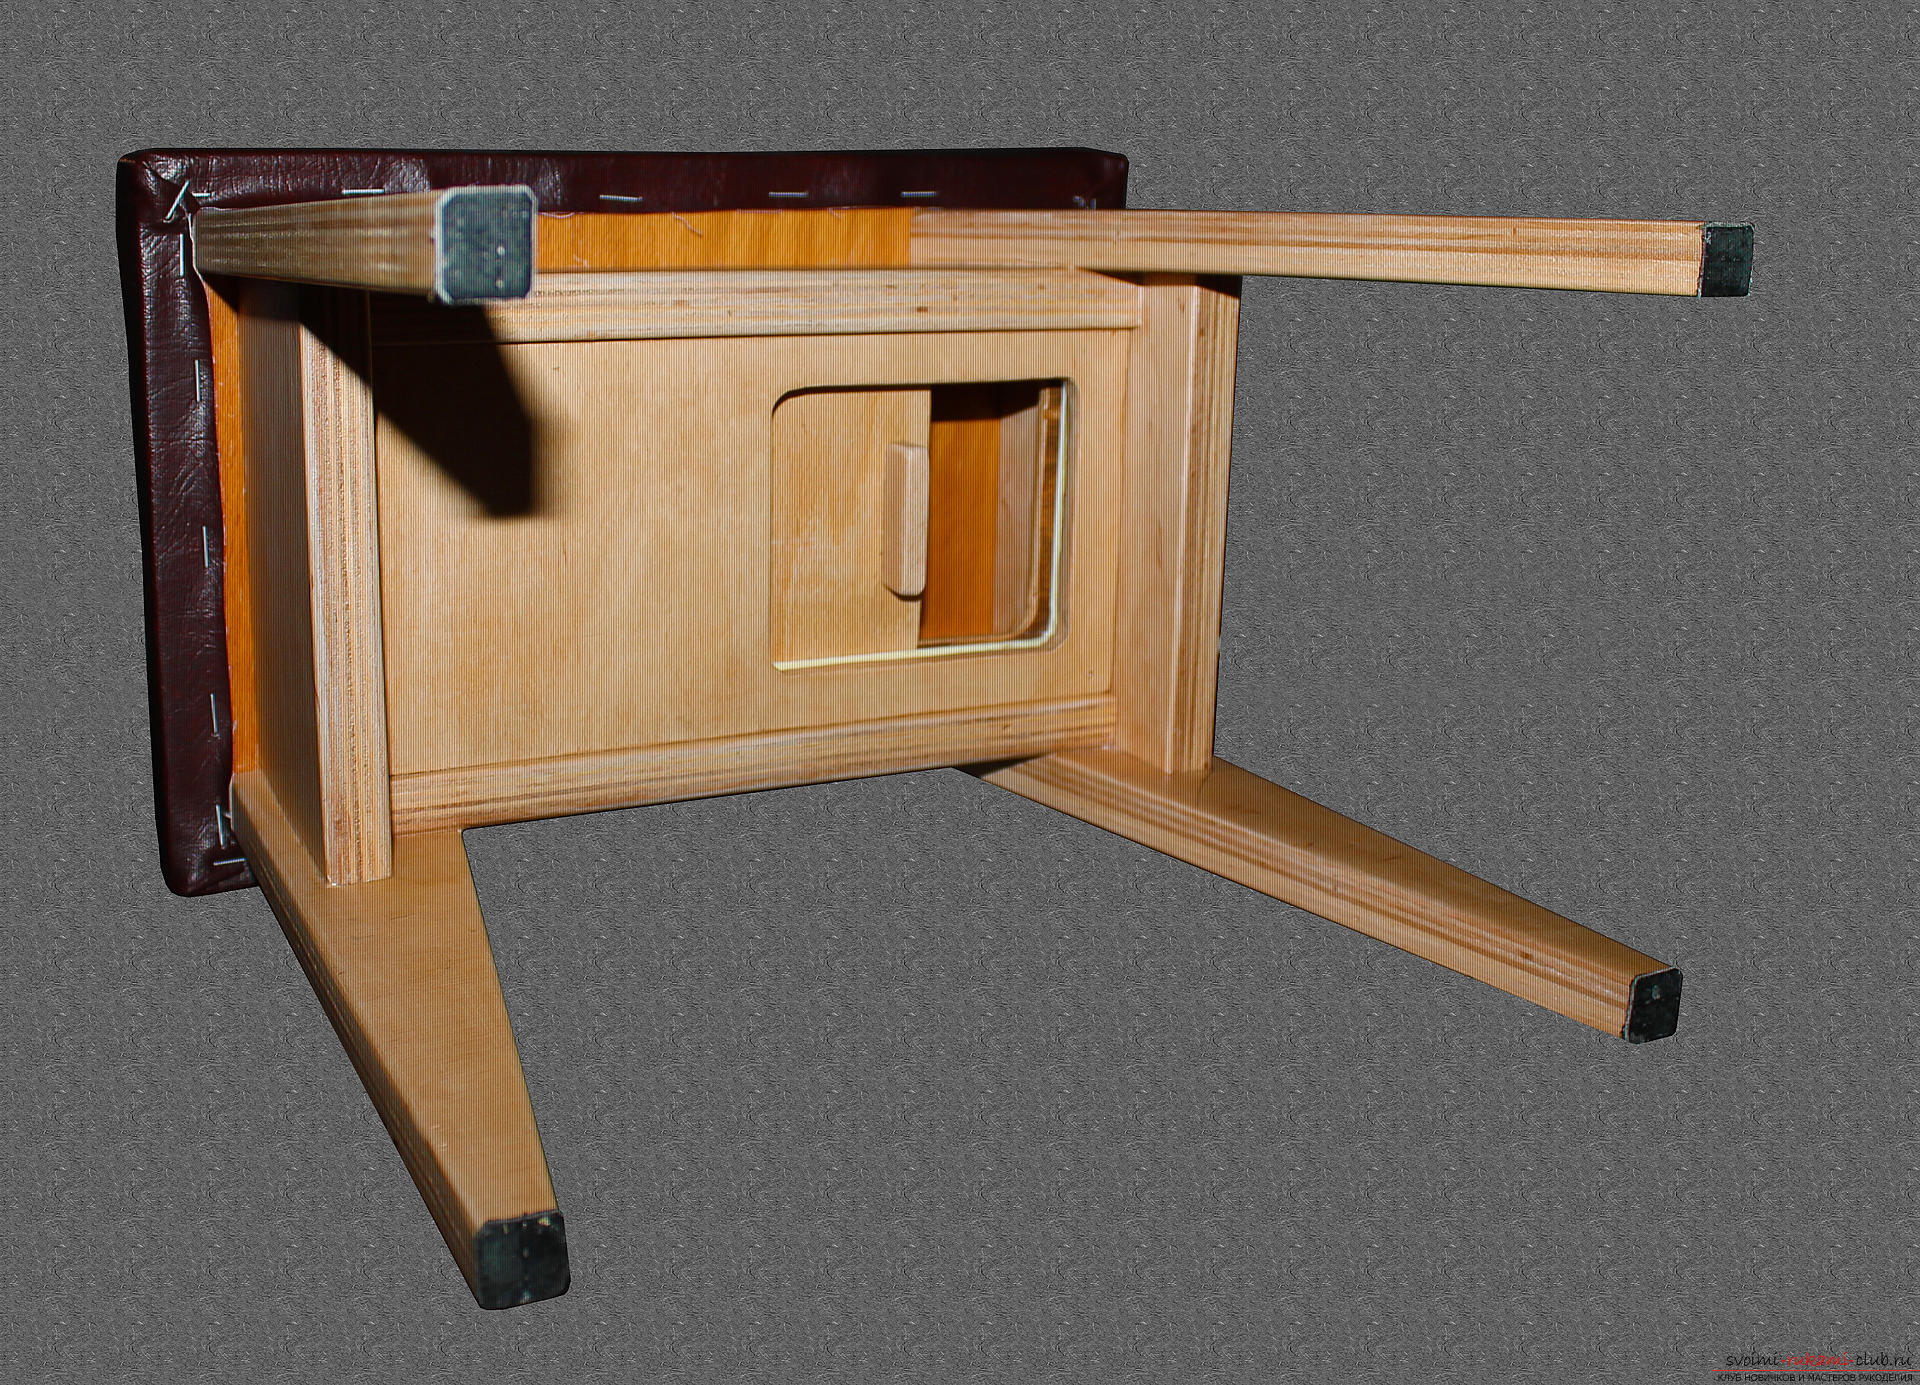 All. A small bench with a secret is ready.
Comments
Related posts:
 A lesson on knitting the cradle under the hot crochet "Elegance". Detailed description of the procedure for working with photos
 A lesson on creating an original gift in the technique of decoupage - bottles of champagne with New Year decor. Detailed description of the technique, workflow and step-by-step photos
 How to make a decoration on the Christmas tree "Gingerbread House" of felt with your own hands? Detailed description of the stages of work with photos
 How to weave a small snowman from the rubber for the New Year holidays? Detailed description of the stages of work with step-by-step photos
 How to crochet a poppy flower of lilac color? Detailed description of the stages of work, a list of materials and step-by-step photos