
Crochet crochet lessons of the original needle bed with step-by-step recommendations and photos
Every housewife loves that all things lie ontheir places, and not lying around anywhere, especially it concerns dangerous in a sense, tools of needlework, namely, sewing needles and pins. It is best to keep them stuck with a pointed end in something soft, it is for such purposes that they were invented completely different in form, size and quality of the needle bed. Such a necessary thing for the safe storage of needles and pins can be purchased at the store or manufactured independently with their own hands in various techniques, today I suggest you to tie a very nice needle bed in the form of a small openwork cushion in the rustic crochet style, as described, class.
What is necessary?
So, to connect the cushion crochet - needle bed, we need:
- mercerized thin cotton yarn cream-colored;
- thin beige fabric;
- Crochet hook number 1.5;
- sintepon or cotton wool;
- satin ribbon chocolate color, width 1.5 cm;
- sewing needle;
- scissors;
- centimeter tape or laneyka;
- simple pencil.
Description of work
1. Let's start with linking the front openwork part of the cushion, for this we will type a chain of five air loops and put it into a ringlet.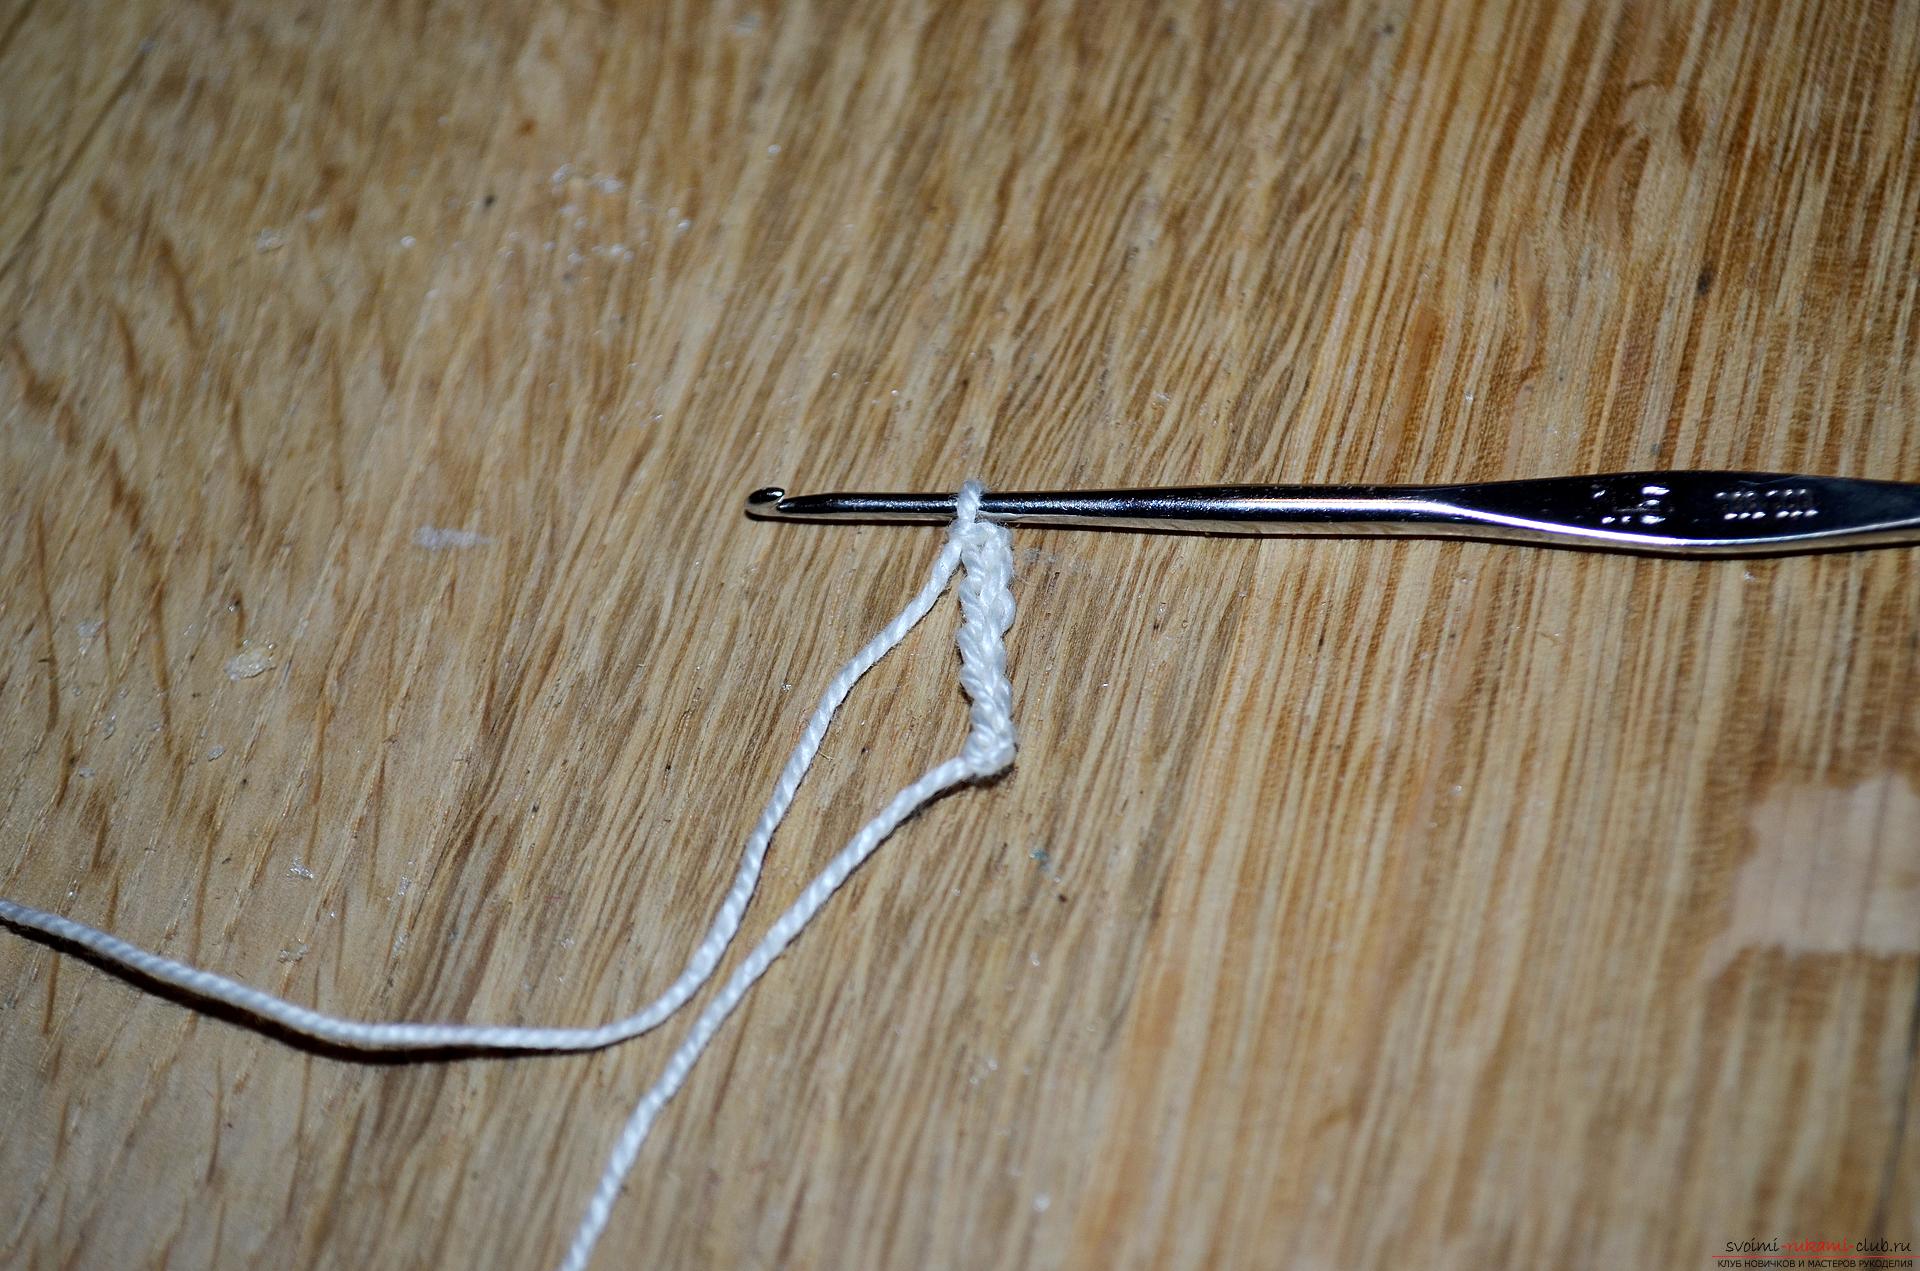 2. Next, we will remove three more air lifting loops.
 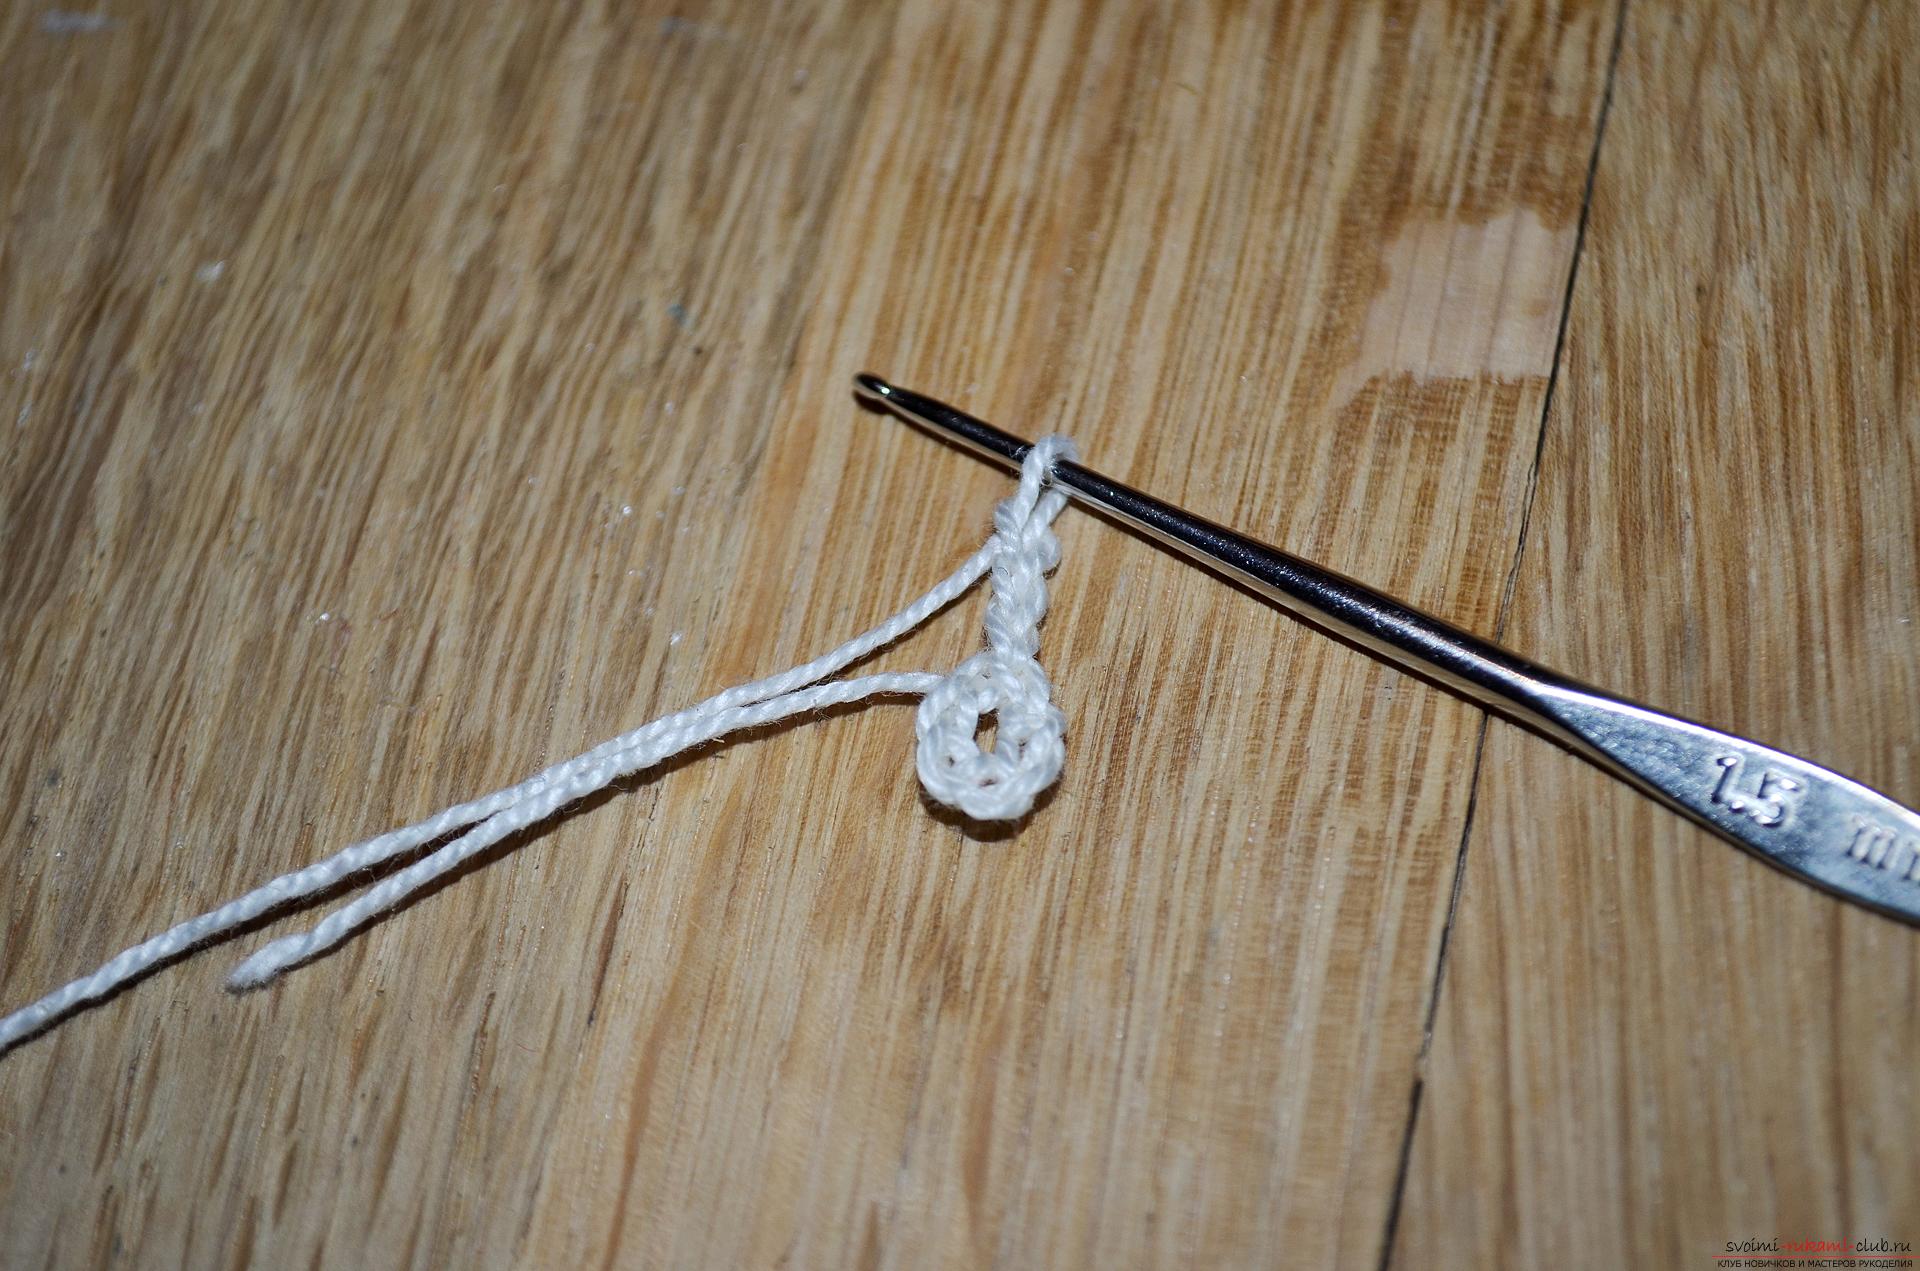 3. Then from the ring we will fasten two more unfinished columns with one crochet and together with three lifting loops we connect them together in one loop, we will receive thus the first petal.
 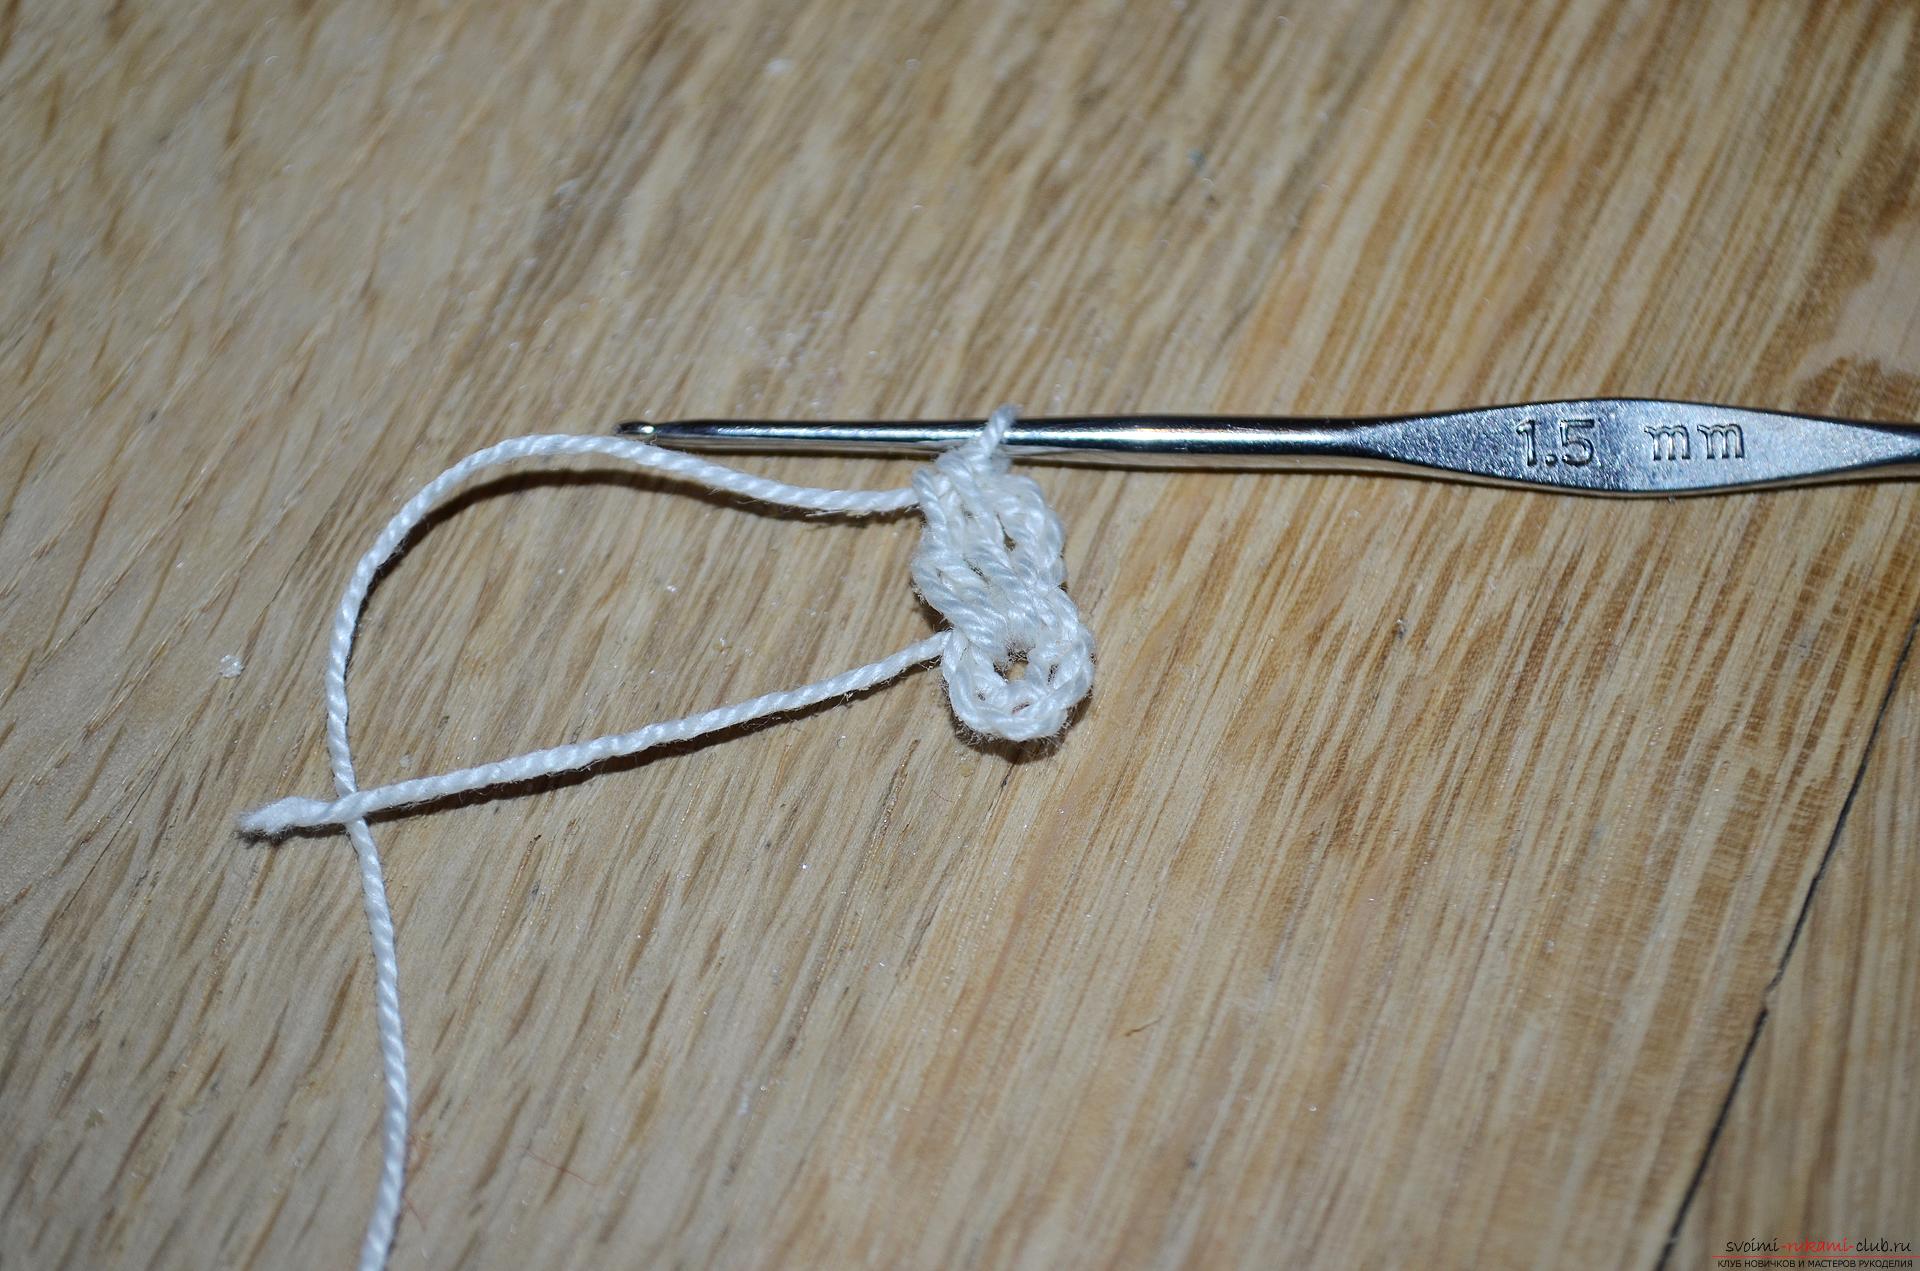 4. After that, we'll loosen the two air loops and proceed to forming the next petal, consisting this time of three unfinished columns with one crochet, connected together. We will knit so, alternating the airy loops and petals in a circle. In total, eight identical petals should be produced.
 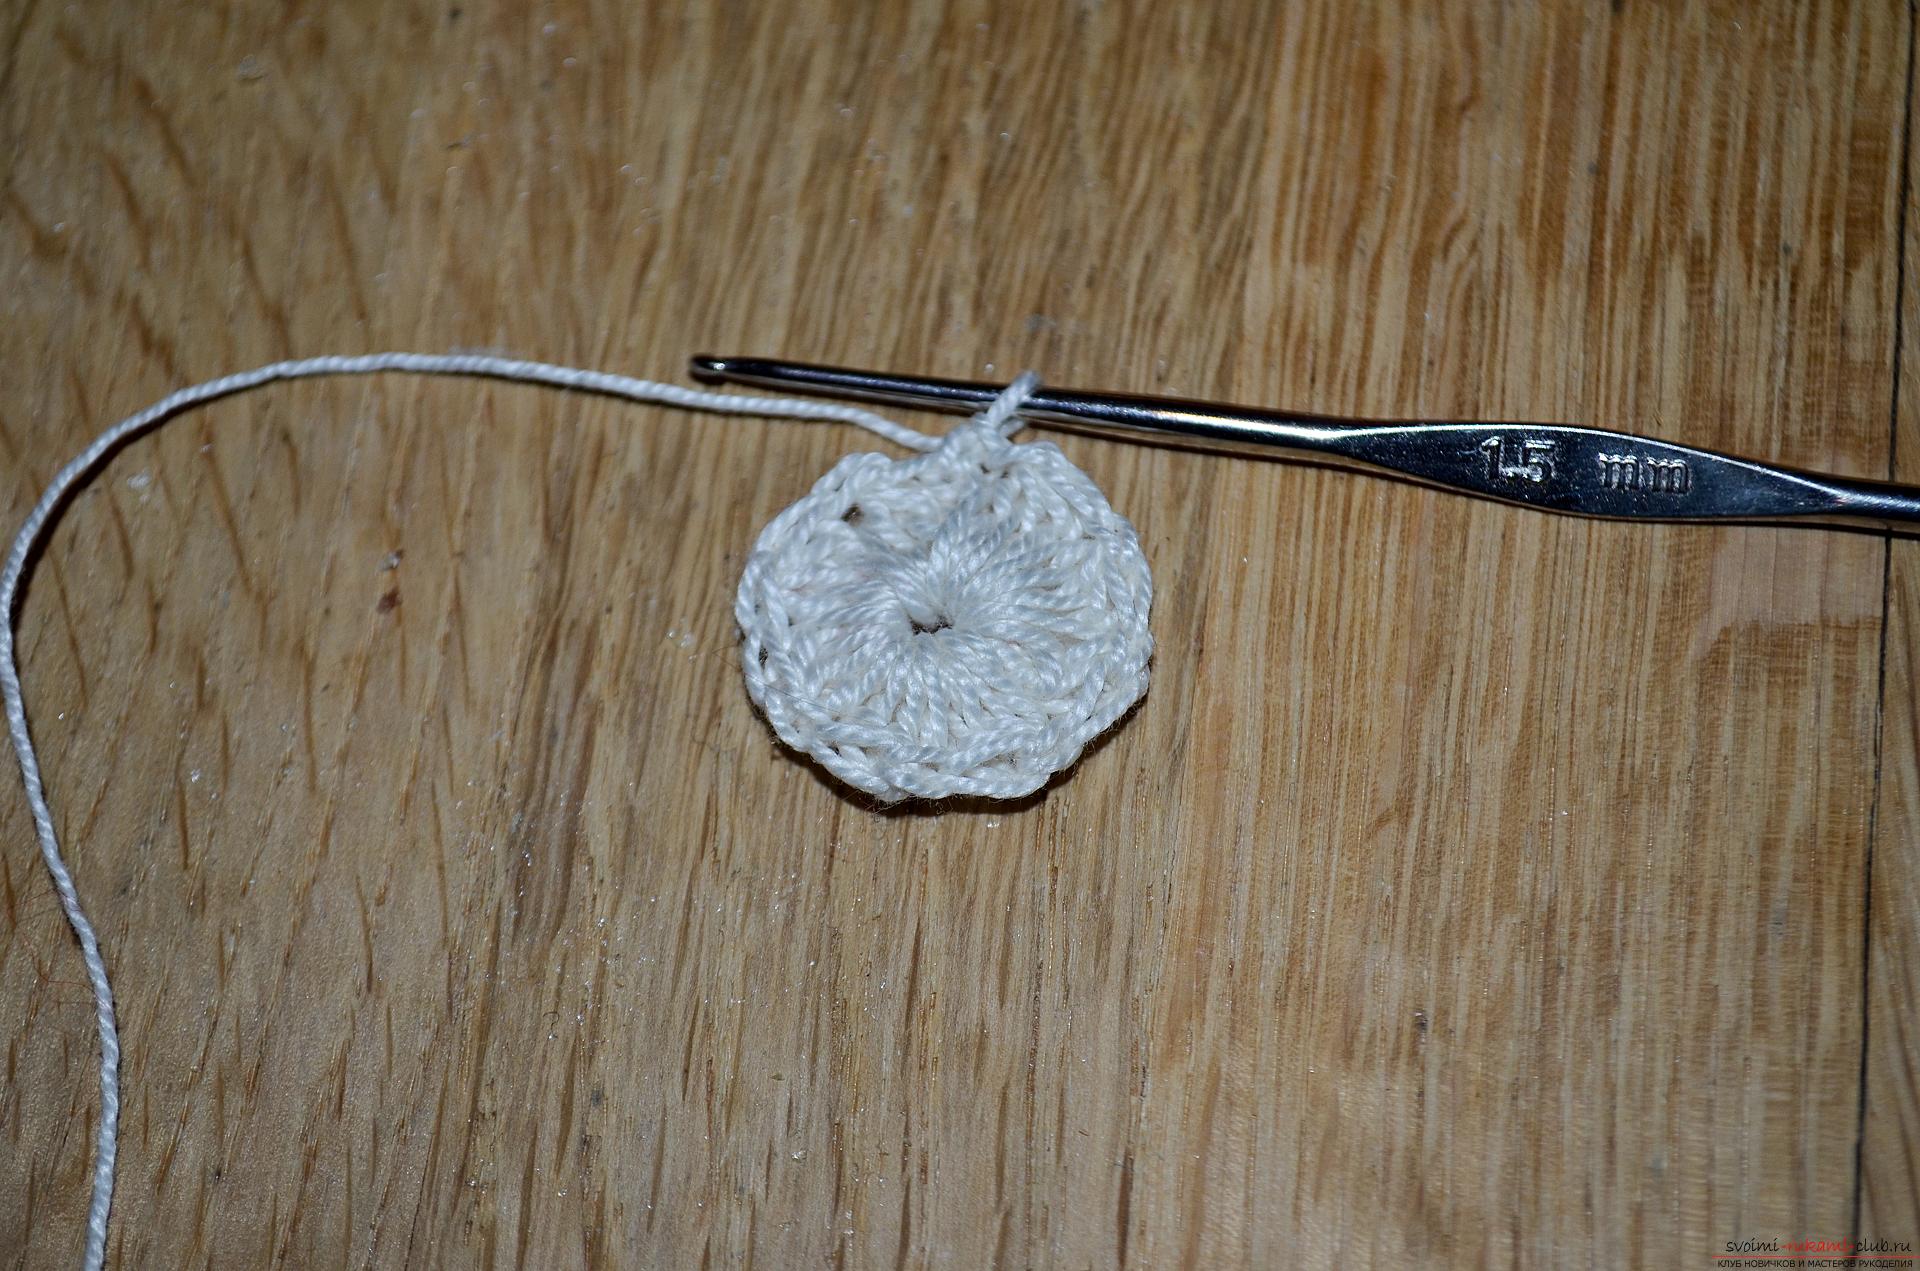 5. Next, from the first two air loops, we untype three air lifting loops, and then two more columns with one overhang.
 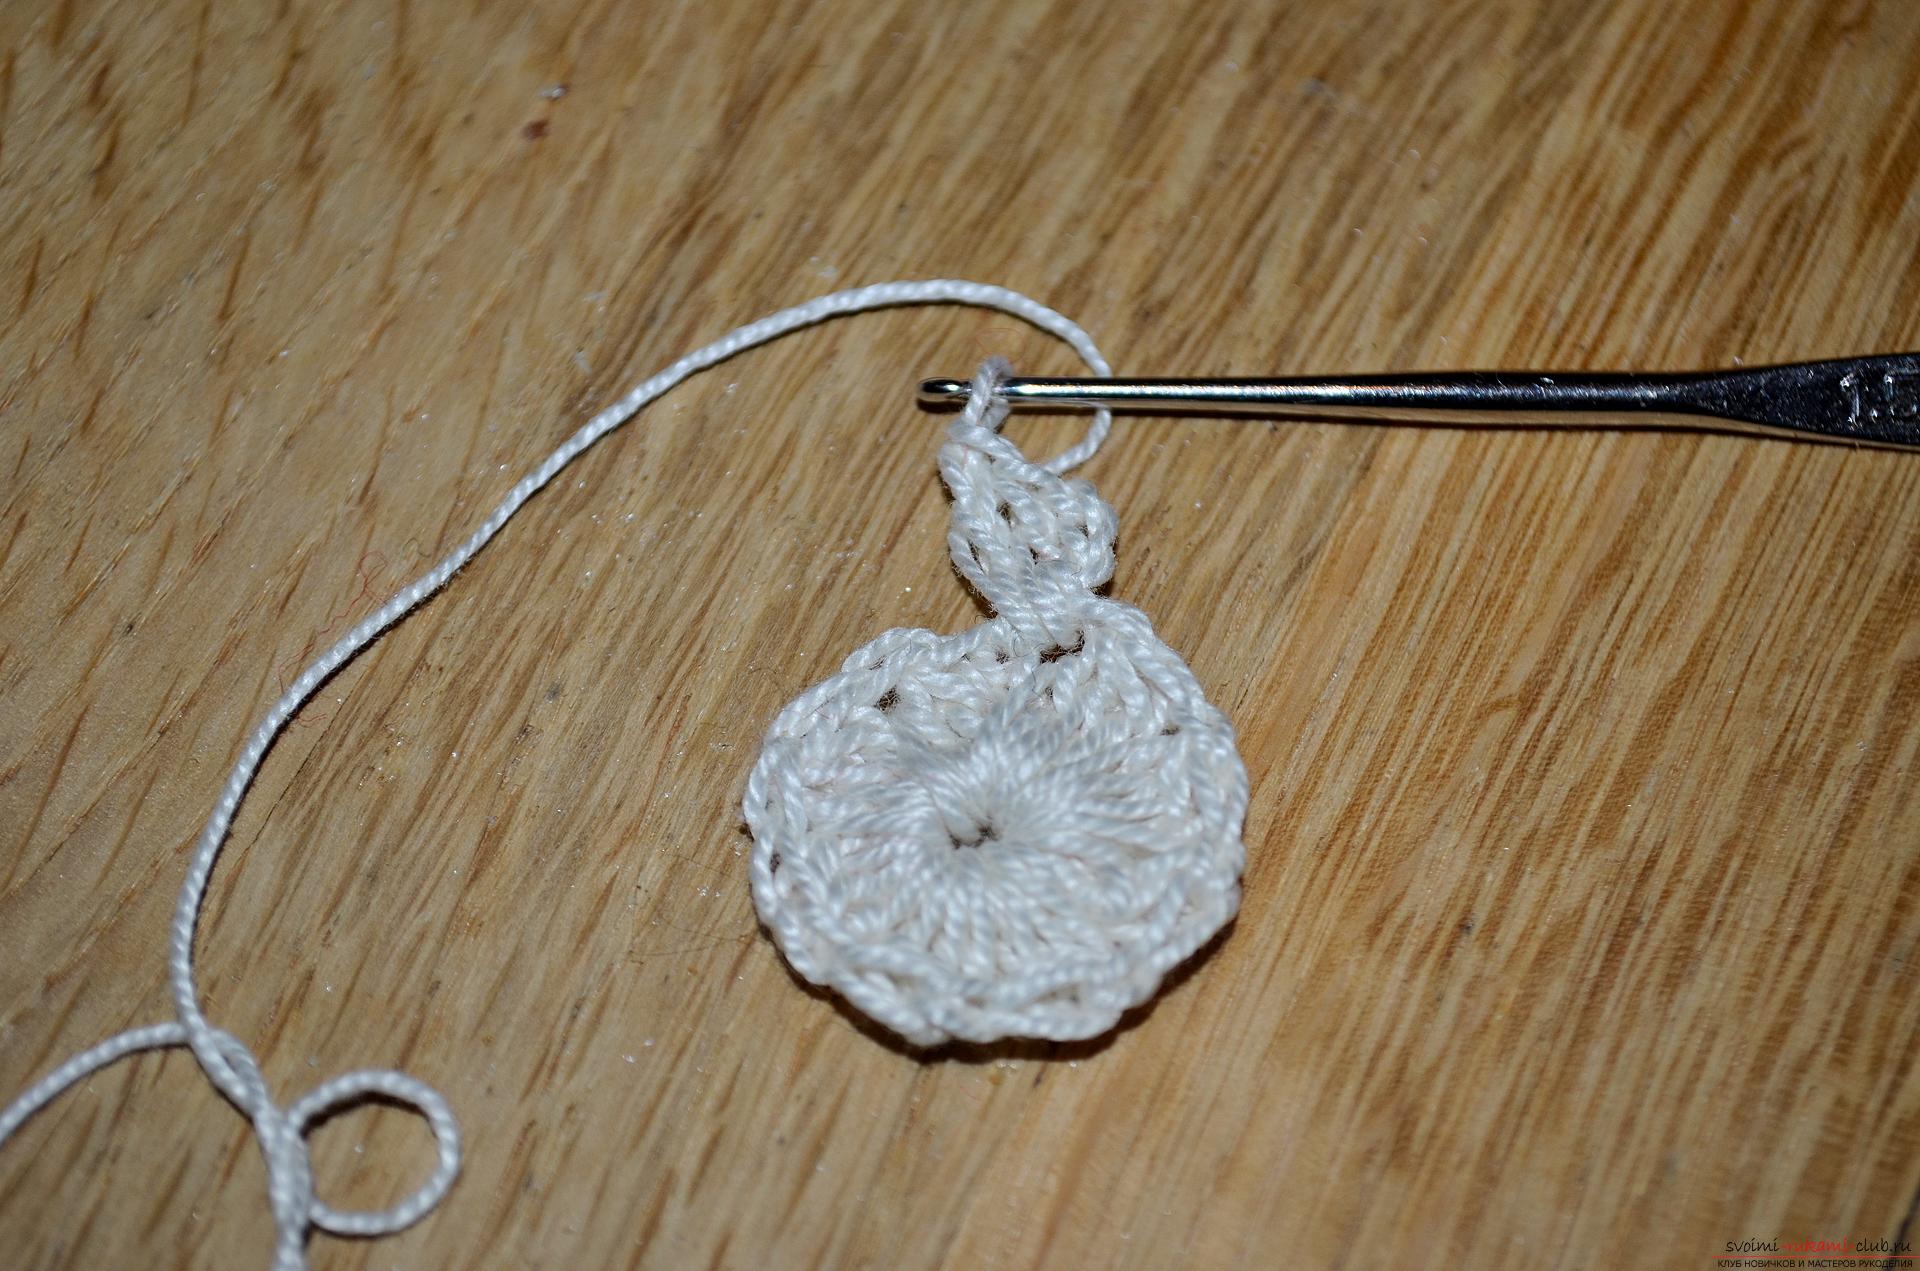 6.Now we sew a chain of two air loops and from the next two air loops of the bottom row begin to form the first corner of the future square motif. To do this, we knit an already familiar petal, consisting of three columns with one crochet, then 2 air loops and one more same petal.
 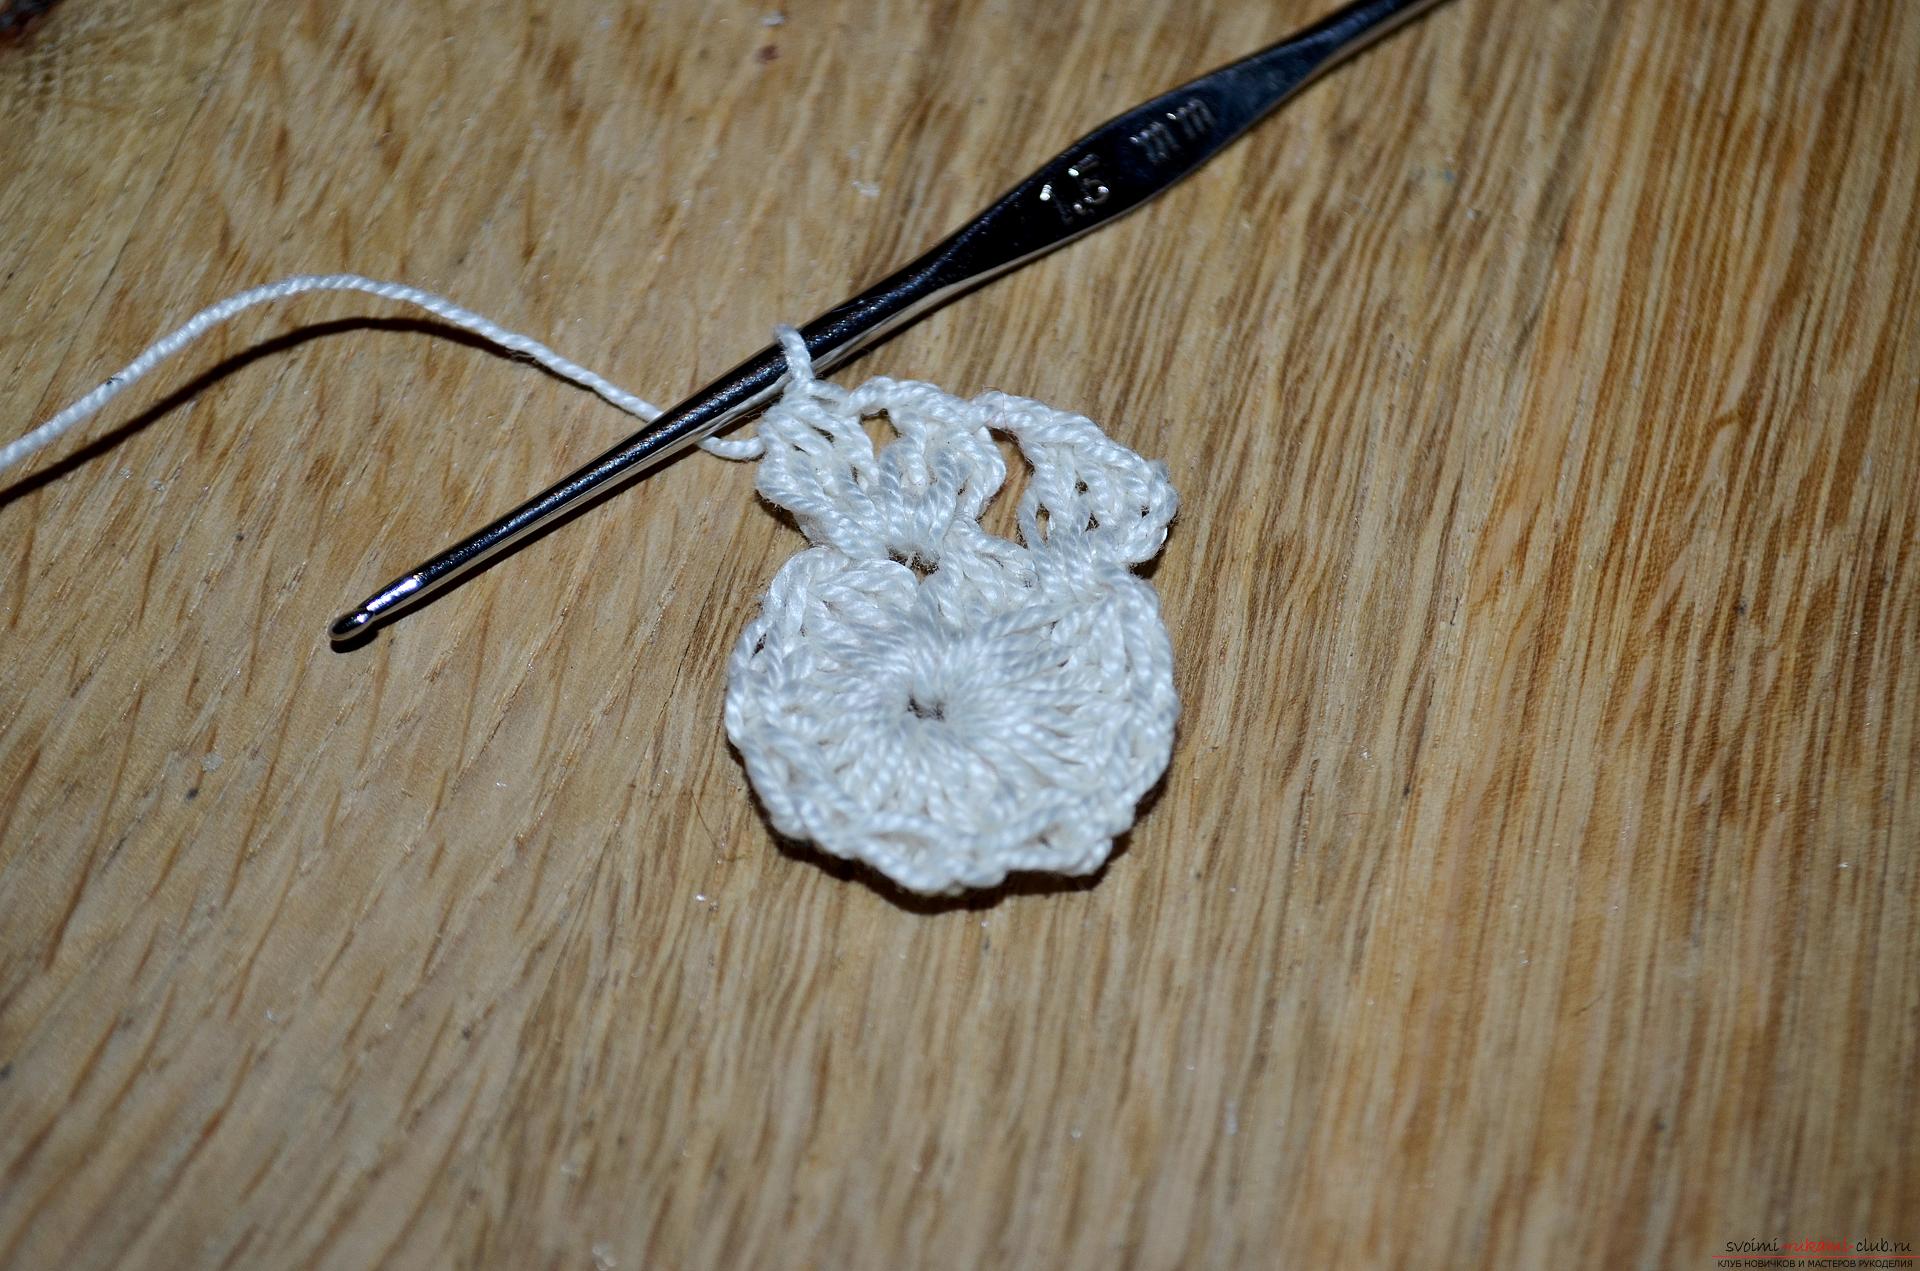 7. Next we knit the whole series in a circle similar to the two previous steps, as a result of which we begin to appear a delicate detail of a square shape.
 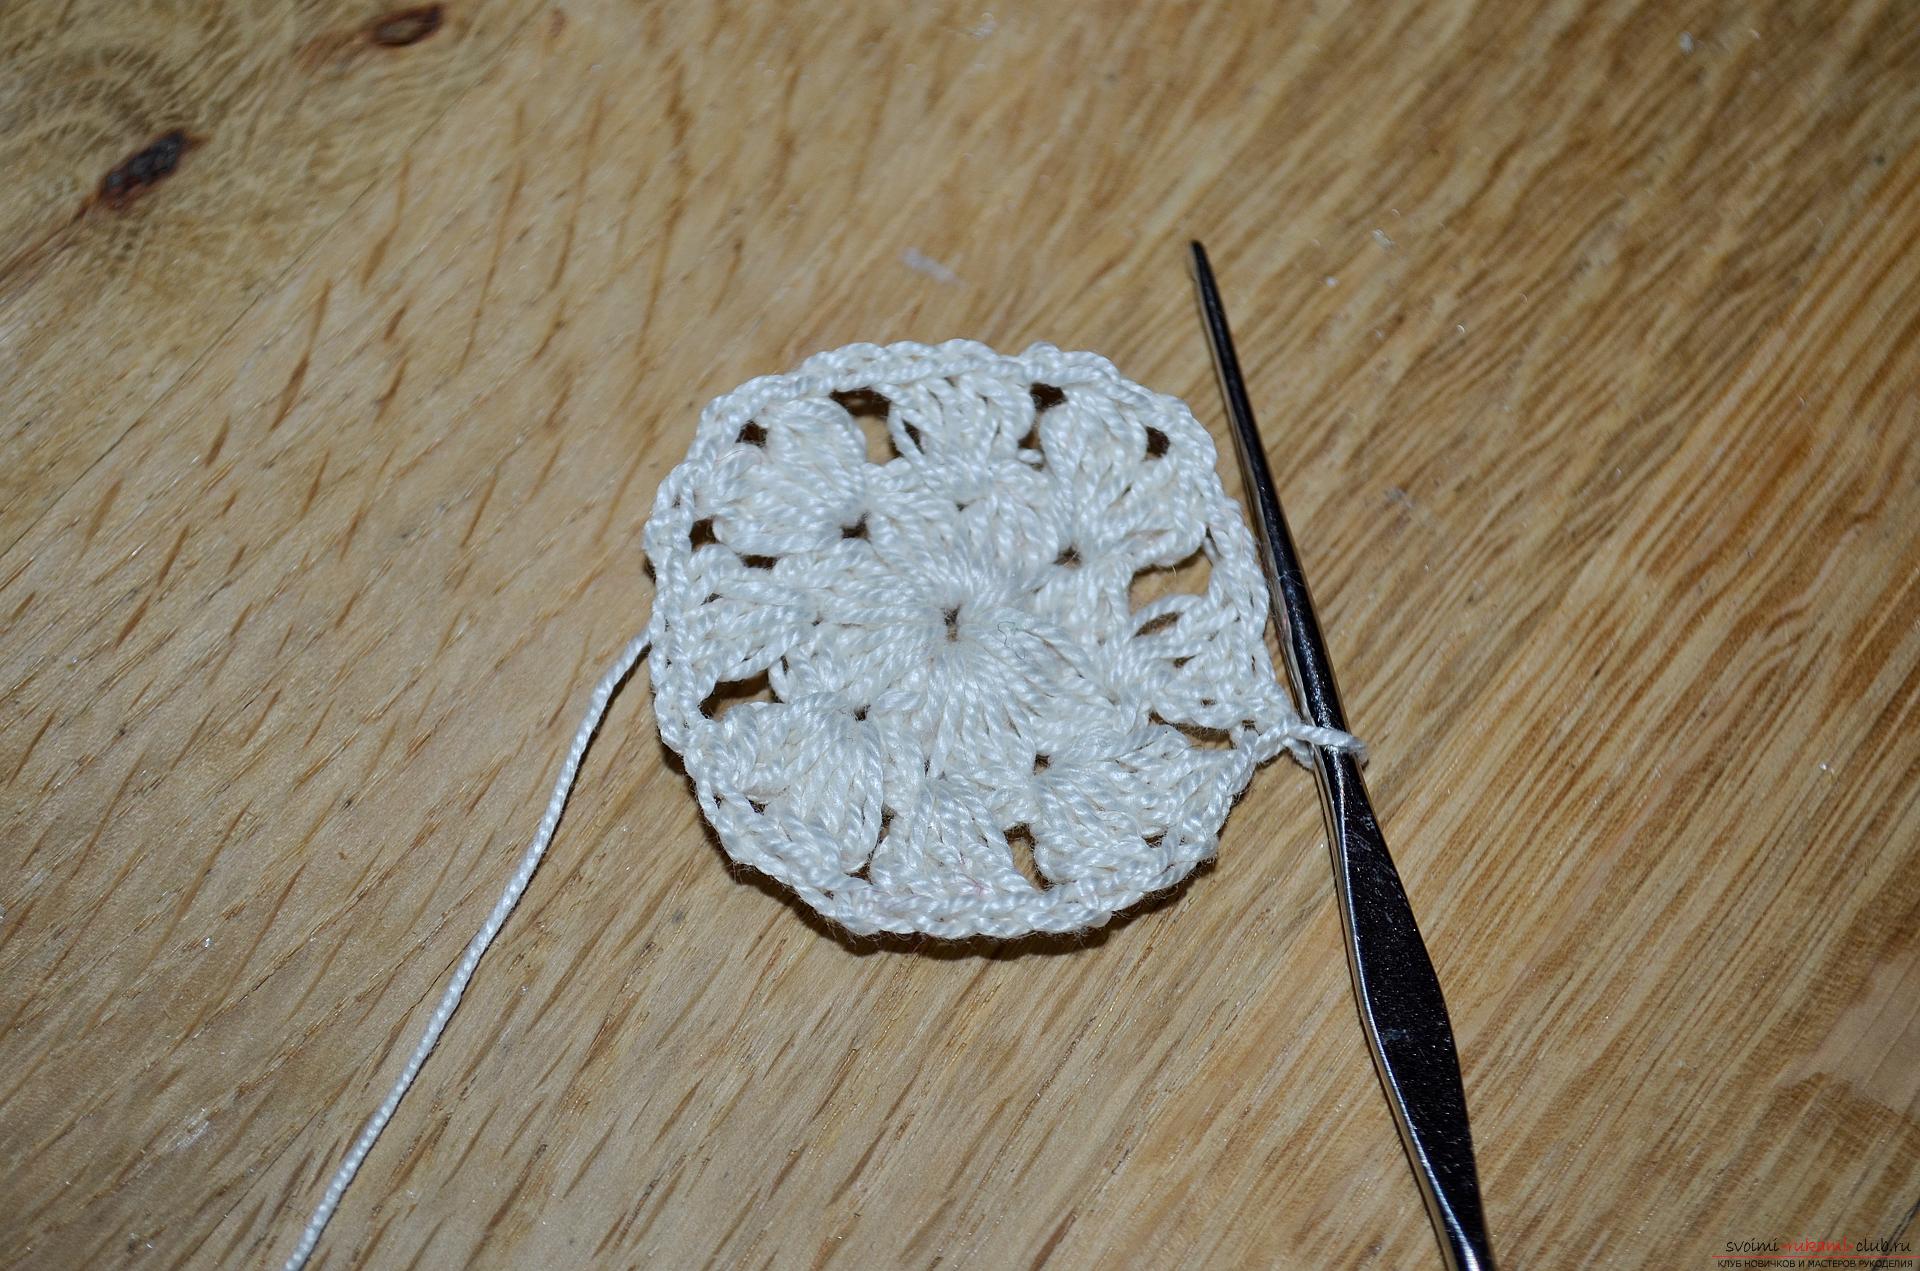 8.The next row is knitted in this way - from each loops of the bottom row, we fasten one row at a time, five times, then we get to the very corner of the square consisting of two air loops and we unfasten them, as in the previous row, two petals with two posts between them .
 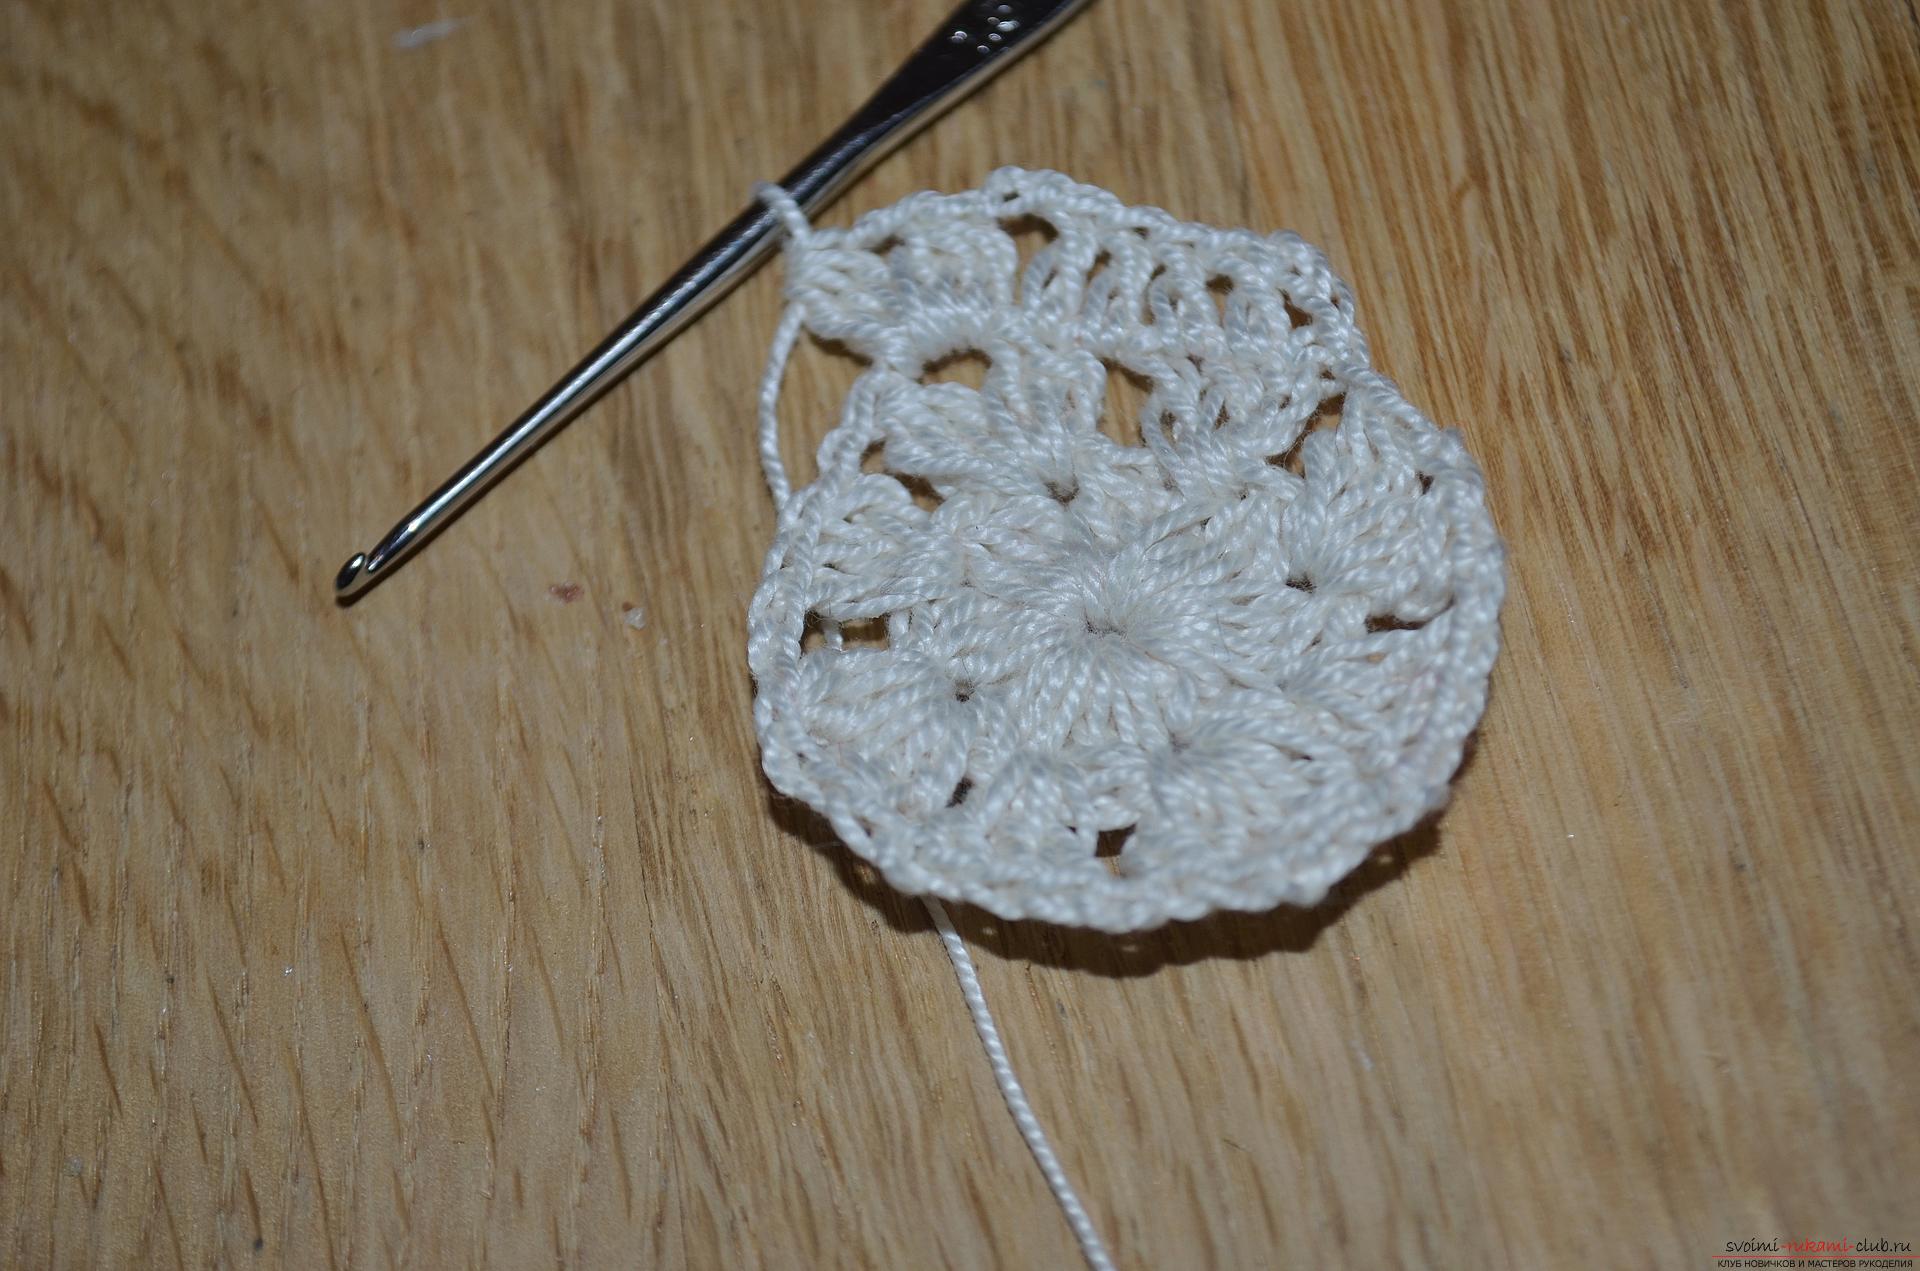 9. We, therefore, twist the whole square around the perimeter, not forgetting to select the corners of the figure.
 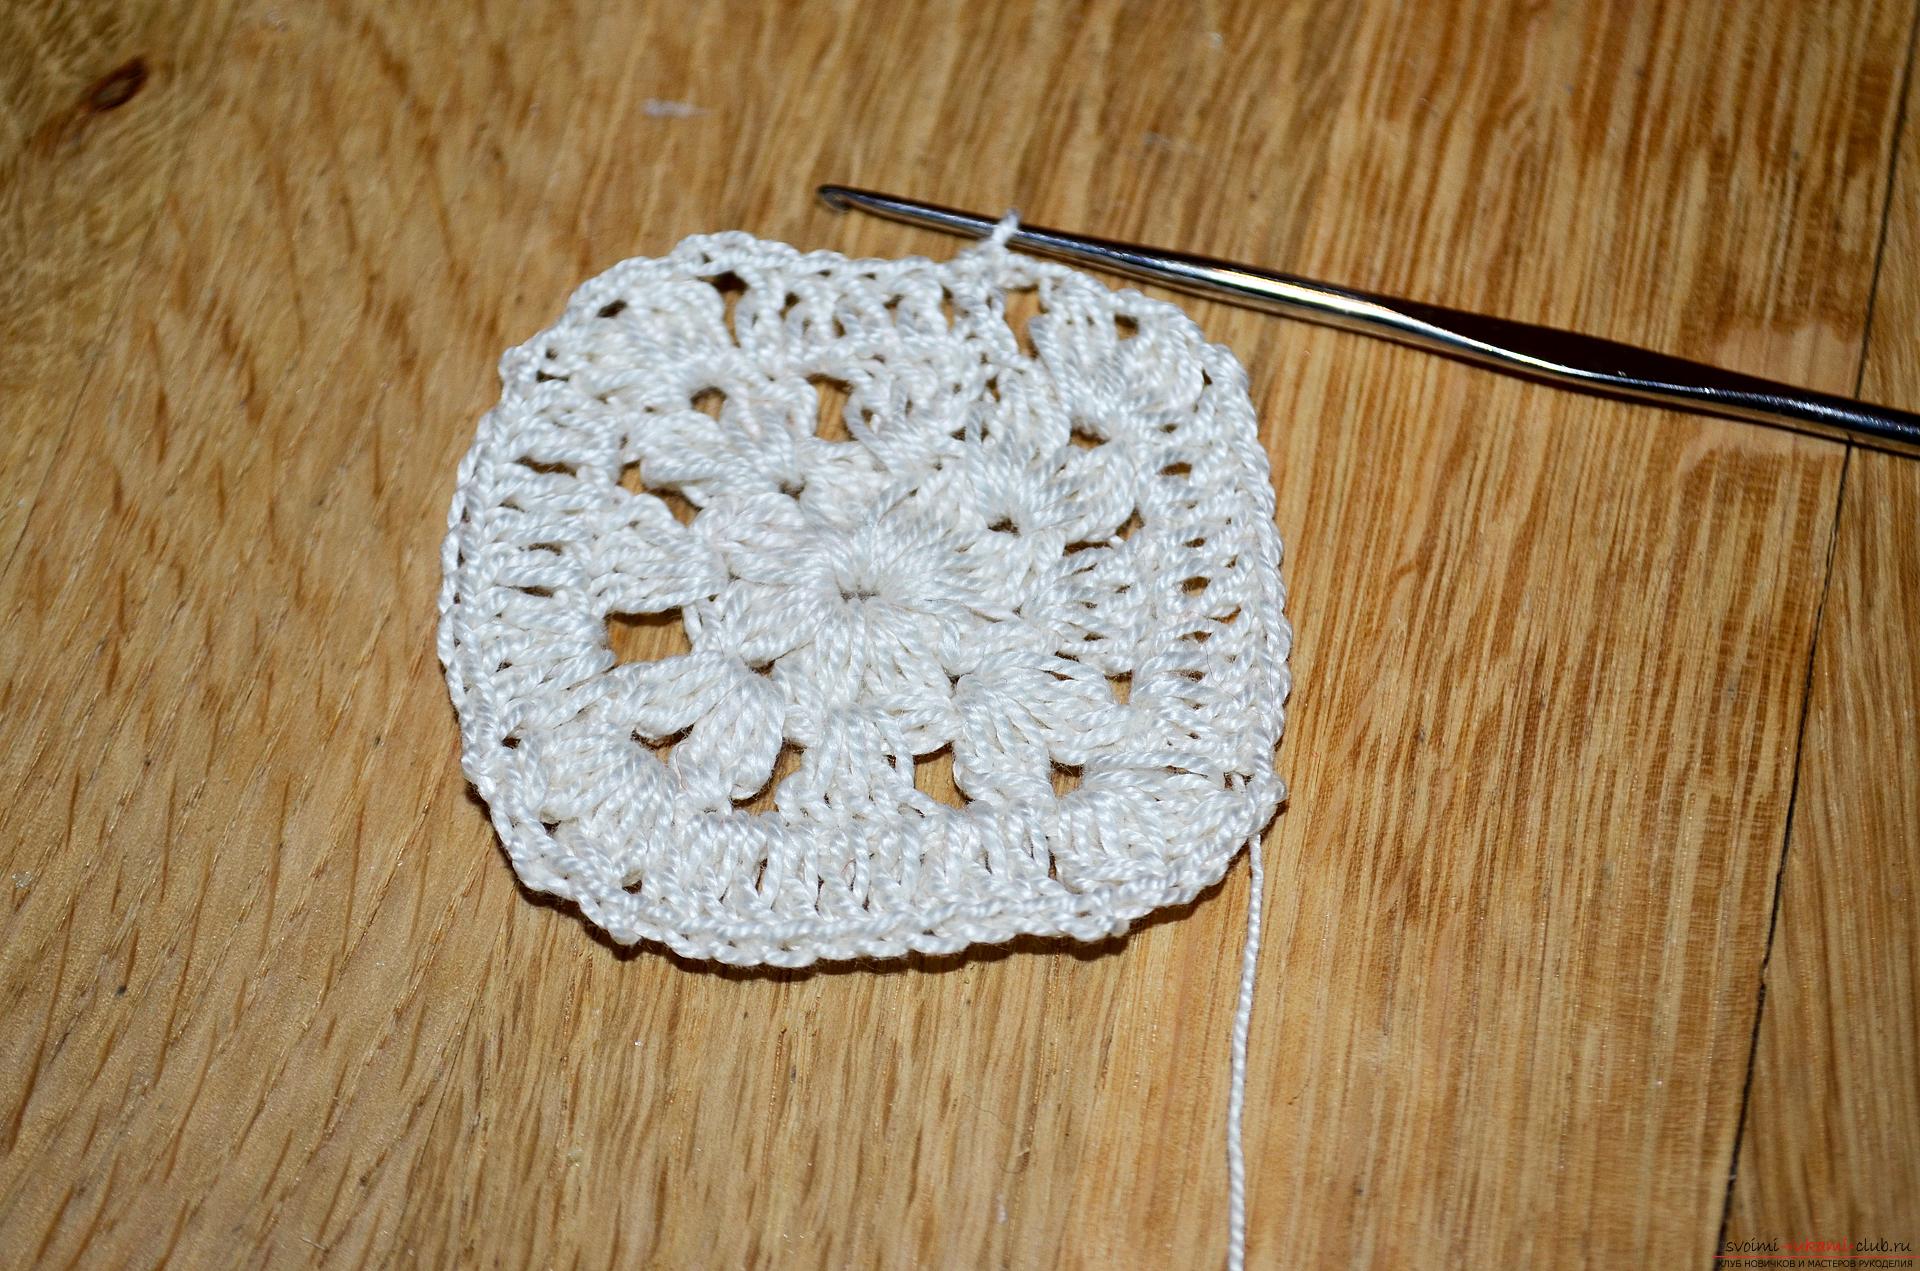 10. The next row is knitted similarly to the previous one, and the number of binding columns with one crochet will increase all the time.
  11. Then we knit another same row, it will be the last in our product. Then fix the thread and trim the excess.
 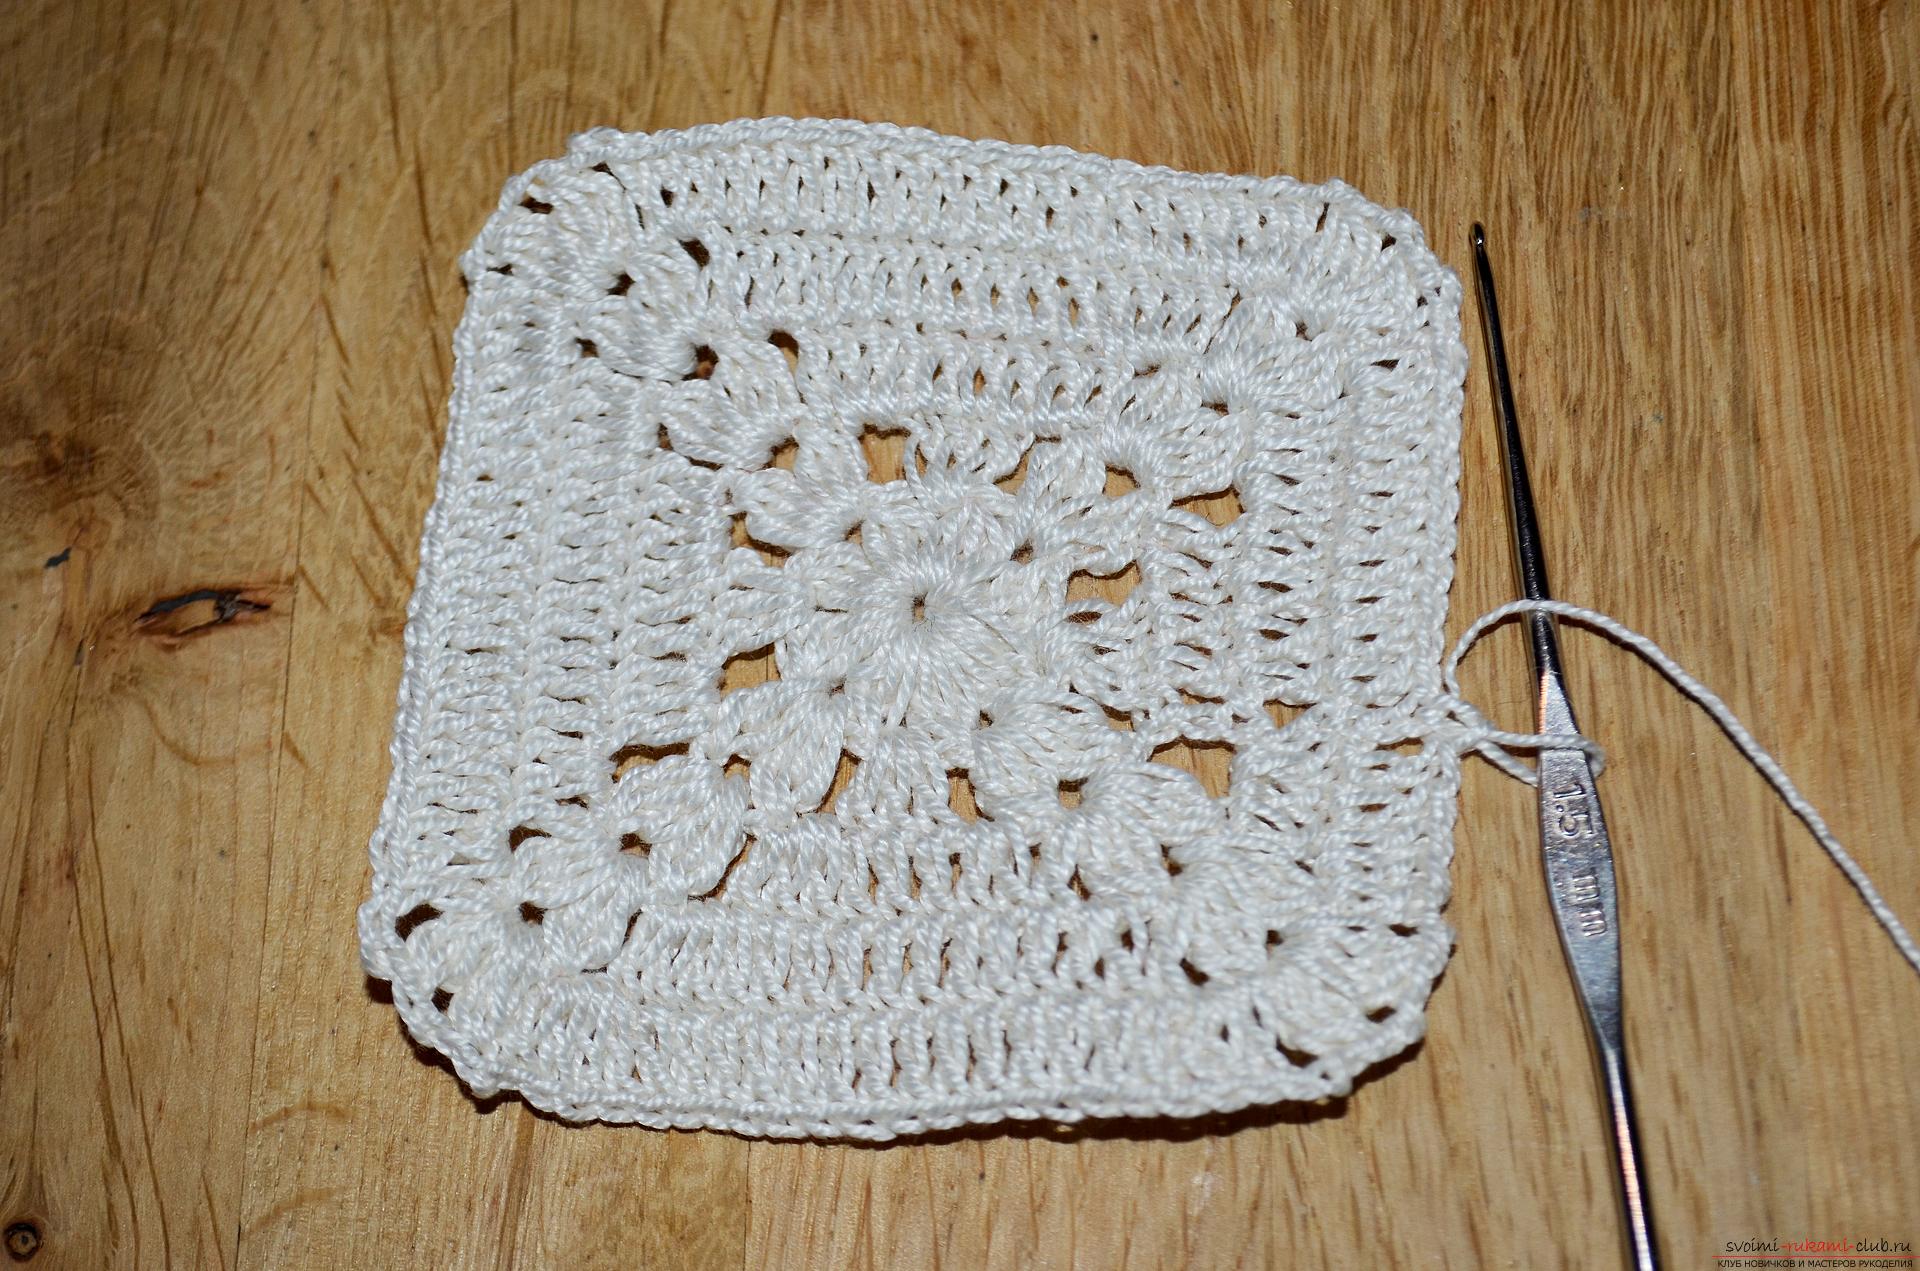 12.Now we need to make a soft pillow base, for this, using a centimeter tape or a standard ruler, remove from our square knitted details of the measurement and transfer them with a simple pencil on the fabric folded upside down. We cut out two identical blanks, which are exactly connected to each other and we trim along the perimeter from three sides with a thread of suitable color, with dense stitches of the suture seam, in the future it will help us to tie a cushion with a crochet.
 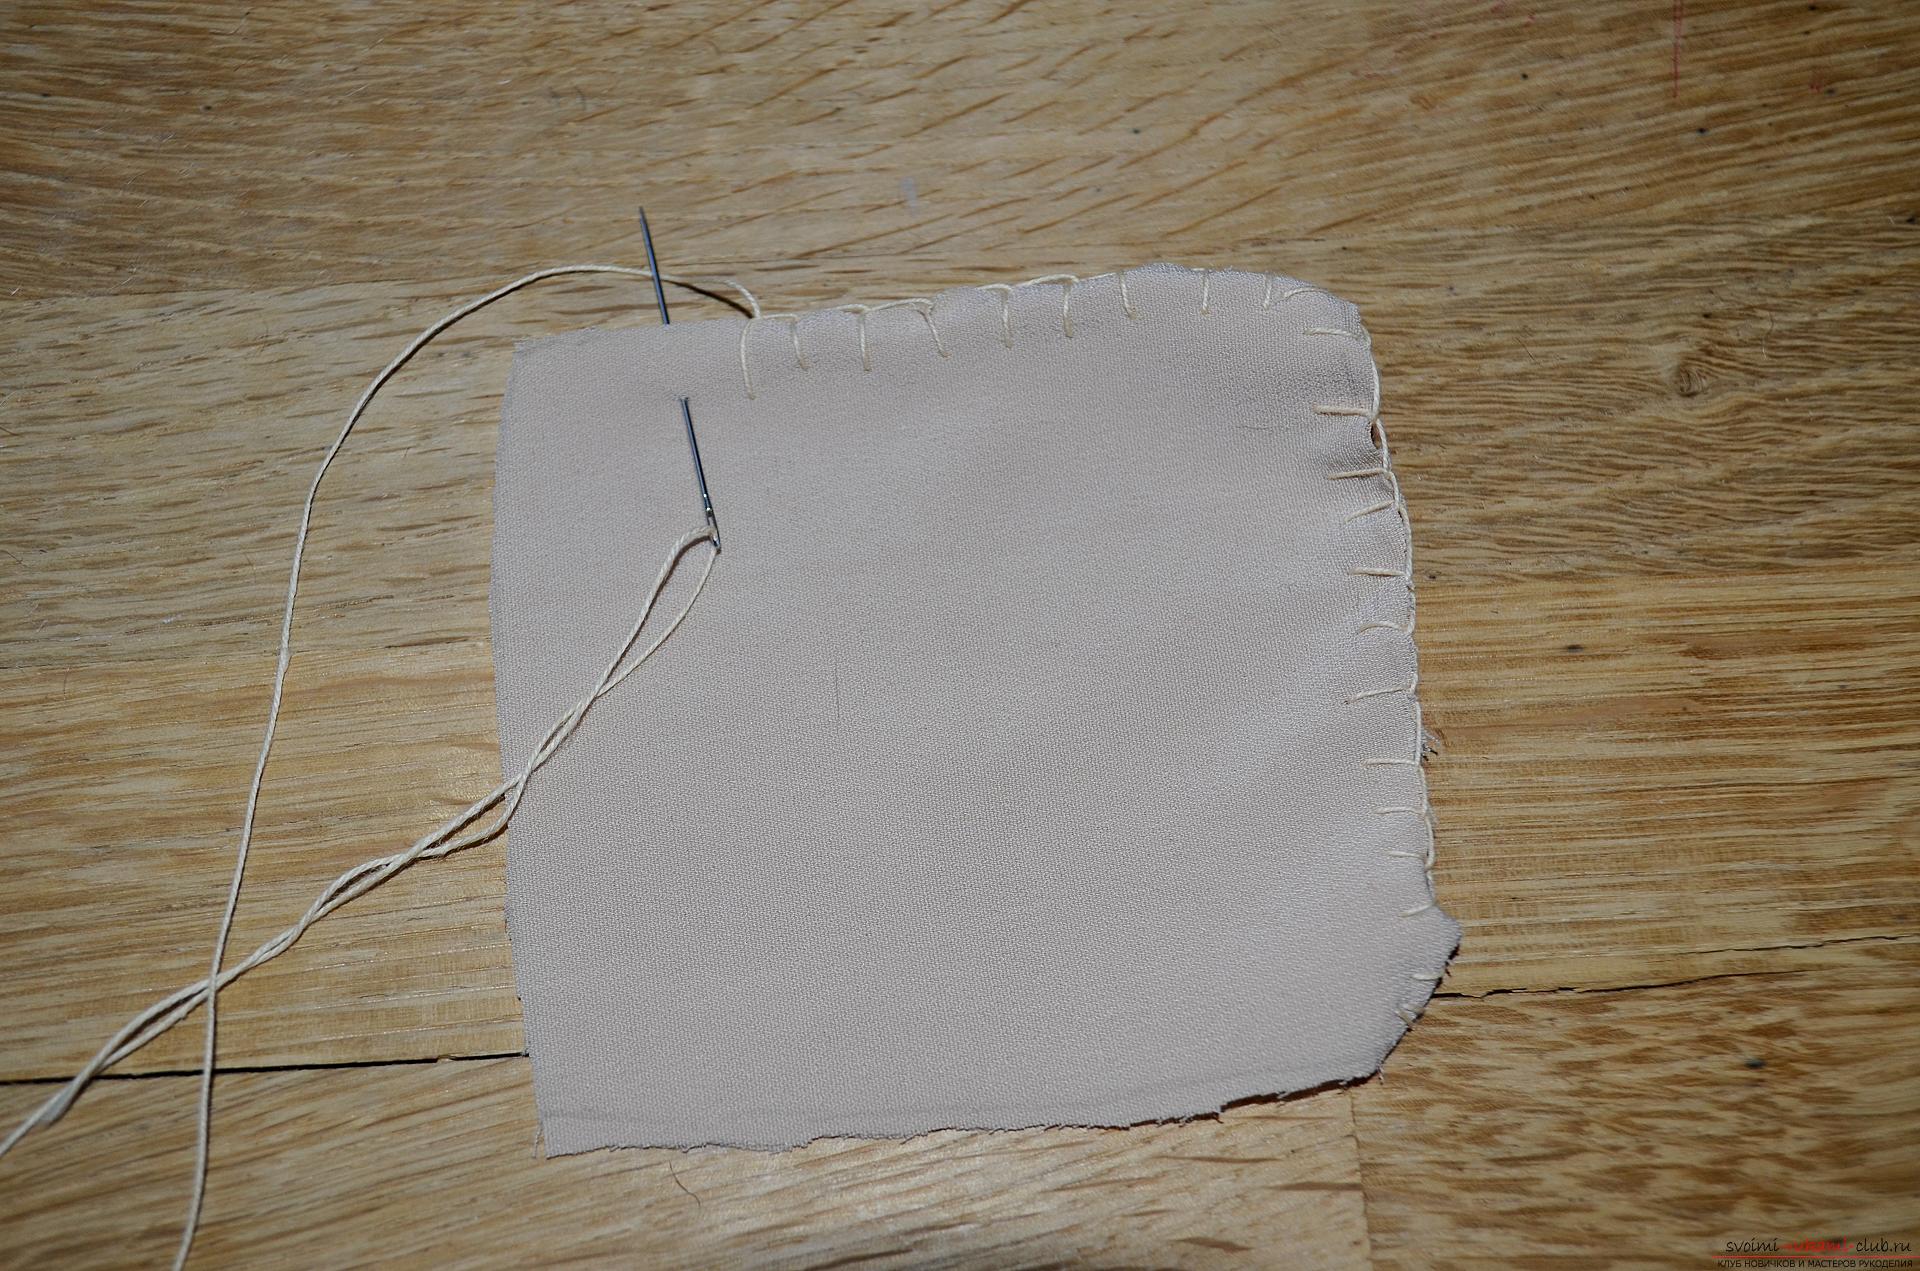 13.Through the fourth non-sewn side we fill the pad with a sintepon, we try to distribute it uniformly and keep the shape well, but it is important that our cushion is not too crowded and does not resemble a barrel.
 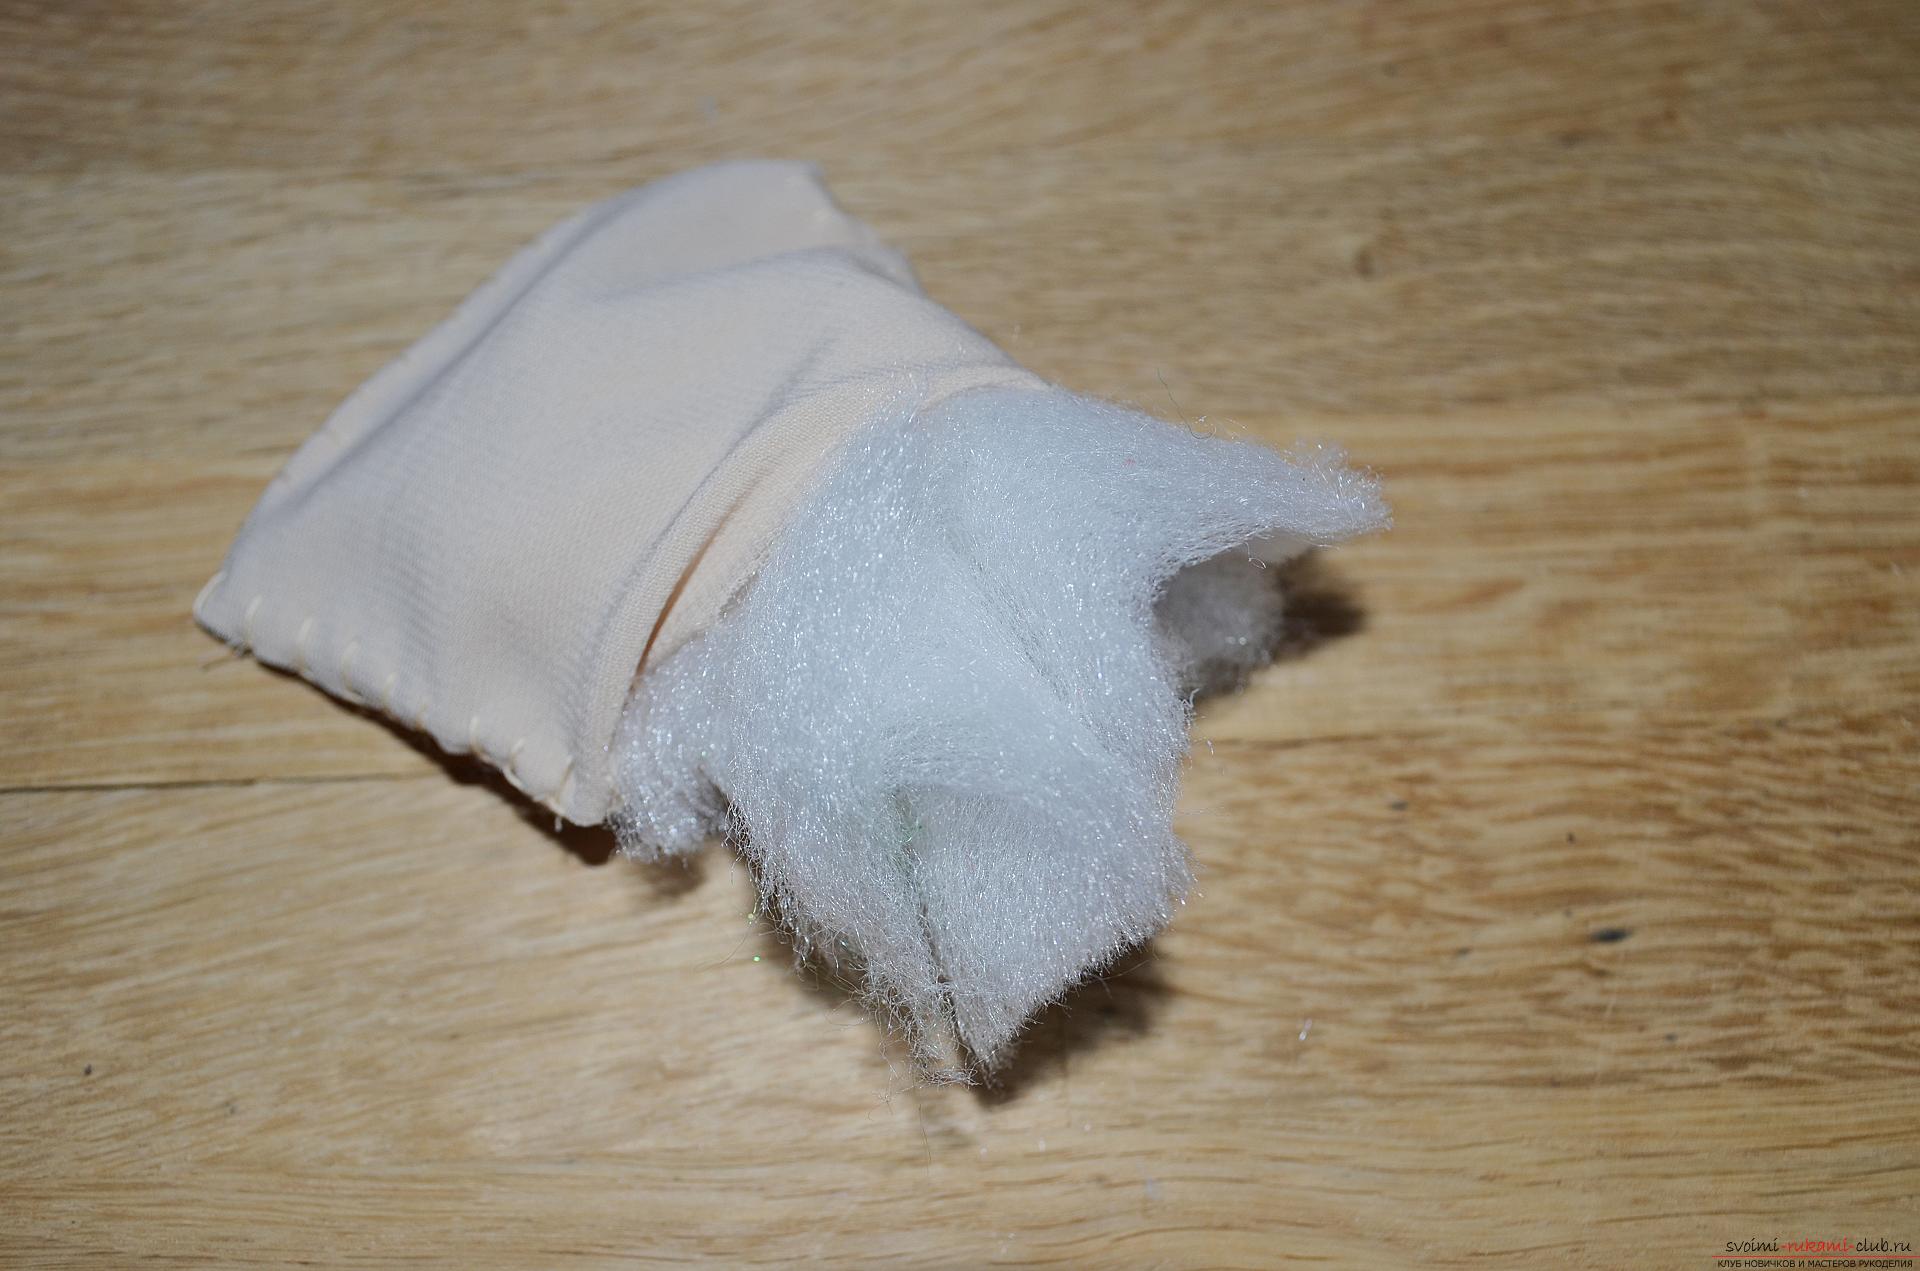 14. Sew the rest of the side with the suture seam and get a cushion like this.
 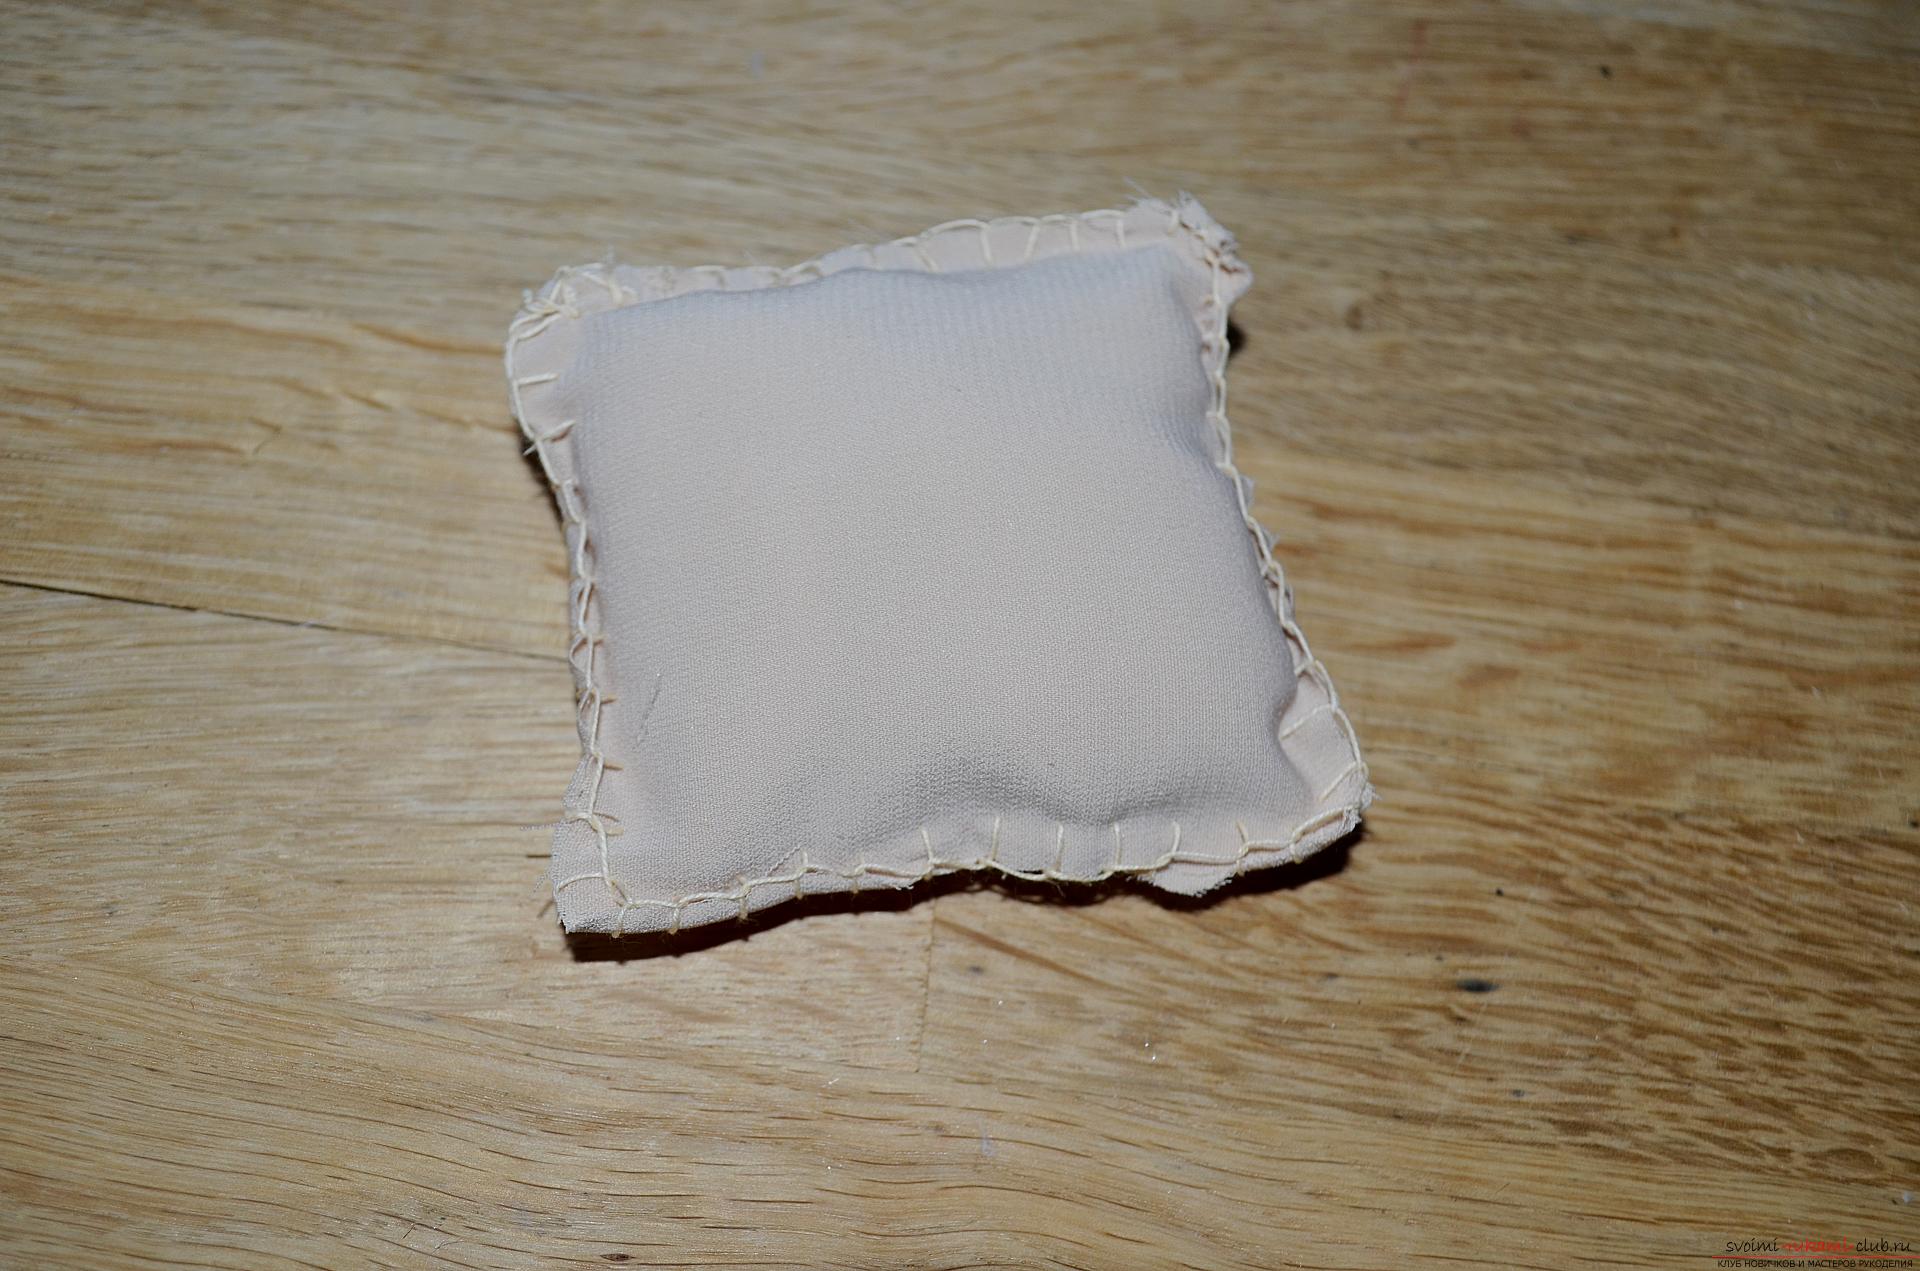 15.Next, we put a knitted piece on top of the pillow and use both a hook and a thread to connect them both, tying along the perimeter with one row of columns without a crochet, while grasping together the extreme loops of the knitted motif and the stitching of the suture seam.
 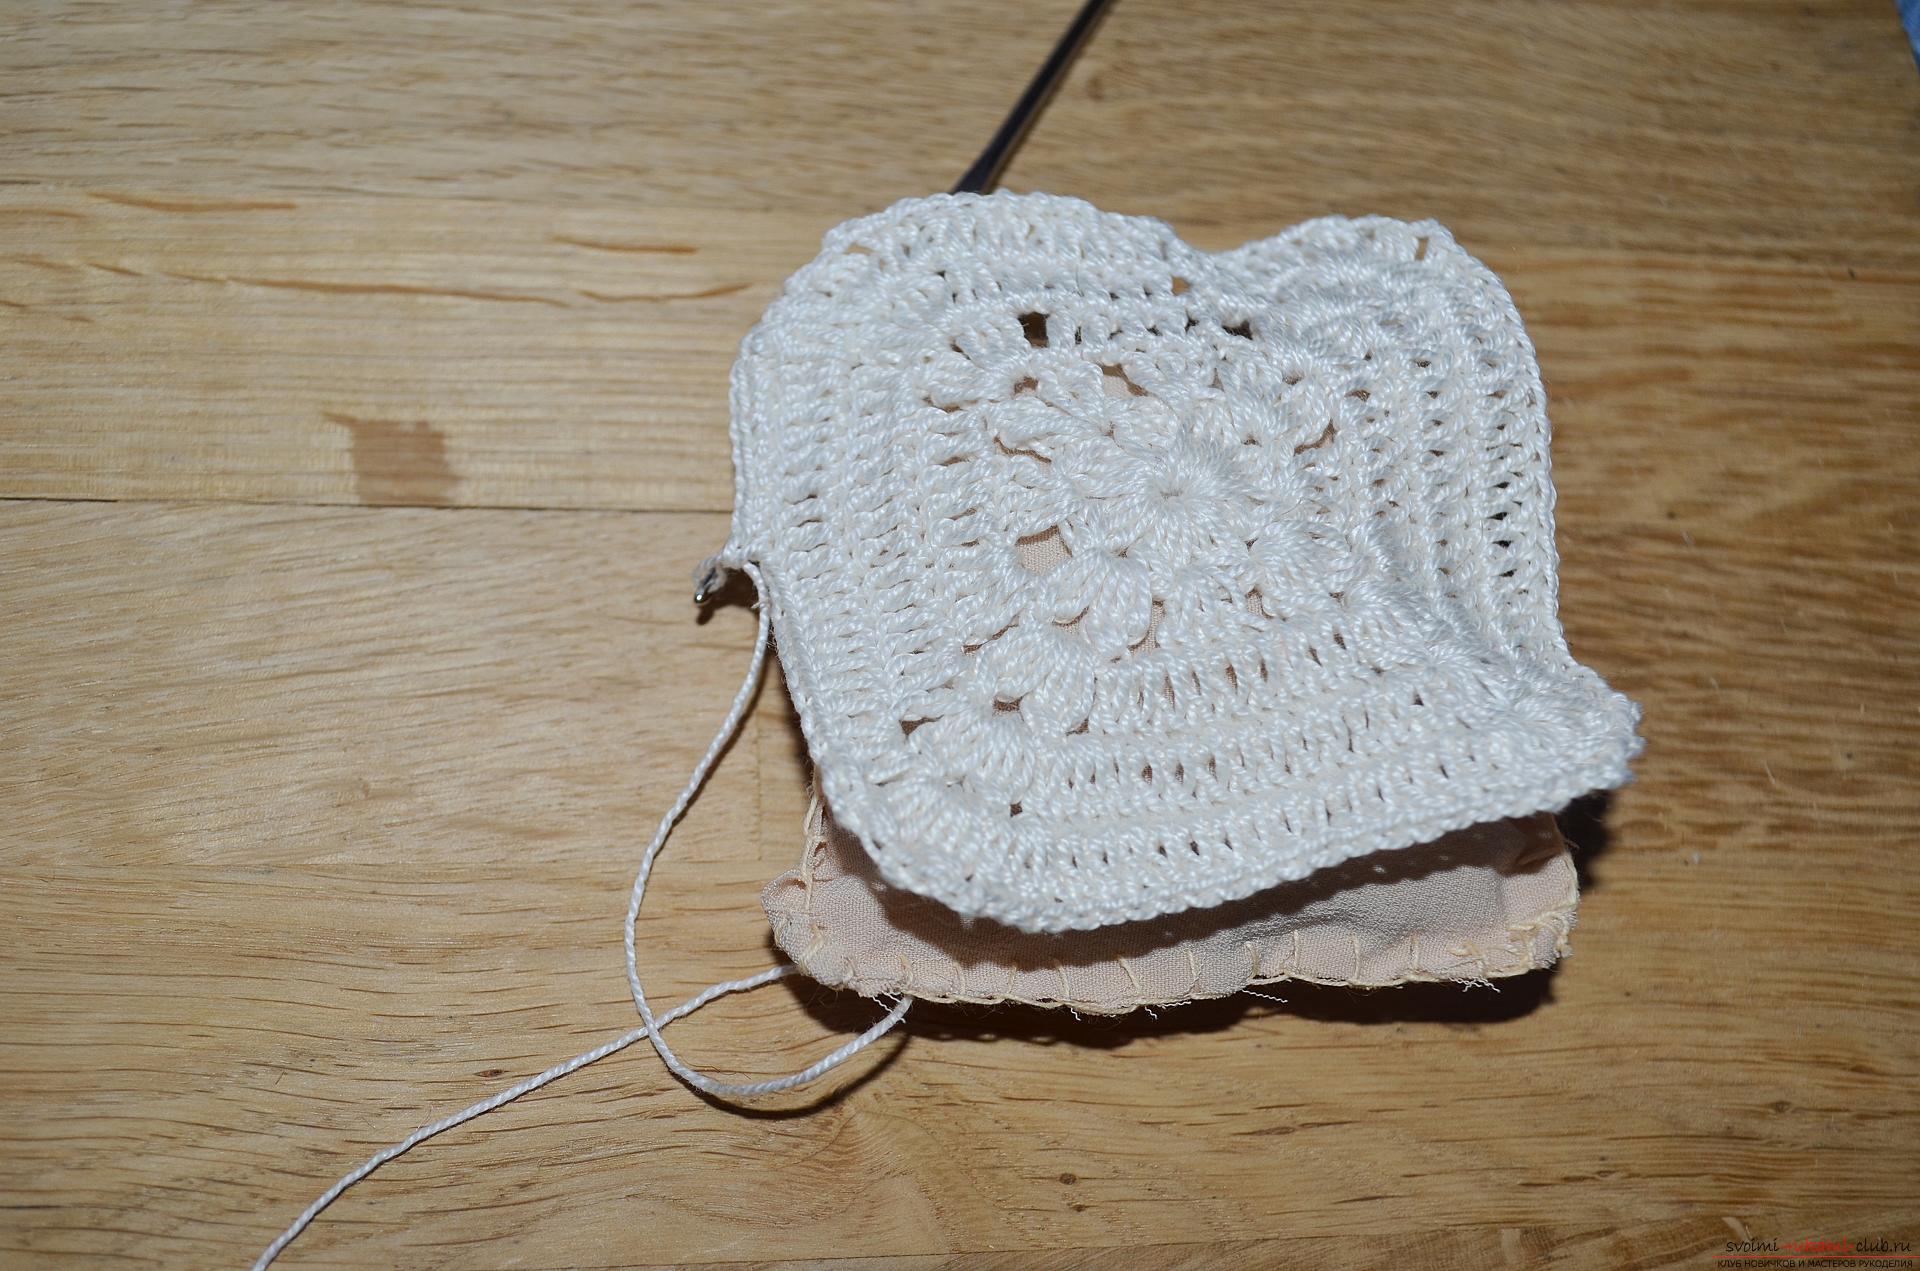 16. Next series we need to tie all four sides of the arches. Each of which consists of four air loops.
  17.Then we tie each arched wavy, according to the following scheme - we unbind one column without a crochet, two sticks with one crochet, one column with two crochets, two sticks with one cuff and again a column without a crochet.
  18. Here such pillow turns out.
 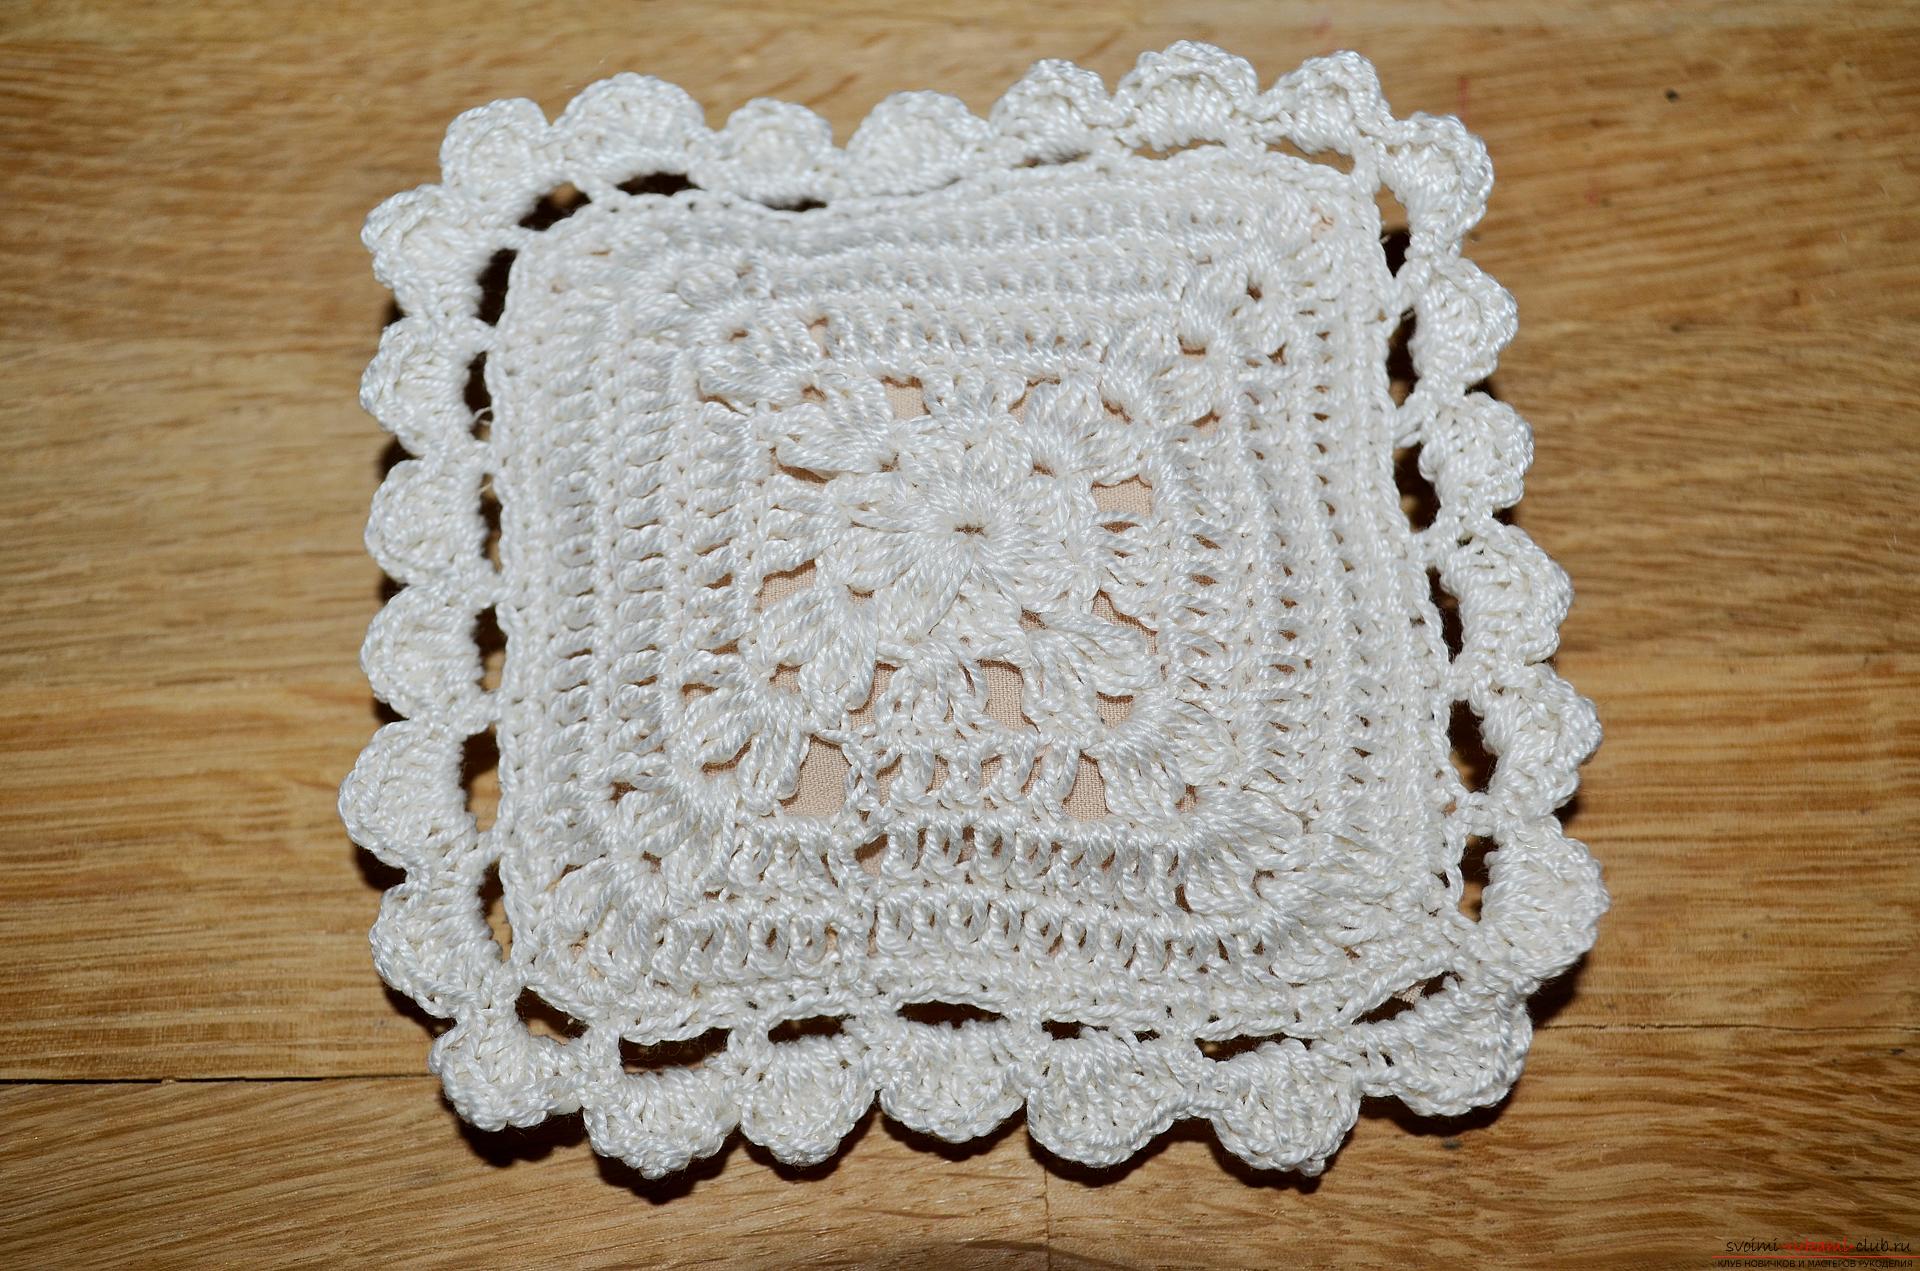 19. There are a few small touches left, namely a little stylish decor, for this we take the satin ribbon of a pleasant chocolate shade and stretch it between the aperture holes, along two adjacent sides, forming on the edges small neat volumetric bows.
  20. Now our crocheted cushion is crocheted - a needle bed, completely ready. You can safely use it for the intended purpose.
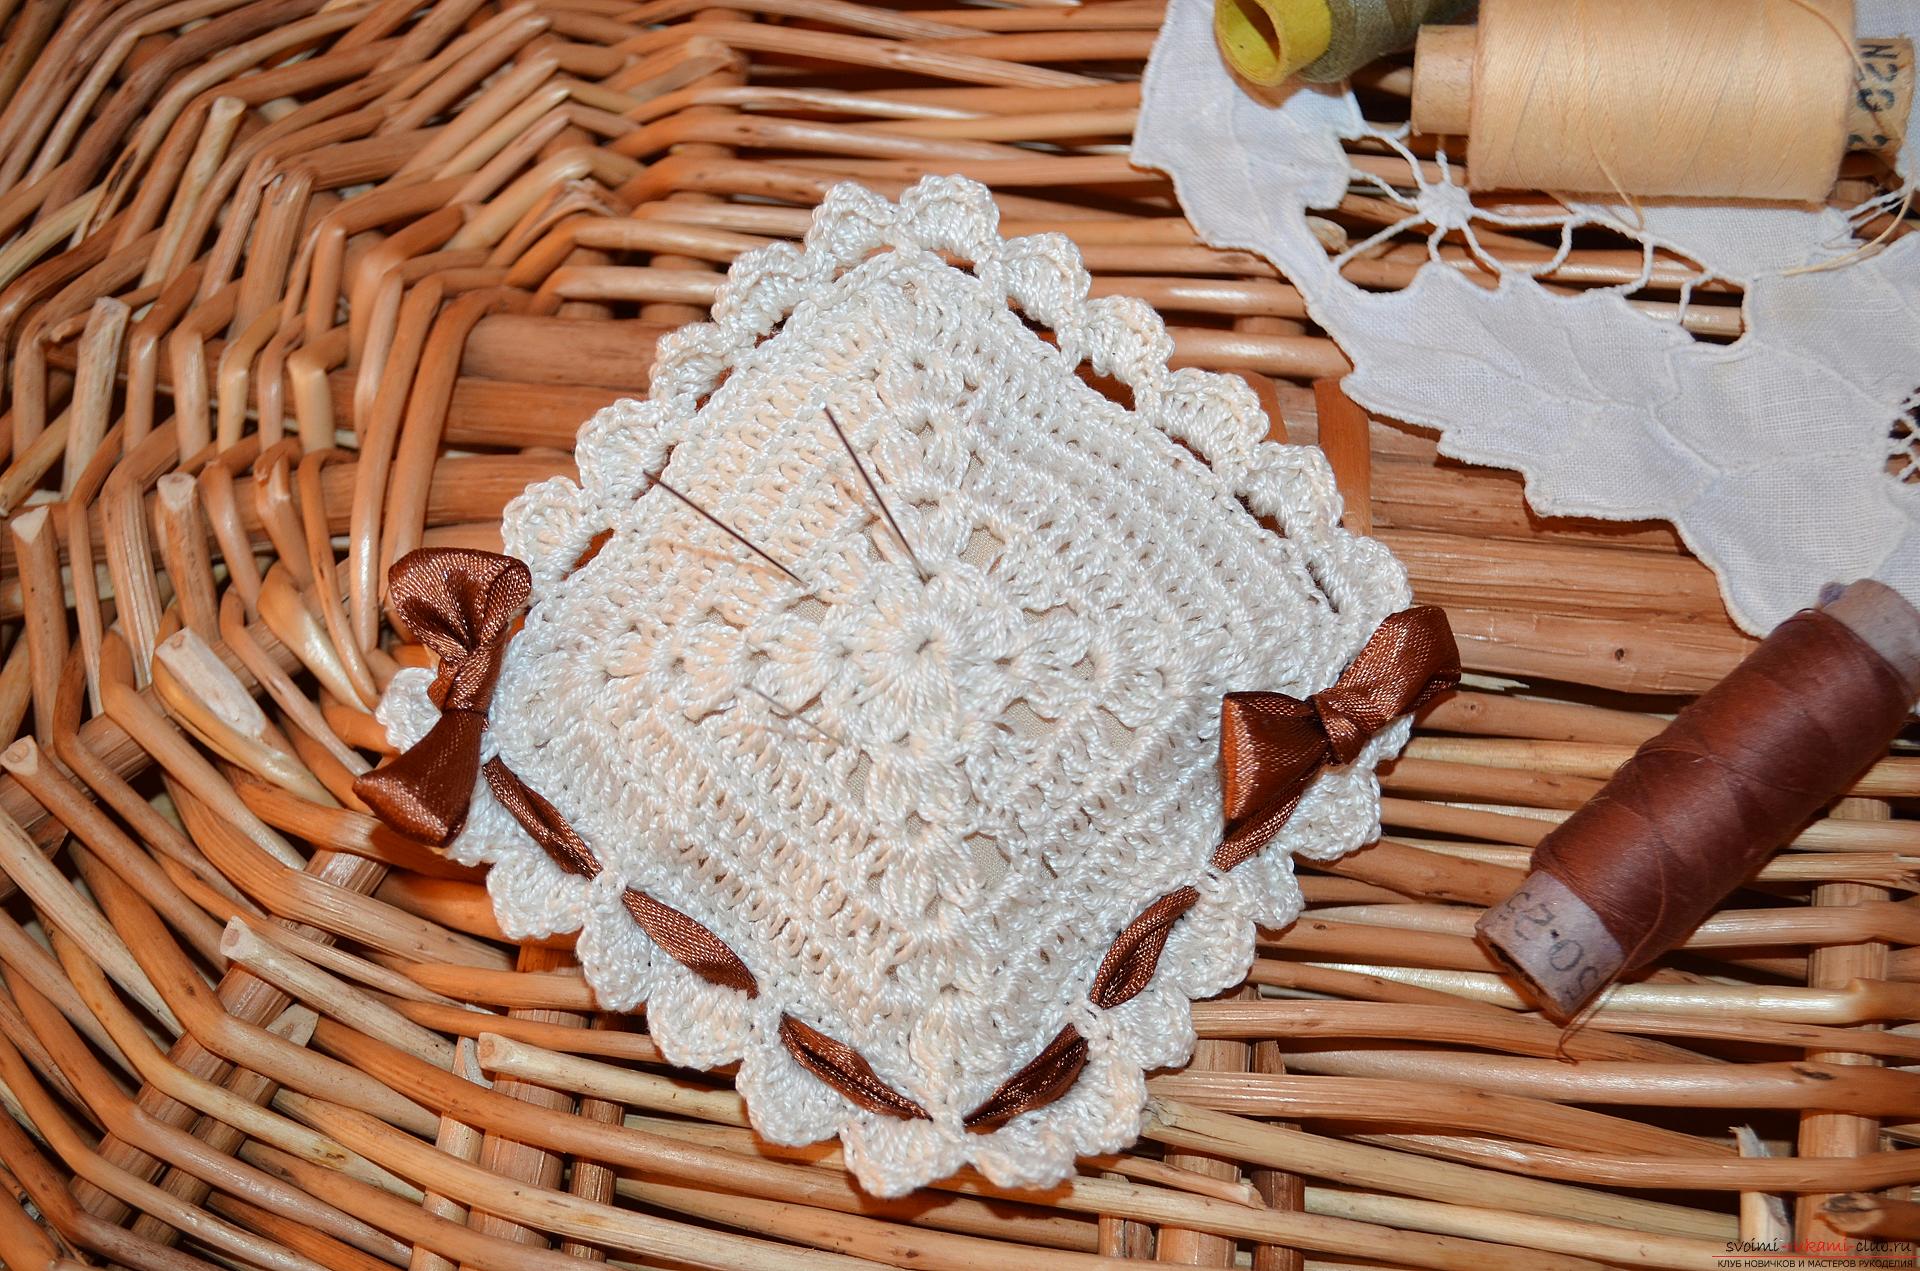
Comments
Related posts:
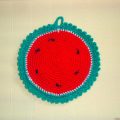 Crochet crochet tutorial for hot "Juicy Watermelon" with recommendations and step-by-step photos
 A crochet lesson for a cute lily flower with step-by-step recommendations, a description of knitting techniques and photos
 How to crochet the original hair clip? Crochet crochet lesson with detailed recommendations and photo
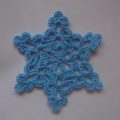 How to tie a snowflake with a crochet for the New Year's decor of the interior? A crochet lesson on the openwork snowflake with detailed recommendations and step-by-step photos
 A crochet lesson for a cute monkey - a symbol of 2016 with a detailed description of the stages of work, a list of materials and step-by-step photos