
Lesson on making hairpins from blue ribbons in Kansas technique with step-by-step photos and video instruction
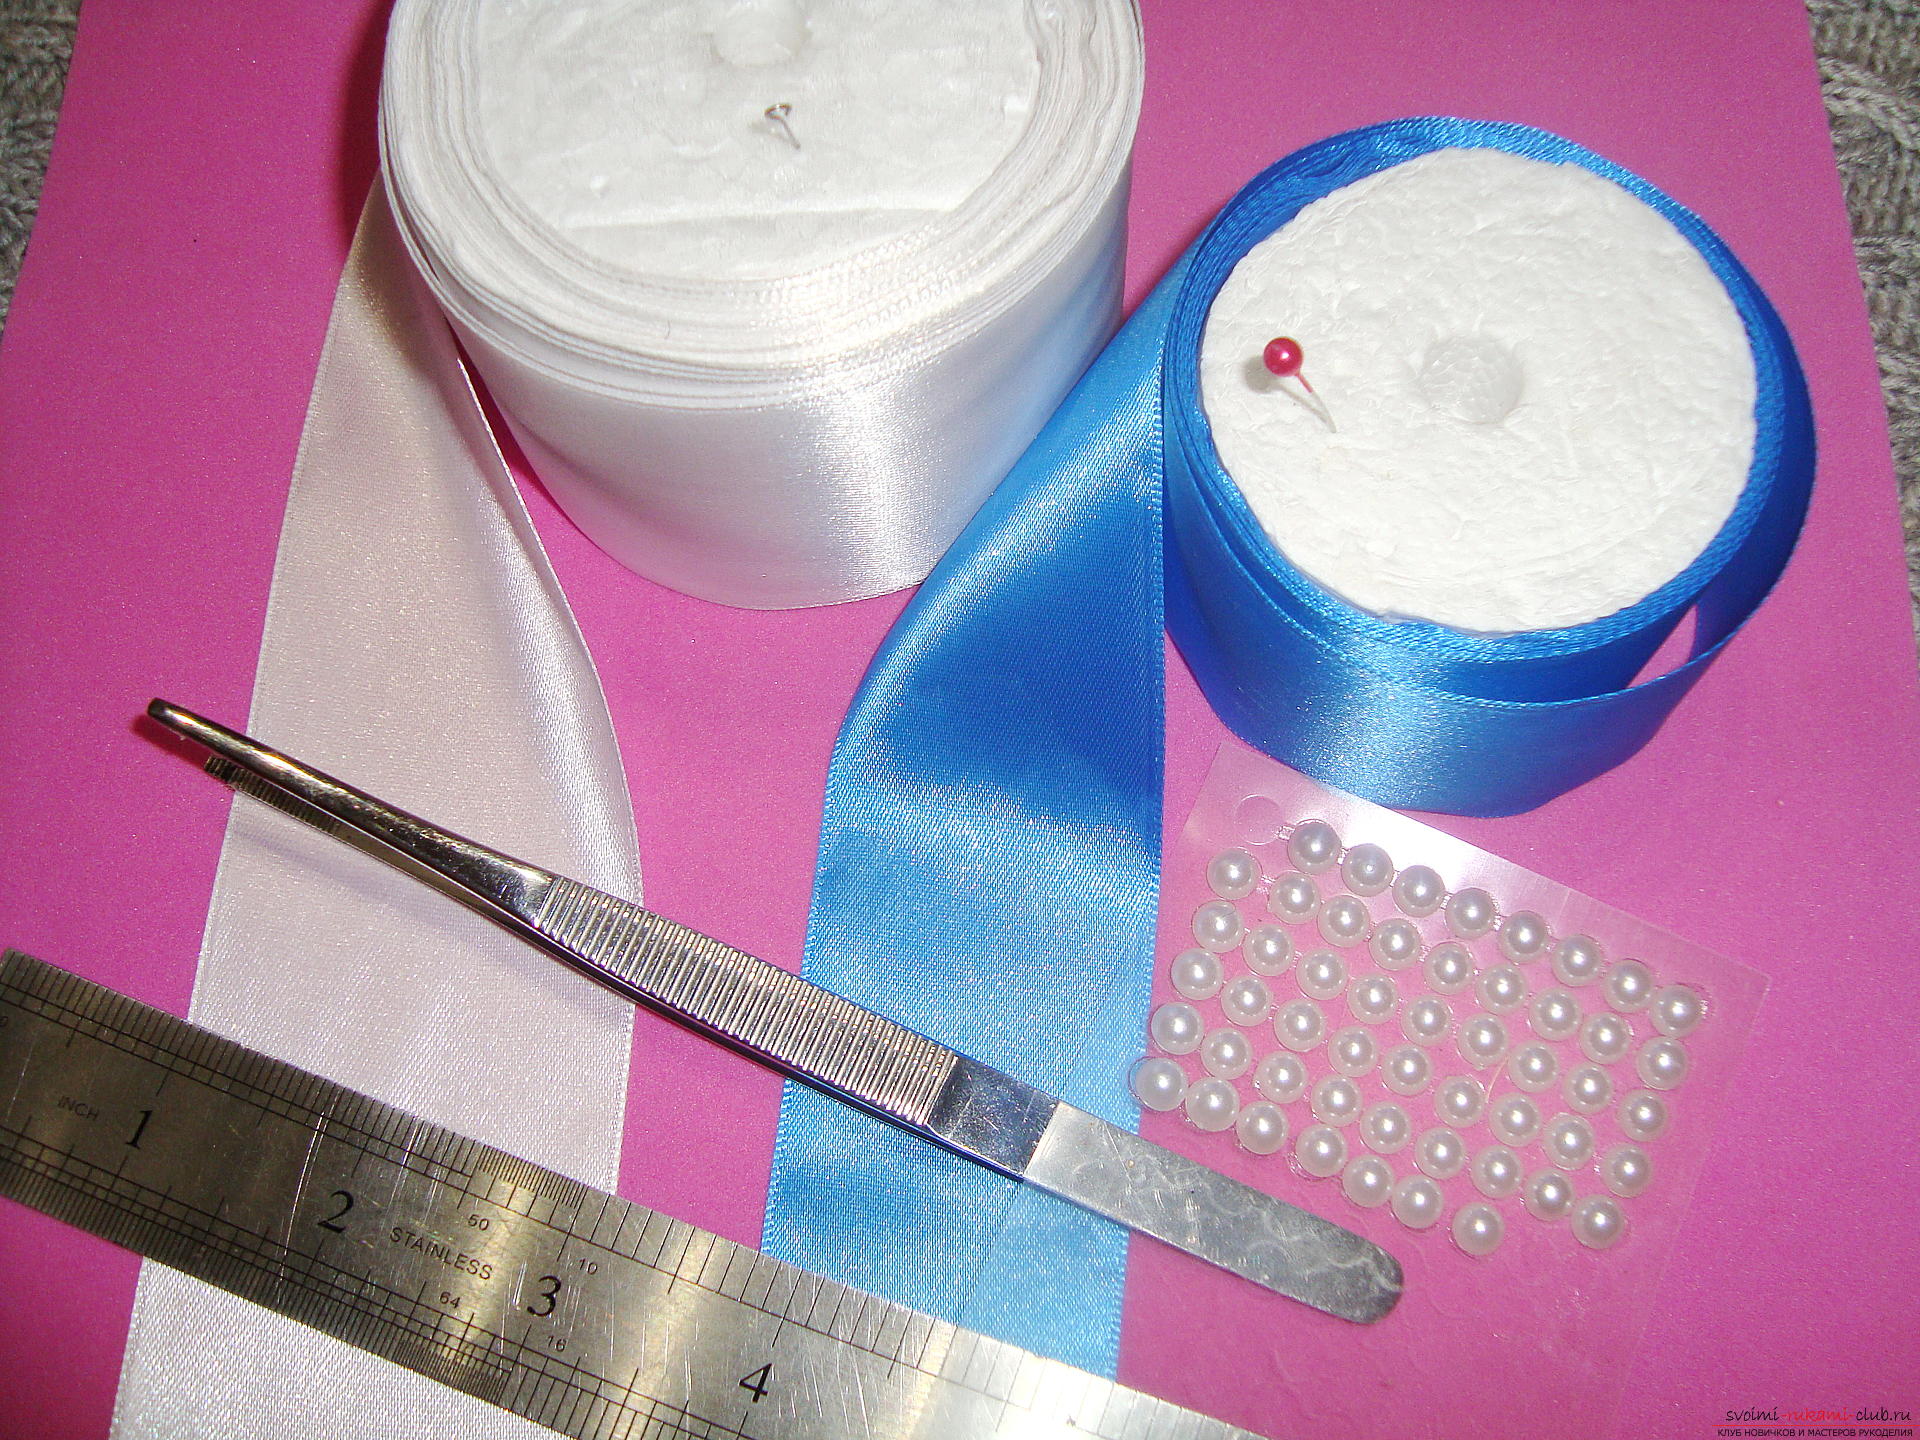
An unusual hairpin adorned with delicate flowers intechnique kanzashi of satin ribbons, will have to taste brunettes and blondes. On blonde hair these flowers will look gently, but with dark hair they will make up a contrast and elegantly decorate the hair. You can also watch a video with a detailed story about the process of creating this hairpin. To create such colors, it takes not much effort and skill, but the material is spent no more than two meters, so this hairpin is available for almost all willing masters. In this master class, the process of creating each detail is described in detail, follow the steps below and you will have a unique hair ornament. 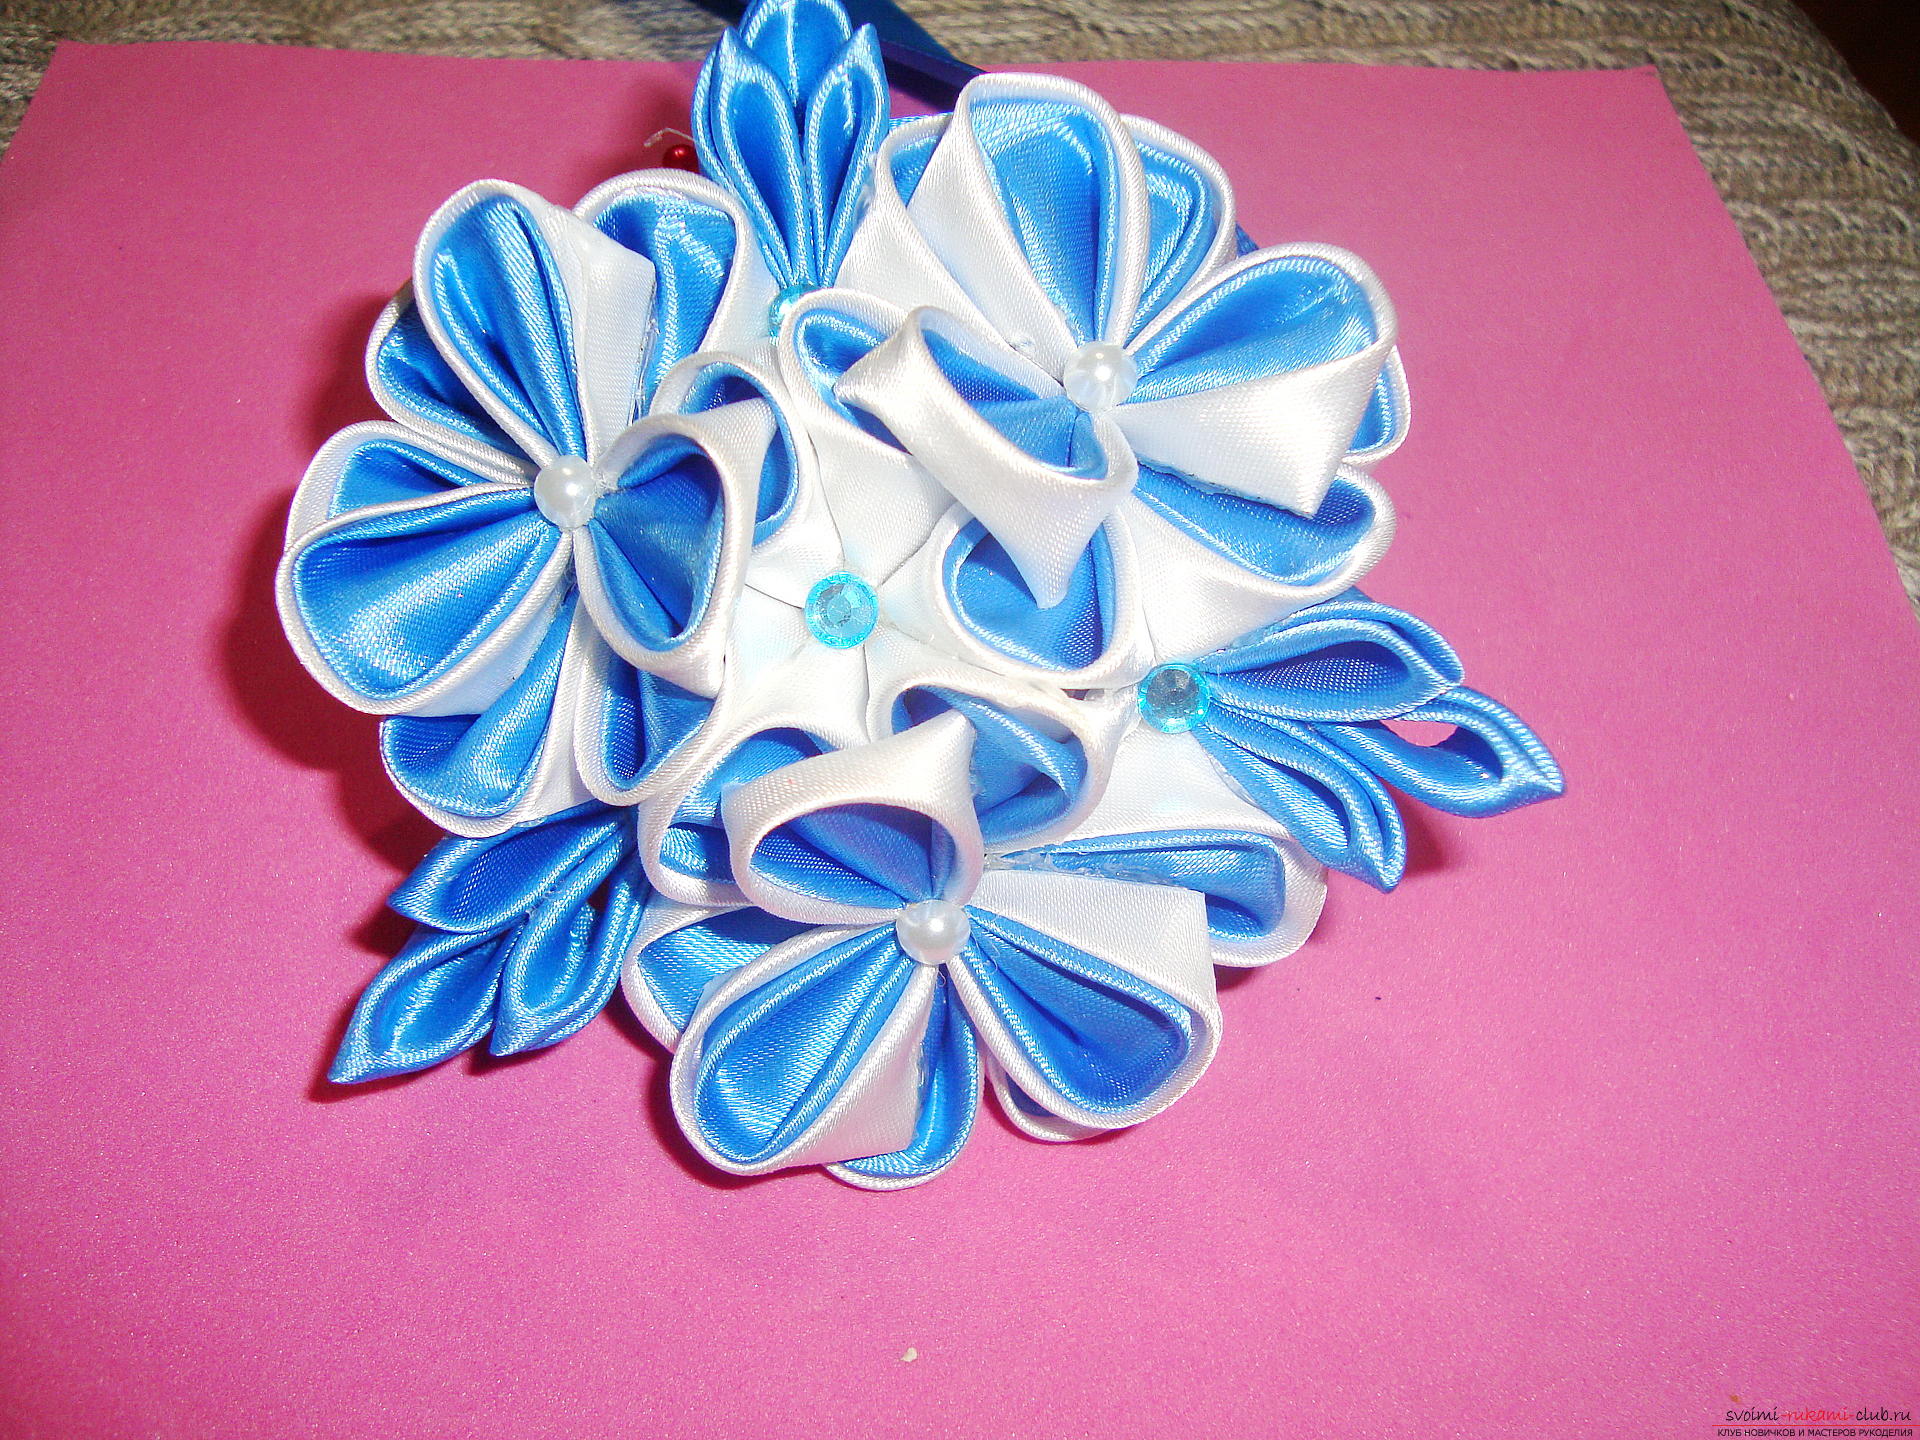 Of course, the color of the product can be changed to your favoriteyou color, but the technique of creating parts and assembling the product will remain as described below. When choosing a color, be guided not only by the shade of the hair, but also by the seasonal wardrobe, so on the threshold of the autumn pore colors can be changed to coffee and gold or red and orange, etc. To create a kanzash barrette you will need:
 The first step: the creation of blanks. Each petal in Kansas technique is created from a flap of a certain size. For these petals, a round shape, you need the workpiece in the form of a square whose side dimension is equal to the width of the tape. That is, we divide the white braid by 5 by 5 cm, and the blue ribbon is cut into squares of 4 by 4 cm or 5 by 5 cm if you have prepared a wide ribbon.
 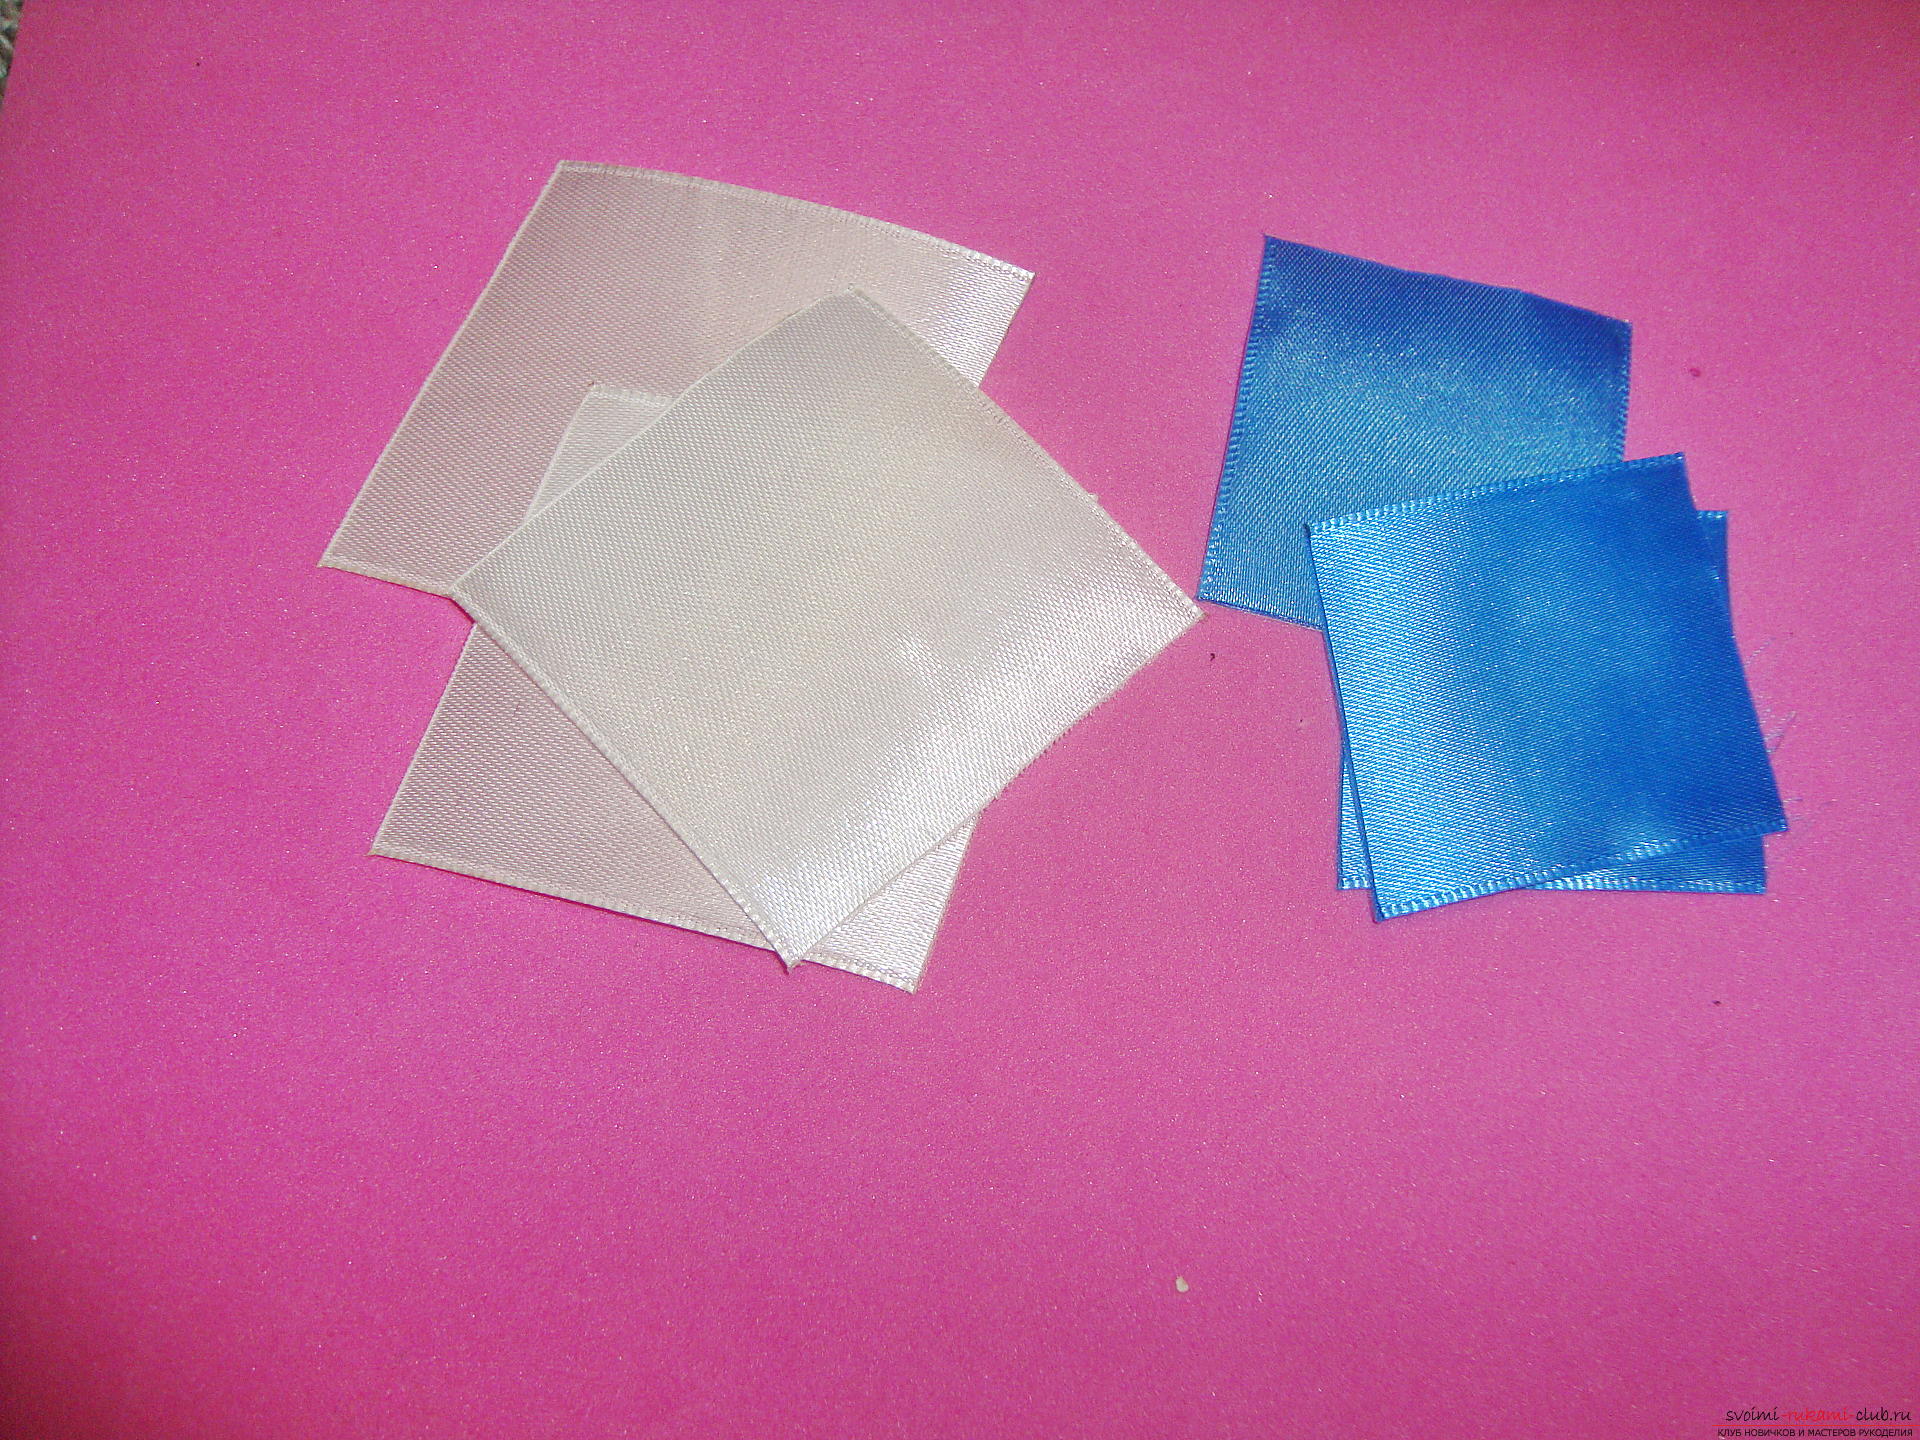 Step two: we form the petals for the flower. Each detail, from which flowers are collected, looks like an irregular rounded petal. To create such an element, you need two blanks - one white, and the other in blue. The white square is bent along the diagonal line, from the upper right corner towards the bottom left.
 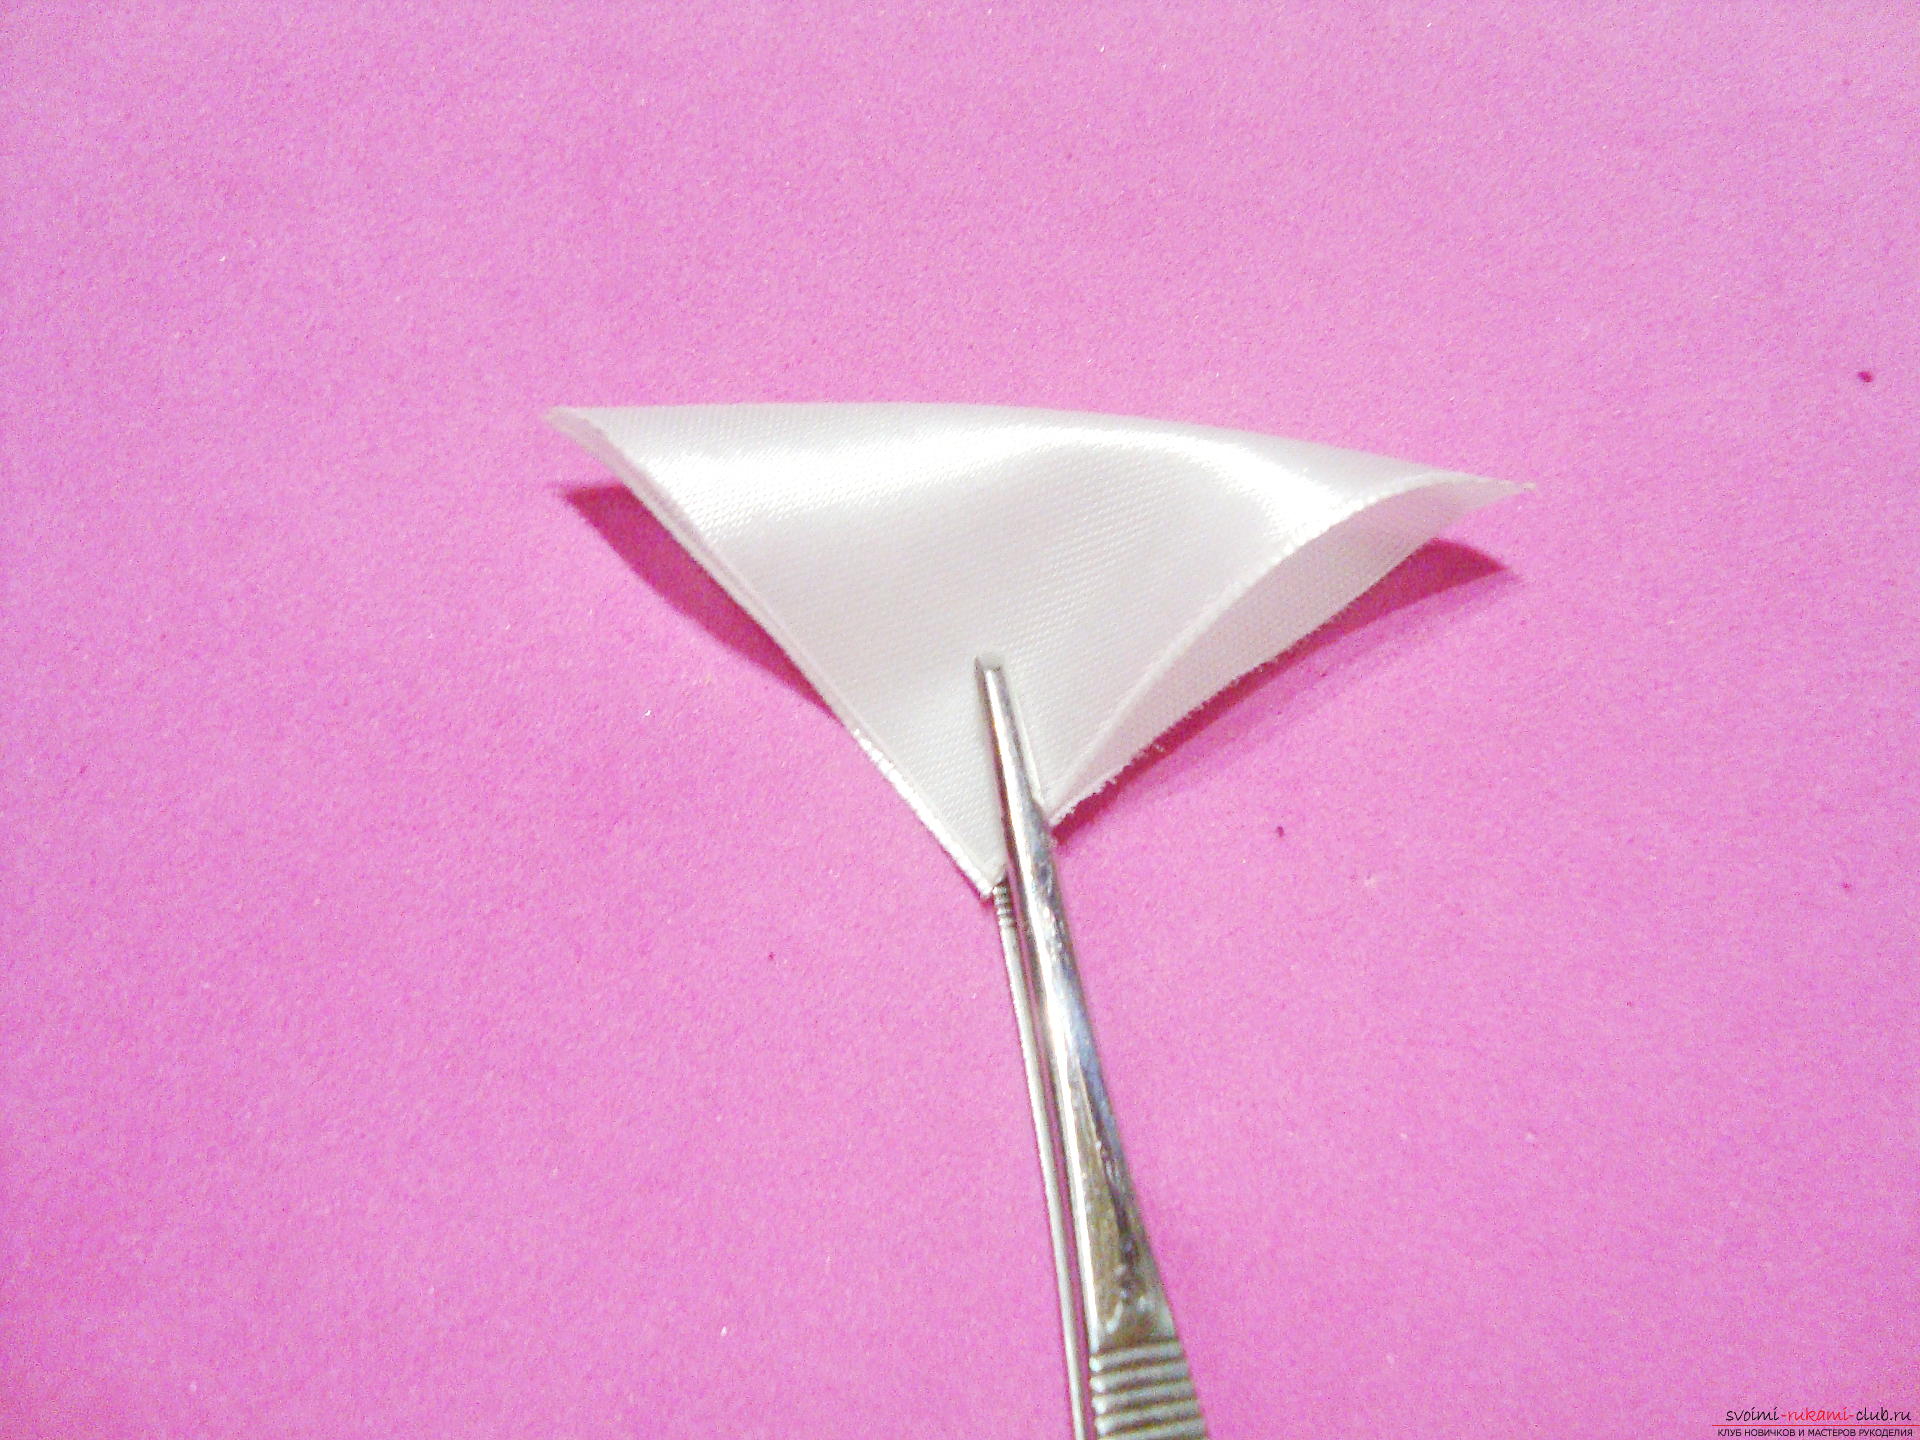 Similar manipulation is performed with the elementblue and turn this part into a triangle. Both blanks are superimposed on each other, but the bottom white part should protrude 1 mm above the blue triangle.
  At the next stage of the creation of the petal,Sharp corners lead to the lower right corner to form a rhombus. But do not try to make a corner at the top, when bending the edges leave a small gap, it will determine the visibility of all layers of the part.
 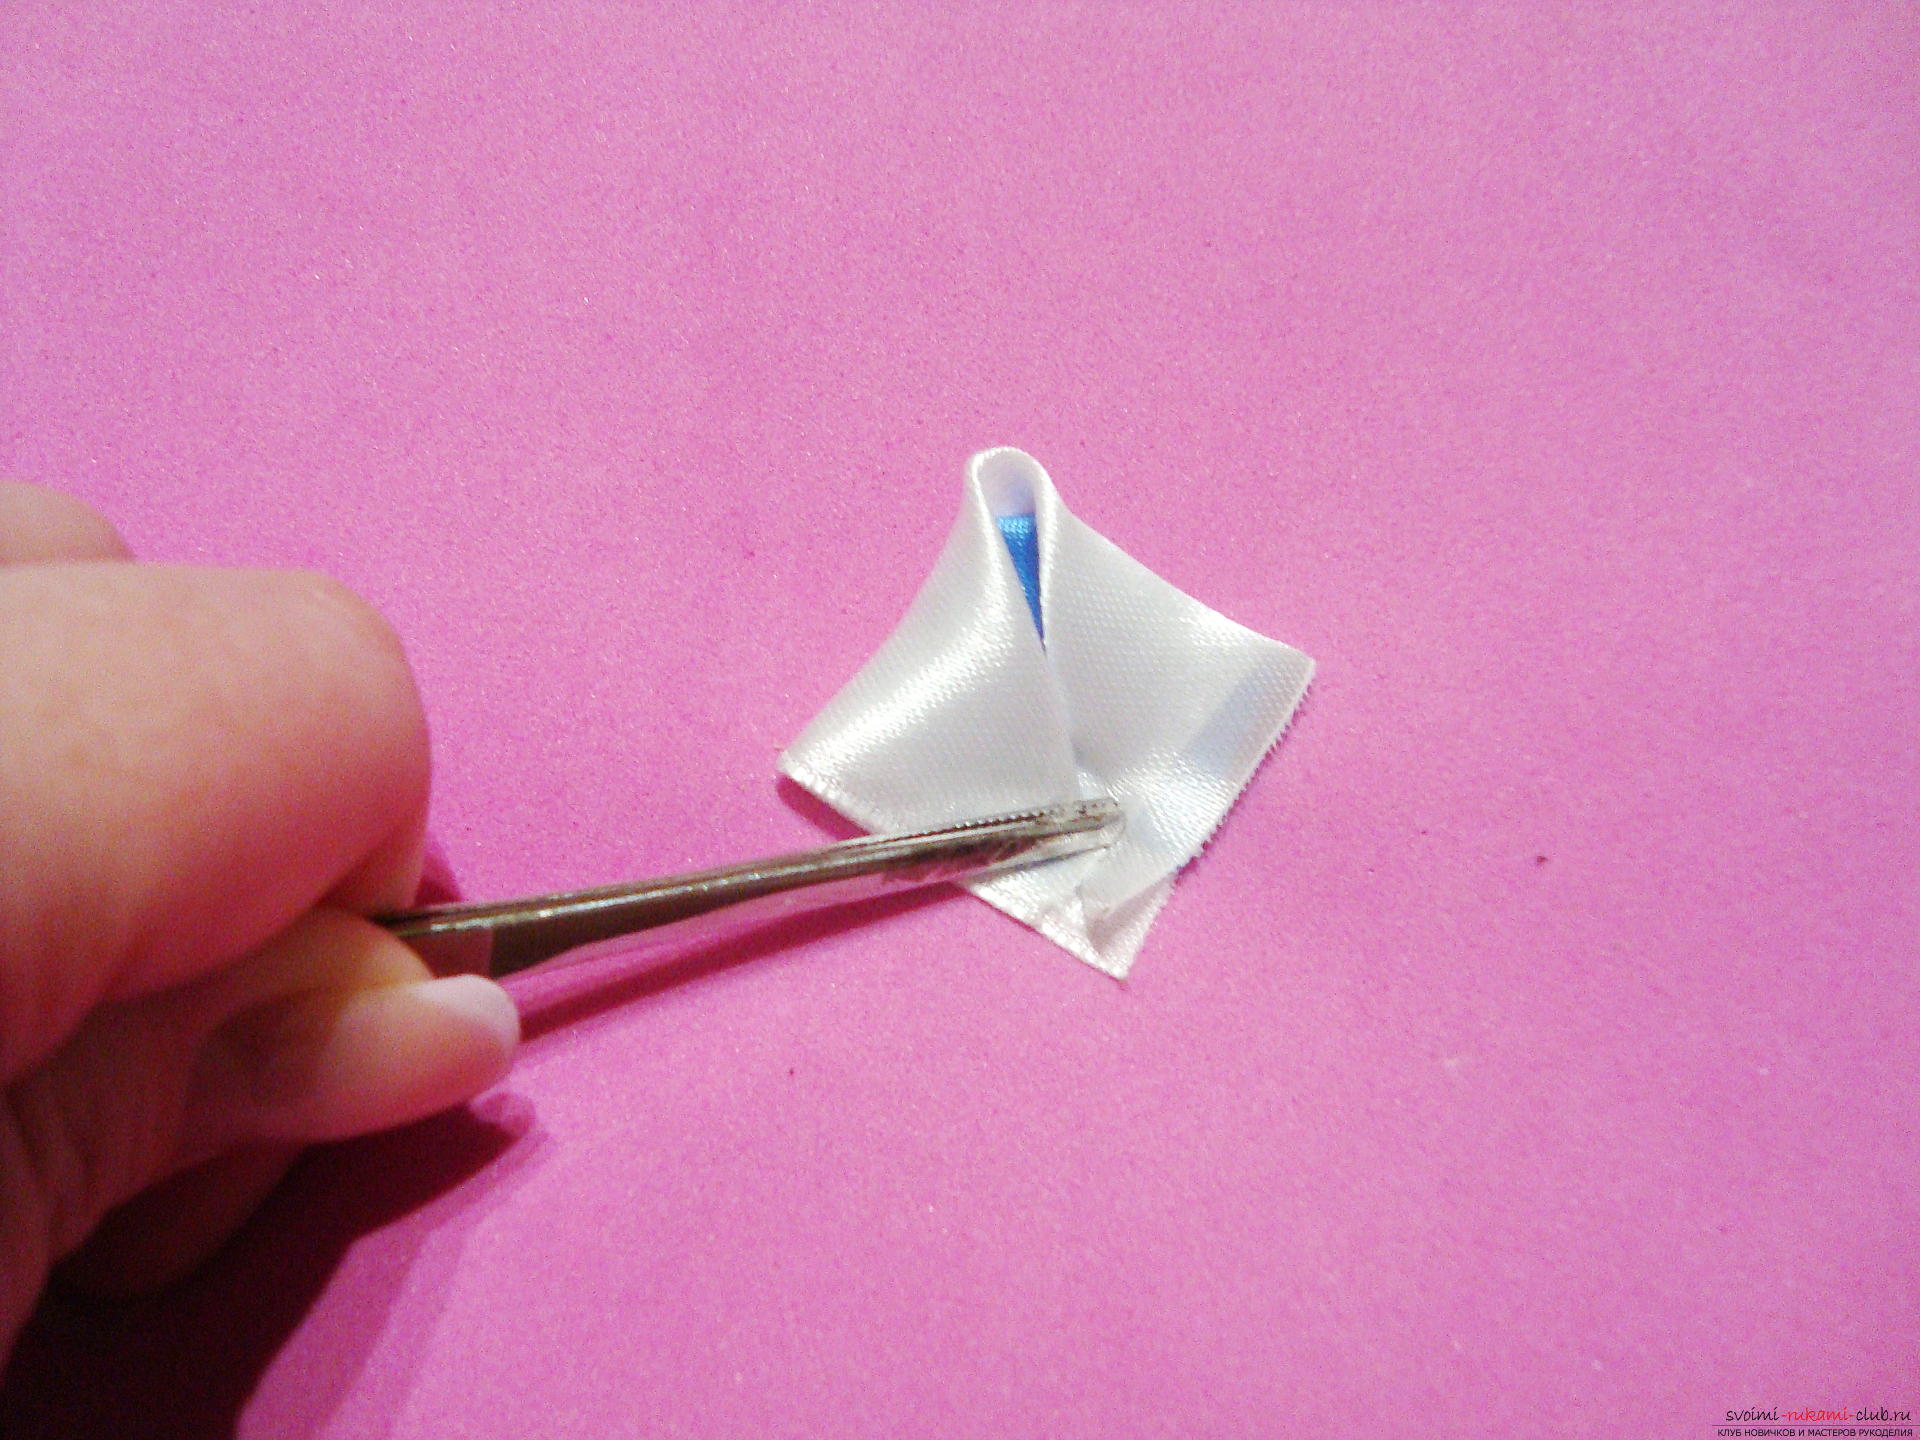 Now you need to work as an incinerator. With the help of a red-hot tool, all layers of workpieces are welded together and the final form of a two-layered petal is formed. The metal ruler is located 1-2 mm from the edge, strictly parallel to the lower lateral lines. Draw a straight line under the ruler. Draw a line with a slight pressure to weld all layers of the atlas. On the other hand, do the same procedure and cut out the uneven edges. In the end, you should get these blue and white petals:
 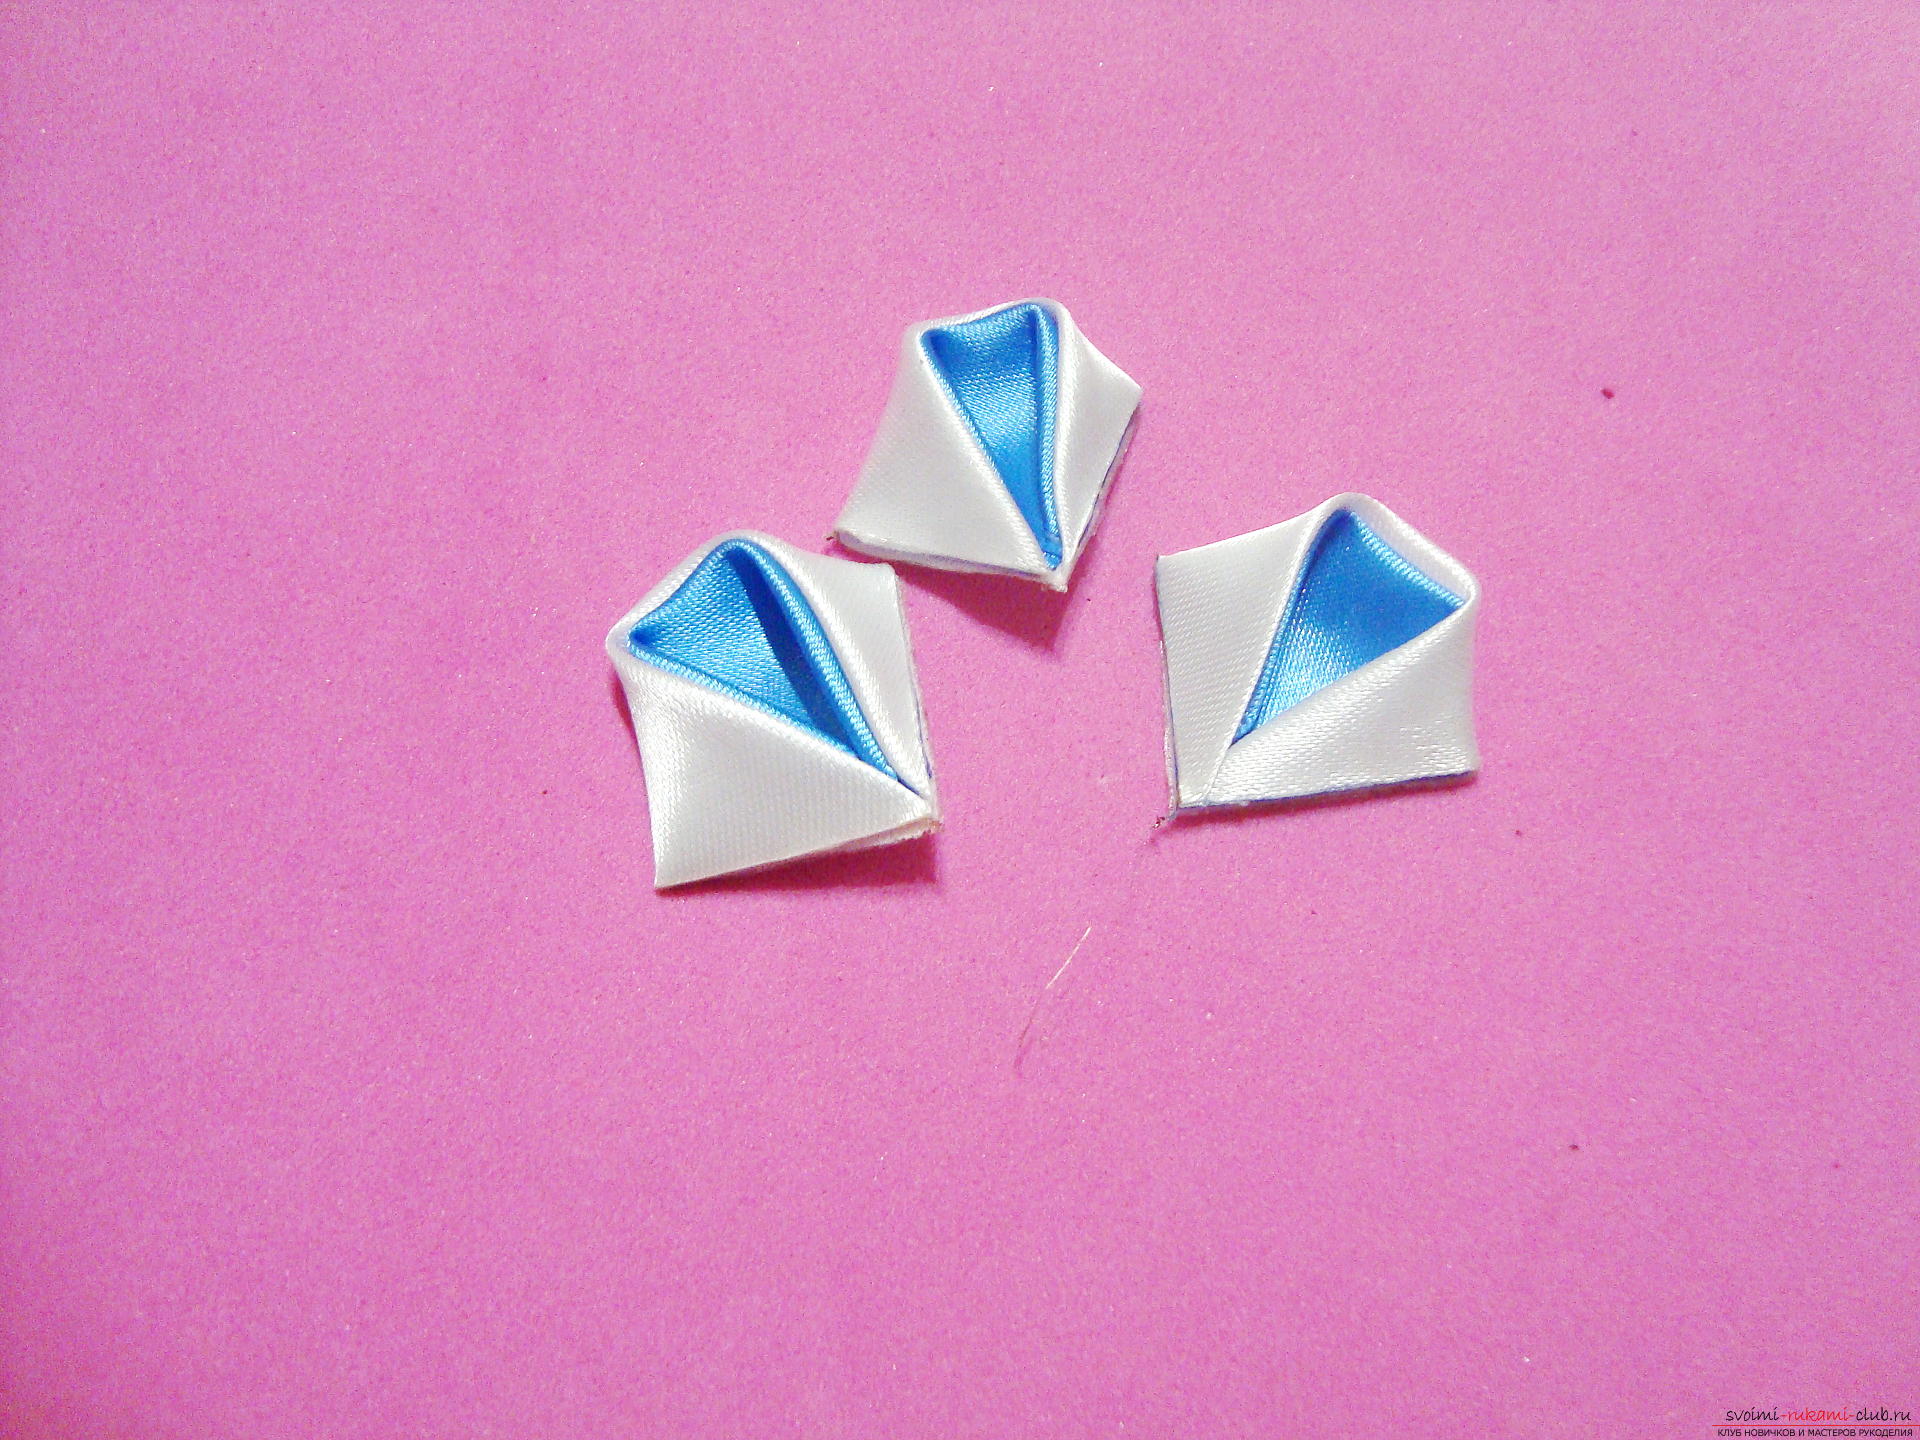 The lower tier of the flower consists of six identicalelements, which are gently glued along the edge of each part, that is, a thin line is fixed from the sides. The second layer forms similar petals, but they will require smaller petals, which are created from the same blanks of 5 cm, but cut slightly more than a millimeter from each edge. The second petals are wetted with glue along the edge, the edges are slightly bent and the elements are fixed above the lower petals. So one petal of the second row is glued to the 1 and 2 elements of the lower tier, the other is glued to the 3 and 4 petals and the last third is located by the ribs in the center of the 5 and 6 parts. Thus, on the lower tier there will be 6 parts, and the petals of the upper tier are united in pairs and the middle consists of three elements. Three identical flowers are formed, which are glued together in the form of a triangle. The flowers are fixed quite easily, because their petals have geometrically regular edges of the same size, and they are ideally suited to each other as the details of one picture (puzzle). The middle of each flower is ennobled with a pearl, without this accent the flower loses its beauty. Step Three: We form petals for twigs. The branches are formed from simple single-layered sharp petals. To create them you need square blanks of blue color. The cut parameters are 4 by 4 cm. Fold the workpiece into a triangle by the same principle as the previous elements were bent.
 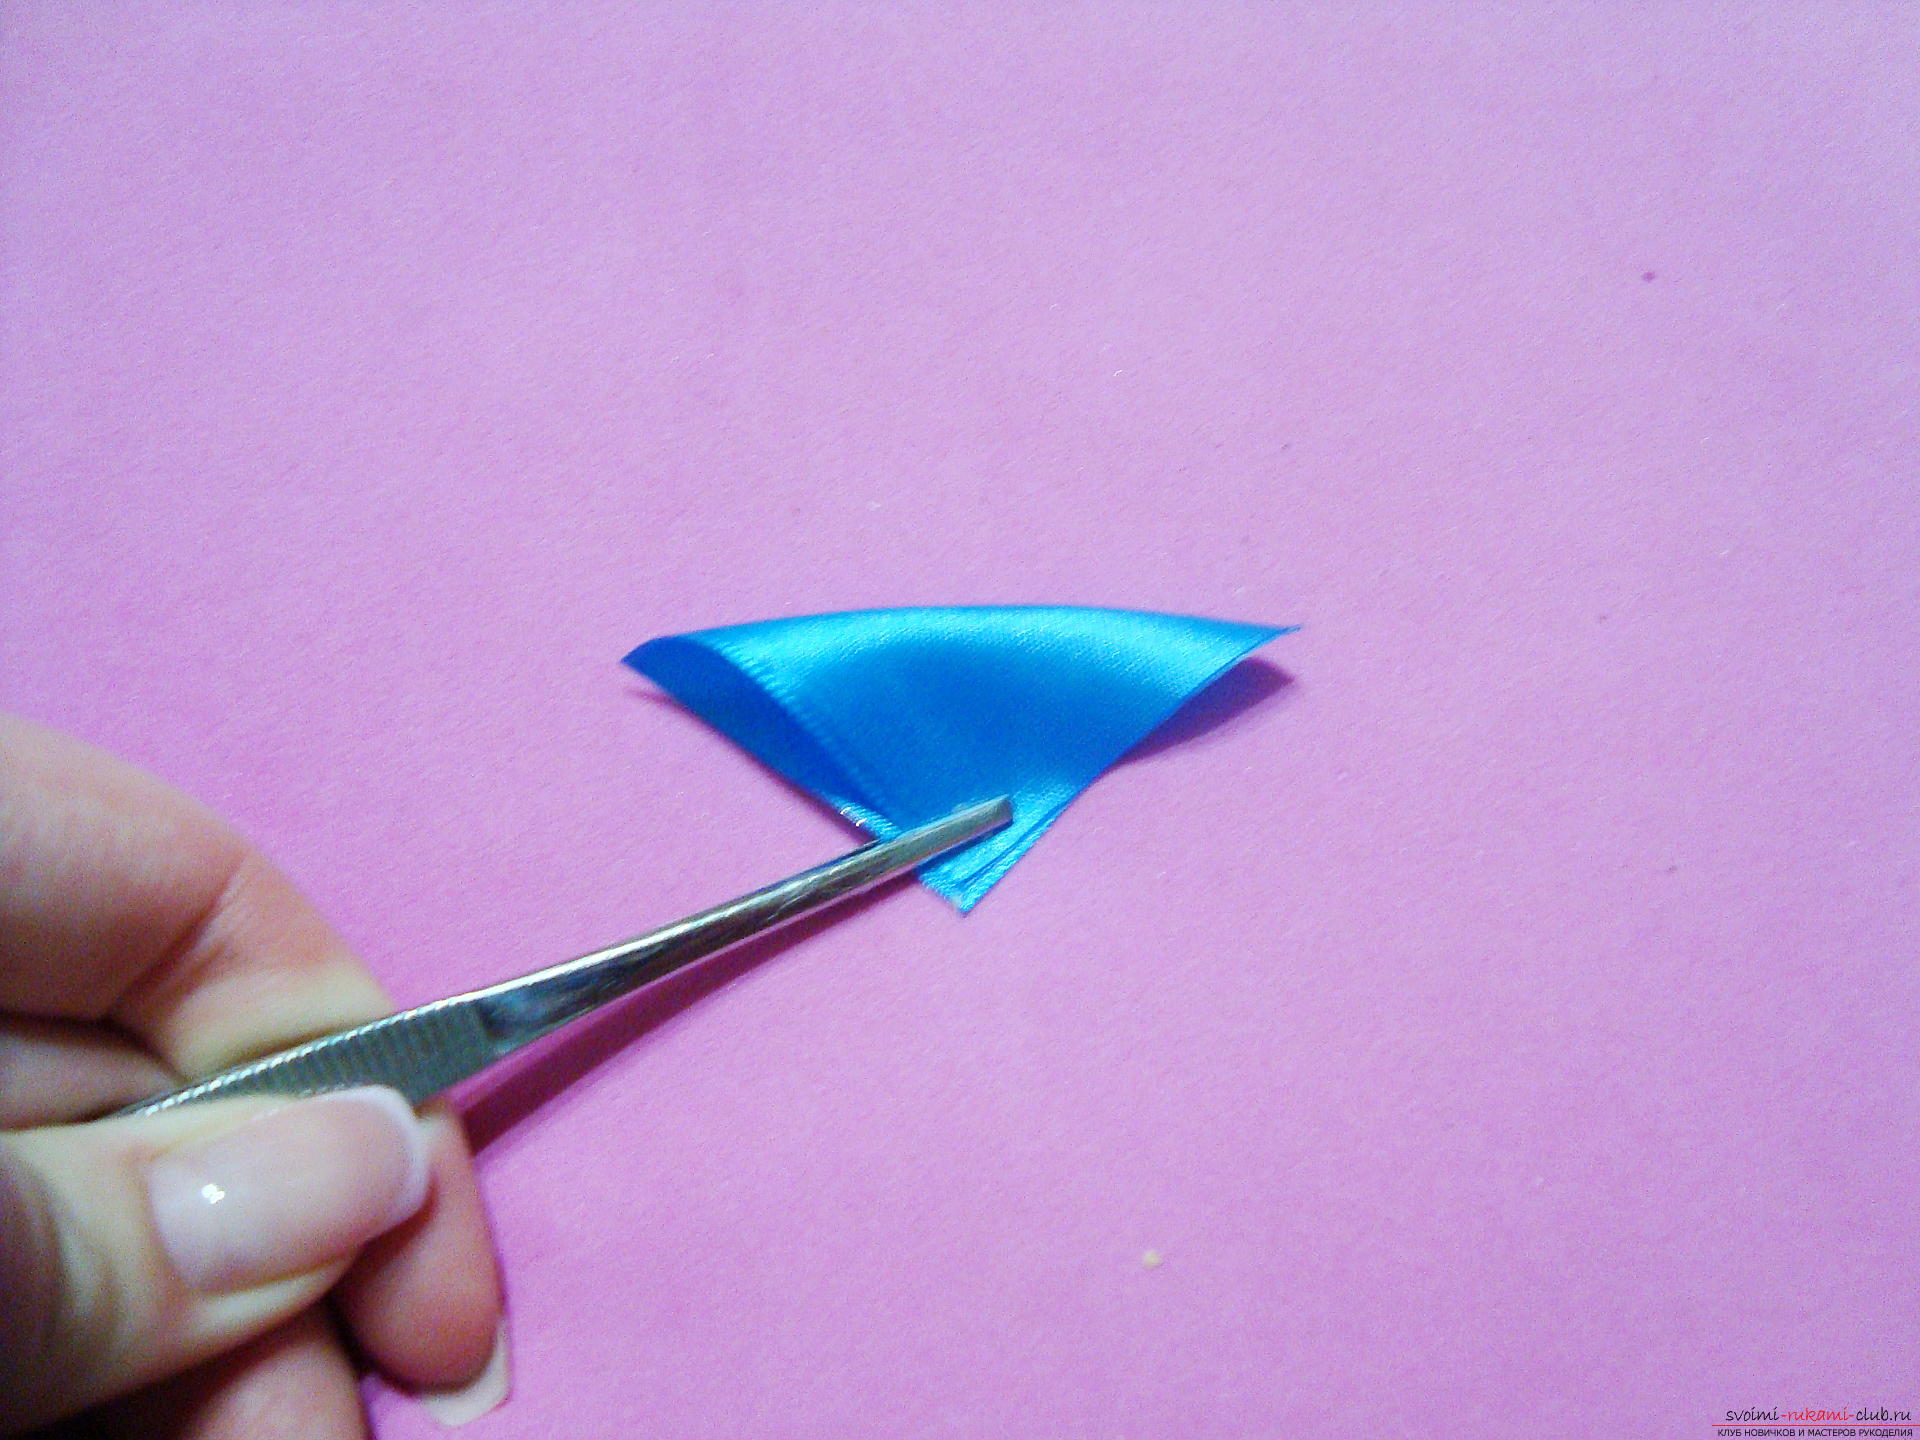 The second fold passes through the center, that is, from the right angle to the middle of the opposite side. With repeated bending, a triangle is formed into four layers.
 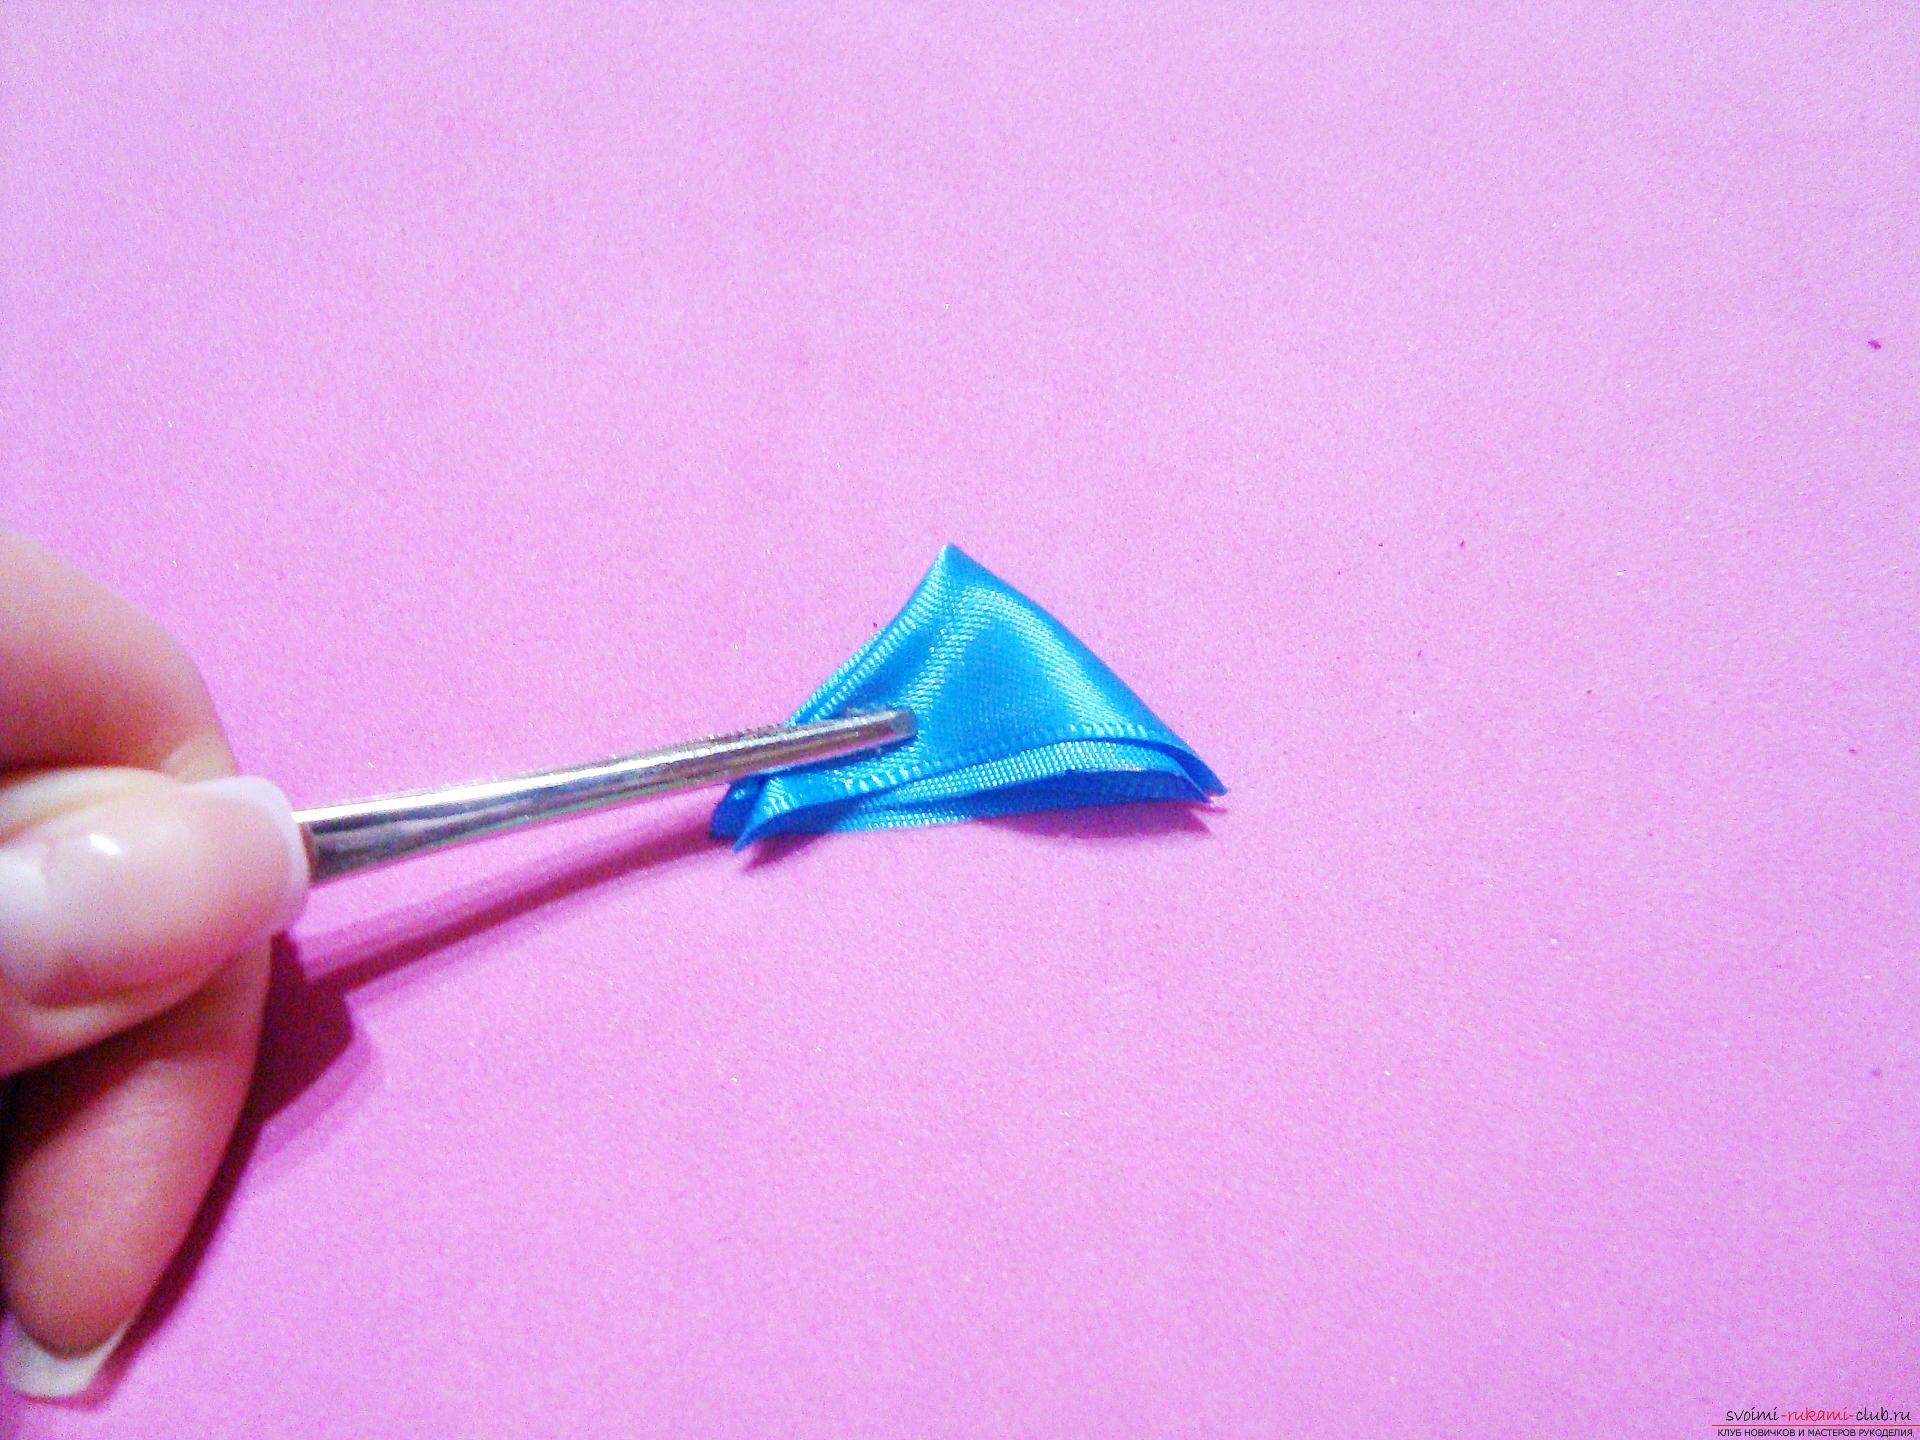 Then the last central inflection is created, which determines the appearance of the sharp petal.
 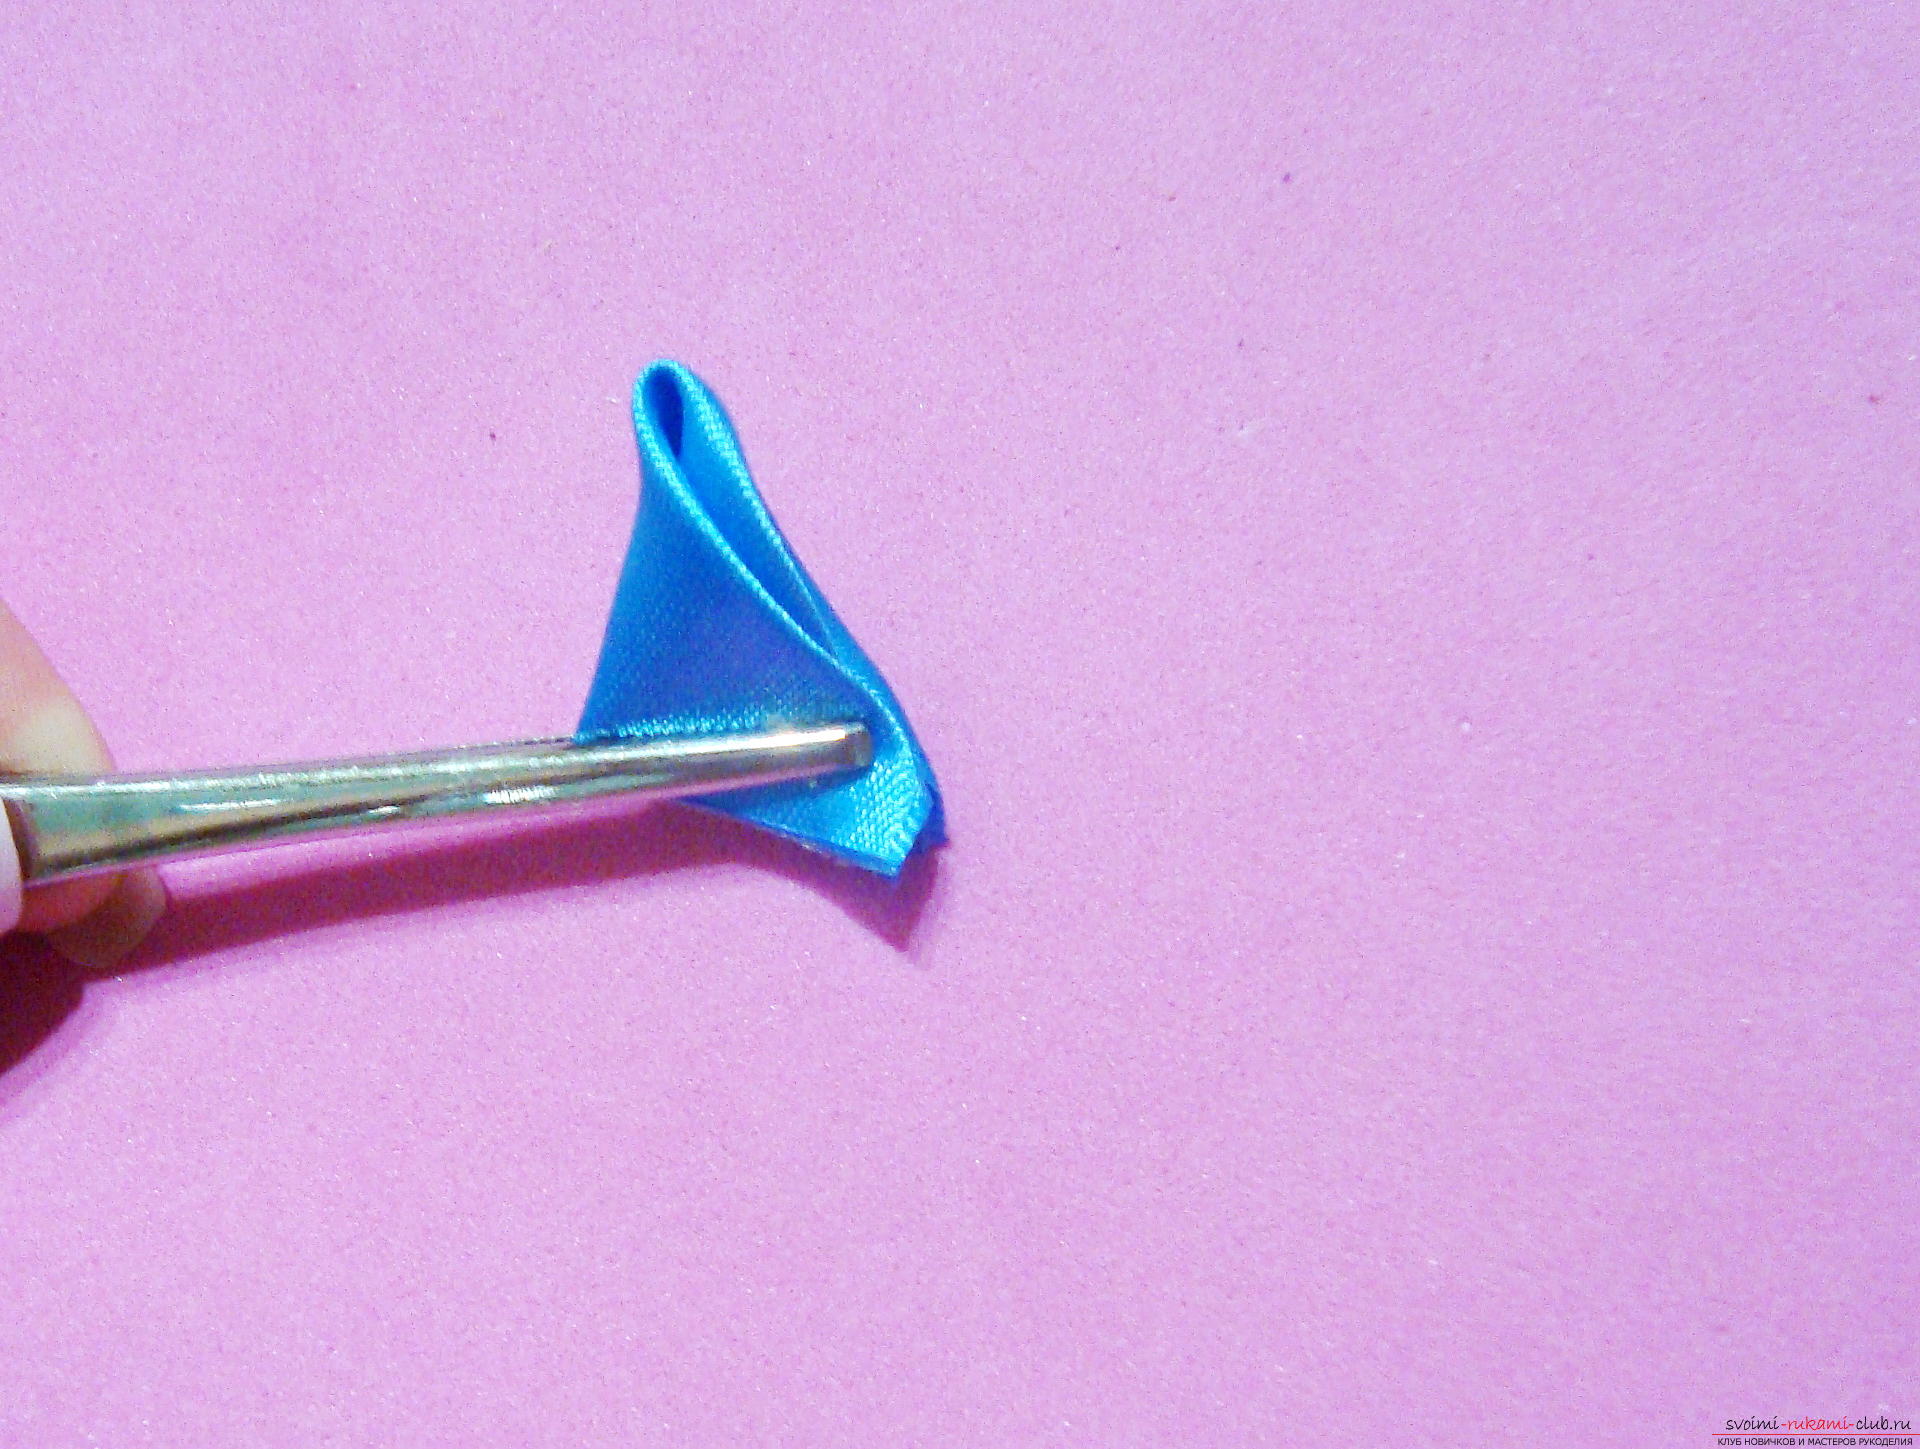 With the burner, cut the bottom of the part (hold the satin with an iron ruler). Create three petals for each branch of the product.
 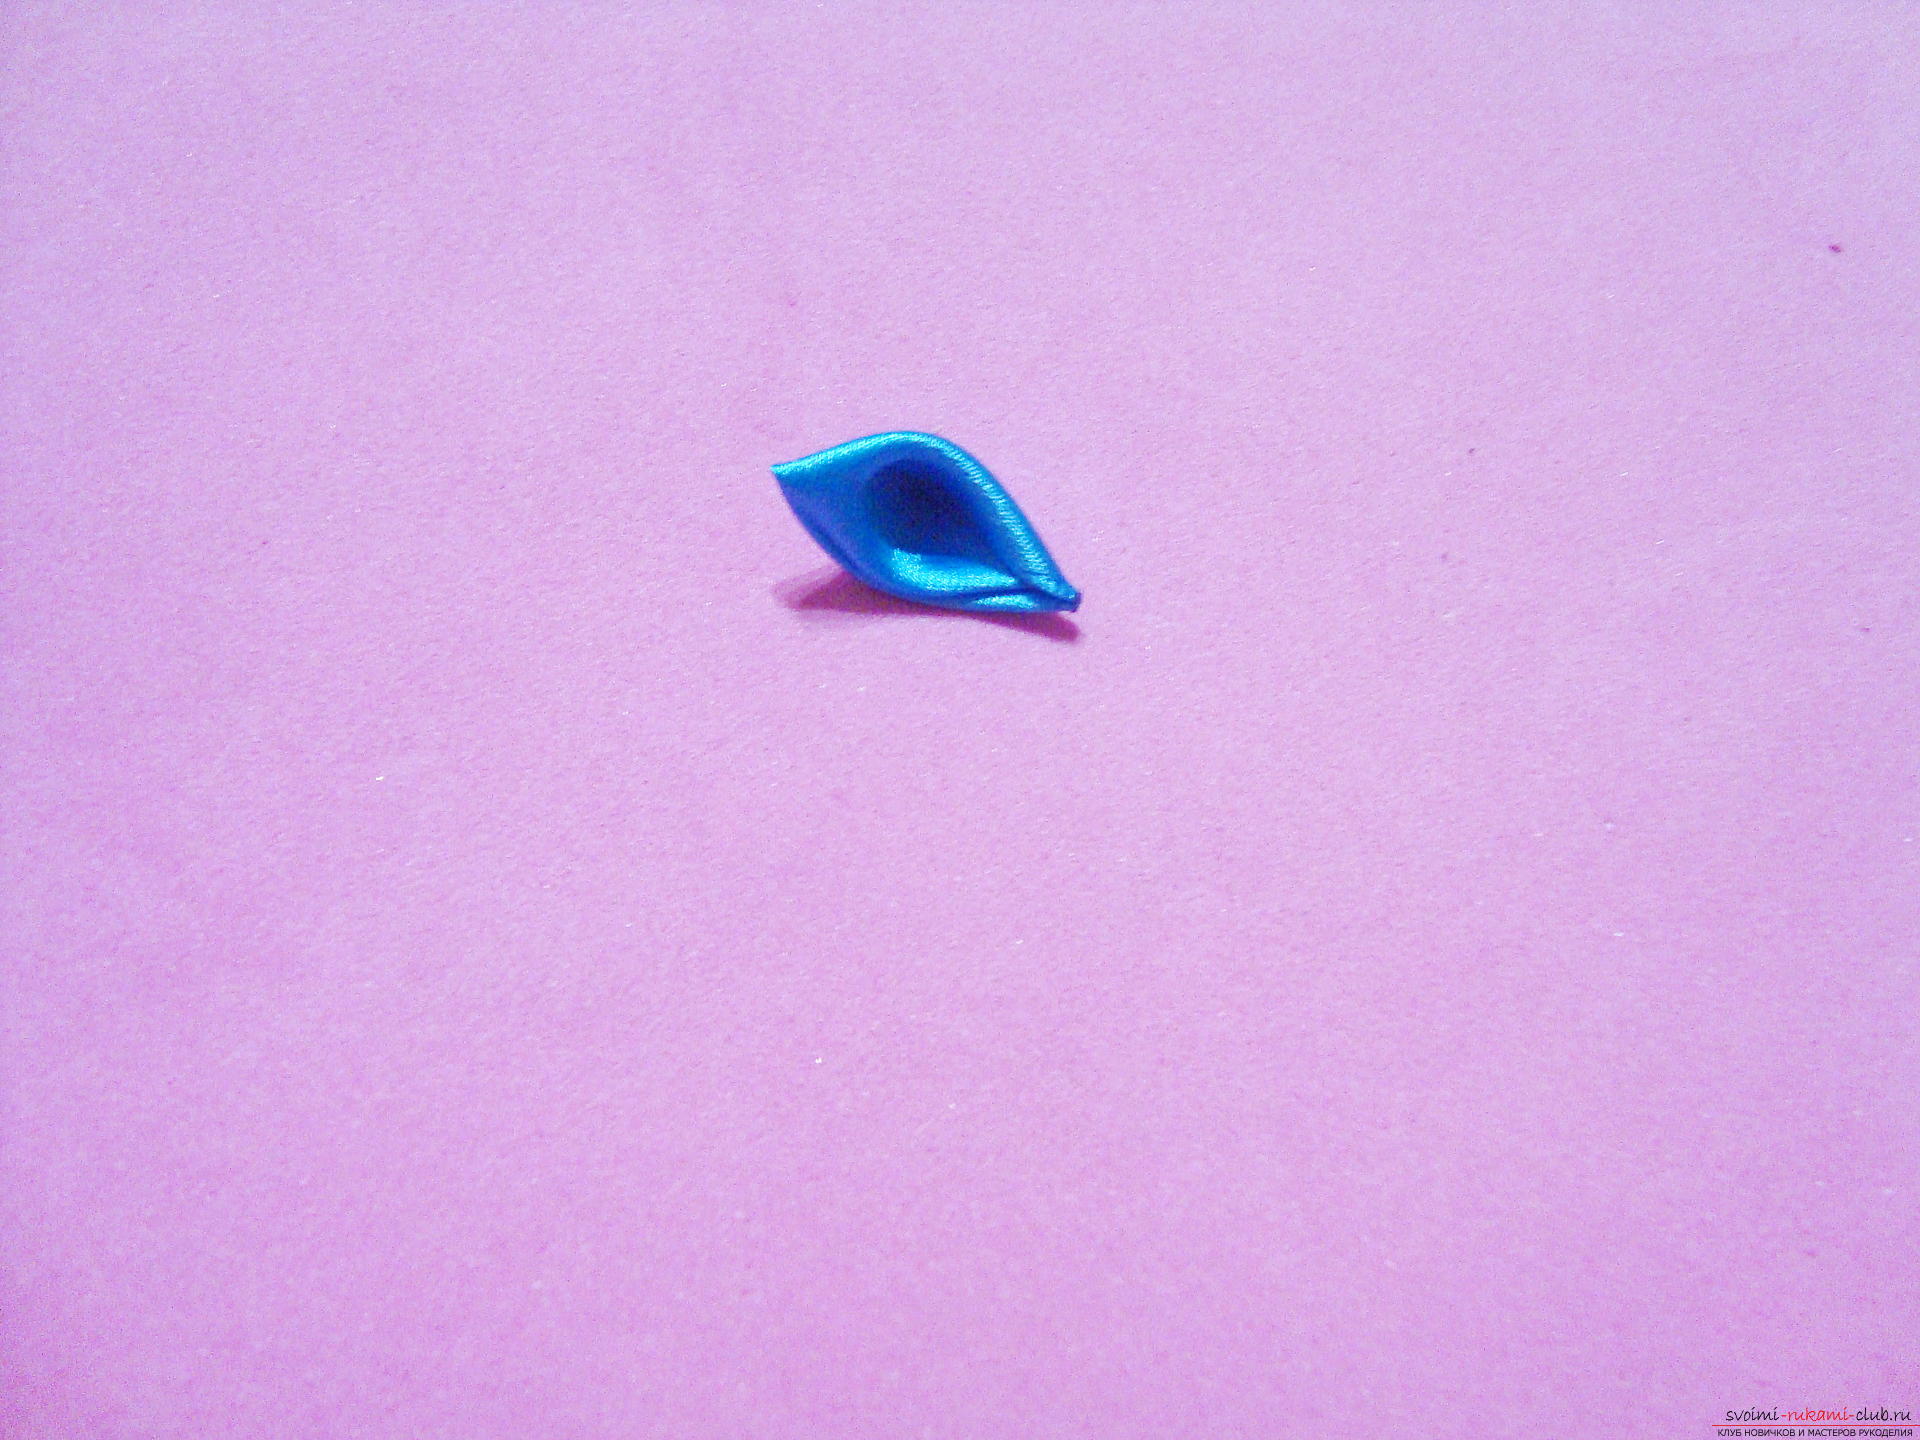 Two petals, glue along the sides in the lower part, and the third will be located in the center of the branch.
 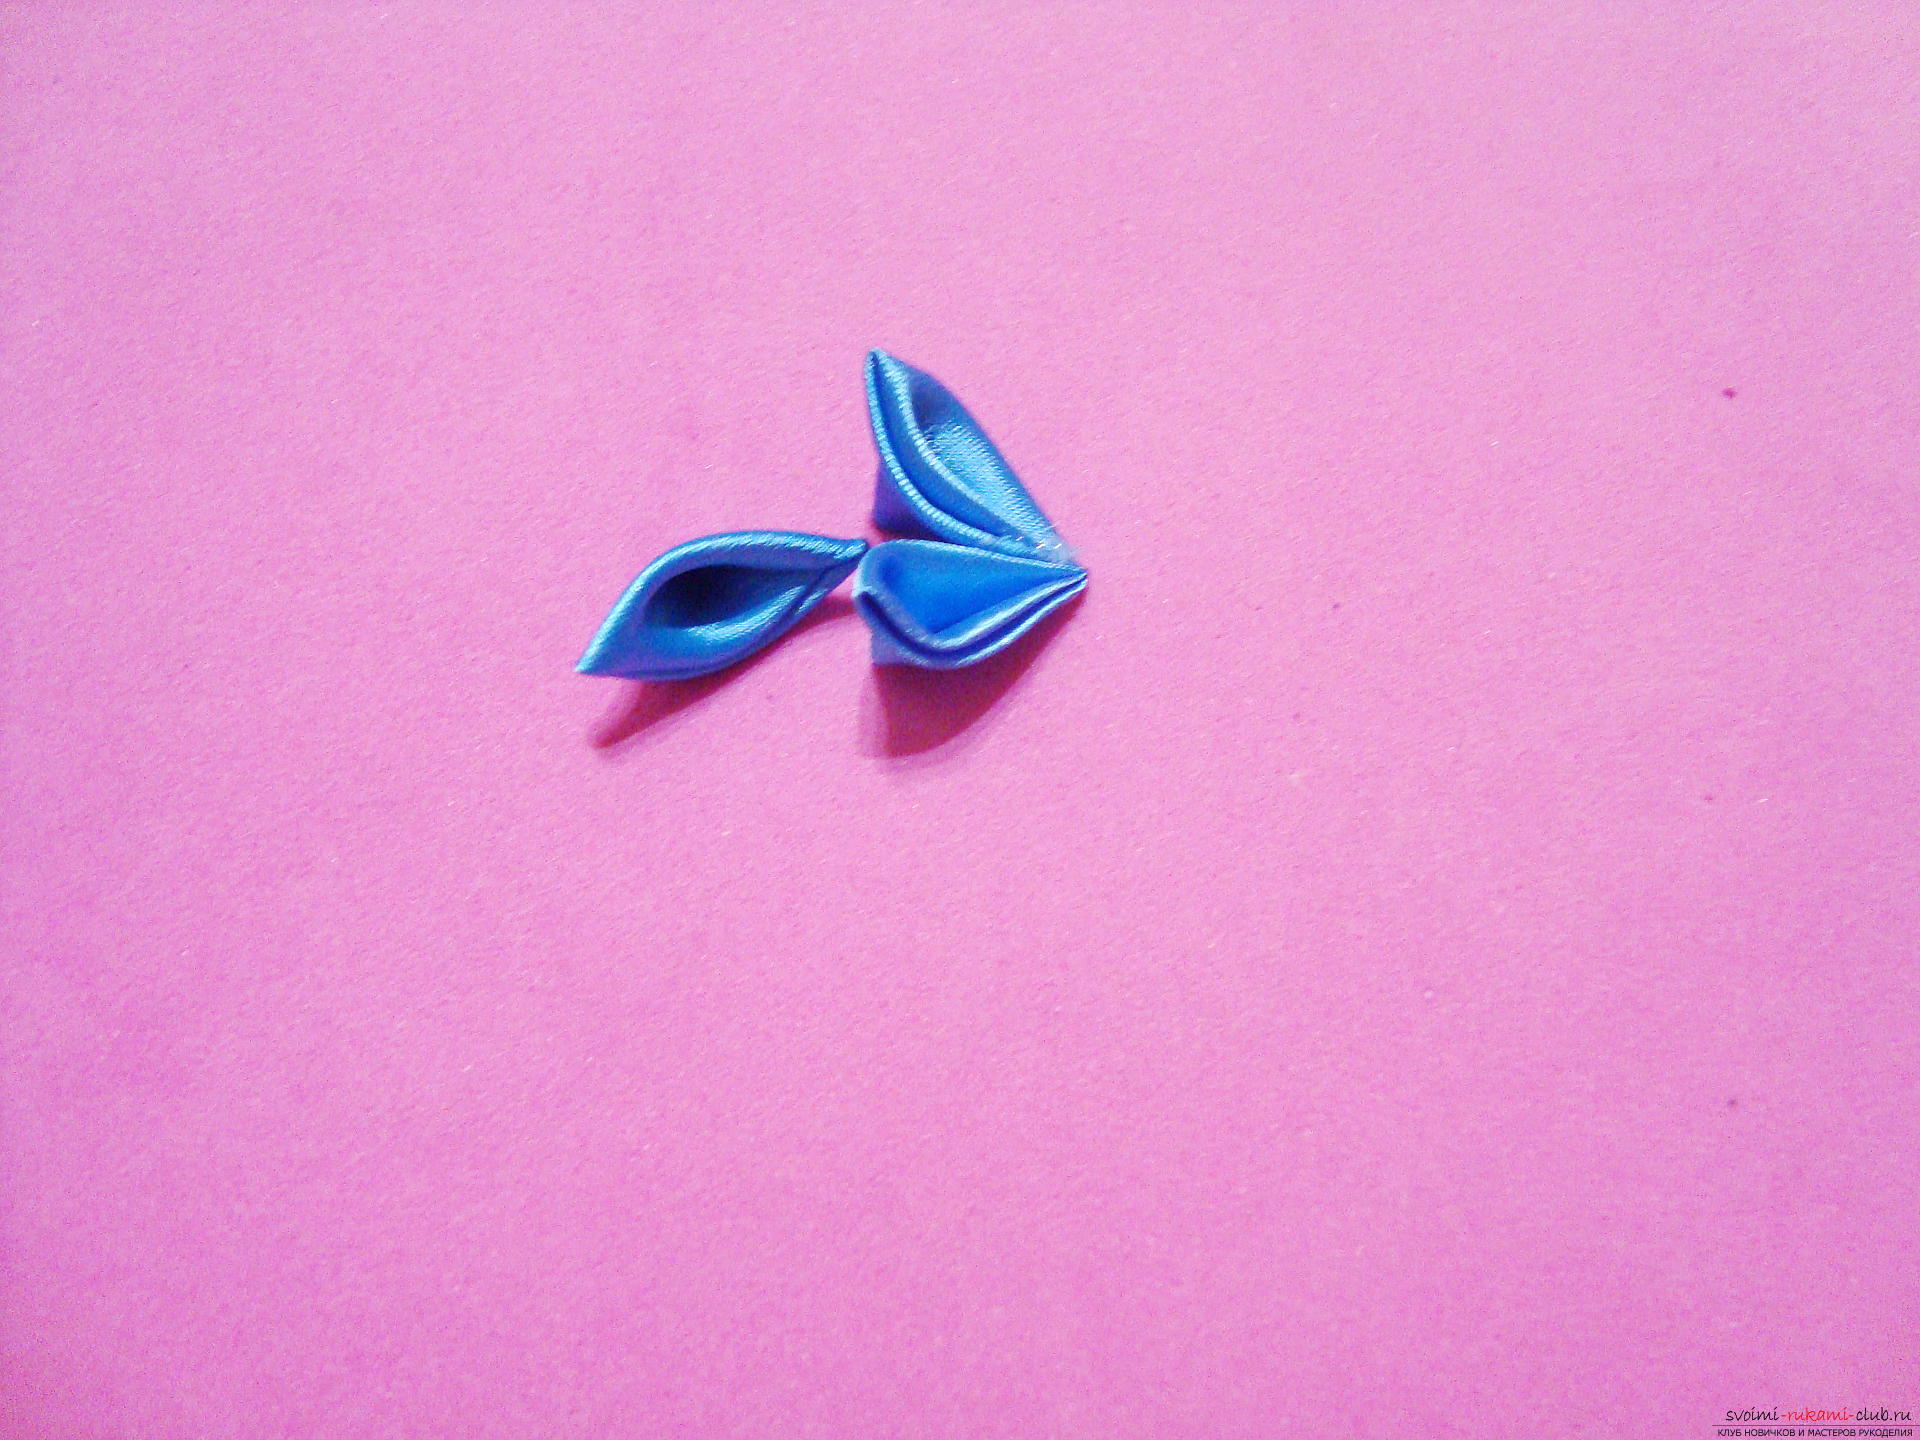 Apply glue to the base of the third petal andimmediately place it in the gap between the first elements, then pinch this petal between the two elements to get a neat little twig.
 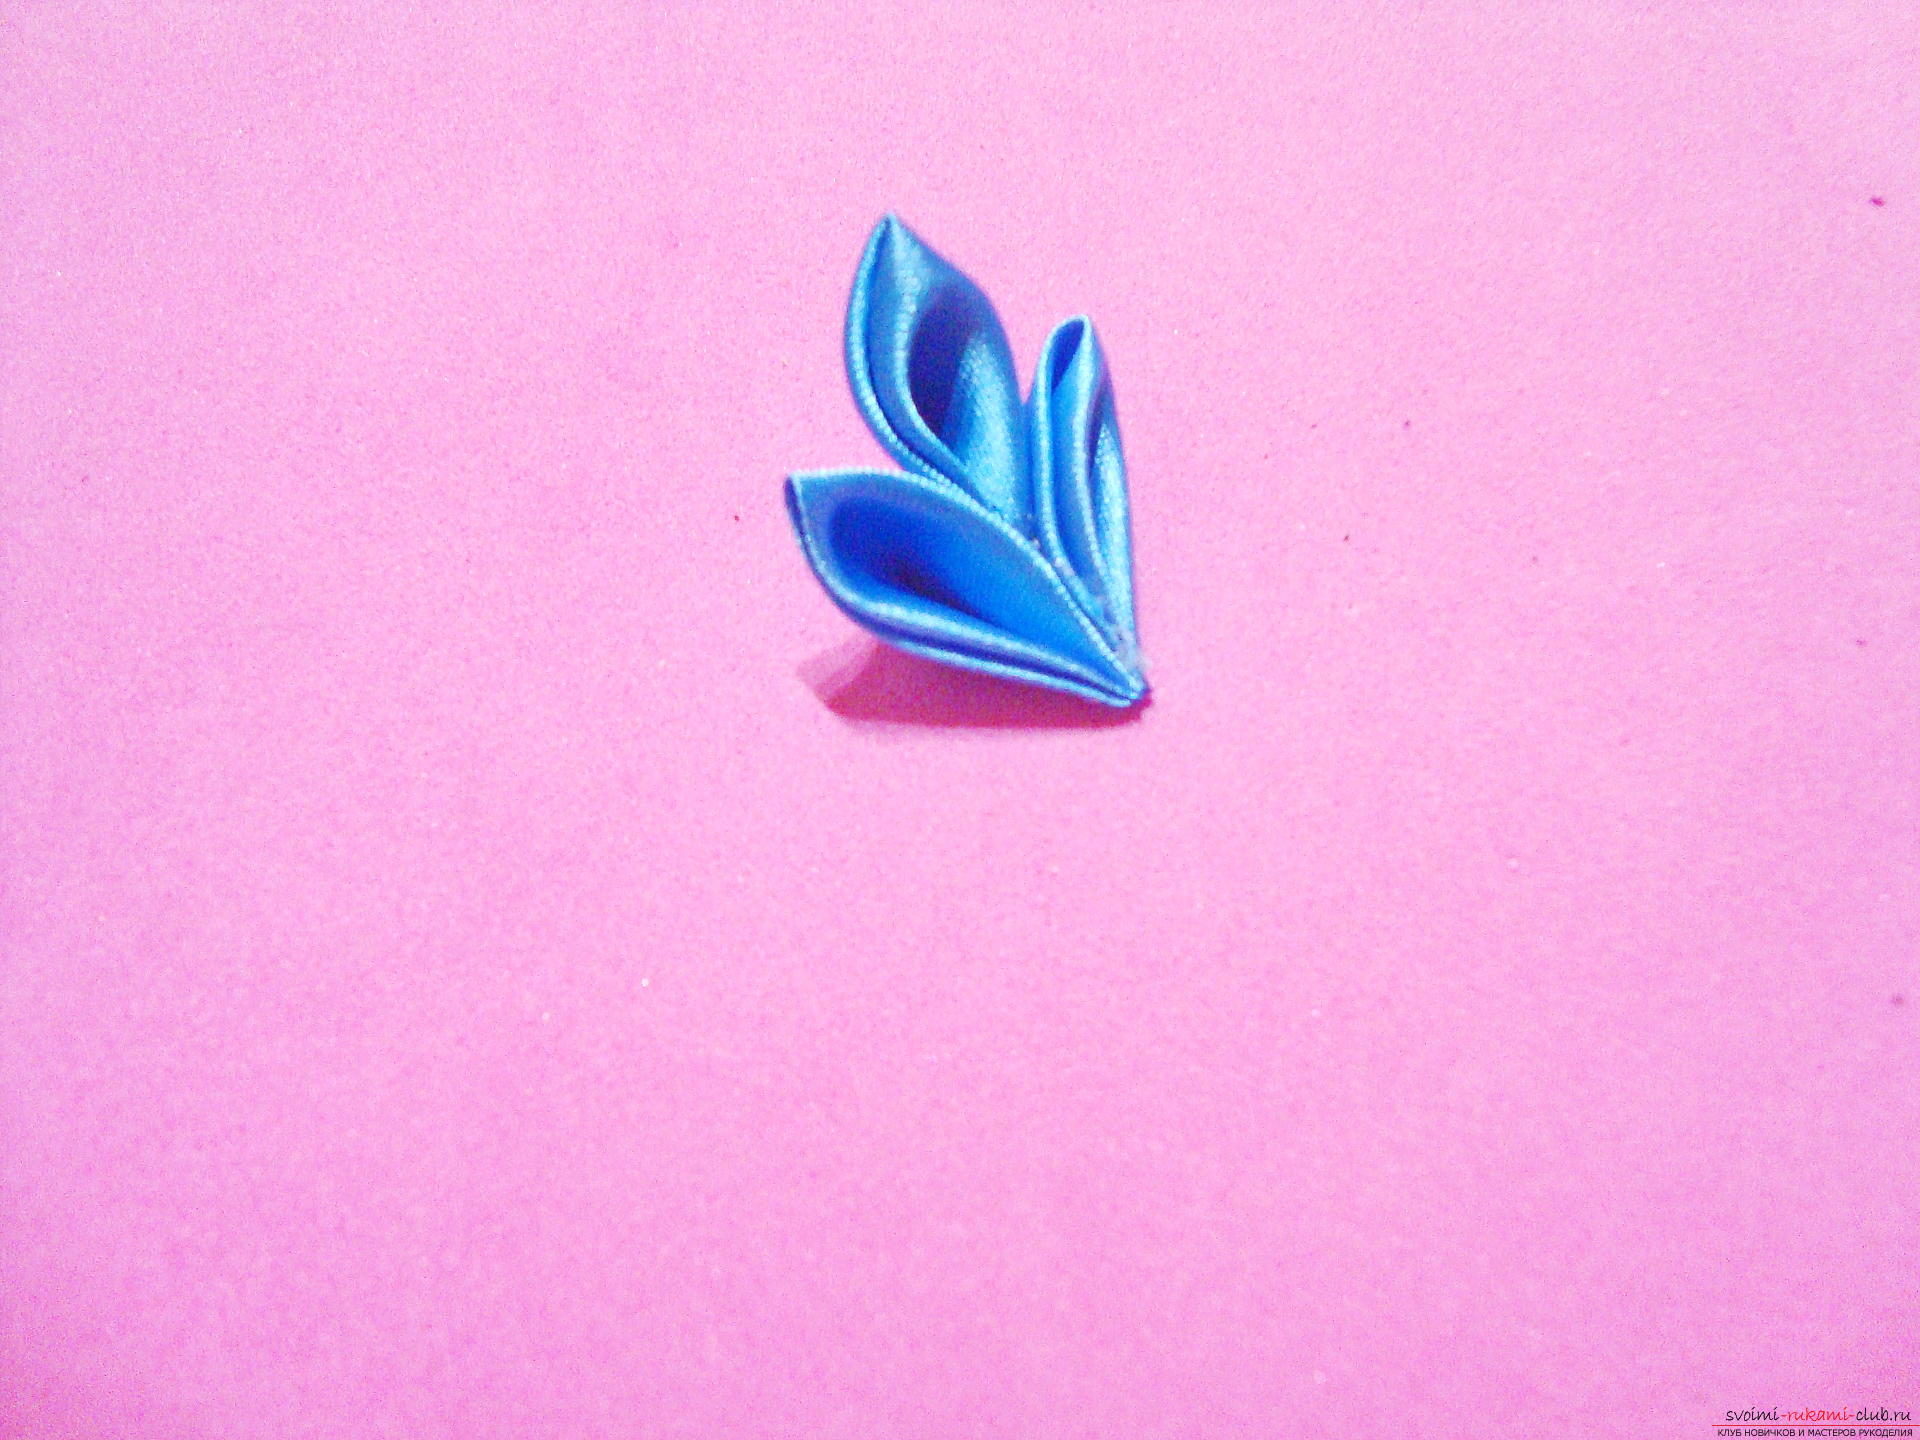 Glue the twigs into the lumens between each paircolors, that is all three branches are required. Try to fix the glue of the parts neatly, not leaving on the surface of the atlas traces of excess glue. On top of the fixation places, apply rhinestones that are attached to a drop of glue.
 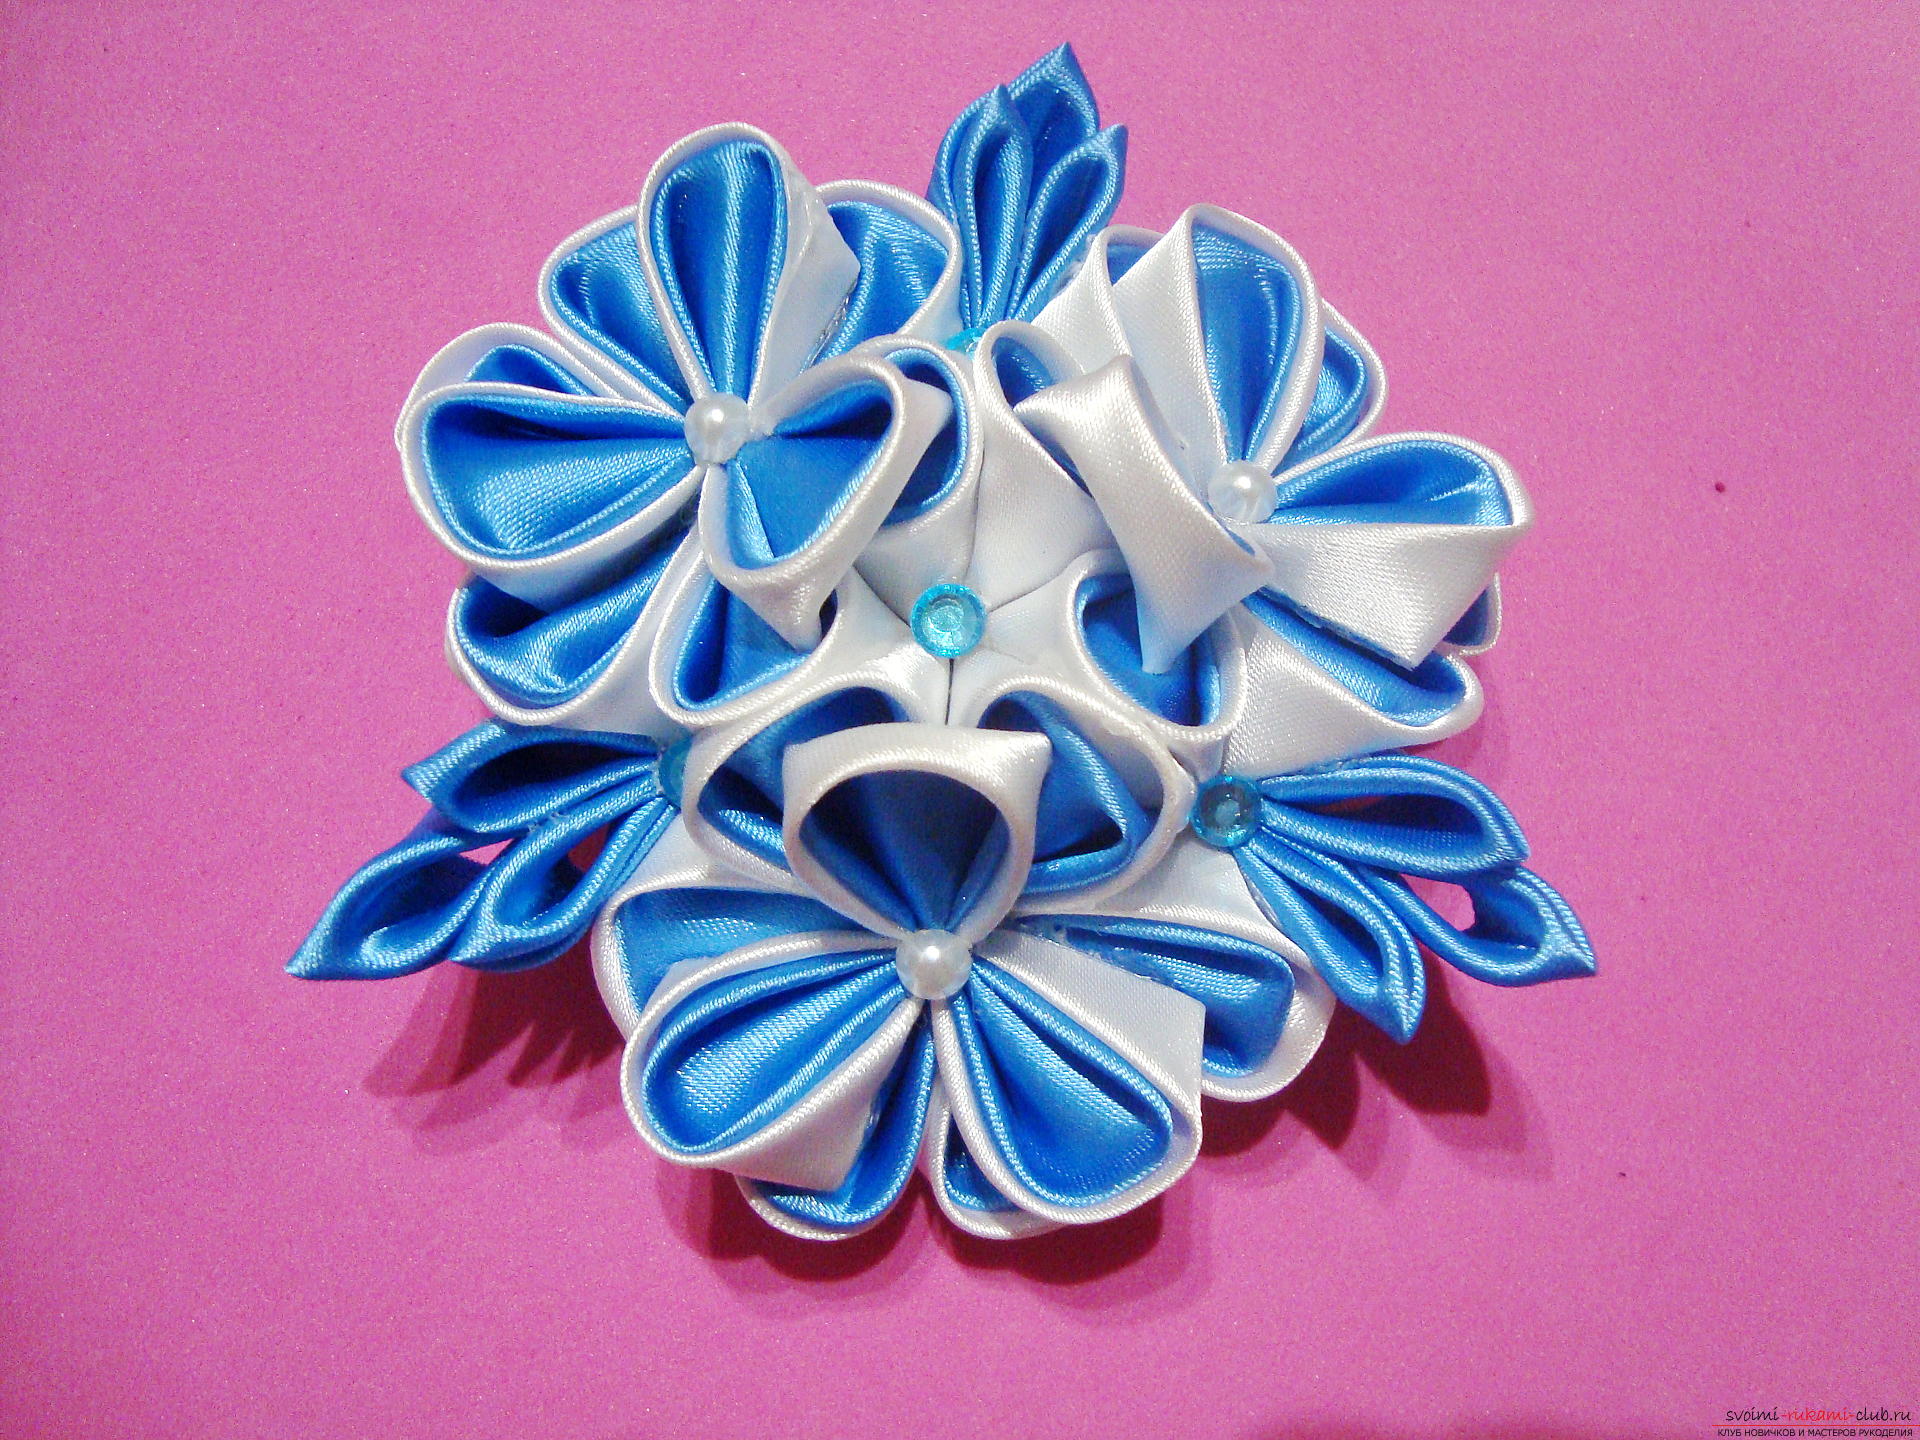 Turn the work over and glue this sideRounded base of white or blue fabric. If you decide to decorate your clothes with such a flower, then the base is not required, but for the barrette or rim this intermediate part is necessary, because the reverse side of the flowers has a ribbed appearance and it will be very difficult to glue the lugs on the longitudinal lines of the petals. Place the hairpin in this way in the center, so that you can hook it to your hair. The clamp must not look out of the product.
 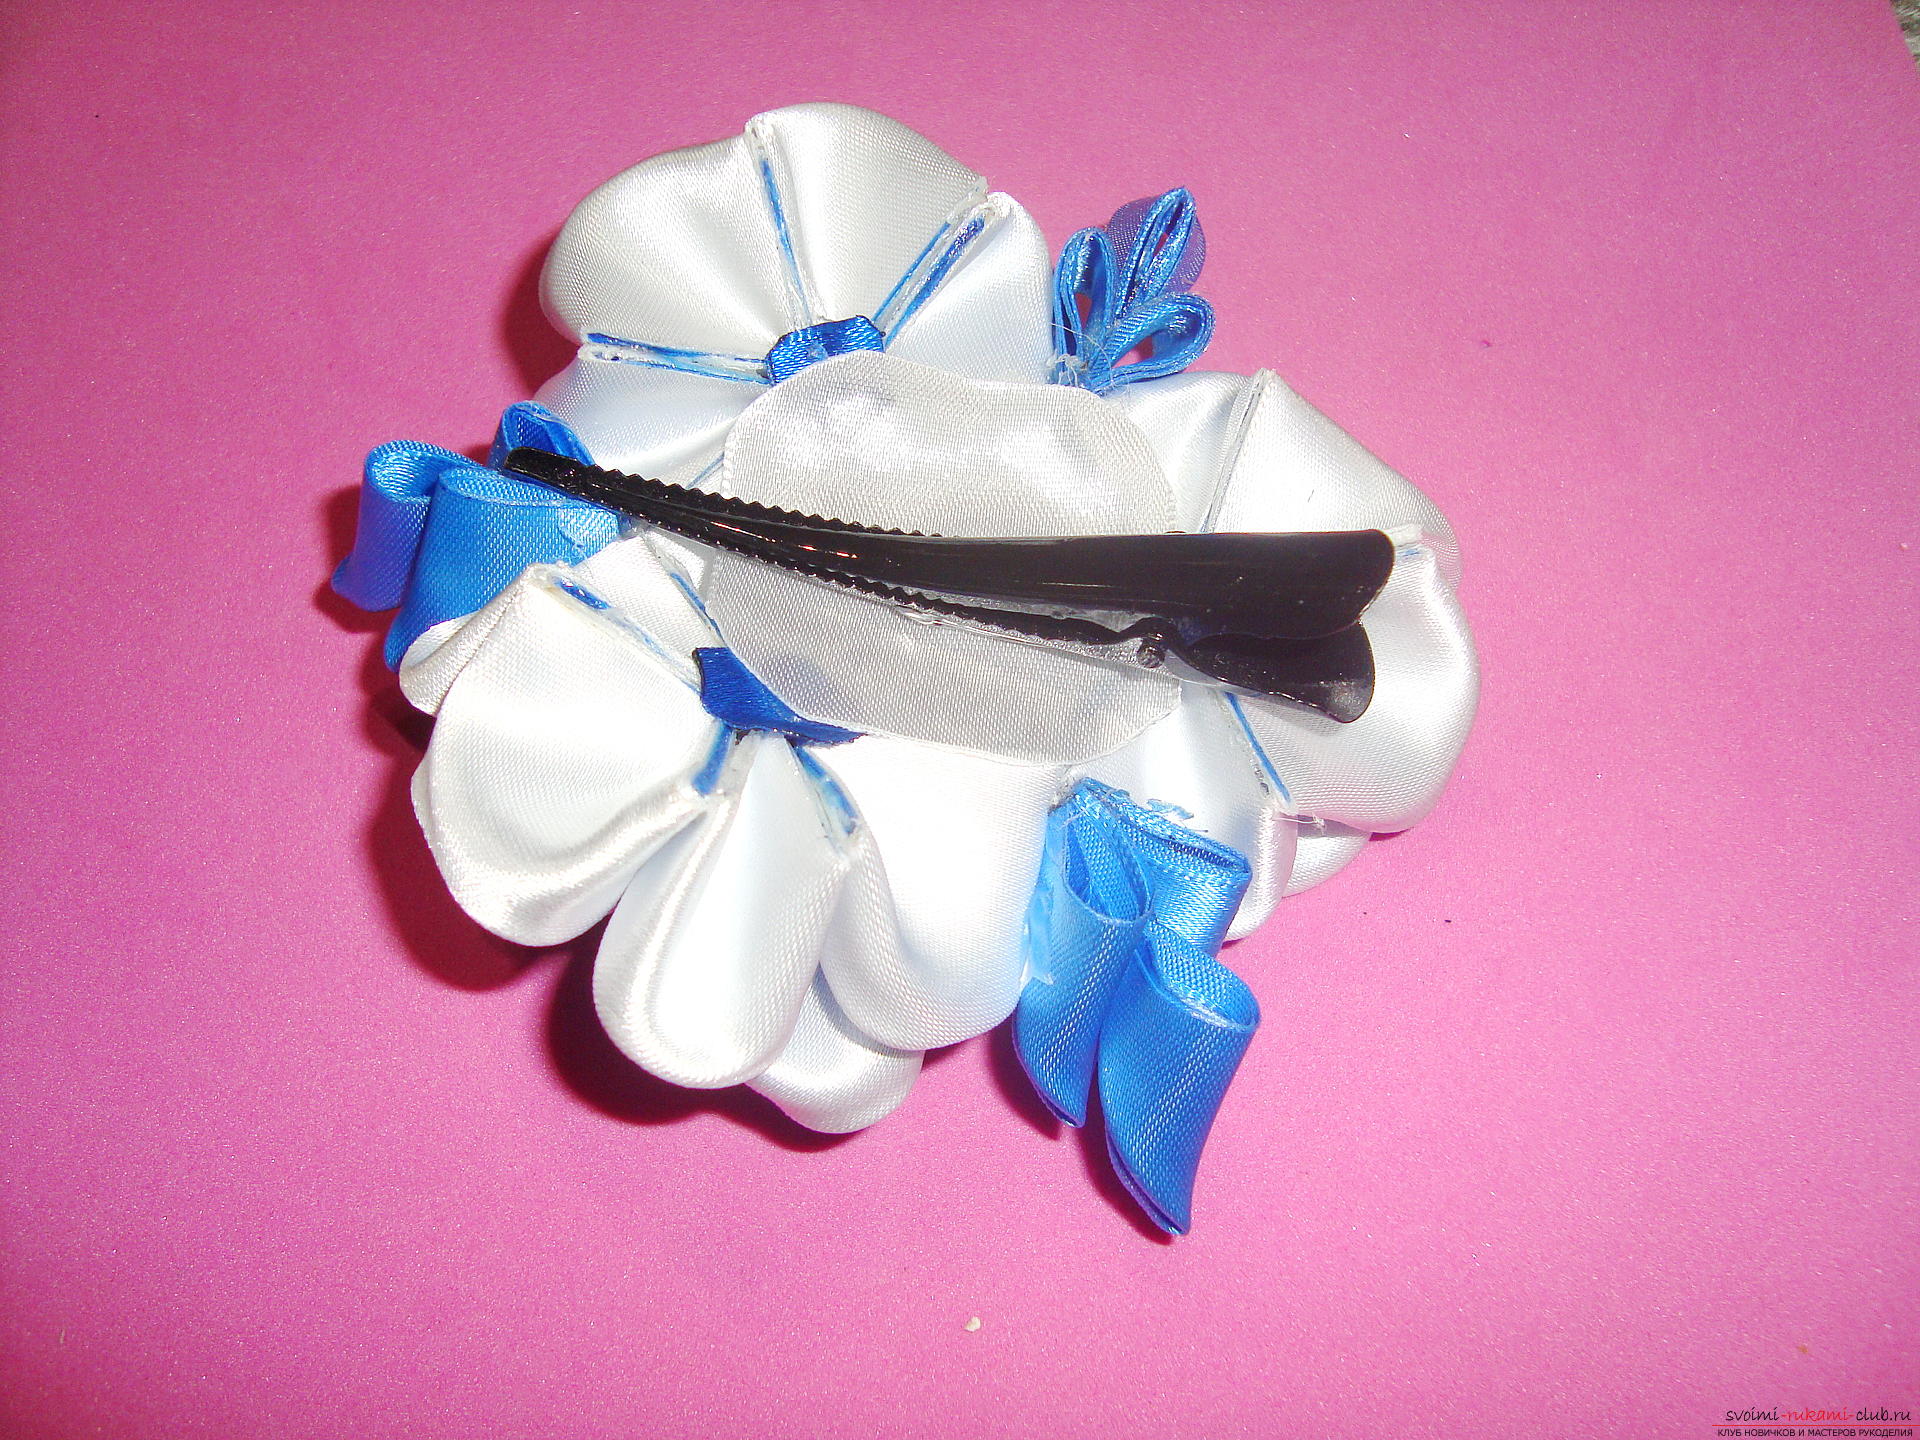 Charming pin in Kansas technique createdown hands. It took about two hours to create it, but the result is unique. Wear a hairpin on weekdays and on holidays, under any mood!
Comments
Related posts:
 A lesson on making hair clips in the form of a flower in Kansas technique with rhinestones
 Kanzashi - crafts from ribbons with his own hands on the 2015 Competition, ideas for Kanzashi
 Master-class with step-by-step introduction on making bows with flowers in Kansas technique
 How to decorate a bandage for hair in Kansas technique, a detailed master class on creating multi-colored round petals and decorating hair bands.
 Master-class hair clips Kanzashi own hands - the original decoration for hair in the form of snowflakes.